Showing posts with label dress. Show all posts

September 30, 2015

Better than nothing

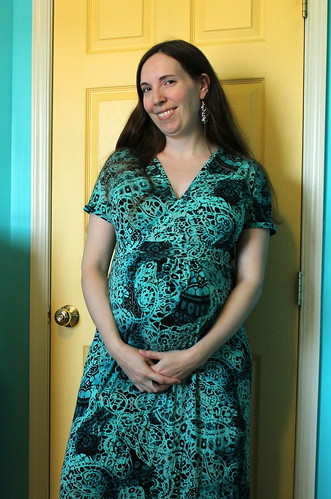
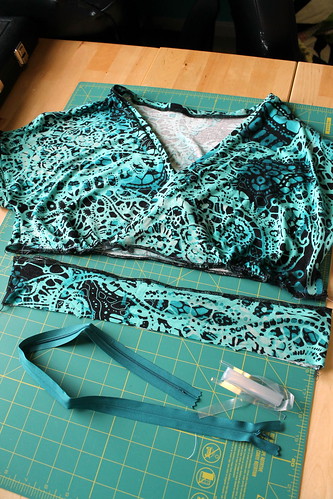
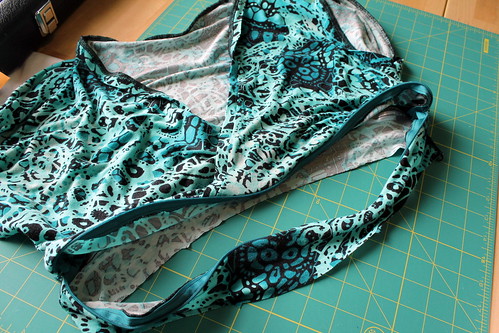
It's hardly worth it to do a September roundup, as this is pretty much all I have to show for the last 3 weeks. It's a simple sewing job, and I feel like I should be closer to finished. But nap time has been a struggle lately, I'm back to almost my full teaching schedule and that means most afternoons are a no-go, and I'm fighting a cold. All I managed to sew yesterday was serging and pressing the armhole seams. But it's one step closer than I was.

So at least it's something.

And all things considered, that's really good.

September 17, 2015

it's that time of year again!


Woohoo! I just wanted to take a few minutes and talk about my FESA plans for this year. Due to my current time constraints, I'm keeping it simple this year, and only committing to a handful of projects-- after all, I also have a little Halloween costume that I've been mentally planning since, oh, last Christmas. So here's what I'm hoping to accomplish...

Fashionable Foundations for Frosty Weather 
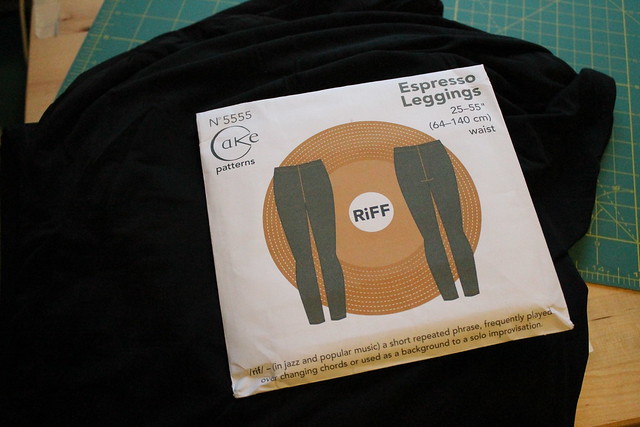
IMG_2813I have fabric that I think will work to finally try out the Cake Espresso leggings in two different colors, though after the disaster that was my last attempt at sewing leggings, I'm definitely double checking the stretch first this time! Assuming all is well, I plan to sew the black pair, because that will go with nearly all of the skirts I own that currently fit.  I'm most likely to wear them as tights with boots. (Honestly, based on my initial fiddling to check the stretch, I think this fabric will be too see-through to use them as anything else!)

Fabulous Frocks
IMG_2811For the third year in a row, I am putting the Megan Nielsen Darling Ranges dress, in this very fall-appropriate rayon challis print, on my list. And I am determined that this is the year I'll actually make it, dangit!!! After all, it looks like the perfect style for postpartum and nursing. I have managed to get the pattern traced, the fabric cut out, and the darts sewn so far. So third time is the charm, right?


Baby It's Cold Outside
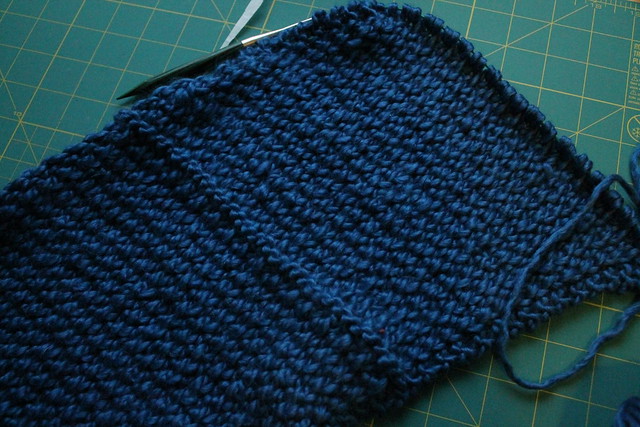
IMG_2812This may be cheating, since I've been working on this particular project for over a month already. But I've been knitting a cowl (the Wine Country Cowl) out of some bulky yarn that I originally bought as the top part of a sweater that I've since abandoned the plan to knit. I could not figure out the very first steps of the pattern at all, and decided I didn't like how the two yarns coordinated after all. "I can't wear wool" substitution problems strike again. Anyway, I'm over halfway done this cowl, I think--it's been one of my methods for coping with Hobbit's penchant for napping best when on my lap and leaving me chair-bound for long stretches of time. Sadly, I think that my plan to use up the entire stash of this yarn isn't going to work out, given its current length. Any suggestions for what else I can do with one or two balls of this stuff?

The nice thing is that if I finish all three of these projects, I'll have one complete outfit! If I can get those and the costume done and still have time left, I have a fairly substantial mental list of additional projects that I could add in. But since I am unsure at this point what the greatest needs in my wardrobe will be, or what I'll be most motivated to work on (SO important right now), I'll just see how this goes first.

July 25, 2015

not in love, but...

Wow, how has it already been a month since Hobbit was born? It's been both rewarding and challenging. On the one hand, aside from some occasional crankiness, I'm surprised at how well I've been able to function while averaging 4-5 hours of often-interrupted sleep every night. And Hobbit does nap well...the challenge is more that it's mostly while he's being held, and it was just last week that I managed to successfully get him to take some naps while I wasn't holding him and could actually get some stuff done--namely, making the project that is the subject of this post! (Also, he eats SO much. Hobbit was a very appropriate nickname!)

(And thanks for all of the kind comments! We think he's pretty adorable, but we may be a little biased.)

The other challenge has been getting dressed. I knew that my figure wasn't going to immediately go back to what it was pre-pregnancy, but I was honestly surprised at how very, very few of my clothes actually do fit right now! Including some things that I thought would fit decently enough, like my Tiramisu dresses. It's been very strange for me, since I was fortunate enough to have a pretty steady weight/measurements for most of my adult life, and now all of my shirts are extra-tight and I literally only have about 5 things that I can get over my hips, all elastic-waist. Needless to say, I'm having a bit of a wardrobe crisis. (I'm especially a little freaked out at the thought of cooler weather hitting and having literally no pants or jeans.) So as soon as I could find some spare time without a napping baby on my lap, I made a thing!
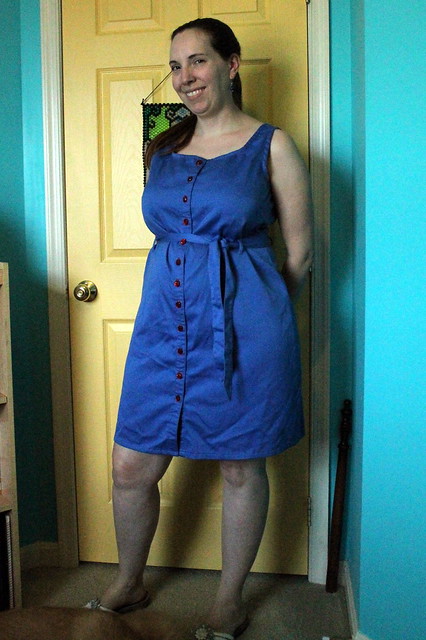
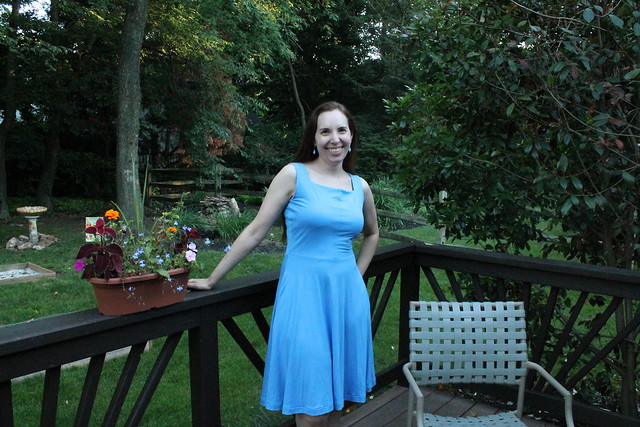
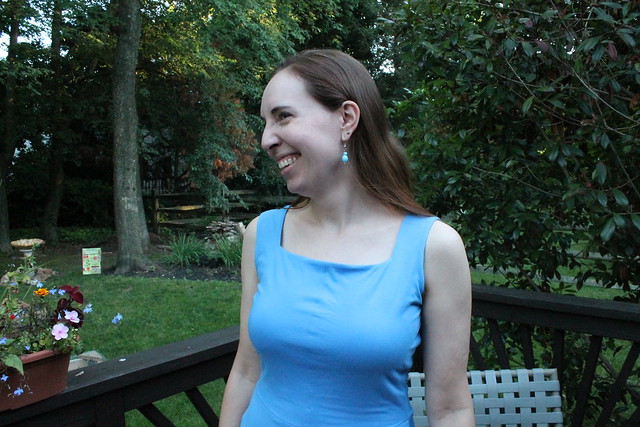
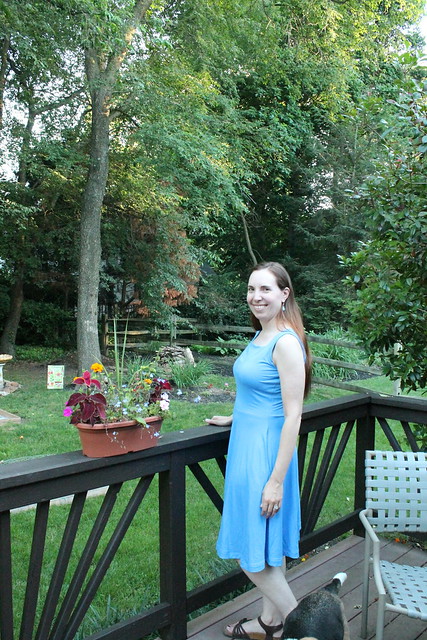
Adelaide frontThis is the Adelaide dress from Seamwork magazine, chosen both for its supposedly fast sewing time and for how forgiving it looked like it would be for my post-partum figure. That, and it looked very nursing-friendly, which is going to have to be the theme of everything I make for my upper half for awhile, I think.  I wasn't 100% sure about the fit, since I was never completely satisfied with the Sorbetto on me, so I opted for the wearable muslin route. The fabric is a mystery woven, probably a poly-cotton blend, that was given to me for free when someone else destashed it to my mom--when this happens, she passes on whatever isn't good for quilts to me.

While I like the color well enough, I thought I'd get bored with a solid dress. Also, I don't have the right kind of set-in snaps on hand. So in the interest of stashbusting, I decided to swap those out for these sparkly red buttons that I originally got with a Beignet skirt in mind, before deciding that a red skirt wasn't something that my closet needed after all and giving away the fabric in a swap. I kept the buttons, though, because sparkly, so I'm glad I finally found something to do with them! To tie those in better, I topstitched the placket, neckline and armholes in red. But I stuck with the blue for the belt and belt loops, because I don't want to draw that much attention to my waist while I'm (hopefully) losing the extra weight.
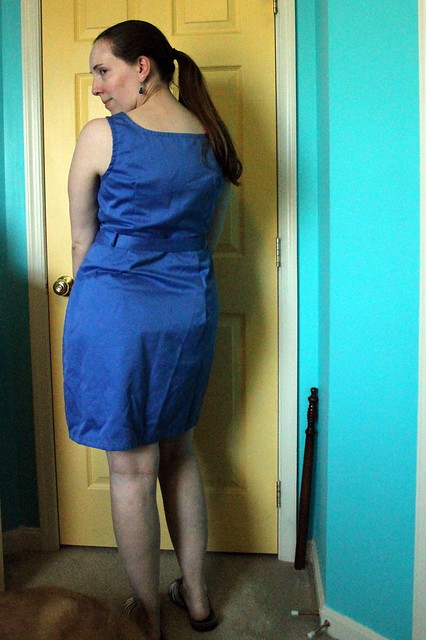
Adelaide backI'll be honest--I don't love this dress. It does serve its intended purpose, and it did knock an entire piece of yardage out of my stash--2 3/5 yards, for the record. I guess I just don't feel like it's entirely me. I'm not sure how much of that feeling is a commentary on the solids, or that my body is a stranger that I'm having to get to know all over again.  It might be worth giving the pattern another shot sometime, because I do feel that it's more of a fabric issue than a stylistic one. I wonder if I'd feel better about it if it was in a print, or a fabric that draped a little better so I wouldn't have that bit of gaping in the neckline. Or maybe just a different shade of blue?

But at this point, I'm also feeling like this beggar can't be too choosy. And there are plusses to the utilitarian stashbusting--I don't really have to iron this one after washing, and I don't particularly care if he spits up on it.

 I do have a couple of other projects in mind that will hopefully carry me through the warmer portion of the fall. And once I get cleared to be more active again, hopefully in 2 weeks, I figure I can start taking Hobbit for walks. Maybe, if all goes well, I'll at least be able to fit into my collection of Thurlow pants again by the time it gets cold. After all, they worked until the end of my first trimester, where all of my other pants failed, so a girl can hope. Right?

Have you ever had to rebuild your wardrobe almost from scratch? How did you deal with it? Or, for those of you who have had kids, how long did you hold on to your old clothes (especially me-mades) to see if they would fit again or not?

April 24, 2015

dressed to the max(i)

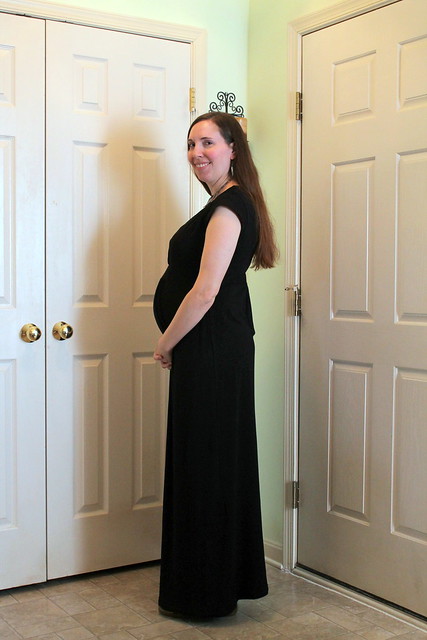
Maternity/nursing maxi-dressThat's right, I finished another maxi-dress! No camouflage baby bump for this one. It kind of looks like I just have no waist at all. (I guess I don't right now, really.) Honestly, I don't really feel like there's a whole lot to say about construction, since this is the third time I've used the Tiramisu bodice and the exact same skirt modification that I made on my last dress. And I already detailed the nursing-friendly alteration in my last post. Really, the biggest issue I had with putting this one together was my iron--it had been acting up for awhile, and I finally hit the last straw with it while trying to press the skirt seams the other day. After all, an iron that keeps turning off while you're actually pressing with it at the moment, and then taking forever to turn back on (and usually some unplugging and replugging--really annoying when the power strip is on the floor and you're 7 months pregnant!) So I ordered a new iron. Hopefully this one will hold up better, since the one I'd been using lasted me less than 2 years. It's supposed to arrive today, and none too soon, because it really shouldn't take me half an hour to press a hem because I have to keep waiting for the iron to turn on!

side viewIsn't this print fun? It's one of the pieces I treated myself to when I visited Mood in NYC a little over a year ago. I'd gotten 3 yards with a maxi-dress vaguely in mind, though I certainly wasn't expecting that it would have to be a baby bump-friendly one at the time! But I do expect that I'll be wearing this one a lot over the coming summer. Even though the two patterns didn't quite come together as smoothly as I'd hoped. The back seems pretty loose to me in comparison with the black dress, and it is so tempting to try to take it in around the empire waist a little. Or fake in a back seam with the serger. Or something. I have to keep reminding myself that I still have the rest of this pregnancy/the belly only getting bigger to go, I have no idea what's going to be up with my bust size after that, and it would be better not to over-fit. I can always try to take it in a little later if needed, though it might be nice to have a looser dress when the Mid-Atlantic summer humidity kicks in. (I did tweak the sleeve/underarm area, though.)


front viewThis will probably be the last garment that I make for myself until after Hobbit arrives, to be honest. I've got less than 8 weeks to go before my due date now (yiiiikes), so despite the fact that I have nearly no pants that both fit and are weather-appropriate, it seems a little pointless to take the time to sew any more maternity-type clothes. I am starting to think ahead to just straight-up nursing-friendly, or things that will work with another period of my figure changing around on me, and I do have some patterns in mind for when I'm feeling up to trying to sneak in sewing time post-baby. Is it weird that after so much time sewing knit garments over the last several months, I'm really starting to get the itch to dig into my wovens stash? But since that has to wait until I have a better idea of what size to sew, any projects that show up here over the next several weeks will probably just be a big babypalooza. I know that's not the most interesting thing for a lot of people, but honestly, this blog is pretty much just my personal craft journal anyway, and this is the stuff I need to be making right now. So, sorry not sorry, I guess?

On a slightly related note, I've decided that I'm going to be sitting out of Me-Made-May this year, though I will happily follow along with what others are doing! Honestly, pretty much everything I've made that fits right now and works for the season has already been shown on here in the last couple of months, I really only have enough of that to do about one outfit a week, and there's other things I need to prioritize over stressing about outfits and taking pictures. Like continuing to stuff the freezer with as much pre-prepped food as possible, the mental list of baby sewing projects that I'd still like to finish in advance, and getting some music together for a couple of my flute students to work on while I'm out of commission for teaching. Not to mention that by the end of May, I'll be in the range of "could potentially pop any time". Hopefully I won't go that early, especially since a couple of my students are participating in a recital two weeks before my due date, and I'd like to be there to support them. Plus, the only date that worked for everyone involved in planning my baby shower is the last Saturday of the month, and I'd really like to not miss that due to being in labor!

I also have to admit that I'm going to be a little sorry when the Small Human Being Sewalong wraps up at the end of this month. It's been fun getting to know a couple of new-to-me bloggers, and helpful to follow along with the discussions of what ends up being useful vs. not/how to find sewing time after baby, and so on. But I'm super-close to finishing another project for that, and may be able to knock out at least one more. In the meantime, I'll just enjoy this dress and all the pretty, swirly blues.

April 17, 2015

Tutorial: Nursing dress adaptation with an invisible zipper

I was so pleased with how my last maternity/nursing maxi-dress turned out that I decided to make a second one. This time, I made a tutorial for how I did the zipper part, in case it helps any sewists who may be expecting in the future!

SuppliesYou'll need:
  • A knit dress pattern with a seam under the bust. I'm also intending to wear this during the remainder of my third trimester, so I'm using the top of the Cake Tiramisu dress with the midriff band and skirt of the out-of-print Simplicity 3678, since I already adapted that skirt pattern both for extra belly room and a maxi length. But if you're making this just to wear for nursing and have an idea of what size to do the waistband, the Tiramisu or Red Velvet dress would be a great option as is.
  • An invisible zipper that's long enough to fit across your ribs from one side seam to the other. (A few extra inches probably won't hurt. Mine was a 22" length, and I ended up chopping off somewhere around 2" at the end.)
  • Clear elastic
  • I used both an invisible zipper foot and a regular zipper foot to do this portion of the construction. 
Before beginning the zipper (these three steps were completed before I started taking pictures, and you can see the results in the first picture):

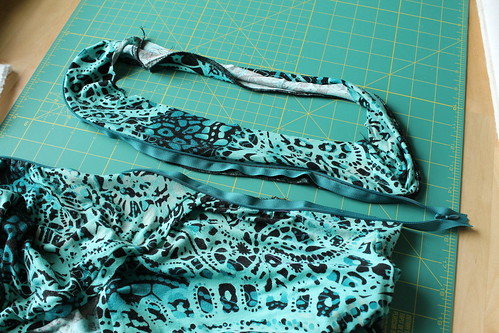
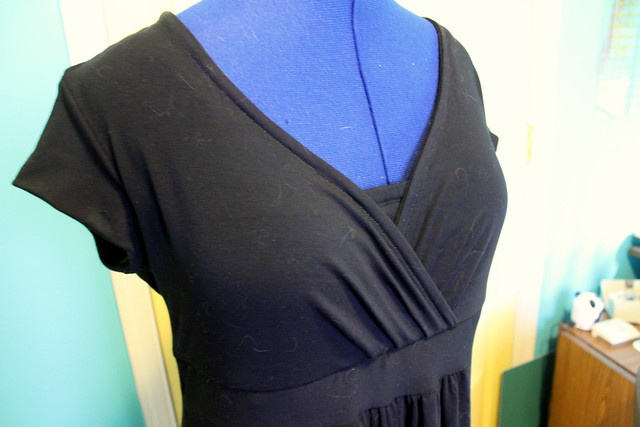
1. Sew the bodice pieces, including side seams. Depending on the pattern you choose, you may need to alter the order of construction. (Normally, the sleeve and side seams of the Tiramisu are sewn all at once after the front and back of the dress are constructed flat, but I went ahead and finished the sleeves/sewed the side seams together before taking this picture, since constructing the side seams around the zipper would be much more difficult than the other way around. It may take a little more effort to get the side seams to match up between pieces this way. For my current fitting needs, the big advantage to this was that I was able to put on the mostly-finished bodice and adjust the gathering and the overlap of the neckline to the larger bust size that I'm currently working with.Which meant that I was able to use my already-sized pattern from before I was pregnant as-is.)

2. Sew the midriff/waistband pieces together at the sides, or skirt pieces if your pattern does not have an extra band. Depending on the length of your dress, you might be able to do the waist and skirt pieces together. I'm only working with the midriff band for mine, since I'm doing a long skirt and don't want the weight of it to distort things as I sew. (Plus it's a lot easier to take pictures that way!)


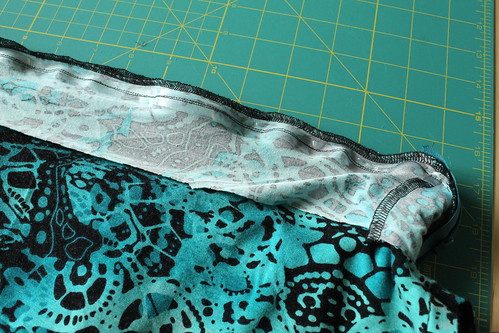
3. Finish the lower edge of the bodice and the top edge of the waistband/skirt. I know knits don't unravel, but it does add some stability to the edge. And since we're working with stretchy fabric and a non-stretchy zipper, that is never a bad thing.

To add the zipper:

Front bodice w/ zipper1. Sew one long side of the zipper across the bottom of the bodice, as you normally would for the right side of a vertically-inserted invisible zipper. I started the teeth at the side seam on the left side, because I'm right-handed, but you could easily flip this around if you're left-handed. I also brought some of the extra length past the right side seam and into the back, just to give myself a little more give for opening. I probably could have done this for the left seam as well to make the whole thing more centered, but I really don't want to have to be reaching behind me with one hand while trying to wrangle a squirming baby with the other! Better to leave the zipper pull where I can more easily see it.


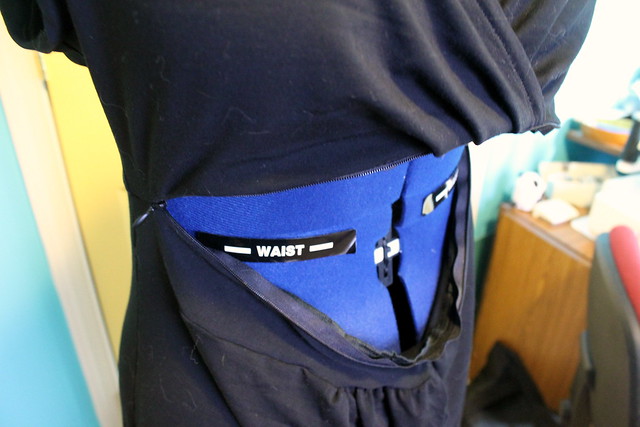
Front waistband w/ zipper2. Baste the other side of the zipper onto the waistband, being careful to align the top edge of the teeth with the correct side seam. Close the zipper, check to make sure both seams are lining up on either side of the zipper, and adjust if necessary. Once you're satisfied with how the sides are lining up, stitch over the basting line. When opened, the two pieces will look kind of like this.


Back bodice/waistband3. Sew the back of the bodice and the back of the waistband together. I added clear elastic here, both to help support the weight of the maxi-skirt and to allow it to bounce back if I need to stretch the dress to get it on over my chest later. (I had to do two rows of stitching here--to get the seam closed as much as possible, I used my zipper foot on a longer stitch length. But my machine doesn't have a stretch stitch, and I can't zig-zag with my zipper foot, so I added a second row of a narrow zig-zag close by, just in case some of the straight stitches pop. I know it looks a little ripply when it's flat on the table, but the other dress is like that too, and it's not really noticeable when wearing.)

4. Shorten zipper if necessary, and press back seams up towards bodice.

5. Continue on with the dress from here-- I still need to add the skirt pieces and hem it, but that's it!

Zipper when closedWhen the zipper is closed, it looks like a normal seam, except for that pull tab...

Zipper when opened


...and then once you open it, easy breastfeeding access without having to stretch out your neckline!

Hopefully that was clear enough--let me know if I need to clarify anything! And for those of you who are moms that sew, I'd love to hear if you have any other nursing hacks you like to add into your clothes.

February 25, 2015

black is the new red

A little bit of selfish sewing in the midst of baby-sewing craziness! As it happens, I finished this dress just in time for my birthday tomorrow. But I won't be wearing it, because there's a chance of snow and it's only supposed to get up to 33 degrees, tops. That's .5 degrees for you Celsius folks, and I don't know how you live with that temperature scale, because that sounds even worse! And this isn't the sort of dress that would work well with close-toed shoes. February birthdays can suck like that.

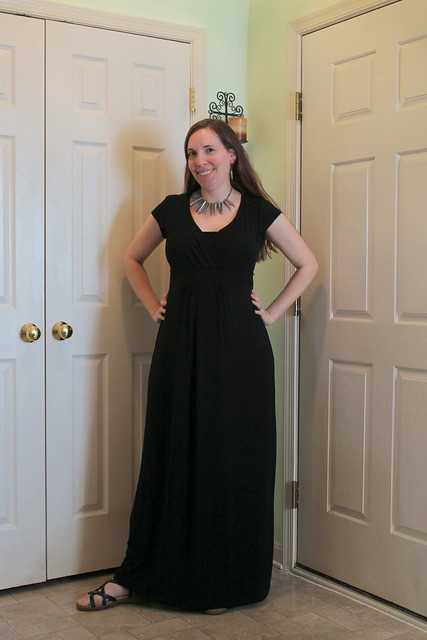
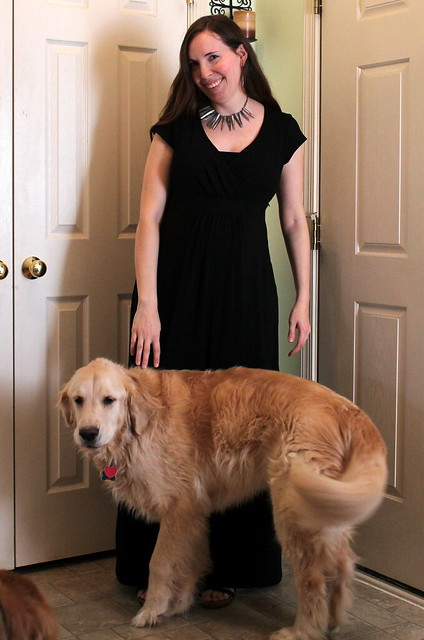
IMG_2327Anyway. This is Simplicity 3678, now out of print, which I've actually made once before. I'm laughing because in the original post, I did specifically mention possibly revisiting it if I ever needed a maternity dress, because of all of the gathering that I needed to remove to avoid the preggo look! I'd kind of forgotten I'd said that, actually. I guess it's a good thing I never threw the pattern away. The funny thing is, at least in this picture, I seem to look pretty normal from the front, right?


Maternity maxi-dress
Nope. Definitely a maternity dress. (I'm at 24 1/2 weeks now.)


Aside from lengthening and slightly flaring the skirt, since I really wanted a maxi-dress, here's the adjustments I made:


  • In some ways, I followed the instructions more closely than the first time. In the original dress, I stitched the pleats down into more of a pintuck, because it was kind of ballooning out funny. For this version, I figured I'll need the extra room and left those as pleats. I also sewed the facing more as it called for, though with a double row of stitching to try and give it a little more of an RTW look. (I wish I knew why my machine is occasionally skipping stitches for that, since I am doing a slight zigzag on a longer stitch length with a ballpoint jersey needle, just like I'm supposed to be! Any thoughts? My machine doesn't have that lightning bolt stretch stitch.)


  • I added a little more gathering in the front to accommodate the bump. Probably somewhere close to 2"--honestly, all I did was go out from the center front fold to the still uncut edge of the original pattern tissue.


  • I still had to cut the back in two pieces, which I apparently had to do the first time, too. With all of that extra skirt length, I was barely able to get the pieces to fit! I actually also had to cut the midriff pieces perpendicular to what it called for as well--but after the recent leggings disaster, I made sure the stretch would work for that before I cut it this time. 

    1. IMG_2322
    • Doesn't look so V-neck now, does it? While that also would have been nursing friendly, my size has already changed enough that this would have been very mentally uncomfortable for me to wear in public. (Seriously--while I know there's a good reason for it, I'm actually kind of embarrassed at the size bra I had to buy recently!) So I improvised a bit of a faux camisole front for it, and even inserted some elastic in the casing that the stitching made to help hold things in place. It's not quite as snug as I would have hoped, but it should do the job. 
      • For the bodice/midriff, I did slim down the seam allowances on the side slightly-- 1/2" instead of 5/8"-- just to give me a little extra room, since I'm not sure how things will go in the third trimester or if my ribcage will expand or anything like that.
          Nursing adaptation
        • To make this nursing-friendlier so I can wear this for more than just the spring, I took a suggestion from Joanne and added an invisible zipper in the front of the dress! It's sitting right at the top of the waistband, which I'm hoping will also stabilize the weight of the longer skirt. (I also sewed some clear elastic in the back to help with that as well.) Because of that, I did somewhat have to change the order of the directions, as in sewing the side seams for the bodice/midriff separately instead of all at once. But again, I took a cue from the leggings issues and made sure to baste things first so the seams had a better chance of lining up. Overall, I'm very happy with how this modification worked, and will possibly be doing it again, since I'm hoping to make a second maxi-dress before Hobbit comes. It's just a case of deciding whether to stick with this pattern, since I already did the hacking, or to play around with modifying last summer's Tiramisu hack. If I do the latter, I may not need to add extra access points, since that one works better on me as a V-neck.
          It'll be good to have something new to look forward to, if it ever warms up around here. If I've learned one lesson from the last month or so of trying to cobble together outfits, it's that I'm just not a wardrobe minimalist. I admire those people that can fully commit to the Wardrobe Architect-type thing of paring down her closet to a set of core outfit components that they can mix and match and accessorize to their heart's content. But frankly, I like having more options, and I've definitely been missing having more prints in my life, even if they don't necessarily go with everything! (I say as I show off a solid black dress, right?)

          IMG_2332Oh, and the title? I'm still trying to play around with keeping up with some of the monthly themes/challenges for the Stashbusting Sewalong and The Monthly Stitch as I can. I can use this for the latter, since it's a solid color, but the only color specified in this month's Stashbusting theme was red, which I hardly ever wear or even buy. But Malkin was kind enough to sport a little red on his collar while photobombing me, so that has to count for something. Right?

          September 11, 2014

          FESA plans!


          It's that time of year again! I do love this sewalong, and this is the 3rd year I've participated. You all know how I feel about the cold, and my ironically wool-phobic skin doesn't help matters. (I say ironic, because since I got married, my last name now starts with Wool! Go figure.) So this is a great way to keep me focused and excited about making things to get me through the winter.

          So without further ado, here are my plans for the next couple of months. I'm keeping things rather conservative this time, so maybe I can actually finish everything?


          Fashionable Foundations for Frosty Weather: I have some stashed knit to try out the Espresso leggings, and I'd like to knock out a pair or two of them. Since woolly tights are a sad no-go for me, I think this could be a great way to keep my legs warmer for wearing skirts. (I wear boots with skirts a lot, so the no-foot-coverage thing won't be an issue.) Not to mention it's a layer I can wear under my jeans while I'm shivering my way through the last bit of October at the outside register at my retail job. (I have some black, too, but it's a much bigger bolt since I'd also bought this fabric with that aborted attempt at a Red Velvet in mind. Oh well. I can always use black knit somewhere, right?)

          Chic Chemises for Cool Climates: The definite is that I'd like to finally finish up the Roheline cardigan that I've been knitting since August 2013! (Though I really didn't get it started until last September, since I had to restart no less than 7 times.) I'm so, so close to finishing the sleeves, which means I only have the yoke and buttons to go, so it's not unreasonable. Depending on how the time goes, I also wouldn't mind trying out the Archer blouse, since I didn't get to that in my summer plans.

          Fabulous Frocks: I would like to do a Darling Ranges dress if at all possible, since the colors will be great for taking it into the winter. Also, I meant to make it last year, so it's time. I'm hoping to knock this one out next month, since The Monthly Stitch's theme is "Frocktober" anyway. I'll just need to find a layer to go over it--I have yarn to knit a yellow cardigan that will pair nicely with this, but there's no way I'll be able to finish 2 cardigans in this time span.

          Baby It's Cold Outside: My old peacoat that I made in 2007 is starting to fall apart. Replacing that will be first priority! (Even so, 7 years, including the polar vortex of wintry doom that we had this past year, is not bad at all for my first me-made winter coat!) I'm hoping to play around with a few more tailoring techniques, but I'm using the exact same pattern as the first one, so at least fitting won't be an issue. I actually have started cutting this one out already, but since there's 4 layers involved, I'm still on the outside. (The black and white tweedy fabric has been cut, but I'm underlining most of the pieces with that greyish silk organza that's right next to it. And that's taking a little longer. Especially given that I haven't been able to touch it since Saturday.)

          Other projects: I'm hoping to knock out a skirt before the end of the month, because a long-standing project I've been making for my sister-in-law is perfect for Scraptember! I may knit up a scarf, too, since I'm strongly leaning towards a one-skein project to take on my upcoming trip to France. (Next weekend! Eeeeee!) After all, I have a lot of plane/airport time, and at least 6 hours on a bus to get to Normandy and back, and I'm not sure how well my Kindle battery will hold up for a cross-continental flight. Also, I know from experience that I sadly cannot read on the bus without getting sick.  Maybe I'll have better luck with just keeping my hands busy.

          I'm also beginning to plot out what I'm going to make for the Disney sewalong that Katie and I are co-hosting in November, but that project is still a secret!


          July 27, 2014

          listening to the fabric

          First off, wow, thanks for all of the compliments on the jeans! Provided the metal doesn't disastrously rip out in the wash (which I'm going to be so nervous about until I actually wash them), I suspect they'll be a staple this fall.

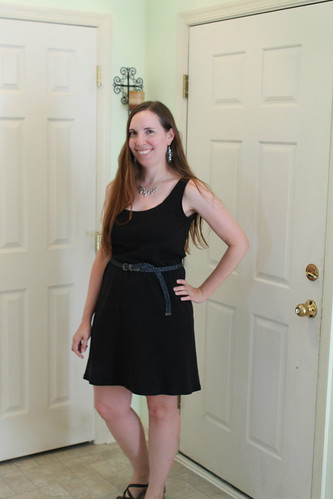
          McCalls 6559Speaking of staples, this finished project probably won't be all that exciting to look at, but I think it does fill a little gap in my wardrobe. I took a break from DragonCon sewing to knock out this little black tank dress, so I could get it done in time for The Monthly Stitch's monochromatic theme month that's currently going on. I also wanted to make sure I got this done before the end of the summer, so I'd have it for traveling--Doug and I booked a trip to Paris! I've never been to Europe, so you can imagine my excitement. I've also been told that he's ok with me buying a little souvenir fabric, so I will happily take suggestions for places to shop there! (Especially places that are reasonably priced and have interesting prints. Despite what this dress may make you think, I'm definitely more interested in buying those!)

          The pattern is McCall's 6559, and it was a quite easy sew. Two pieces, and the edges are just turned under and stitched. I'd probably do a binding on the armholes and neckline next time so it would lay a little flatter. I'd originally thought to make this a more fitted maxi-dress. Obviously, that didn't happen, because the fabric said no. It ended up being too narrow at the bottom for the full width of the skirt. So rather than slim the skirt and end up annoyed walking in it--I definitely have a long stride--I figured I'd just go for the shorter length. So I still have maybe a yard left over, but it shouldn't be terribly hard to figure out something to do with a lovely black organic cotton interlock, right?

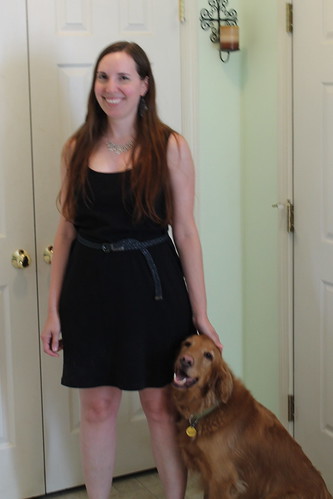
          IMG_1495(He just can't stand to stay out of the photos for long!) I did take it in at the armholes a little, and would normally have taken in the waist more, too. But I think I made the right choice in leaving that as is. The interlock doesn't drape as smoothly as it would probably need to for a more fitted dress. So I figured that leaving it looser would give me some styling flexibility, plus probably be a little more comfortable when August around here is doing its usual 90+ degrees with 2000% humidity thing. This was how I wore it for its first outing, to see a local exhibit of costumes from Downton Abbey. (Yes, I took detail shots, and will happily share them in a future post if people are interested.)


          image


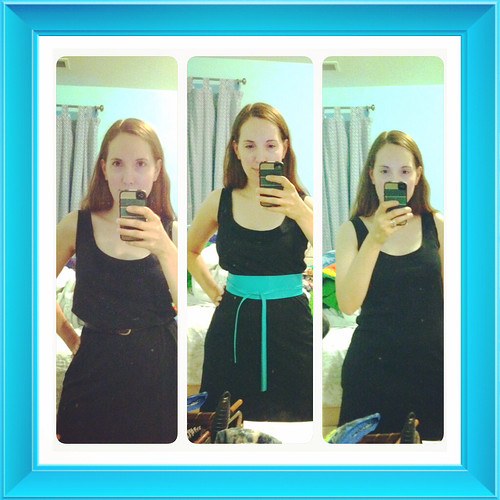
          But I also did some playing around on Instagram after I finished it--the right is unbelted (and you can see a little how loose it is), and I tried it with a wider belt and then a skinnier belt and blousing it out a la the Sewaholic Saltspring dress. I do think it kind of needs some kind of belt to work on me, to be honest.


          image


          But I do like the versatility of it. This was from last night-- after I got home later than expected, Doug suggested we hit the Waffle House instead of me cooking dinner. Isn't he great? So I threw on a recently-acquired chambray shirt, threw the belt back over that, and was ready to go. I'm glad I did, because I get cold in air conditioning fast. 

          So, even though it wasn't quite what I originally had in mind, I'm satisfied with how this turned out for such an easy thing to make, and I'm sure I'll have fun this fall with layering it up to make it more functional for that season, too.

          June 21, 2014

          Mone-misu? Tir-etta?


          Monemisu
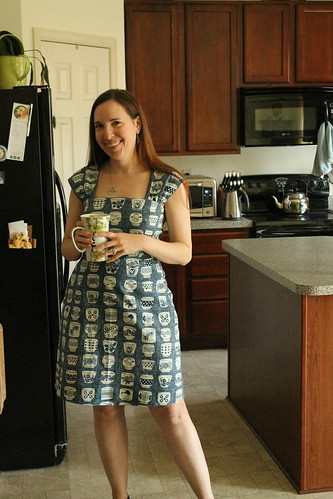
          This dress wasn't in my original summer plan, but it was a nice quick make. I cut it out and sewed most of the bodice together on Sunday, sewed the neckline and armholes on Monday, made and attached the skirt on Wednesday, and hemmed it yesterday. It's also nice and comfortable--the fabric is some rayon knit from Mood that I bought specifically for this project. Not so great for the stashbusting, but at least I used it quickly!


          IMG_1411This week's Indie Pattern Month contest on The Monthly Stitch is Franken-patterning, so that was part of my inspiration.  The top is based on the Colette Monetta dress, and the bottom is based on the Cake Tiramisu dress, though I modified both parts. For the Monetta top, I squared off the neckline and added seams down the center of both the front and back of the outside pieces. Since I wasn't doing the collar, but I still wanted to line the top, I also had to tweak the clean finish directions a bit--I did that around the neckline, and the lower half of the armholes, but I had to hand-stitch the top of the armholes closed. For the skirt, I cut both halves on the fold instead of seaming it down the middle like the original pattern. It's a pretty plain and simple dress overall, but I think it'll be a good one to play with accessories. Especially since the color is much brighter and cheerier than the average neutral solid knit dress!

          IMG_1409
          So if you've been reading this blog for awhile, you know I'm a fan of secretly geeky clothes. Now that I've got you thinking this is just a normal knit dress, it's time to ruin the illusion by revealing that this is also going to be a part of one of my DragonCon costumes! I still have a couple components to make for that, but I'll give you a clue: Think Disney bookworm who's fond of teacups.


          I'm having trouble with the picture insert, so you can find the picture here. So did I get the gist of it? The idea is to make as many costume bits that can be worn as everyday clothes as possible, so I'm not spending my entire summer sewing things that I'm only going to wear once. And Belle was my favorite when I was a kid--she loved books, she was a fellow brownI'm having trouble inserting the picture, so click here.-eyed girl, and she wasn't afraid to use her head to help her get out of sticky situations. And whack at the wolves with a big stick, even if she wasn't very good at it. What's not to love?
          I still need to make a top, apron, and hair bow for this, but I think this dress is a pretty good start.

          Speaking of DragonCon, I've recently made the difficult decision to set the Tauriel costume aside. It's been going so slowly, and I've been racking my brains unsuccessfully for 3 months to come up with a good way to sew that armor bodice without making the vinyl tear apart the second I put it on, since I never was able to find a closure for it. Given how much I still need to make for multiple costumes, even though they're more everyday-clothes, and that I'm also going to need to help my best friend with some of hers, it just doesn't make sense to continue when I have a perfectly good Eowyn costume that only needs a blonde wig. Besides, as surprisingly much as I enjoyed Tauriel in the latest Hobbit movie, Eowyn is still cooler. And, you know, actually in the books.

          June 8, 2014

          Tira-max-su

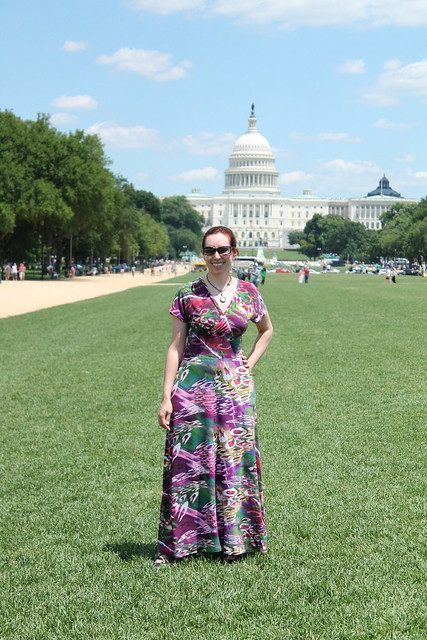
          IMG_1388Last summer, Cindy at Cation Designs posted a maxi-dress made from the popular Cake Patterns Tiramisu dress. I’ve been wanting to try this hack since, and finally got around to finishing it on Thursday! I figured that I have made this dress once before, and it’s knit, so it should come together fast, right?

          Note to self: If you’re going to go to the trouble of keeping a notebook where you write down changes you’ve made to patterns so you can go back and alter the pattern later, don’t lose the bloody notebook. (I guess it’s time to clean my sewing room again, sigh!)

          The first time around, I had a bit of trouble getting the bust to fit right. But in typical fashion, I didn’t actually bother to make changes to the pattern before moving on to the next project. I’m impatient like that. So of course, when I sewed up the neckline this time, it was saggy and sad-looking. Which means I had to resort to unpicking several inches of serging in the middle, overlapping it more, and serging it again.

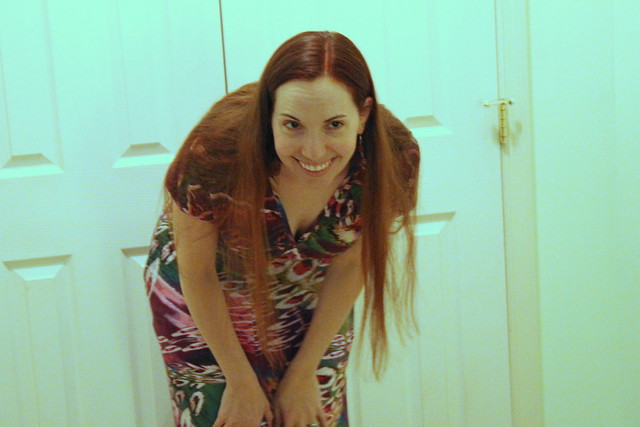
          IMG_1337It’s still not perfect, but at least the weight of the skirt pulls it down enough that it sits mostly flat now! At least, as long as I'm not trying to do the typical Tiramisu pose of bending over to show how much it's not gapping. (Please ignore the scary Gollum face. And my posture. Rounded back much?) It’s not too big in the chest, just the neckline, so I need to do some research to figure out what adjustment to make for next time. Maybe if I just take a wedge out of the neck or something?

          The fabric was a Christmas gift from my mom this past year–the really great thing about having a mother who also sews is that I can tell her my ideas for things I want to make, and she finds great fabric prints for me! And only living in the stash for 6 months is pretty amazing, by my standards. The other really nice thing about this particular print, aside from the fact that so many colors I love are in it, is that it was so abstract, I didn’t have to worry about matching at all. That helped a lot with the speed of sewing things together.


          Aside from my fitting quick fix, here’s the changes I made:
          • Lengthened the skirt to about 37″ (95.25cm)
          • Made the skirt panels narrower from about the hips down, for the super-practical reason that they were too wide at the bottom for my lengthwise-folded fabric otherwise!
          • Added clear elastic to both the shoulder seams and the lower midriff band seam to help support the weight

          Click to go to voting page
          I took a couple of pictures on Friday night so I could get my post up on The Monthly Stitch in time for the Indie Pattern Month dress competition. Voting is open now, so if you're so inclined, I'd appreciate any votes that I can get!  

          Aside from that, I debuted the dress yesterday, when Doug and I went down to Washington, D.C. for the day. The nice thing about living on the East coast is that it's really easy to get places, and this particular day trip is only about a 2-hour drive one way for us. We were celebrating our one-year anniversary, which is actually today! And, competition aside, I really wanted to get this dress done in time for the trip, because I wanted something that would be breezy and comfortable enough for walking around the city in 80+ degree temperatures (we went to the National Zoo and the Smithsonian's Air & Space Museum), but dressy enough for the evening's finale at a performance by the National Symphony Orchestra. It worked out really well for both purposes, I think!

          IMG_1355
          Also, watching a panda eat bamboo is pretty adorable. Am I right?


          April 19, 2014

          everyone deserves a tea dress

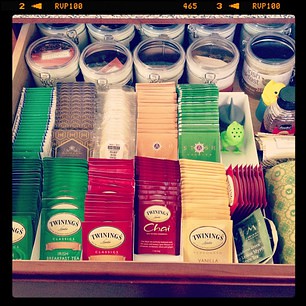
          It's no secret that tea is my favorite beverage in the entire world. I grew up spoiled on home-brewed iced tea made from real tea bags, and branched out into hot tea in my college years when I discovered that no matter how many all-nighters I was pulling, I will never, ever like the taste of coffee. It all started with discovering chai in the coffee shops, and went uphill from there. I started going for nice loose-leaf teas somewhere within the last 6-7 years, and I literally have an entire drawer in my kitchen that is dedicated to tea.
          tea drawer See? (For the record, Doug is the one who organized this for me. He's really good at that sort of thing.)

          I love my tea drawer.


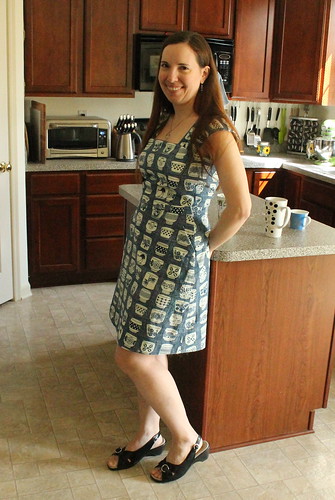
          Tiny teacupI also love this dress! You may recall that this fabric was part of my Christmas haul, and only being in the stash for less than 4 months is pretty amazing for me. I wanted to get to this quickly anyway, and the Sew Dolly Clackett event was pretty much the perfect excuse. So it's the perfect dress to sip a cuppa in.


          Real teacup!Just kidding....THIS is what passes for a cup of tea in my world! The mug even says so.

          The dress is the Cambie, of course, to continue my theme of all things Sewaholic that seems to be happening this year. Though this is the first "real" Cambie that I've made, since the wedding dress version was so heavily altered and didn't even use the skirt. This time, I cut a straight size 10, because I was going by the bust size and figured the skirt would be ok. I also decided right off the bat to use Tasia's tutorial for the "slightly less sweet" straight neckline, because it looked like it would fit better with the more-or-less linear pattern. I took in the back darts a little bit after the muslin stage. When I got to the point where I was ready to sew the lining in, I discovered that the neckline was gapping. Odd, since it didn't do that on the muslin! So my quick fix for that was to add some darts at the top, right around where the sleeve/strap things meet the bodice.  Whenever I end up making this again, I'll probably just go back to my wedding dress fix and convert the top to princess seams.

          Tea CambieThe pattern matching could have been better, I guess-- I did try, and did fairly well in several places! But I didn't think to factor in the flare of the skirt, and that skewed things a bit. In my defense, the teacups aren't exactly in a straight line, either. I checked. With a 6" wide ruler. It's not as fitted as I usually make my dresses either, but I think that will actually be a good thing. I recently had to weed several of my handmade dresses that I've had for years out of the closet, because slight post-honeymoon weight gain means they just don't zip up anymore! But those dresses were overall very fitted at the waist, and wovens, and so I think a little extra wiggle room will be a good thing. Especially for things like breathing while playing my flute, and the mid-Atlantic heat/humidity. You know, if it ever actually gets warm and stays there.


          Tea Cambie closeupThe dress is completely lined in the ivory cotton sateen that I've already used to line two other dresses. And I still have about a yard left! I also have about 1/3 yard of the teacup fabric left, which will be perfect for something like jeans pockets. So here's my stashbusting totals:

          Total fabric out: Approximately 5 1/4 yards.
          Total stash left: Approximately 312.19 yards. Though this total will be going up soon, sadly, because I had a box of stuff I accidentally left at my parents' come home with me recently, and there is some actual yardage in with the scraps. So I need to measure and update.

          Oh, and before I forget: I've been going back and forth on this, and I've decided to go ahead and sign up for Me-Made May anyway. So my pledge:

          I, Becky, pledge to wear at least one handmade garment and one handmade accessory every day, for the duration of May. (I think my focus is going to be on testing out what I've been playing with in the Wardrobe Architect series, particularly the palette and silhouette picks. Incidentally, with the navy and ivory, this dress fits right in!)

          March 28, 2014

          a post of small things, part 2

          To continue from the other day...though these are slightly bigger things.


          1. So you remember back when I was making that wedding dress, and I had to muslin the top of the Cambie dress 4 times to get it to fit? Obviously, planning a wedding was messing with my judgment, because this was my thought process at the time: "The bulk of the dress is going to be supported from the waist, so I should fit the waist first and then adjust the bust to fit, even though this is for pear-shaped figures. Even if it takes me multiple FBA's and eventual conversion of the darts to a princess-seamed top." (Which it did.) 

          Well, somewhere in the moving process, I lost the final muslin. And I never actually made those changes to the pattern, because I was sewing a wedding dress/packing and moving all my stuff/often working 6 days a week, and who had time to alter tissue patterns for later projects? But the next thing I have planned to sew, aside from the costume, is a "real" Cambie. And since I'm using a bigger table at my parents' house to cut out the costume, I dug into my refashion bin one night recently and found something to chop up and do a quick mock-up, which I'm hoping to turn into a wearable top at some point. Makes me feel better about muslin time, if I get something actually wearable out of it. But this time, I cut the size based on the bust, because it's ok for a casual summer dress to be a little looser at the waist. Around here, it might even be preferable.

          Clearly, I should have done this for the wedding dress, too. This is straight out of the envelope, with the only alterations being that I took the back darts in a tiny bit and did Tasia's straight neckline variation. Oh well...live and learn, I guess.

          For the record, I know the neckline looks gappy, but when I fold the seam allowance under, it seems to be fine. There's also some diagonal wrinkles at the sides, but the weight of the skirt should pull that out in the real version. I think I could probably take the front darts in maybe 1/8". Any thoughts, before I start chopping up my pretty dress fabric?

          2. In other news, I'm having a surprisingly tough time with last week's Wardrobe Architect assignment. It's one thing to assemble silhouettes that I'm drawn to for various seasons, and another to use that to plot out a capsule wardrobe. I think where I'm getting hung up is the spring/summer bit--I already have a few projects in the queue that I'd really like to get to this season, and it's not necessarily stuff that would make for a cohesive chunk of my wardrobe. And I haven't really had a whole lot of time to sew in the past week or so. When I have, it's basically been that Cambie top mockup or working on a prom dress that I agreed to shorten for a friend of mine. (Only because she's a good friend that I see regularly--I'd already turned down one request this spring from someone else who I haven't actually seen in years but am friends with on Facebook.) For now, this week's assignment on colors is inspiring me more, and the more I think about this, the more I think I may be better off skipping spring altogether and focus on the summer, or even summer into early fall, since that will allow me time to get these next couple of projects done first. So I'll come back to these later.

          September 5, 2013

          Finally finished my August Sewcial Bee project...

          And just in time for Pantsapalooza!

          My finished Reeses' dressSo here it is, my Tiramisu dress and its chocolately color inspiration.

          There's not too much to say about the pattern that hasn't been said by scores of bloggers. I'm happy with the fit, overall, now that I tweaked the bodice. It's probably not as deep of a V as it would have been otherwise, but I feel like I can comfortably wear this for teaching and church and such and not feel like people are looking at my chest, so that's good. And I do think the solid chocolate brown was a good move. I'm also happy to have something I can wear these (barely seen) yellow beaded earrings with, because there's not much in my closet that goes with them.


          Reeses' dress, side view


          And here's a slightly blurry side view, in which my husband was getting creative with posing, and probably a more accurate color assessment. (My weekend is entirely booked, between work and church and music-related things, so I have no idea when I'd be able to get a natural light shot. Thus the indoor pics.)

          I also finished trimming and pinning up the third hem of my friend's wedding dress today, which will be a hand-sewing job, in preparation for busy work during tonight's episode of Project Runway. 

          I also realized that today is 7 years since I wrote my first post on here. Crazy, right? 

          August 17, 2013

          Sewcial Bee!


          I didn't think that I'd be able to participate in the Sewcial Bee this month, because it just happened to be the same weekend as my extended family's annual hangout at the beach. Doug and I were only planning on going down for the Saturday, but Sundays are usually also pretty busy with church activities. When he requested that we stay home for the afternoon/evening so he could relax, though, I jumped right in!
          My project is not done yet, though I've only technically used 4 1/2 of the allotted 7 hours. I just haven't picked it up since my sewing binge on Sunday, since I either haven't been home to sew or I've been working on finishing the gift sewing. (Deadline is next weekend, but I'm down to hand-sewing. Which I hope to get a lot of done today, since two of my friends are coming over for crafting, which means they'll crochet and I'll do this.) But since I haven't been able to post what I've been making otherwise, I hope you don't mind a little sneak peek!

          The theme was "garment inspired by food". And this was not an easy thing for me to come up with, because my stash doesn't exactly scream edibles at me! My first thought was one of the many green pieces in my stash and say it's vegetables, but I wasn't feeling it. Then I saw some cherry-print cotton left over from this apron that I made for a friend years ago. There was only maybe enough for pockets, but I could almost hear Nina Garcia yelling at me that it was too literal.
          Then I saw this paisley knit stuff that my mom gave me for Christmas a few years ago, and it finally clicked. Because it reminds me of Reeses' Pieces. I didn't think I had enough to make the entire pattern that I had in mind (a Cake pattern, what else would fit a food challenge?), so I added some chocolate brown knit, and I had a plan!
          The first step, of course, was to trace out the pattern. I had a little debate about what size to trace, because I was pretty much right on the sizing line between a 30 and a 35. After some quick advice on Twitter about how the cup sizes work, I decided to try the 35 and take in as needed. This process took about 45 minutes.


          Cutting took me longer than I'd anticipated. The print wasn't quite 1-way, but it wasn't quite not, and I ended up doing a lot of flipping and turning and attempting to get the pattern to match up as best as I could while cutting single-layer. As you can see, I still pretty much botched it up, but hopefully it'll turn out ok when the skirt is actually sewn together.


          This is where things stood at the end of the 4 1/2 hours, when my husband was up and about again and it was late enough that dinner was becoming a necessity. (He ordered pizza so I could sew as long as possible-- I definitely got a keeper!) The front band being shorter than the back band isn't an accident--when I sewed it as is, the front was very gappy and saggy. I'm sure this will mean some kind of alteration for whenever I use this pattern again, but for this one, I basically just pulled the overlap so that the notches lined up where the gathering stopped, and that pretty much made it perfect! So I trimmed down the front band to match, so I wouldn't lose the sleeve shaping. My waistband pieces traced out very oddly anyway, with a very sharp curve, so that's something that needed to be fixed.

          I'm pleased with how this is turning out so far, and I think the addition of the solid was a good move, because this print as an entire dress would probably be way too much! (The skirt will be the print as well, and the sleeves will also be trimmed in the brown.) Steph's instructions are stellar, and I'm having no trouble with adapting instructions for the serger where needed. So even though I didn't finish within the timeframe of the Sewcial Bee, I think that this will be a very sweet dress to take me into the fall!

          May 22, 2013

          late night musings

          I'm in the process of going through my clothes. The plan is to try to figure out all of my outfits for the days leading up to the wedding (and the honeymoon, of course!) within the next couple of days so I can just pack up and move the rest of my wardrobe and be done with it. One of the things I have going on within the next 2 1/2 weeks is another wedding, since we have some friends from church who are getting married a week before us. I'd been planning on wearing my Dahlia dress, but I may have to rethink that, because....
          Oh no, stain!!!...look what I found on the back when I pulled it out from the under-the-bed storage! I have no idea what this random brown line is, how it got there, or how long it's been there. All I know is that my initial attempt to scrub it out with soap and water failed.

          This led me to examine the dress further. Which was probably a mistake, because the more I look at the top of this in particular, the less happy I am with several aspects of the finishing on this thing. The lining wants to curl to the outside of the bodice, the width of the top of the bodice is wider than the lower edge of the strap, the lining is all puckered because I think I was struggling with learning how to deal with the thread tension on my serger--I'd only had it for a few months at this point. Plus the top of the zipper is a hot mess. In short, there's several things about it that just look very homemade in the bad way. (I will not call it a certain phrase that Project Runway popularized, because on behalf of all other Beckys in the world that sew, I hereby proclaim that this particular phrase needs to be tossed back into the fiery chasm from whence it came!)

          Even if I can't get this stain out, I think I can salvage this, because guess what--I still have an entire yard of this fabric left! I'd been tossing around the idea of a Sorbetto, but I could quite happily go for using it to remake the top of this dress and see if I can get it better the second time around. I still like the style, but surely with 5 more years of sewing experience, I can improve on those details, right? Or I could just try to get the stain mostly out and at least add a hook and eye to the back to see if that improves the zipper...

          I still need to figure out what to wear to that wedding. Maybe my Lonsdale from last summer?

          Sans accessories and required garden center work clothes that I've already worn this week and therefore need to be washed, I do have outfits picked out for 10 of the next 17 days. Including the rehearsal dinner--another previous me-made, in case you want to know--and the bachelorette party, and a button-down reserved for wearing over my wedding dress while my hair and makeup gets done. (I tested it before, and I didn't extend the zipper enough to pull it on over my hips. Drat.) Not bad for a night's work. Now I just need to get half the contents of my closet off of my bed so I can, you know, attempt to sleep tonight.