Showing posts with label technique. Show all posts

April 26, 2013

branching out

Both literally and in terms of knitting technique, as that was the name of this pattern.
IMG_0538
These are the "Branching Out" mitts from the Coastal Knits book, which I got for Christmas in 2011. This was also my first foray into colorwork other than stripes, and I think that I handled it pretty well overall! They could probably use a good blocking to even the stitches out, but as usual, I'm impatient and wanted to show off my finished project! Also, I may want to wear these tonight, since despite the fact that we're finally scraping into the 60s, my hands are still perpetually cold.

IMG_0539
Aside from the colorwork, this was also my first attempt at a thumb gusset instead of just a hole! I think it went pretty decently. And they fit really well, too-- I know they look very long, but I don't mind most of my fingers being covered. Aside from playing the flute, I should still be able to mostly use my hands fine.

It was a little bit of a challenge to come up with yarn that would work, since I can't do the wool thing, but I ended up using the Milky Whey yarn that I got last summer at the beach yarn shop. It's half-soy, half-milk (!), and absolutely lovely to work with and to wear--it's so soft! Once again, I seriously overestimated how much yarn I needed, and have at least 2/3 of a skein of the tan and maybe around 1 1/4 of the blue left over, so I think a matching slouchy hat will be in order. If I can find that full ball of yarn, that is--somehow, between last night and the previous time I'd worked on it, the entire unused skein of the blue disappeared from my knitting bag! I hope it turns up as I'm packing!

Also in knitting news, I was recently gifted the Craftsy class of my choice by Gwen, as an early wedding present! It was a tough call, because there's a lot of tempting sewing classes that I haven't signed up for yet. But in the end, I decided to sign up for the Knit Lab class, because I've realized that there's some finishing details, like sewing up seams and especially weaving in ends, that I could really use some extra work on to take my knitting to the next level. I probably won't get to it before the wedding, but hopefully I have some yarn in the stash that will be good to use for the class project.

Guess what? I also have a sewing project to show! But not in this post, as I still need to take pictures.

January 15, 2011

Drat.

I've spent hours and hours over the last 3 days basting all of my underlining to the outer fabric of the dress. And a big chunk of today getting the bodice all basted together.

I have to admit, the underlining process has been rather a pain. I guess I didn't really know how to handle silk organza, because it kept shifting around on me, and half of the time, the marks had disappeared before I actually got to the basting. (For the record, this was using tracing wheels and chalky pencils and that sort of thing, not disappearing markers.) If it hadn't been for that, I think it would have been ok--the crepe de chine on the skirt went much more smoothly.

Unfortunately, I can't show any pictures right now, because I basted in the zipper (into the wrong seam, because I guess it's just that kind of day), and the bodice is HUGE on me. I'm going to have to take it in all over, I think. And then re-mark all of the seams.

But I guess it's better to know now, while it's only hand-basting and easier to fix, right?

(This dress had better look really good in the end. Because right now I'm kind of frustrated with it. Can you tell?)

November 3, 2010

Experiments in seam finishes

Check it out-- my first Hong Kong seams! I'd decided that I wanted to leave the Burda jacket that I'm currently working on unlined--with the style it's in, it's the sort of jacket that can never really be worn over another shirt (at least one that's showing above the neckline), and so I'm making it with the intent of wearing it more as a buttoned-up shirt of sorts. But I wanted a nice finish inside, since it would be showing. And this seemed like a practical one, since it would help tack down the embroidered cords that go off the edges.

So far, I've discovered that it's working better to move the needle over a notch closer to the edge of the foot-- I like the more narrow seam finish better.  And I'm finally getting to use up some fabric--I cut the bias strips from fabric left over from the charmeuse dress of fail. (The pieces were too large to toss, but not quite enough to make any other garment out of. Unless I do some crazy draping experiment with a camisle...But bias strips work too, and at least this fabric is good for something. I like the look of it quite a bit so far, and am trying to ignore the fact that this jacket is going to take 3 times the amount of sewing time it would otherwise.

In other news, I've been working quite a bit lately on upping my inventory for the craft fair--worked on that basically all day on Saturday. Just over a month to go, yikes!

September 12, 2009

Making it work!!

I had an unexpected day off of work yesterday. It was pouring down rain for most of the day, and generally when that happens, I get called and told to take the day off from the garden center job because they don't get enough customers to keep a cashier there all day. Bad for my wallet, good for my time. And then my one flute student of the day ended up not coming because her mom forgot about it! (Which is understandable, since this was just week 2 at her new time.) It was probably a good thing I didn't have work, because I had a massive nauseating headache (I miss the days when I didn't have allergies), but it also gave me time to work on my sister-of-the-groom dress.

Thanks to Antoinette's suggestions, I was able to make some tweaks to my muslin that made it look much better-- still not the perfect fit, but good enough (and probably still better than I'd get with a RTW dress, since those tend to be huge at my waist) given that I'm basically at the point of trying to make a couture dress on a Project Runway deadline! So I'm giving my inner perfectionist the smackdown and carrying on with it. Yesterday I finished the muslin, marked all of the seams, and transferred that to my paper pattern (you kind of get the idea here-- the original black lines were the ones I marked on the muslin at first, and the red lines are where I ended up having to move the darts and seams to! Except for the shoulder--I had to take in a good bit there too so that's the new seam line.) I also spent a couple of hours last night doing my first attempt at thread tracing the seam and dart lines. (Except on the last piece I got lazy and decided to skip the neck and armhole seams, since they're still going to be your basic 5/8" seam).

It was insanely time-consuming, but I'm glad I did it because so far it's been helpful. I'm having my own personal Project Runway day today (currently on lunch break) and trying to see how much of this dress I can get done before my best friend comes over for Beatles Rock Band time!! So far, I've gotten all the darts sewn and pressed, and the invisible zipper put into the back. I'm still afraid the side darts may have gone a little wonky because I had to tweak them a bit further to get the ends to line up properly and not take a huge chunk out of the seam. But I'm thrilled with the zipper-- provided I don't screw up the rest of the back seam, this may very well be the best invisible zipper I have put in to date. I'm also glad that I thought to do a test seam first with some of the scraps to check about stitch length and pressing, because I discovered that silk charmeuse will show every single line from both the edge of a dart and the edge of the iron. So I had to play around with a couple of pressing cloths around here in an attempt to avoid that. I'm also going to be making my first attempt at a Hong Kong seam finish, because the edges of the fabric are fraying badly and I know it won't hold up to a serger. So this project is just a ginormous learning experience, isn't it? I just hope it looks good at the end!!

April 24, 2009

Questions... questions that need answering

So my mom kindly picked up the Vogue pattern that I'm hoping to use for my brother's wedding when she went to JoAnn's yesterday. I think this has some definite potential to be a very gorgeous dress. Which would be perfect, since his fiance is hoping for an elegant wedding (and I will be seen, most likely, since it's looking very likely that my involvement will be as a musician.) But after looking at this pattern more closely, there's a lot of detail involved, and I think in order to do it justice, there's a lot of questions I need to figure out before I start it. (Good thing I have until October.)

#1: The prepwork. There's a lot of really funky-shaped pieces in this pattern, as you can see! I did some research yesterday and saw that I should probably cut the charmeuse out while laid out on top of some tissue paper to help tame the slipperiness of it. (Probably wouldn't hurt in terms of protecting the fabric from the table too, since my usual cutting table is a ping-pong tabletop on the pool table, and the surface is a little rough!) But there's some other things I need to look into as well. Like how to best pin it-- or if I should even use pattern weights instead. And whether I'd be better off attempting a rotary cutter rather than scissors, to keep it flatter. But I'd probably have better control with the scissors...

#2, the structure. The charmeuse I got is very lightweight-- in fact, the pattern calls for charmeuse for the lining rather than the outside. But I liked the color, and I wanted to go with a natural fiber since I think it would have a better chance of keeping me warmer for an outdoor fall wedding. Due to that, though, I'm questioning whether I should consider underlining the fabric to give it some additional strength. There's two main difficulties here. The first one, as you can see, is the pleated section. I didn't realize until folding out the instructions yesterday that those aren't gathers-- they're very specifically placed pleats! A lot of pleats. Both front and back. But they're kind of soft pleats, so I don't want to stiffen up the fabric too much. But at the same time, I'm not sure that side panel could hold them all without some reinforcing help. The second is the assymmetric drape in the front of the skirt--if I underline it, I'm going to have to choose the fabric carefully, because the wrong side will show. I emailed Ann at Gorgeous Fabrics for some advice, and she was very helpful-- her suggestion was that if I underline it, I may want to consider using silk organza for that side panel where the pleats go into, and chiffon for the rest since it's softer and wouldn't affect the drape much, though it would be a lot of work to underline it. But I think I might want to put that work in-- I know silk is a strong fiber, but I have this fear of going to all this work and then the seams pulling out the first time I wear it! My other thought is, the hem might look better if I do underline it, since then I can just hem it to the underlining and it won't show on the outside. I know that charmeuse will show everything. Or would I be better off just sticking with that narrow machine hem, with that irregular hemline?

#3-- I'm not sure yet what on earth to line this with. I guess I can just go for one of the nicer lining fabrics at JoAnn's or something-- though do I really want to wear a polyester lining with silk? (The lining won't show on that wrong side of the fabric, since the dress isn't fully lined.)

#4-- how to handle the zipper, due to that aforementioned lightweight fabric. Though if I do go the underlining with silk organza route, that might help since I can probably use a strip of that to reinforce it. The pattern calls for an invisible zipper-- I'm debating whether I'd be better off attempting to hand-sew that in, since I haven't quite mastered exactly how to get the invisible zipper in without the bottom of it getting all puckered and leaving gaps when the rest of the side seam is sewn. Not to mention sometimes I have trouble getting it close enough to the teeth. But would a hand-picked invisible zipper even hold?

#5-- how best to hem this. Though I already talked about that, so I won't elaborate again.

I am trying to do my research here--looking through my old saved Threads articles, and the Couture Sewing Techniques book for ideas. And I definitely plan on doing a muslin for this one-- debating whether I should even try a lined muslin, since the lining isn't even the same shape as the dress! It's going to have to wait, of course, since the first priority at the moment is my summer wardrobe type stuff. But hopefully that will give me some time to find some answers.

p.s. Any advice welcome-- it's not like I haven't sewn formalwear before, but it was always with polyester satin and stuff. I've never sewn on silk. And I've never underlined anything. This one's definitely going to be a skill-stretching project!

Edit, as of Saturday: Got my latest BWOF in the mail today. Woohoo, I have a backup plan!!

February 27, 2009

Friday Favorites, Episode 40

Ah, the big 4-0! Does this mean the series is getting old, I wonder?

Favorite Tutorials of the Week:
The Crafty Chica had a fun how-to for making a stitched paper dot lantern. I also really liked that she posted some alternate ideas for how to use the stitched paper dot technique! Craft: had a link to a tutorial for some lovely beaded flowers. The Long Thread featured a tutorial for some cute, simple fabric "crooked coasters"-- they just look fun to make, since sewing in crooked lines is the entire point! And Dollar Store Crafts had a tutorial for a handbag made from a miniature rag rug! Crafting a Green World had two that I liked-- one for a t-shirt covered corkboard, and one for upcycling boring greeting cards with fabric scraps. (It always makes me happy to find tutorials for fabric scrap projects that aren't cutsey or kid-oriented, since I'm neither at this point in my life!) And last but certainly not least, Sharon over at Adventures from the Sewing Studio had a great tutorial for attaching collars to button-down shirts without getting a bump between the collar band and the main part of the shirt.

Favorite Projects:
I'm thinking I need to stop being so tutorial-oriented with this, and bring in a few more projects I see around the blogs that just deserve to be seen by more people! So with that in mind, I have two this week. The first is my favorite from Wardrobe Refashion for this week. Despite having been born in them, I hate the 80s and think it was one of the worst decades for music and (especially) fashion, ever. So I love it when people can take 80s ugliness like this stripey maternity muumuu thing, and turn it into something fun in a much better vintage sort of way (in this case, using a bodice pattern from the 60s, which was an exponentially better decade in both aforementioned categories.) Speaking of 60s music (maybe, anyway), I really loved Eileen's concert journal--she took a thrifted vinyl 45 and an old music book and turned it into a scrapbook to fill with concert memorabilia and such.

Favorite Miscellaney:
This doesn't really fit under tutorials. And this isn't really something I've ever tried, beyond purposely saving stuff to throw in a scrapbook and writing out stuff for journaling while on vacation. But over at ScrapHappy, she's started a mini-series about scrapbooking while traveling. Only one post so far, but I'm enjoying it. And who knows, at some point I might want to try the whole assembly-as-I-go thing!

Ok, that's it for today. May end up with another post depending on how things go today, since the weekends seem to be my blog catch-up time!

February 20, 2009

Friday Favorites, Episode 39

...which will hopefully be the first of a couple posts today. I have some catching up to do!!! So on with the show.

Everything in its place....

Got two from Whip Up today... the first is a tutorial for a quick & easy shoe bag, which I think they're using for travel packing purposes. If my closet wasn't the size of a shoebox, I think I'd try to find a way to tack them to the walls so I can get some floor space back! (I might try anyway.) The second is a tutorial for a reusable snack bag, for those tired of tossing out plastic ziploc bags every time they want to bring something crunchy with their lunches. (And more fun, too!) And from Crafting a Green World, they showed this laptop pillow that looks like it would be pretty easy to replicate with some tube-style pillows velcroed together. Of course, around here, it would probably get used as a temporary holding pen for the cat!!

Around the house...

Lots of fun decorating ideas this time. For those without on-demand cable to turn it onto the virtual aquarium, Apartment Therapy Unplugged shows how to turn an old tv into an actual aquarium. Heehee. I'm absolutely loving this faux capiz shell lampshade from Craftynest, which is made from laminated rice paper, and if I could actually manage to clear a spot big enough to set it on, would so make this for my bedroom. It would fit in perfectly. On ReadyMade, there's a tutorial for this funky bubble light fixture. And on a completely random note, if anyone ever wanted an 8-foot pillow shaped like a giant squid, PW Style is the place to find directions for that (found courtesy of One Pretty Thing's Daily DIY roundup.)

Things to Wear and Do...

At The Impatient Crafter (also found courtesy of One Pretty Thing), there's a free project from a new bead book of some really fun-looking cascade earrings. I definitely have some of those little cone things to use up, so I'm excited to try these sometime! (I'm also liking yesterday's "Tiger, Tiger Burning Bright" Choker, and think I'm going to have to start following this blog.) And while not actually something to wear, this CraftStylish tutorial for how to do 4 different seam finishes will definitely help with things to wear. I especially want to try that Hong Kong seam finish, because I've never used that one and I think it'll be perfect for one of my (hopefully) upcoming projects.

Random but Awesome

A bunch of non-tutorialish crafty goodness this week. First of all, this tissue box at Disdressed just made me laugh. Especially since I've been quasi-sick all week. Confessions of a Craft Addict used one of those giant cupcake cake pans to make a ginormous rice krispy treat. Craft Tutorials had a knitted dress that cracked me up-- I wouldn't want to dress like a cheeseburger, but if I did, this would be the way to go. I have to give a shoutout to Lydia, who posted this week to say she finished sewing together her baby bag-- believe it or not, other than a few baby bibs, this was her first major sewing project, and I think it looks great! And I also have to give a shoutout to my friend Nicole--she's an amazingly talented artist and a good friend of mine, and she just started a blog for her artwork this week. So go check it out!

Ok, gotta get some stuff done so I can post again... I'm hoping I can get stuff up today both for those scrapbook layouts I promised, and my long-overdue embroidered shirt. And then I also started a new skirt yesterday and I'd like to work on that some more too!

EDIT: I almost forgot!! I've been following Cake Wrecks since a friend sent me a link to their V-day disaster cakes (which I posted about in FF last week.) Apparently once a week they do a feature devoted to cakes that are actually good, and this week's was by the Ace of Cakes crew. Their stuff is always amazing anyway (yes, I admit I watch the show when I can catch it), but this one was just made of awesome. It was made for the crew of Lost to celebrate their hundredth episode. And has tons of fun little tributes to the show-- the computer with The Numbers, the Dharma beer, little figures of the cast (mmm, Sawyer...)

October 4, 2008

Saturday refashions

I'd been pulling a lot of late nights this past week, so I'd fully intended to go to bed shortly after seeing if Sanctuary was going to be any good, so I could try and catch up on a little lost sleep. (Yes, I am a geek, and proud of it!) But as I was removing my stack of recon-potentials from my bed, inspiration struck at around 11:30! So I was up past midnight (again) cutting, pinning and seam-ripping to turn these...


(one hoodie with a lame logo, passed down from my mom, plus one too-short tank top)


...into this.
I also shortened the sleeves to 3/4, because they were a bit too short on my long arms, and adding enough fabric to make them a good length after removing the cuffs would have been so wide that it would have looked really dumb. And I need a few 3/4 casual shirts for weekends, as well as long-sleeved.


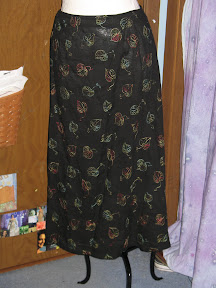
I also took this skirt that my mom made for me several years ago, I think during one of my busier college periods when I couldn't sew as much...

From sew and so

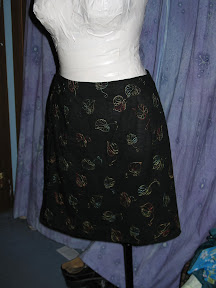
...which was a little longer than mid-calf (which is a really bad length on me), and shortened it to this.
From sew and so
Now it hits just above my knee. Much better, don't you think? And I'm also proud of myself, because I taught myself to use the blind hem stitch/foot on my machine, using an old sewing book for reference. It worked pretty well, once I figured out which way I was supposed to fold everything. I don't think I'll use it on everything, because some fabrics just demand the slightly more invisible hand stitching, but for casual skirts, this is going to be a huge time-saver!

April 4, 2008

Friday Favorites, Episode 4

Can't really categorize this week's offering-- it's really random.

1. As most of you who actually read this probably know, I love ThreadBanger. I grew up with craft shows, since my mom is also a very crafty lady, but have often found the projects on them to be kind of lame for my tastes (I'm way more rock n' roll than country.) So if this had been around when I was a teenager, I would have been probably making everything featured on this show. Of course, as it is, I generally watch this more for the entertainment value, since a lot of the projects are rather easy for me by this point. That, and though I can get away with a lot more than, say, someone who worked in the buisness world, I do feel it's important to try to maintain some form of professionalism in my dress while I'm teaching (albeit funky, artsy professional.) After all, this is my buisness. And while a lot of what they show is great for teenagers and college students, doesn't work so well for an older 20-something in the working world.

That being said, I was really excited about this past week's new episode. It's a technique I've never tried (freehand machine embroidery), I've had that foot sitting in my box unused for years, and this is something that I could actually use. My head is reeling with the possibilities of custom-embroidered bags, jeans pockets, etc. (I just have to try it first.)

2. Creative Kismet showed some lineoleum block-carved stamping that she made for some notecards. This is another one of those art forms that I've had some exposure to (we did a bit of that in my high school art class too-- I still have one of my more intricate stamps down in the basement with my other crafty stuff), but I never got this involved on it. I love all the layering and the colors (and the design, of course, because I really love tree-based designs).

3. Laura gets the most practical application award this week, thanks to this well-written and illustrated how-to on underlining and finishing a garment with Hong Kong seams. I've been wanting to try the underlining technique as part of my resolution to learn how to finish the insides of my clothes better. I just haven't found the right project to attempt it yet, since pretty much all I've been sewing this year so far are simple tunics and skirts and the like. But once I do, like next time I make a jacket or something, I will certainly be returning to this.

4. The craziest item of the week, as seen through Crafting a Green World: a musical dress. I kid you not. Somebody wove this "sonic fabric" out of the innards of old tape cassettes, designed a hand-held device that allows one to "play" it (like the same thing that's inside a tape player that reads the tape), and made a dress out of it, gave it to the lead singer of Phish, and he "played" it on stage.

5. Also through Crafting a Green World: vinyl wrist cuffs. Being the music junkie that I am, I have long admired crafts that recycled things like records and cds. And since I really have no reason to try the record bowl that everyone's made by this point anyway, I really like this (and I don't think it would clash with the "funky professional" aesthetic I mentioned earlier in the post). This one they show is extra-cool because of the vinyl color, but either way it gives me another reason to reconsider browsing the record section of the thrift store....

6. Not a craft, but I still really enjoyed two posts over at Beadlust this week. In the first post, she instructs you to draw five symbols, and then number them in order of what visually appeals to you most to least. (She got this from a psychologist friend.) Then, in the second post, she reveals what each symbol stands for, and what their placement in the 1-5 order means. Surprisingly insightful, and since I love personality tests anyway, it was fun to have one art-related.