Showing posts with label sewalong. Show all posts

September 17, 2015

it's that time of year again!


Woohoo! I just wanted to take a few minutes and talk about my FESA plans for this year. Due to my current time constraints, I'm keeping it simple this year, and only committing to a handful of projects-- after all, I also have a little Halloween costume that I've been mentally planning since, oh, last Christmas. So here's what I'm hoping to accomplish...

Fashionable Foundations for Frosty Weather 
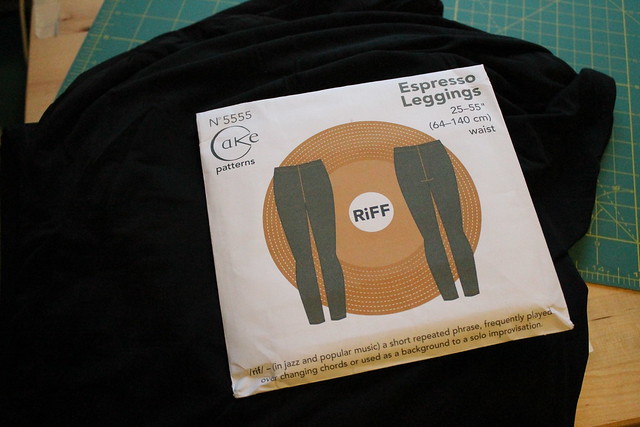
IMG_2813I have fabric that I think will work to finally try out the Cake Espresso leggings in two different colors, though after the disaster that was my last attempt at sewing leggings, I'm definitely double checking the stretch first this time! Assuming all is well, I plan to sew the black pair, because that will go with nearly all of the skirts I own that currently fit.  I'm most likely to wear them as tights with boots. (Honestly, based on my initial fiddling to check the stretch, I think this fabric will be too see-through to use them as anything else!)

Fabulous Frocks
IMG_2811For the third year in a row, I am putting the Megan Nielsen Darling Ranges dress, in this very fall-appropriate rayon challis print, on my list. And I am determined that this is the year I'll actually make it, dangit!!! After all, it looks like the perfect style for postpartum and nursing. I have managed to get the pattern traced, the fabric cut out, and the darts sewn so far. So third time is the charm, right?


Baby It's Cold Outside
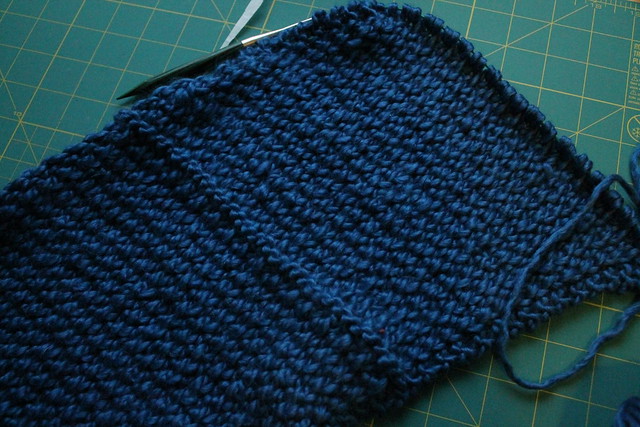
IMG_2812This may be cheating, since I've been working on this particular project for over a month already. But I've been knitting a cowl (the Wine Country Cowl) out of some bulky yarn that I originally bought as the top part of a sweater that I've since abandoned the plan to knit. I could not figure out the very first steps of the pattern at all, and decided I didn't like how the two yarns coordinated after all. "I can't wear wool" substitution problems strike again. Anyway, I'm over halfway done this cowl, I think--it's been one of my methods for coping with Hobbit's penchant for napping best when on my lap and leaving me chair-bound for long stretches of time. Sadly, I think that my plan to use up the entire stash of this yarn isn't going to work out, given its current length. Any suggestions for what else I can do with one or two balls of this stuff?

The nice thing is that if I finish all three of these projects, I'll have one complete outfit! If I can get those and the costume done and still have time left, I have a fairly substantial mental list of additional projects that I could add in. But since I am unsure at this point what the greatest needs in my wardrobe will be, or what I'll be most motivated to work on (SO important right now), I'll just see how this goes first.

April 27, 2015

Sewing for boys: My Little Jedi


I have a feeling this is going to be a sporadic, ongoing series, at least while Hobbit is in the age range that I can sew things for him without him protesting. Because one of the first things I've learned about being a (future) boy mom who sews is that it's a lot harder than it should be to find cute patterns/good fabric with boys in mind. I'm more hopeful about the patterns than I was initially, since recently finding an Ottobre magazine at the local Barnes & Noble/joining a Facebook group specifically focused on sewing for boys. But the fabric is still tough. Especially if I'm looking for anything that isn't quilt cotton or doesn't cost over $10 for just half a yard. (Which is all the fun prints I've found so far.)


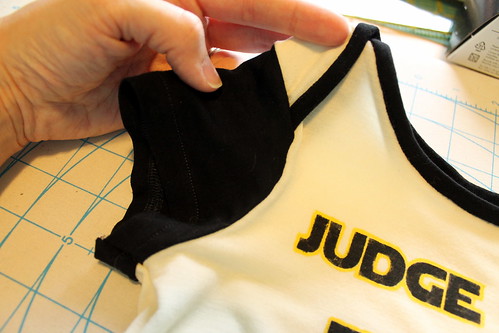
Yoda shirtAll that to say, I made a baby shirt. And it's geeky. Because that's how I roll. (Though, for the record, I think this totally counts as gender-neutral. After all, girls like Star Wars, too!)

My fabric stash is going to be challenging to shop for boy clothes, because frankly, I don't have a lot of stuff that suits--if the color is right, the fabric is usually wrong (too delicate/drapey/etc) and so on. So I was quite pleased that I was able to construct this shirt completely from my scraps! The black is leftover bamboo-blend rayon pieces from the maxi-dress I recently made, and the cream is some leftover scraps from a knit top I made years ago. I guess I'd been thinking they were large enough scraps that I could use them to attempt to make undies or something, and that's why I still had them? But both pieces are very soft, which are perfect for baby wear. And since I used the same multi-piece pattern that I used for those hockey pants, this shirt was essentially free! I'm happy that I finished it within the SHB Sewalong timeframe, too.

Stencil closeupAs for the stencil, I remembered that I have a scrapbook cutting tool that will use any True Type font that I have on my computer to cut shapes. (Why didn't I remember this when I was making those bibs last fall? Oh well...cutting those stencils was one of the only crafty things I was feeling up to at the time, anyway.) So I used that and some freezer paper to cut this Yoda quote out of a Star Wars-looking font. It worked pretty brilliantly, other than my evil, possessed ex-iron deciding to spew water all over the stencil when I ironed it on. The result was a little bleeding here and there where the fabric was still damp when I started working. It ended up being for the best, though-- I used some other paint in my stash to outline the letters in yellow to help cover the messy bits up, and ended up liking it so much better with the pop of color than I did when it was plain black! I can still sort of see the parts where it had bled, especially around that comma, but it looks a lot better than it did.

Neckline detailThe one major change that I made to this pattern was the shoulder edging. The original instructions called for turning those little curved edges under and hemming them. That seemed rather fiddly to me, and like I'd just be setting myself up for rippling and frustration--especially given the state of my iron. So I cut an extra 1/4" off each edge instead, cut some bias strips out of the black knit, and treated it more like a binding. So much easier, even with trying to stitch in the ditch around tiny curves to get the underside to stay in place, and I like the contrast better than I think I would have liked the plain cream.

I made this in the medium size, which looks like it corresponds roughly to somewhere in the 6-12 month range. Baby clothes sizing still baffles me, to be honest. I've actually resorted to hanging the onesies that I currently have in the closet by length, because they're all supposed to be the same size, but they don't look it at all! So I figured that if I go by length, I might be able to make faster guesses at what might fit him vs. not. Anyway, the point of all that is that I'm hoping this means he'll still fit into this shirt next May 4th. Yes, I already made him a shirt for his first Star Wars Day. I already have his first Halloween costume plotted out, too. What's your point?

On a side note, I've also learned that it's almost impossible to find boy clothes with a sports theme that actually reference hockey. At least in the US--it's all baseball and football and occasionally basketball. Since Doug only cares about hockey and especially dislikes baseball, we've actually been passing the sportsy hand-me-down clothes we've been given to a good friend of mine who's due to have a boy about 6 weeks after me--clothes are all she's needed, since she already has a young daughter, and her husband is a lot more into sports in general. Also, now that Doug knows I have a machine that will let us make custom stencils, he requested that I help him decorate one of the plainer onesies that we've had passed on to us. The result?

https://igcdn-photos-e-a.akamaihd.net/hphotos-ak-xfa1/t51.2885-15/11085068_1558879861044348_2079045648_n.jpgAccording to him, this font is one that gets used on some professional hockey gear. I did the machine set-up/ironing, he stenciled the black, and then I outlined it with the gold again so it would be closer to Pittsburgh Penguins colors. He had a lot of fun showing this one off to various local friends--we live in Flyers country, of course, and he likes trash-talking them--and I have a feeling he'll want me to make more hockey-themed clothes in the future!

(Completely unrelated side note: Blogger is telling me this is my 900th post on here--crazy!)

April 24, 2015

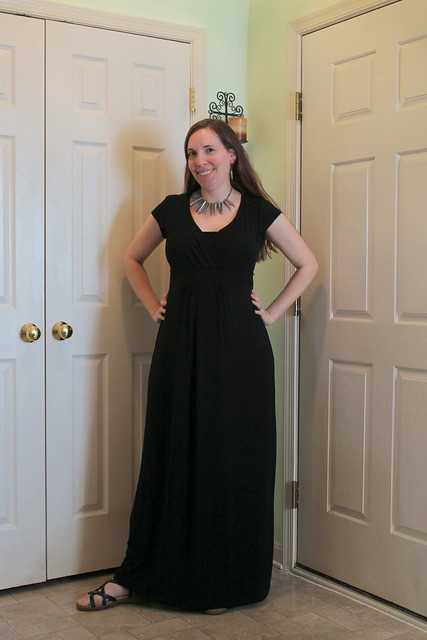
dressed to the max(i)

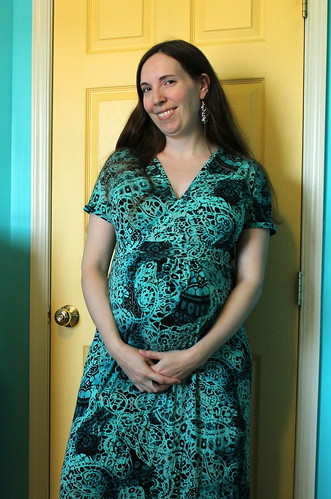
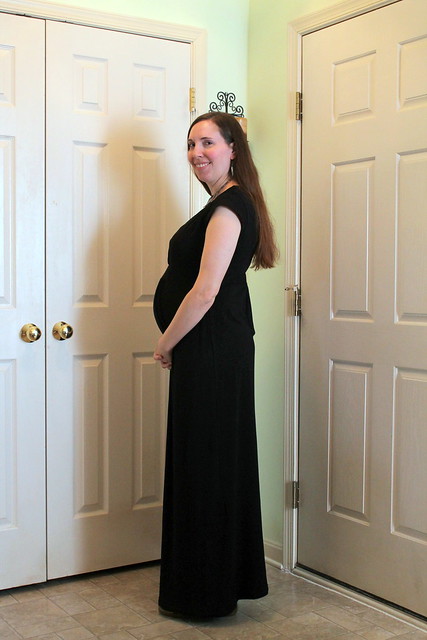
Maternity/nursing maxi-dressThat's right, I finished another maxi-dress! No camouflage baby bump for this one. It kind of looks like I just have no waist at all. (I guess I don't right now, really.) Honestly, I don't really feel like there's a whole lot to say about construction, since this is the third time I've used the Tiramisu bodice and the exact same skirt modification that I made on my last dress. And I already detailed the nursing-friendly alteration in my last post. Really, the biggest issue I had with putting this one together was my iron--it had been acting up for awhile, and I finally hit the last straw with it while trying to press the skirt seams the other day. After all, an iron that keeps turning off while you're actually pressing with it at the moment, and then taking forever to turn back on (and usually some unplugging and replugging--really annoying when the power strip is on the floor and you're 7 months pregnant!) So I ordered a new iron. Hopefully this one will hold up better, since the one I'd been using lasted me less than 2 years. It's supposed to arrive today, and none too soon, because it really shouldn't take me half an hour to press a hem because I have to keep waiting for the iron to turn on!

side viewIsn't this print fun? It's one of the pieces I treated myself to when I visited Mood in NYC a little over a year ago. I'd gotten 3 yards with a maxi-dress vaguely in mind, though I certainly wasn't expecting that it would have to be a baby bump-friendly one at the time! But I do expect that I'll be wearing this one a lot over the coming summer. Even though the two patterns didn't quite come together as smoothly as I'd hoped. The back seems pretty loose to me in comparison with the black dress, and it is so tempting to try to take it in around the empire waist a little. Or fake in a back seam with the serger. Or something. I have to keep reminding myself that I still have the rest of this pregnancy/the belly only getting bigger to go, I have no idea what's going to be up with my bust size after that, and it would be better not to over-fit. I can always try to take it in a little later if needed, though it might be nice to have a looser dress when the Mid-Atlantic summer humidity kicks in. (I did tweak the sleeve/underarm area, though.)


front viewThis will probably be the last garment that I make for myself until after Hobbit arrives, to be honest. I've got less than 8 weeks to go before my due date now (yiiiikes), so despite the fact that I have nearly no pants that both fit and are weather-appropriate, it seems a little pointless to take the time to sew any more maternity-type clothes. I am starting to think ahead to just straight-up nursing-friendly, or things that will work with another period of my figure changing around on me, and I do have some patterns in mind for when I'm feeling up to trying to sneak in sewing time post-baby. Is it weird that after so much time sewing knit garments over the last several months, I'm really starting to get the itch to dig into my wovens stash? But since that has to wait until I have a better idea of what size to sew, any projects that show up here over the next several weeks will probably just be a big babypalooza. I know that's not the most interesting thing for a lot of people, but honestly, this blog is pretty much just my personal craft journal anyway, and this is the stuff I need to be making right now. So, sorry not sorry, I guess?

On a slightly related note, I've decided that I'm going to be sitting out of Me-Made-May this year, though I will happily follow along with what others are doing! Honestly, pretty much everything I've made that fits right now and works for the season has already been shown on here in the last couple of months, I really only have enough of that to do about one outfit a week, and there's other things I need to prioritize over stressing about outfits and taking pictures. Like continuing to stuff the freezer with as much pre-prepped food as possible, the mental list of baby sewing projects that I'd still like to finish in advance, and getting some music together for a couple of my flute students to work on while I'm out of commission for teaching. Not to mention that by the end of May, I'll be in the range of "could potentially pop any time". Hopefully I won't go that early, especially since a couple of my students are participating in a recital two weeks before my due date, and I'd like to be there to support them. Plus, the only date that worked for everyone involved in planning my baby shower is the last Saturday of the month, and I'd really like to not miss that due to being in labor!

I also have to admit that I'm going to be a little sorry when the Small Human Being Sewalong wraps up at the end of this month. It's been fun getting to know a couple of new-to-me bloggers, and helpful to follow along with the discussions of what ends up being useful vs. not/how to find sewing time after baby, and so on. But I'm super-close to finishing another project for that, and may be able to knock out at least one more. In the meantime, I'll just enjoy this dress and all the pretty, swirly blues.

April 17, 2015

Tutorial: Nursing dress adaptation with an invisible zipper

I was so pleased with how my last maternity/nursing maxi-dress turned out that I decided to make a second one. This time, I made a tutorial for how I did the zipper part, in case it helps any sewists who may be expecting in the future!

SuppliesYou'll need:
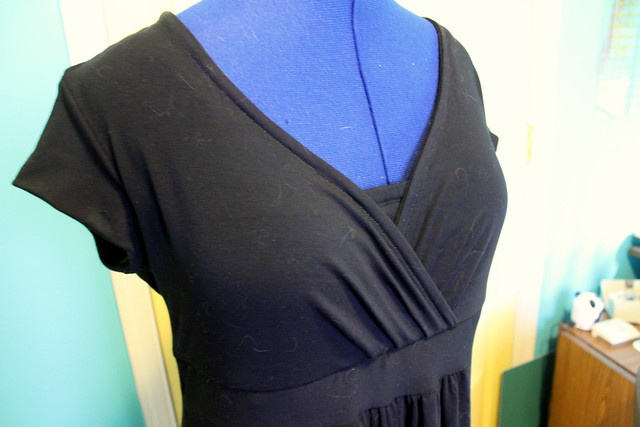
  • A knit dress pattern with a seam under the bust. I'm also intending to wear this during the remainder of my third trimester, so I'm using the top of the Cake Tiramisu dress with the midriff band and skirt of the out-of-print Simplicity 3678, since I already adapted that skirt pattern both for extra belly room and a maxi length. But if you're making this just to wear for nursing and have an idea of what size to do the waistband, the Tiramisu or Red Velvet dress would be a great option as is.
  • An invisible zipper that's long enough to fit across your ribs from one side seam to the other. (A few extra inches probably won't hurt. Mine was a 22" length, and I ended up chopping off somewhere around 2" at the end.)
  • Clear elastic
  • I used both an invisible zipper foot and a regular zipper foot to do this portion of the construction. 
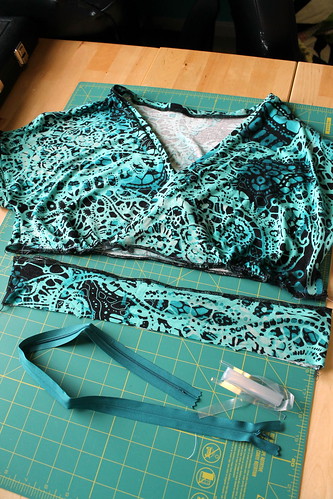
Before beginning the zipper (these three steps were completed before I started taking pictures, and you can see the results in the first picture):

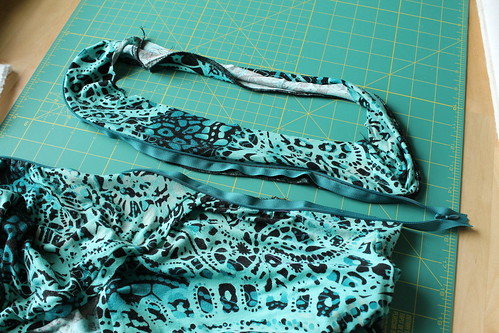
1. Sew the bodice pieces, including side seams. Depending on the pattern you choose, you may need to alter the order of construction. (Normally, the sleeve and side seams of the Tiramisu are sewn all at once after the front and back of the dress are constructed flat, but I went ahead and finished the sleeves/sewed the side seams together before taking this picture, since constructing the side seams around the zipper would be much more difficult than the other way around. It may take a little more effort to get the side seams to match up between pieces this way. For my current fitting needs, the big advantage to this was that I was able to put on the mostly-finished bodice and adjust the gathering and the overlap of the neckline to the larger bust size that I'm currently working with.Which meant that I was able to use my already-sized pattern from before I was pregnant as-is.)

2. Sew the midriff/waistband pieces together at the sides, or skirt pieces if your pattern does not have an extra band. Depending on the length of your dress, you might be able to do the waist and skirt pieces together. I'm only working with the midriff band for mine, since I'm doing a long skirt and don't want the weight of it to distort things as I sew. (Plus it's a lot easier to take pictures that way!)


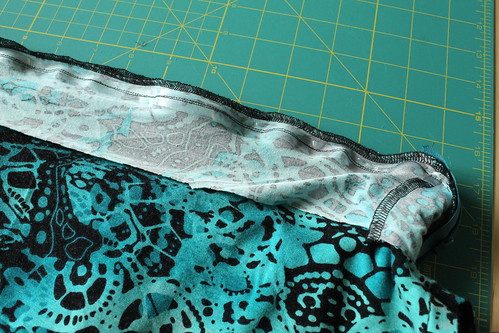
3. Finish the lower edge of the bodice and the top edge of the waistband/skirt. I know knits don't unravel, but it does add some stability to the edge. And since we're working with stretchy fabric and a non-stretchy zipper, that is never a bad thing.

To add the zipper:

Front bodice w/ zipper1. Sew one long side of the zipper across the bottom of the bodice, as you normally would for the right side of a vertically-inserted invisible zipper. I started the teeth at the side seam on the left side, because I'm right-handed, but you could easily flip this around if you're left-handed. I also brought some of the extra length past the right side seam and into the back, just to give myself a little more give for opening. I probably could have done this for the left seam as well to make the whole thing more centered, but I really don't want to have to be reaching behind me with one hand while trying to wrangle a squirming baby with the other! Better to leave the zipper pull where I can more easily see it.


Front waistband w/ zipper2. Baste the other side of the zipper onto the waistband, being careful to align the top edge of the teeth with the correct side seam. Close the zipper, check to make sure both seams are lining up on either side of the zipper, and adjust if necessary. Once you're satisfied with how the sides are lining up, stitch over the basting line. When opened, the two pieces will look kind of like this.


Back bodice/waistband3. Sew the back of the bodice and the back of the waistband together. I added clear elastic here, both to help support the weight of the maxi-skirt and to allow it to bounce back if I need to stretch the dress to get it on over my chest later. (I had to do two rows of stitching here--to get the seam closed as much as possible, I used my zipper foot on a longer stitch length. But my machine doesn't have a stretch stitch, and I can't zig-zag with my zipper foot, so I added a second row of a narrow zig-zag close by, just in case some of the straight stitches pop. I know it looks a little ripply when it's flat on the table, but the other dress is like that too, and it's not really noticeable when wearing.)

4. Shorten zipper if necessary, and press back seams up towards bodice.

5. Continue on with the dress from here-- I still need to add the skirt pieces and hem it, but that's it!

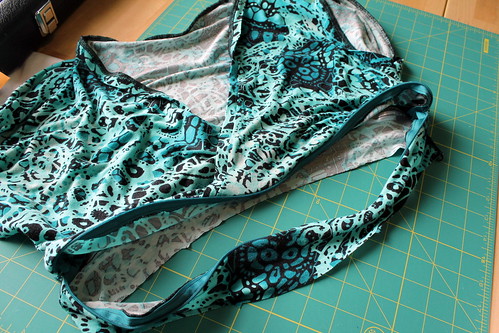
Zipper when closedWhen the zipper is closed, it looks like a normal seam, except for that pull tab...

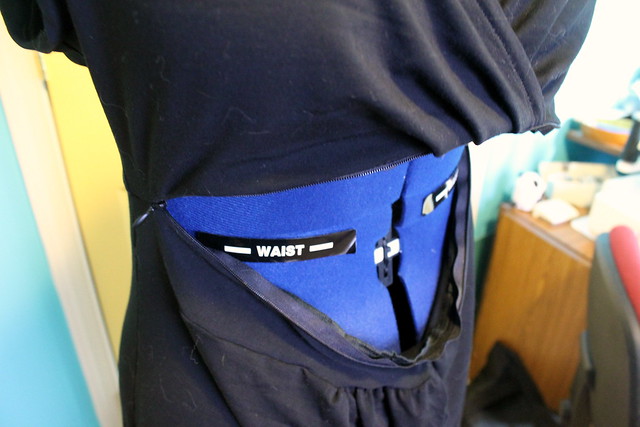
Zipper when opened


...and then once you open it, easy breastfeeding access without having to stretch out your neckline!

Hopefully that was clear enough--let me know if I need to clarify anything! And for those of you who are moms that sew, I'd love to hear if you have any other nursing hacks you like to add into your clothes.

April 1, 2015

the March round-up, and April/May plans!

I'm really liking these monthly round-ups. Since I've been mostly doing finished project posts lately, it's a good way to keep tabs both on my stashbusting attempts and the longer-term projects/quickies that don't necessarily need individual posts.

Projects finished this month: 6 total. There was the diaper bag, the skirt and matching baby pants, the top I blogged the other day, and 2 more baby projects.

Project #1, with backstory: The bulk of the clothes I've gotten for Hobbit so far have been courtesy of my mother-in-law, who keeps finding people who are getting rid of baby boy stuff and snagging it for us. For the most part, it's been like-new or very gently worn, so I think we'll be able to use most of it--though I did send a stack of newborn onesies to the thrift store, because they were specifically labeled 5-8 pounds. Given the weight updates I've been getting at my ultrasounds, and the weights that both Doug and I were at when we were born, he'd probably fit those for a week, tops. And I also passed a few things on to one of my best friends, because neither Doug nor I cared about keeping the sports-themed clothes (they never have hockey anything on them and he doesn't care about any other sport), she and her husband actually like football and stuff, and she's due to have a boy about a month and a half after me--instant friend for Hobbit! Yay! She had a girl for her first baby, so all she really needs for this one is clothes, and I don't mind sharing. Anyway. There were also a few things that I thought were generally cute, and mostly in good condition, except for some obvious staining around the necklines. I had a little mental battle between my cheapness thriftiness and not wanting to dress my kid in clothes with mystery stains that he didn't make. Then I remembered that I can sew, and therefore I can still get some use out of this stuff!

So I took these cute-but-stained pajamas, and this organic cotton onesie that was in excellent condition, but a little boring. And I cut the frog applique off and hand-stitched it onto the onesie--I wasn't sure how well my machine would navigate those little tiny openings, since the side seams were already closed up! (The only before picture I have was on my phone. Yes, that's Doug playing with toys in the background--if you follow me on Instagram, you know all about my excellent thrift score on a box of K'Nex over the weekend!)


Ta-da! Much cuter onesie, in about 20 minutes. And I still have other unstained parts of the original pajamas left--maybe I can hack the legs and sleeves into a little hat or something?


Project #2: Since hockey apparently doesn't count as a sport in the minds of people who design fabric for baby clothes, I'm having to get creative. After all, if I can make geeky stuff for the baby, I should accommodate Doug's interests too, right? So I used some fabric left over from the one hockey bib that I made a few months ago to make a project that I promised I'd do.

He mostly gets flak for being a Pittsburgh Penguins fan, since we live in Flyers country, but his other favorite team is the Colorado Avalanche, and it's a lot harder to find pre-made anything for that team for some reason. Even on the internet. But I did find some quilt cotton. So now our kid has Avalanche pants. The pattern is Simplicity 1330, slightly adapted because I didn't have the right size elastic and partially because I didn't want to bother putting the elastic in the bottom of the legs. The waistband came out huge with the length they said to cut, too, and the casings weren't cooperating well with my wider elastic, so I also cut a few inches off. Hopefully they'll fit him ok--these are supposed to be 6-12 month. Otherwise, super-easy--I had these cut and completely sewn in an afternoon.

Stashbusting totals for the month: About 6 1/2 yards used up. I still need to figure out what to do with the rest of that Avalanche fabric, since I have maybe 1/4 yard left. I also bought 1 yard of quilt cotton from Jo-Ann's, because it was another hockey-themed print, and I don't see those often. Still, used more than I bought. So yay! Total for the year so far: 27.75 yards down, just under 360 still here.

The in-progress stuff: The good news is that the newborn and small-sized diapers are completely done! I just need to finish up with the mediums, and my mom got a good chunk of that done. So I just need to finish with leg elastic and snaps. It's definitely easier (and less boring) doing that sort of assembly-line sewing with someone else. As for my Lord of the Rings-themed quiet book, I haven't made as much progress on that, since a nice chunk of the time I'd normally be spending on that was spent on diaper snap installation. But I have finished up to page 5 of (I think) 11, aside from machine-sewing the backing page on two of them, and am working on the 6th. So I'm about halfway there.

How I did with March's goals: Well, the diaper bag is done, and I managed to make 2 pieces of clothing for myself instead of one, so I did well! I haven't actually started that massive cooking project yet, save making a massive grocery list and at least figuring out which recipes to start with. But that is definitely on the agenda for this month, since I decided that it would be better to wait until closer to the time that we would actually be eating this food. Less freezer burn that way.

April's plans (and beyond): 
SHBsewalongbadge2 

I mentioned this sewalong in my last post, and since everything I'm sewing right now fits one of the three categories, the timing is perfect! I'm not entirely certain what order I'll end up making things in, so I'm just going to list all of the sewing that I'm hoping to get done before June by category, and see what actually happens.

1) Baby Clothing
Not 100% sure of my plans here yet, though I do have some things set aside and some ideas.
  • I have a few knit scraps pulled out that should be just enough to make a baby t-shirt. I'm also planning on freezer paper stenciling it since both fabrics are plain--with a geeky reference, of course! 
  • I do have two more partially useable free baby clothes that could also get the refashion treatment. 
  • I also have a couple of patterns lying around that would be fun to try out. Including one for adorable soft-sole baby shoes, and a button-down shirt one that I recently acquired. I even have an old work shirt of Doug's hiding in my refashion bin that I can use for fabric, and I think it would be cute (and free!) to cut down Daddy's old shirts for little boy clothes!
  • And I guess finishing up those diapers can count as clothes, right? I mean, he has to wear them...
 
 2) Baby Accessories and Other Items, such as quilts, toys, burp cloths, bibs, etc.
I should be solid on bibs and burp cloths, mostly thanks to my mom!
  • But I do want to make a portable changing mat to go in the diaper bag, since I have fabric left over from that. 
  • I have a scrap quilt in-progress, which I'm planning on just using as a throw-on-the-floor play mat, but that's probably lowest on my priority list right now. (A, he won't be able to sit up for awhile, and B, that might be an ideal project to work in 5 minutes of sewing here and there shortly after he's born, since it's all stitching strips onto blocks.) 
  • The quiet book definitely counts as a toy, and I did get some suggestions about maybe turning the rest of that Avalanche fabric into a stuffed toy, via the Stashbusting Sewalong group on Facebook.
  • I also have leftover towel fabric from when I made a baby gift (for the same friend mentioned earlier) a couple of years ago, so I'd like to see if I can squeeze a hooded towel out of it. 

3) For Parents
  • I have one more nursing/maternity maxi I want to make, as mentioned in my last post. I think that, for ease/speed of assembly, I'm going to just mash up the Tiramisu bodice, which I've already made twice and I know has some room for expansion, and the already-altered Simplicity skirt pattern from the black dress.  Which means that I'll probably do the invisible zipper nursing alteration trick again, so maybe a tutorial post will happen?
  • As mentioned in my last post, I may give that Megan Nielsen pattern another go, with a few tweaks, since I'll need something sleeveless for the hot days too. 
  • Given the colors of either project, I can also use the scraps to alter a not-quite-nursing bra that I picked up recently. The straps are the type that can snap closed in the front, so it just needs a little tweaking. 
  • I also need to make myself a nursing cover. I'm pretty sure I know which stashed quilting cotton will be sacrificed for this cause, I just need to do it. 
Hopefully this isn't too overly ambitious. But I'm determined to cram in as much time with my sewing machine as I can now, because I suspect it'll be hard to do for awhile!


March 21, 2015

it's the time of the season

Happy spring, right? Here in the good old Mid-Atlantic, ours started with winter trying to get in one last sucker punch! I think it's time for a breakup with cold weather, because I am OVER winter clothes. I know I say that every single year, but with my currently limited wardrobe choices, it's even worse. I've been wearing the same 2 pairs of pants (with the jeans mixed in as I can) and the same 3 cardigans almost every single day. And my one purchased winter maternity top is looking rather dingy and sad. I guess that's what I get for buying a cream sweatery-looking top.

That being said, with the limited window I have remaining in which making clothes for myself to wear throughout the rest of this pregnancy still has a point, I'm trying to focus on things that will carry me through the spring and into the summer. And, hopefully, still be wearable afterwards.

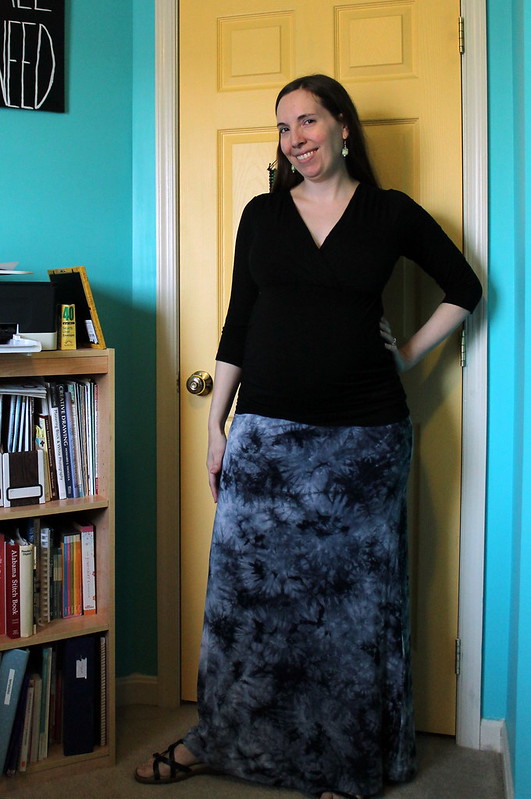
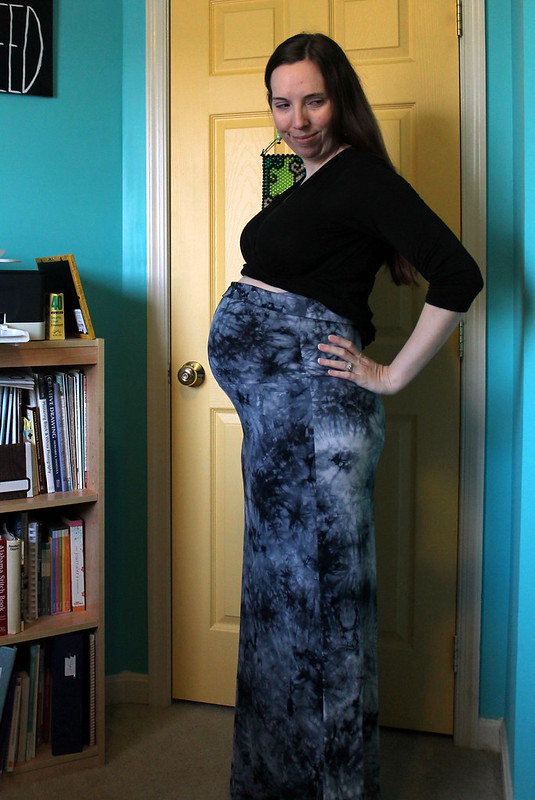
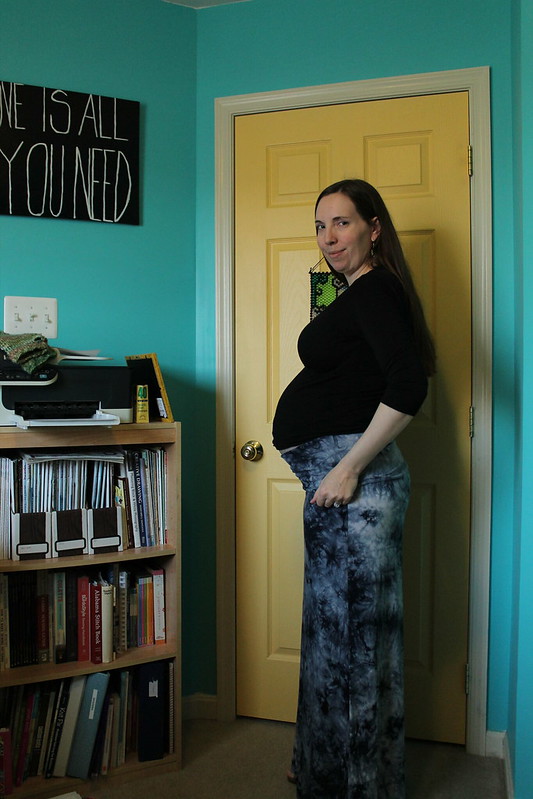
Tie dye maternity skirt frontEnter my new maxi-skirt! The fabric is a luscious-feeling bamboo-rayon jersey blend, part of the mini-stash of knits that my parents gave me for Christmas. It took me a lot of thinking initially about whether this fabric wanted to be a skirt or a top, but once I realized that I only have 2 pairs of non-jeans maternity pants left that still fit (I've outgrown the third, which were a little small on me when I first chopped them into maternity pants), and they're both reconstructed corduroy pants, a warmer-weather friendly piece of bottomwear won out.

This month's Stashbusting Sewalong theme is sewing with patterns that you already have. So I based this skirt rather loosely on Simplicity 7229, which I've used a few times before for skirts and capri pants. (I'm having to link this to my Pinterest since it's out of print, so hopefully it'll work!) The original skirt is pretty basic-- the two pieces for the front and back are the same, and it has a wide yoke with a drawstring top. I'd always made it in wovens before, but here's the changes (aside from knit fabric) that I made to make it more maternity-friendly:
    skirt full panel
  • Added several inches to the length of the front/back pieces. Which I actually did the last time I made this pattern, because the original pattern was this awkward mid-calf length, and I ended up hating that and chopping off the previously made skirts to a shorter length.
  • I did also have to narrow that at the bottom a bit, because my fabric wasn't quite wide enough to accommodate the extra width. But since it's stretchy, that's ok. Especially since I'm starting to get into the waddle phase and my steps aren't quite as big as they used to be.
  • While I used the yoke/drawstring waistband pieces to get a general idea of how wide to cut it, I replaced that with a slightly skinnier but much longer rectangular piece. The idea is that I can use it to cover up the baby bump for now--the over-bump stuff sits on me way better than under-bump stuff, which just feels awkward and like it's constantly on the verge of falling down. It's a little loose at the very top of the band, around the rib area. But I'm not too worried about it.
skirt yoga waistband
    It folds down into a yoga-style waistband, so I'm hoping that it'll be snug enough that I can wear this skirt once I'm a little smaller around the waist again, too! It's obviously hard to tell how that will work right now, but a girl can dream, right? 

    Overall, I'm really pleased with how this adaptation worked out, and how fast it was to sew together! I did all of it, including cutting out, in 2 sewing sessions. Which is pretty speedy for me. Depending on how this works out to wear afterwards, this just may be how this skirt pattern ends up getting used from now on. It's so tempting to find more of this type of knit and whip out a few more! But I have several pieces of knit that I still want to make other clothes out of to wear in the meantime, so I shall try to restrain myself.

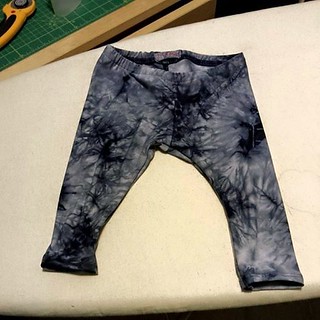
    I used up pretty close to a full 2 yards on this. As an added bonus, I had just enough fabric left to make a little something for the Hobbit! We're actually doing pretty well with collecting baby clothes so far, largely thanks to my mother-in-law, who's brought over multiple bags of things that neighbors and acquaintances were getting rid of.  At least, we're doing pretty well with onesies and pajamas. What seems to be largely lacking is pants. Given his nickname, all I can think of is that old Lord of the Rings movie meme where certain words get substituted with "pants". The most famous being...
    Which never fails to crack me up, but Hobbit is going to need some pants eventually. So I made some.

    tie dye leggingsThe pattern was a freebie that I found on Craftsy, the Go To Baby Leggings. I wasn't entirely sure about tie-dyed pants for a boy, but a few kind sewcialists on Instagram talked me into it, and I hope these actually end up fitting him because I think they turned out pretty cute! I made these in the 3-6 month size--partially because lightweight jersey pants going into the fall make sense, and partly because I literally did not have enough fabric left to make them any bigger. Doug was pretty impressed, I think--I cut and sewed these in their entirety on Thursday, along with finishing the skirt, and his instant reaction was that they were adorable and I should post them on Facebook. Always a good sign. I wish I knew how they were actually going to fit him, because I had these cut out and sewn together entirely in basically no time! But at least I have the pattern tested, so if it works out, I can always fall back on this as a quick project while he naps or something.

    February 25, 2015

    black is the new red

    A little bit of selfish sewing in the midst of baby-sewing craziness! As it happens, I finished this dress just in time for my birthday tomorrow. But I won't be wearing it, because there's a chance of snow and it's only supposed to get up to 33 degrees, tops. That's .5 degrees for you Celsius folks, and I don't know how you live with that temperature scale, because that sounds even worse! And this isn't the sort of dress that would work well with close-toed shoes. February birthdays can suck like that.

    IMG_2327Anyway. This is Simplicity 3678, now out of print, which I've actually made once before. I'm laughing because in the original post, I did specifically mention possibly revisiting it if I ever needed a maternity dress, because of all of the gathering that I needed to remove to avoid the preggo look! I'd kind of forgotten I'd said that, actually. I guess it's a good thing I never threw the pattern away. The funny thing is, at least in this picture, I seem to look pretty normal from the front, right?


    Maternity maxi-dress
    Nope. Definitely a maternity dress. (I'm at 24 1/2 weeks now.)


    Aside from lengthening and slightly flaring the skirt, since I really wanted a maxi-dress, here's the adjustments I made:


  • In some ways, I followed the instructions more closely than the first time. In the original dress, I stitched the pleats down into more of a pintuck, because it was kind of ballooning out funny. For this version, I figured I'll need the extra room and left those as pleats. I also sewed the facing more as it called for, though with a double row of stitching to try and give it a little more of an RTW look. (I wish I knew why my machine is occasionally skipping stitches for that, since I am doing a slight zigzag on a longer stitch length with a ballpoint jersey needle, just like I'm supposed to be! Any thoughts? My machine doesn't have that lightning bolt stretch stitch.)


  • I added a little more gathering in the front to accommodate the bump. Probably somewhere close to 2"--honestly, all I did was go out from the center front fold to the still uncut edge of the original pattern tissue.


  • I still had to cut the back in two pieces, which I apparently had to do the first time, too. With all of that extra skirt length, I was barely able to get the pieces to fit! I actually also had to cut the midriff pieces perpendicular to what it called for as well--but after the recent leggings disaster, I made sure the stretch would work for that before I cut it this time. 

    1. IMG_2322
    • Doesn't look so V-neck now, does it? While that also would have been nursing friendly, my size has already changed enough that this would have been very mentally uncomfortable for me to wear in public. (Seriously--while I know there's a good reason for it, I'm actually kind of embarrassed at the size bra I had to buy recently!) So I improvised a bit of a faux camisole front for it, and even inserted some elastic in the casing that the stitching made to help hold things in place. It's not quite as snug as I would have hoped, but it should do the job. 
      • For the bodice/midriff, I did slim down the seam allowances on the side slightly-- 1/2" instead of 5/8"-- just to give me a little extra room, since I'm not sure how things will go in the third trimester or if my ribcage will expand or anything like that.
          Nursing adaptation
        • To make this nursing-friendlier so I can wear this for more than just the spring, I took a suggestion from Joanne and added an invisible zipper in the front of the dress! It's sitting right at the top of the waistband, which I'm hoping will also stabilize the weight of the longer skirt. (I also sewed some clear elastic in the back to help with that as well.) Because of that, I did somewhat have to change the order of the directions, as in sewing the side seams for the bodice/midriff separately instead of all at once. But again, I took a cue from the leggings issues and made sure to baste things first so the seams had a better chance of lining up. Overall, I'm very happy with how this modification worked, and will possibly be doing it again, since I'm hoping to make a second maxi-dress before Hobbit comes. It's just a case of deciding whether to stick with this pattern, since I already did the hacking, or to play around with modifying last summer's Tiramisu hack. If I do the latter, I may not need to add extra access points, since that one works better on me as a V-neck.
          It'll be good to have something new to look forward to, if it ever warms up around here. If I've learned one lesson from the last month or so of trying to cobble together outfits, it's that I'm just not a wardrobe minimalist. I admire those people that can fully commit to the Wardrobe Architect-type thing of paring down her closet to a set of core outfit components that they can mix and match and accessorize to their heart's content. But frankly, I like having more options, and I've definitely been missing having more prints in my life, even if they don't necessarily go with everything! (I say as I show off a solid black dress, right?)

          IMG_2332Oh, and the title? I'm still trying to play around with keeping up with some of the monthly themes/challenges for the Stashbusting Sewalong and The Monthly Stitch as I can. I can use this for the latter, since it's a solid color, but the only color specified in this month's Stashbusting theme was red, which I hardly ever wear or even buy. But Malkin was kind enough to sport a little red on his collar while photobombing me, so that has to count for something. Right?

          January 7, 2015

          administrative details


          Just two quick things today:

          1. Since the sidebar widget I had for my finished projects hasn't let me add anything to the list since May (really, Blogger?!), I finally got fed up and reworked the page for what's in my closet to take care of that. It's just a big link list now, since trying to figure out how to add that many pictures would take forever, given that this is on the older side for sewing blogs. But I did at least organize it between what's in my closet/what isn't in my closet anymore/stuff I made for other people/etc.

          Incidentally, I'm kind of surprised at how old certain items in my closet are now. Like that black military jacket I made back in 2006--whaaaat? I guess that explains why the lining is tearing. I'm also wondering how many of those current closet residents will get to stay around post-baby, but I guess it's too early to worry about that.
          https://blogger.googleusercontent.com/img/b/R29vZ2xl/AVvXsEi7LQmVUA544TsWRjzEpbtC5Je9TTcAAMYp8rnYVHAKE0bwjfFp7tWCLBilYoWWv5N9ADfSQbqrlRB1Pr0QmRsitfghyphenhyphenFZ048t8Hb3TNY4SdI27_h5VYxwUKvC3FgvRlpb2F0qw5w/s1600/Stashbusting+Sewalong+Challenge+Button+2015.png.png

          2. Since I ended up with significantly more yardage than I started last year with, and the Facebook group is really fun, I'm doing the Stashbusting Sewalong again. With all new themes and a bunch of new hosts! I didn't volunteer to host a month because, you know, baby stuff, but best of luck to all you ladies who are participating! So here's my pledge for this year, which I kept really simple:

          I, Becky, will endeavor to end 2015 with less yarn and fabric than I started this year with, and to only buy notions as needed for specific projects.  I shall also try to limit the number of new patterns I buy for myself this year. 

          To avoid stressing myself out, I purposely am not doing a number of yards/pieces of fabric type pledge this year, since I have no idea what sort of wrenches being pregnant and having a newborn will continue to throw into my sewing. And I did also specify limiting patterns for myself, because I'm sure I'm going to want to start collecting a few kids' patterns. I do have a few from things I've made for friends before, and whatever's in my Burda magazines, but not a whole lot to pick from in my pre-existing stash. If Hobbit cooperates, we should see if we're having a boy or a girl in less than two weeks, which I'm getting quite excited to find out!

          And with that, I guess I'd better finish practicing my flute so I have a shot at actually cutting something out today. Yeah.

          December 2, 2014

          one day I'll be part of your world

          First off, thanks for all the kind words on my last post, both on here and Twitter! It's been hard to keep things quiet, and while quite a few of my friends and family have known already, it's nice to have the support of my sewing friends as well. :) Of course, the baby is also the reason I could only show a preview of my Sew Disney project, and why the Gabriola skirt I'd originally planned wasn't going to work! It's a shame, because I did have enough fabric to do so, but non-stretchy waistbands don't make sense right now since I have no idea how my sizing will end up when this is all over. Or if it would even fit now, tbh.

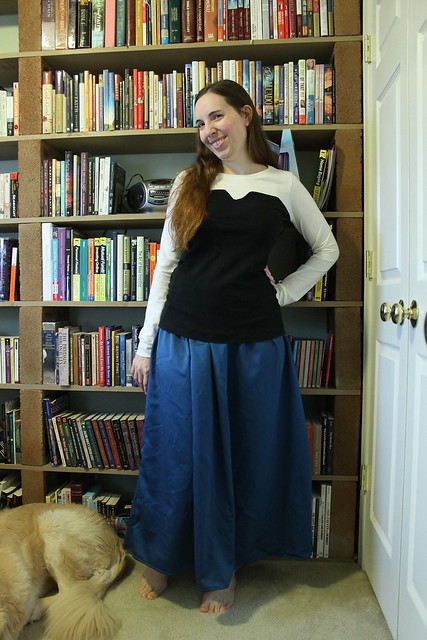
          Ariel-inspired outfit
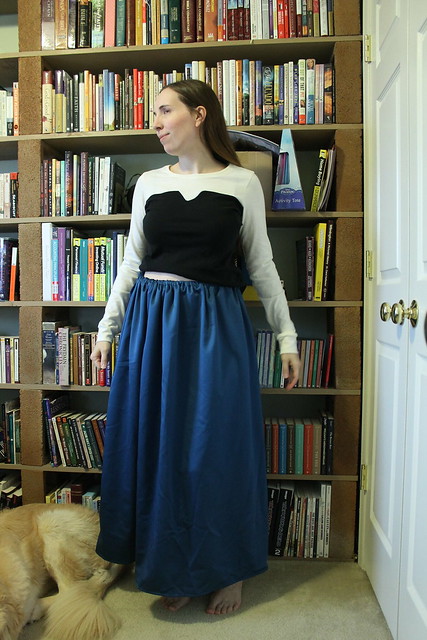
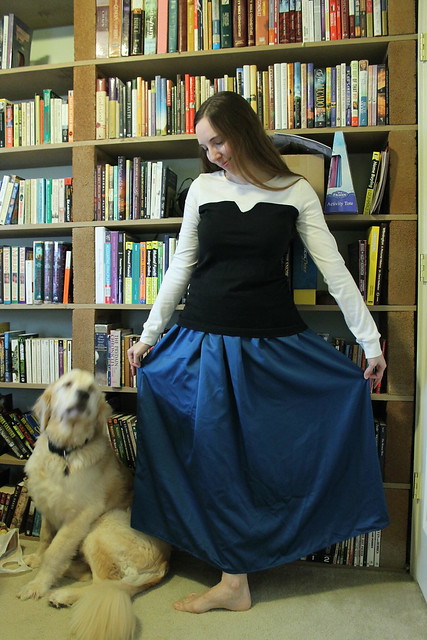
          So here's my whole outfit, with a little help from Malkin--and my hair even looks slightly red here! I wasn't sure if it would, since it's very cloudy here today. As I said before, the top is a Renfrew, though I did make a few additional modifications that I hadn't mentioned before. I added a little extra width to the front (about 1/2" total, I think), and I added some length--more in the front than the back, so I could do a little ruching on the side. I also left the bottom band off, simply because I didn't have enough fabric left to cut it, even if it had been pieced together! The length looks all right for now, but since I'm sure I'm going to use this pattern to make a couple more tops, I think next time I'm going to add even more length to the front and put the band on anyway, just to accommodate any expansion and hold things in place. I'd definitely like to avoid that baby belly hanging out from underneath my clothes look if I can!


          Ariel skirtSince the Gabriola was a no-go, I raided my pattern stash for ideas. I picked out an elastic-waist maxi skirt, then realized that the hips were still pretty fitted and that this skirt wouldn't work for too long as a result, either. So, believe it or not, it was a boxy Burda magazine pattern to the rescue! This is #119 from the June 2010 issue, and it's literally two rectangles with two drawstrings that tie at the sides. No elastic, even. But I figured that could be a good thing, because then I can tighten and loosen this to fit exactly where needed. I'll admit the result is a bit bulky around the waistband, but you can't really tell as much when it's under the shirt, I think. I did change the pattern slightly by doing a drawstring casing instead of a lining piece at the top, and I also did a French seam finish inside. If this ends up looking like a high-low hem in a few months, I wanted the insides to look good!


          Ariel- side view
          Here's the side view--you can sort of see the ruching, but my hand's in the way. Now that I'm seeing the top on, I kind of wish that I'd started the black a little bit lower so it wasn't running directly into the sleeve seam. Oh well.

          You can also see that I'm not really showing much, if at all, at this point. I'm sure that will change soon, though. It's been very hard to wrap my head around the fact that I've lost a few pounds overall, due to the nausea and the very limited, bland diet I've been eating to try to get through the days, and yet I'm still having trouble with my pants fitting! For the record, my Thurlow pants have fared much better than most of my thrift store jeans, and it's just been this week that I haven't been able to button the top anymore. So that does give me hope that they'll fit again! (I haven't tried my last pair of jeans, because I need to do a little repair on the waistband before I can wear them. But honestly, I've already worn maternity jeans a few times and they stayed up, so I may not bother trying.)


          Stashbusting totals:
          Top: about 2 yards (1 of the ivory jersey, and 1 of the black interlock left over from the summer's black tank dress. Both pieces completely used up, hurrah!)
          Skirt: 2 1/4 yards of the teal. I have about 2 3/4 yards left, which I'll need to come up with a use for at some point. (I already bought a similar-colored short-sleeved maternity top on clearance at Target, so that option is out.)

          Ariel outtakeAnd I'll leave you today with an outtake--  I've got the standard Disney princess animal companion, and we can just pretend his name is Max for this picture, even if he is the wrong breed. But apparently Ursula's spell messed up, because this mermaid only has one foot!

          November 18, 2014

          Making plans, Disney-style

          If you follow the Sewcialists blog, then you've probably heard that this month's theme is all things Disney. And I'm co-hosting! So I'm really glad to be done with the coat so I can actually, you know, make an outfit for this.

          Since I already channeled my favorite Disney bookworm earlier this year for DragonCon, I decided to look a little further back into my childhood for this one. I grew up watching Disney cartoons--one of the things that I always looked forward to during family gatherings was that my grandmother would try to get the latest Disney movie on VHS, and my cousins and I would all watch it together. And if there wasn't anything new, we'd watch older classics like Cinderella or Peter Pan. I enjoyed those, of course, but the first one I really remember latching onto was this one:

          I have this vague memory of this being the first movie that I actually saw in a movie theater, though I guess that depends on how accurate my memory is--after all, I would have been around 7 at the time. But I loved this one. Especially the music, and all of the underwater prettiness, though I'm also pretty sure this is where I got the idea that my hair should be red and if it doesn't agree, then I should just give it a little help! (Now if I could just get her volume...)

          I don't want to go all-out costume for this one, especially since a shell top and tail just isn't something I want to be seen in out in public! So I'm taking my inspiration more from her going around town/"Kiss The Girl" outfit:


          I actually already have the top done, so I'll give a little sneak preview!

          It sits a little wonky on Donna, but here's what I came up with! I really thought about making the black neckline more of a sweetheart shape, but with some careful basting, managed to get a mostly clean line for the notch.

          It's a Renfrew, of course, with some modifications for the color-blocking and also a raised neckline. Now that I look at the Ariel picture again, I probably could have left it a little more scooped, but I'll be warmer this way. Since I'm all about the stashbusting, and some of the pictures look more off-white and some more light blue, I used an ivory jersey for the top/sleeves and the leftover black interlock from the dress I made over the summer for the "corset".  I just barely had enough to squeeze this out--I couldn't even cut the band for the bottom, so it's just hemmed. I'm hoping this won't look too blatantly costumey if I pair it with cardigans or jackets or whatever, but I do like the look of it, and I'm quite happy that my hack turned out the way I wanted it to! There may have to be more color-blocked Renfrews in my future. Because that's a way more interesting use of plain colored fabrics, IMO.

          More pics to come once I figure out what I'm doing about that skirt--I was originally planning to make a Gabriola, but it isn't going to work at this point. So I'll have to improvise. Looks like it might be my old Burda magazines to the rescue...

          September 11, 2014

          FESA plans!


          It's that time of year again! I do love this sewalong, and this is the 3rd year I've participated. You all know how I feel about the cold, and my ironically wool-phobic skin doesn't help matters. (I say ironic, because since I got married, my last name now starts with Wool! Go figure.) So this is a great way to keep me focused and excited about making things to get me through the winter.

          So without further ado, here are my plans for the next couple of months. I'm keeping things rather conservative this time, so maybe I can actually finish everything?


          Fashionable Foundations for Frosty Weather: I have some stashed knit to try out the Espresso leggings, and I'd like to knock out a pair or two of them. Since woolly tights are a sad no-go for me, I think this could be a great way to keep my legs warmer for wearing skirts. (I wear boots with skirts a lot, so the no-foot-coverage thing won't be an issue.) Not to mention it's a layer I can wear under my jeans while I'm shivering my way through the last bit of October at the outside register at my retail job. (I have some black, too, but it's a much bigger bolt since I'd also bought this fabric with that aborted attempt at a Red Velvet in mind. Oh well. I can always use black knit somewhere, right?)

          Chic Chemises for Cool Climates: The definite is that I'd like to finally finish up the Roheline cardigan that I've been knitting since August 2013! (Though I really didn't get it started until last September, since I had to restart no less than 7 times.) I'm so, so close to finishing the sleeves, which means I only have the yoke and buttons to go, so it's not unreasonable. Depending on how the time goes, I also wouldn't mind trying out the Archer blouse, since I didn't get to that in my summer plans.

          Fabulous Frocks: I would like to do a Darling Ranges dress if at all possible, since the colors will be great for taking it into the winter. Also, I meant to make it last year, so it's time. I'm hoping to knock this one out next month, since The Monthly Stitch's theme is "Frocktober" anyway. I'll just need to find a layer to go over it--I have yarn to knit a yellow cardigan that will pair nicely with this, but there's no way I'll be able to finish 2 cardigans in this time span.

          Baby It's Cold Outside: My old peacoat that I made in 2007 is starting to fall apart. Replacing that will be first priority! (Even so, 7 years, including the polar vortex of wintry doom that we had this past year, is not bad at all for my first me-made winter coat!) I'm hoping to play around with a few more tailoring techniques, but I'm using the exact same pattern as the first one, so at least fitting won't be an issue. I actually have started cutting this one out already, but since there's 4 layers involved, I'm still on the outside. (The black and white tweedy fabric has been cut, but I'm underlining most of the pieces with that greyish silk organza that's right next to it. And that's taking a little longer. Especially given that I haven't been able to touch it since Saturday.)

          Other projects: I'm hoping to knock out a skirt before the end of the month, because a long-standing project I've been making for my sister-in-law is perfect for Scraptember! I may knit up a scarf, too, since I'm strongly leaning towards a one-skein project to take on my upcoming trip to France. (Next weekend! Eeeeee!) After all, I have a lot of plane/airport time, and at least 6 hours on a bus to get to Normandy and back, and I'm not sure how well my Kindle battery will hold up for a cross-continental flight. Also, I know from experience that I sadly cannot read on the bus without getting sick.  Maybe I'll have better luck with just keeping my hands busy.

          I'm also beginning to plot out what I'm going to make for the Disney sewalong that Katie and I are co-hosting in November, but that project is still a secret!


          September 6, 2014

          The Sorbetto that was late for everything

          I love sewalongs! Especially when I can work things so that one project fits the parameters of multiple ones. What can I say, I guess I have a hard time not wanting to participate in All The Things. I mentioned in a recent post that I'd been planning to make a Red Velvet that I could use for both The Monthly Stitch's birthday sewalong, and the Sewcialists' Tribute month, and that it didn't work out. So my plan B was to revisit my original list of things I planned to sew this summer, and make the Colette Sorbetto. My thought process, since I was still in DragonCon prep mode at the time, was pretty much this:

          "A lot of cake has flowers on it, so a floral print top would work for cake. Even if they're daisies and not roses. And I'm sure somebody out there likes Sorbettos enough that I could say this is a tribute to her, right? Right!"

          And then I didn't finish this until yesterday anyway, which makes it too late for both sewalongs. Oh well. I'll probably throw this one up on TMS anyway.

          Oh, right, you probably want to see that shirt, don't you?

          IMG_1583
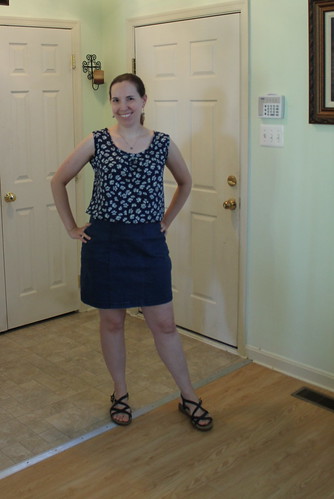
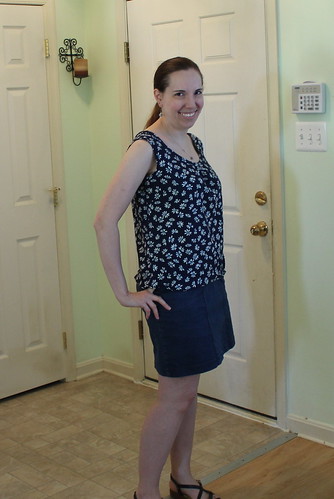
          So here it is, in all of its slouchy glory. I'm still not convinced this is a good pattern for me, to be honest. It's all right when tucked in, though that's not a look I often go for, and I guess I'm a little stuck on looser top + fitted skirt still = waist definition. But it is pretty comfortable to wear outside, which is good, because September and July seem to have traded places this year! So while I was enjoying mostly that golden range of 70-85 degrees most of the summer, now that it's unofficially fall, we're back to 90 degrees and 200% humidity. Go figure.

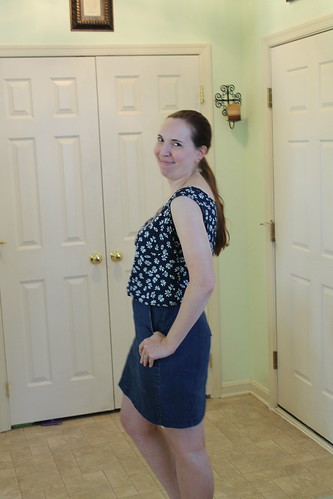
          I did make a couple of changes, which are completely unoriginal, given how long this pattern's been out. I lowered the darts about 1", because they were way too high on the original pattern. I'm pretty sure they're in an ok place now, but the shirt tends to slide forward on me and bring them too low, so it's hard to say. I also replaced that front pleat with some gathering--I thought that might help it work better with both the pattern and, well, my chest. In that, I do think this was more successful than my last attempt. Finally, I lengthened the pattern as much as the fabric would let me.

          IMG_1586
          Untucked, it just looks like a sack. So while I was considering/planning to bring this on my upcoming France trip, now I'm not so sure.

          As for the fabric, it's a rayon challis that I acquired via a swap with Kat about a year and a half ago. I hadn't sewn with challis since, oh, the 90s. And I forgot how lovely it can be to work with--which is good, since I have 2 more pieces stashed for dresses! And I guess a year and a half really isn't all that bad, as far as my stash habits go. I literally still have fabric that I purchased back when I was in college (over a decade now, yikes!), though at least by now, it's a piece leftover from a finished project.

          The time of year pretty much demands that I move on to more fall sewing now. So let's evaluate how I did with my summer sewing plans overall, shall we?

          Tops:


          1. A navy daisy-print tank, most likely a slightly modified Sorbetto. See above.
          2. A royal blue button-down blouse, from a Burda mag. Not even close to thinking about this one.
          3. A navy Archer blouse, which will probably be closer to the fall. I did think about this one, but it obviously didn't happen.
          4. A striped ivory knit tee--hoping to use the Plantain but we'll see if I have enough fabric. Done, cardigan-style.
          Bottoms:
          1. Fitted/skinny-ish jeans. Check!
          2. Thurlow shorts. Too bad I didn't have time for these, because I really could have used some shorts that fit for when I was at work, if nothing else. Maybe next year?
          3. Solid black Thurlow pants, which I do not currently have fabric for. And I still don't have fabric for them, but I still should do this sometime. My black RTW pants that I've also had since college are finally starting to fall apart!
          4. Possibly some black Clover pants-- I have fabric that will work, but have not tested this pattern yet. Maybe I should just use that fabric with the Thurlows?
          5. If I have time, a Pavlova skirt. I didn't have time.
          6. I also have a plum skirt that I can do a quick refashion of to make it a better skirt. Maybe this fall?

          Dresses:
          1. A navy/ivory Cambie  Done!
          2.  A plum/yellow/royal/white Darling Ranges. I'm bumping this one to my fall plans.
          3. A yellow/white/turquoise Reglisse dress. Part of me is tempted to say I want to make this in October, since The Monthly Stitch is using that pattern as one of their Frocktober contest ones, but the colors are just sooooo summery. I dunno.
          4. A plum/green/white/ knit Tiramisu maxi-dress Done!
          5. A black tank knit maxidress, from McCall's 6559. Done, though shorter than planned.
          Layering pieces: Honestly, I didn't touch this category.
          1. a 3/4 sleeve jacket, from the ivory/black embroidered twill I got at Mood and Simplicity 4491 (which I'll modify to shorten and cuff the sleeves.)
          2. An ivory Carmine shrug.
          3.  a yellow knitted cardigan, which I already have yarn and a pattern for, but starting it will have to wait until I finish my grey cardigan. Considering I haven't even finished my Roheline cardigan yet, this was a definite no-go.
          IMG_1592So all in all, I had 18 things on my list, only made 6 of them, but also made about 6 things that weren't on this list at all for DragonCon. Plus that Kimono tee from the maxi-dress leftovers, and a couple of refashions. So I guess that isn't too bad for this summer!

          Next post: FESA plans!! Did I mention I love sewalongs? But for now, I'll leave you with my "smug model" photo. Because I can. And this particular picture makes me think that maybe tucking in a looser top could actually work on me. Maybe.

          July 22, 2014

          get the skinnies

          Despite last weekend's difficulties, I'm proud to say that the jeans are DONE!
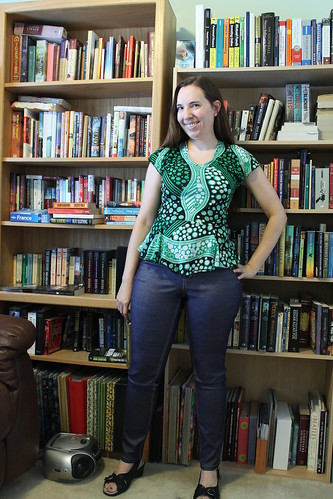
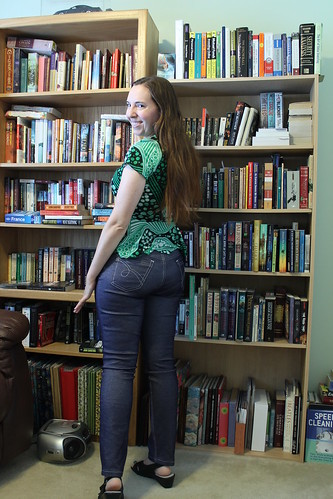
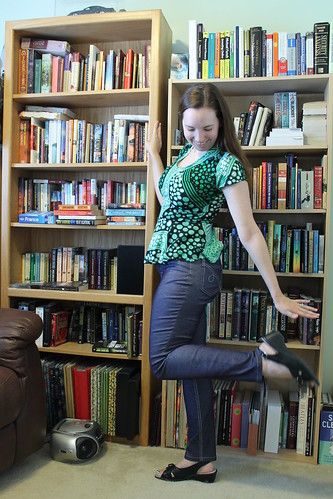
          IMG_1453So here are my new skinny jeans. I paired it with my Hummingbird shirt, because it was the most Oona-esque print I had clean that wasn't a dress and wouldn't kill me from heat. (It's supposed to get up to 90, so between that and the fact that town workers are currently outside digging up our yard, because all those recent power outages apparently broke a line in just our yard, it's an indoor photo day!) That's right-- I didn't think I'd get to do it because I have SO much to do before DragonCon, but Oona herself said on twitter that shiny skinny jeans totally count for Oonapalooza!

          Which makes sense. I stayed away from skinny jeans for a long time, because I'm definitely more of a curvy girl. And shiny metallic on my backside is definitely a little out of my comfort zone--at least when not in the context of a TARDIS skirt. But that isn't quite so figure-hugging, you know?


          IMG_1455Case in point. But I'm pretty proud of those pockets, darnit!! Even though they will be covered up most of the time, because I tend to pair the skinny jeans with the longer, flowy tops. I'm only wearing them with a shirt this short for the sake of pictures.

          So, obviously, I can get the jeans on now. I ended up just removing the stitching from the lower waistband, then making lots of clips in the twill tape from both sides of the stitching so that it's now in lots of little pieces instead of one big piece, and therefore the waistband has some stretch again. I asked about it in the Craftsy class, and the instructor clarified that the twill tape is only supposed to be in the back. So that's where I went wrong, because I did it for the entire waistband.

          It really is a good class overall, and I'd like to go through it again the next time I make jeans. I didn't do any of the distressing this time, just because the nature of the fabric was screaming dressy denim at me. Also, as much as the metallic threads in particular fray, I figured that would extend this pair's life if I just let it distress itself naturally. But hammering and sandpapering look like a lot of fun, so there will be distressed jeans in my future somewhere. Oh yes.
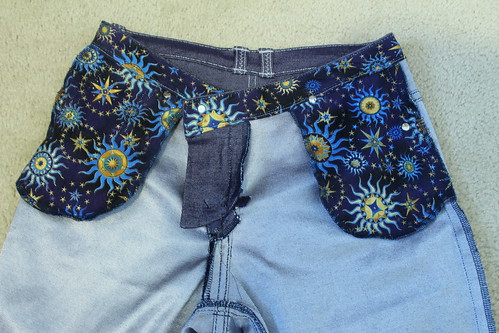
          shiny jeans innards
          I had to show off the insides, because the fabric is fun! I had this scrap of cotton left over from covering a photo album, and thought the metallic gold suns and stars would be a good pairing with the metallic silver insides. I had to cut the waistband in two pieces to make it work, but I just squeezed it out. The inside is a little wonky just under the fly, so I do need to work out how to finish that more cleanly for the next pair.

          Aside from that, here's what I'd change the next time:
          IMG_1459 -Checking the zipper more carefully before sewing the waistband on. I thought I had it lined up, but obviously, I didn't, because this happened.

          -Make the waistband wider. I mostly used my self-drafted pattern from the last pair, and just made the legs skinnier, but I took the curved waistband from a J. Stern jeans pattern. I like the fit, but the width looks a little narrow for the average belt. Not that I do wear belts with my jeans often, because I rarely tuck shirts in, but it would be nice to know I could if I wanted to!

          -Work on my rivet skills. I got impatient and bought rivets and buttons from Joann's, even though I have some on order, because they have those now and the others haven't arrived in the mail yet. I broke two button screws trying to hammer this in, because I kept doing it crookedly. I'm not 100% sure I got these rivets and the button right here either, and am fervently hoping that they don't fall out the first time I wash this. My dad basically ended up doing this part for me the last time I made jeans, so I need to learn to wield that hammer properly myself!
          Shiny jeans!One last picture. Overall, though there are some minor issues here and there, I'm quite happy with how these turned out. It's nice to have the look of skinny jeans without the feeling of my thighs being poured into sausage casings! Taking my already-drafted pattern and using it for stretch denim worked beautifully, too. I initially cut this with extra-wide seam allowances to allow for any fitting tweaks, but when I basted it together, it was fine as is. I do have one piece of stretch denim to make a future pair out of, and will probably go back to my beloved bootcuts for that. But that won't happen for awhile, since I have several other things I need to finish first!

          I'm also laughing at myself, because after all that, I'm not sure if I use these for my DragonCon Amy Pond outfit after all! In most of the pictures I've seen, they focus on Amy's shirt. But I was looking yesterday to see what shoes she's wearing, so I could figure out if I possibly have anything that would work, and I saw this picture and realized her jeans are cropped, and the jeans I was wearing for work at the time were actually a much better length! But these are much less faded, so I have to think about what would be the greater crime against cosplay. Hmm.

          Also, despite having used this for two projects now, I still have fabric left! It's a full yard, plus rather large remnants on either end from pieces I had to cut single-layer. So any ideas of what I can do with more stretchy silvery denim?