Showing posts with label jeans. Show all posts

July 22, 2014

get the skinnies

Despite last weekend's difficulties, I'm proud to say that the jeans are DONE!
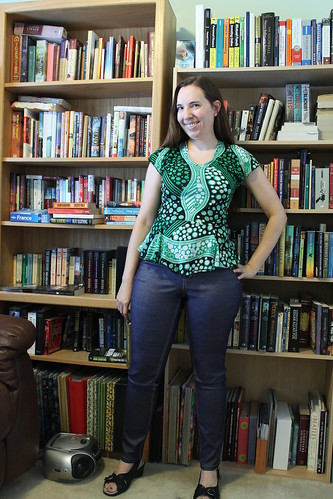
IMG_1453So here are my new skinny jeans. I paired it with my Hummingbird shirt, because it was the most Oona-esque print I had clean that wasn't a dress and wouldn't kill me from heat. (It's supposed to get up to 90, so between that and the fact that town workers are currently outside digging up our yard, because all those recent power outages apparently broke a line in just our yard, it's an indoor photo day!) That's right-- I didn't think I'd get to do it because I have SO much to do before DragonCon, but Oona herself said on twitter that shiny skinny jeans totally count for Oonapalooza!

Which makes sense. I stayed away from skinny jeans for a long time, because I'm definitely more of a curvy girl. And shiny metallic on my backside is definitely a little out of my comfort zone--at least when not in the context of a TARDIS skirt. But that isn't quite so figure-hugging, you know?
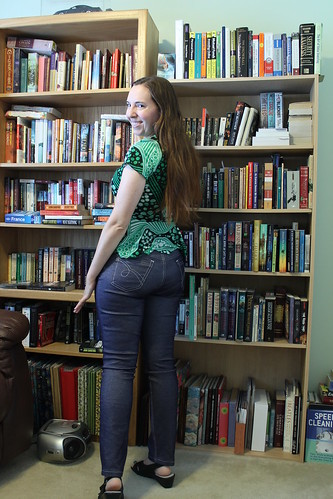


IMG_1455Case in point. But I'm pretty proud of those pockets, darnit!! Even though they will be covered up most of the time, because I tend to pair the skinny jeans with the longer, flowy tops. I'm only wearing them with a shirt this short for the sake of pictures.

So, obviously, I can get the jeans on now. I ended up just removing the stitching from the lower waistband, then making lots of clips in the twill tape from both sides of the stitching so that it's now in lots of little pieces instead of one big piece, and therefore the waistband has some stretch again. I asked about it in the Craftsy class, and the instructor clarified that the twill tape is only supposed to be in the back. So that's where I went wrong, because I did it for the entire waistband.

It really is a good class overall, and I'd like to go through it again the next time I make jeans. I didn't do any of the distressing this time, just because the nature of the fabric was screaming dressy denim at me. Also, as much as the metallic threads in particular fray, I figured that would extend this pair's life if I just let it distress itself naturally. But hammering and sandpapering look like a lot of fun, so there will be distressed jeans in my future somewhere. Oh yes.
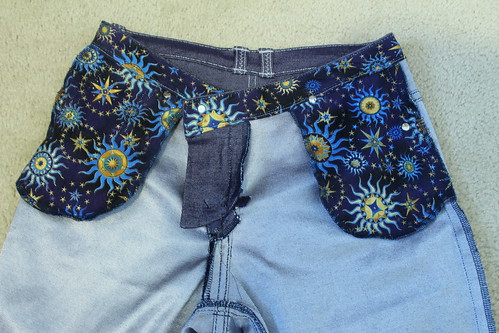
shiny jeans innards
I had to show off the insides, because the fabric is fun! I had this scrap of cotton left over from covering a photo album, and thought the metallic gold suns and stars would be a good pairing with the metallic silver insides. I had to cut the waistband in two pieces to make it work, but I just squeezed it out. The inside is a little wonky just under the fly, so I do need to work out how to finish that more cleanly for the next pair.

Aside from that, here's what I'd change the next time:
IMG_1459 -Checking the zipper more carefully before sewing the waistband on. I thought I had it lined up, but obviously, I didn't, because this happened.

-Make the waistband wider. I mostly used my self-drafted pattern from the last pair, and just made the legs skinnier, but I took the curved waistband from a J. Stern jeans pattern. I like the fit, but the width looks a little narrow for the average belt. Not that I do wear belts with my jeans often, because I rarely tuck shirts in, but it would be nice to know I could if I wanted to!

-Work on my rivet skills. I got impatient and bought rivets and buttons from Joann's, even though I have some on order, because they have those now and the others haven't arrived in the mail yet. I broke two button screws trying to hammer this in, because I kept doing it crookedly. I'm not 100% sure I got these rivets and the button right here either, and am fervently hoping that they don't fall out the first time I wash this. My dad basically ended up doing this part for me the last time I made jeans, so I need to learn to wield that hammer properly myself!
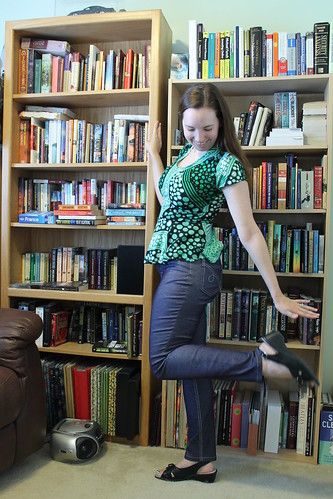
Shiny jeans!One last picture. Overall, though there are some minor issues here and there, I'm quite happy with how these turned out. It's nice to have the look of skinny jeans without the feeling of my thighs being poured into sausage casings! Taking my already-drafted pattern and using it for stretch denim worked beautifully, too. I initially cut this with extra-wide seam allowances to allow for any fitting tweaks, but when I basted it together, it was fine as is. I do have one piece of stretch denim to make a future pair out of, and will probably go back to my beloved bootcuts for that. But that won't happen for awhile, since I have several other things I need to finish first!

I'm also laughing at myself, because after all that, I'm not sure if I use these for my DragonCon Amy Pond outfit after all! In most of the pictures I've seen, they focus on Amy's shirt. But I was looking yesterday to see what shoes she's wearing, so I could figure out if I possibly have anything that would work, and I saw this picture and realized her jeans are cropped, and the jeans I was wearing for work at the time were actually a much better length! But these are much less faded, so I have to think about what would be the greater crime against cosplay. Hmm.

Also, despite having used this for two projects now, I still have fabric left! It's a full yard, plus rather large remnants on either end from pieces I had to cut single-layer. So any ideas of what I can do with more stretchy silvery denim?


July 18, 2014

A cautionary tale

See my jeans.


See how close I was to finishing? Topstitching, belt loops, cool fabric for the lining, buttonhole, the works.

I say "was", because as it turns out, following the Craftsy class instructions to stabilize the top edge of that waistband with twill tape means I can barely pull these previously well-fitting jeans over my backside. And the front won't quite overlap as well as it was supposed to. Which means that I now have to undo my entire afternoon's work. Which was actually an afternoon off from my retail job, so it's way more work than I would have gotten done otherwise. I'm so upset!

 I checked, and I do have enough of the denim to cut a new waistband and lining. So I guess that's better than unpicking every single stitch of this. Though I am quite sad that I'm going to lose that waistband lining--that and the pockets was all I had left over from using this fun print to cover a scrapbook awhile back. 

I'm not sure if that means it's always going to be gapping in the back, since now I'll have to use two pieces of stretch fabric vs. one piece of stretch plus one slightly bias non-stretch. I'm afraid to try the twill tape again. But I still feel like I'm going to have to stabilize the back somehow so it's not always riding down on me.

So how would you keep a curved waistband from gapping out in this sort of situation? Have you ever had a completely demoralizing sewing disaster close to the end of a project?

I guess the moral of the story is that girls with curvy butts should take fitting advice from teachers who state they have a flat butt with a very large shaker of salt. If you need me, I guess I have a hot date with my seam ripper.


July 15, 2014

a simple tee

IMG_1445
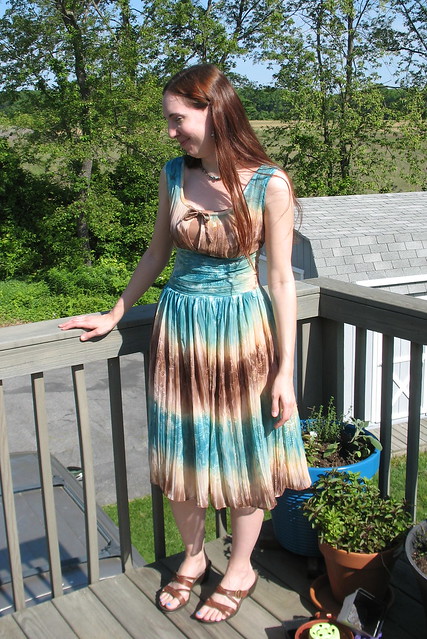
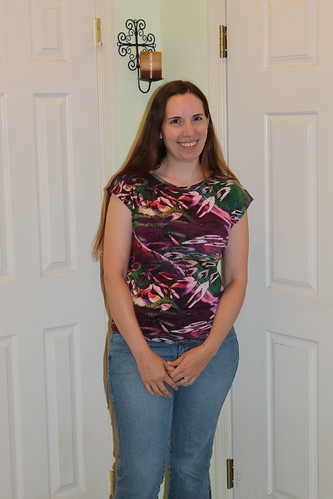
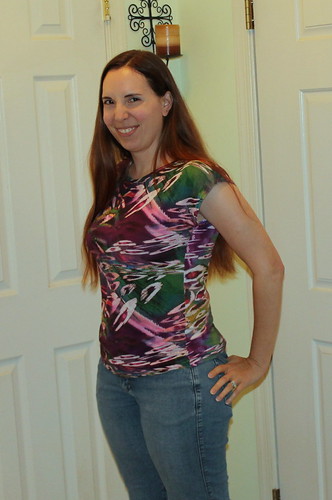
Does this fabric look familiar? It should, since I just used it for my Tiramisu maxi-dress. For once in my life, I got on the stashbusting right away! (I made this in June, but didn't get a chance to post until now.) After I realized that I had a decent yard left over after I cut the dress out, I grabbed this untried top pattern and cut it out, since it was only two pieces. I figured that if it didn't work out, I still had the Tira, but I think it worked out pretty nicely!

This is the Maria Denmark Kirsten Kimono tee, which is a free download! I really do love that so many of the indie companies are generous enough to offer some simple patterns for free. I grew up sewing mostly the Big 4, which you can easily get for $1 on sale at Joann's, so the frugal part of my brain really likes getting to try a company out before spending the average $10-25 dollars that the indie patterns usually cost. (I'm not complaining about the price, because I think they're well worth it! I'm just saying that I have a tendency towards being cheap. It's a necessary survival skill when you went into the arts.)


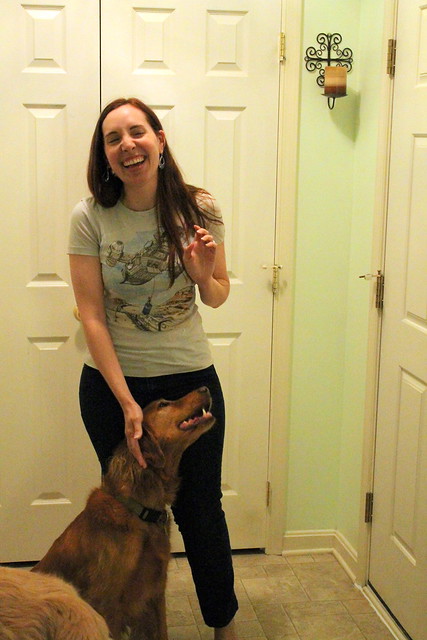
Kirsten Kimono TeeThe top went together quite quickly and easily, since there were only two pieces and a neck binding. The only issue I had with it was that I didn't read the directions before I started, so I didn't realize that seam allowances weren't included! So I just did as narrow a seam as my serger would allow, and then did a narrow hem on the sleeves and shirt bottom as well. It still fits, and actually is quite loose around my waist compared to, say, my Renfrew tops. You can't see it so well in these pictures, since I had to resort to using indoor flash photography in order to get any pictures at all. But the busy print and the drapiness of the knit camouflages it pretty nicely, and keeps it from looking too baggy. Good thing, since it is still quite fitted at my hips. So mental note to self, a thicker knit with less drape probably wouldn't work out so well for me.

Whenever I make this again, I think I'd add some length to the bottom, and especially the sleeves, to make them a little less cap once they're hemmed. But overall, this was a great instant-gratification project!

I'm going to end this post with something I haven't done in awhile, at least for my sewing--an in-progress shot.
IMG_1451 As I've mentioned before, I'm doing the jeans sew-along that Sew Busy Lizzie is hosting. And my progress has been a little slower than I would have liked-- I didn't get much in last week because I had my annual teaching-flute-at-middle-school-day-camp job, and on the night that I'd actually reserved to do some sewing, the power in the entire town went off for the whole evening and didn't come back on until it was too late to start anything! I was home all day on Saturday, so I did make quite a bit of progress then--pretty much everything you see on the front, plus the inseam. But then the power went off again before I could do the topstitching there, so that's where it's stayed. I do have a little extra time off from my retail job this week, so I'm hoping I can finish this up rather quickly now that the hard part (the fly zipper, obviously) is over. At least the sewing part, since I realized I didn't have enough silver rivets on hand and had to place an order.

This is the same denim that I used for my TARDIS skirt back in the fall, and would you believe I still have a yardish of this left? I'm running out of ideas for what to do with shiny metallic stretch denim!

June 13, 2014

they've been chopped

For all of the refashioning that I used to do, I really hadn't done any in awhile. Over the last couple of years, I've been super-focused on stashbusting and making from scratch, so much so that I forgot how fun, and how instantly gratifying, transforming something that's already around can be. It's a whole different group of problems to solve, and a good challenge.

I have two refashions from May to show today. The first is one of my all-time favorite dresses, that sadly wasn't zipping at the top anymore.
MMM'12, Day 13 Remember my Titania dress? I was so proud of this one, since I basically designed it and hand/draped it myself. Though, to be honest, the top wasn't holding up so well. Since I was more or less winging it, the insides weren't finished so great, the fabric was starting to sag around that slit in the front, and gaps were starting to appear where the ends of the binding met around the sleeves. I still love the fabric, and that hand-pleated skirt would have been the hardest thing to let go of. So naturally, I chopped off the top and made this dress into a skirt.

Aside from one random Instagram, I didn't take the time to do too many in-progress shots this time. So what I did was to pin a length of grosgrain ribbon to the midriff panel, leaving an extra-long tab at one end, stitch it, flip it, and use that to make a waistband. The extra-long tab was used to make an underlap, which has a couple of hooks and eyes and snaps and things sewn to it. Aside from that, the only thing I did was to shorten the zipper in the center back.

Titania skirt

And here's the result! It feels a little weird to me since I'm not used to skirts that hit at my natural waist. But with the fullness of the chiffon bit, this skirt makes me think of ballet. I feel like this will be a lot more versatile as a skirt than it was as a dress, since I can also dress it down depending on my top and footwear. So all in all, I feel like this was a success.


Skinny-ish jeans


As for the second project, this one had a preview during Me-Made-May. I bought a few pairs of jeans at the thrift shop near the end of the winter, because I had a couple of pairs shrink or wear out completely (to the point where they had to be relegated to work jeans--yes, I have a separate set of jeans that I only wear to the garden center, because I don't care if they get messed up by dirt or paint or whatever other random things I have to get into there--or just gotten rid of completely), and I knew I wouldn't have time to make jeans anytime soon. Yay, spring. One of the pairs I bought fit me adequately well through the waist and hips, but they were just a little too short to look good with regular flat shoes. I don't have a before picture, so just think flared jeans that were awkwardly hitting right around my ankle.

Here's the after--I was intending to make it more of a skinny jeans silhouette, but discovered while I was working with it that the fabric would be much happier with a straight, slightly tapered cut. There wasn't any stretch to the denim, so it made sense. All I did was take the side seams apart up to about the knee, pin them down the length of my leg (much to Doug's amusement, since I was also wearing them inside out at the time), sew in the zippers, and re-stitch the hem. The zippers ended up being unnecessary in the end, since I can pull them on and off easily without unzipping them, but I like the detail that they add. I do still plan to make some more jeans, and am hoping to tackle some skinny jeans this month because I do need them before DragonCon. Because of reasons.

I do have to say that I was really surprised at how easily these jeans came apart! The nice thing for refashioning purposes was that each side of the outer leg seams was individually finished on the serger, so I didn't have to unpick a bunch of serging. But if I unpicked it in the right place, the seams came apart quite quickly, and the hems pretty much entirely unraveled with the tug of a thread. I would have thought the quality would have been slightly better, given the Tommy Hilfiger label on them!

IMG_1405
And, since it's Friday, I'll leave you with a silly outtake picture. Silly dog can't resist an opportunity to photobomb me!


September 9, 2012

just in time for fall...


As promised, two new things to show today! But first, I just wanted to give a quick follow-up to the last post. To all of you who gave me your feedback, thanks so much! Several of you brought up the time issue when it comes to commenting, which I hadn't mentioned. Truthfully, it hadn't crossed my mind while I was at work, but that's an excellent point--I'm not always the best commenter myself, because it's often hard to just keep up with the blogs I enjoy reading, and commenting often falls by the wayside. So that's something I'd like to do better about myself--there's just so many good sewing blogs out there, most of which I didn't even mention by name, and everyone deserves for their work to be appreciated! And it is good to know that people are reading and enjoying what I make.

And without further ado, on to the good stuff!


Guardian's Tail cowl#1: Near the end of August, I finally finished a knitting project that I'd been picking at on and off for months--not so much for lack of interest, but first I had to focus on the Camille shrug, then spring craziness broke loose, then I got engaged....let's say I got sidetracked. But mostly thanks to some recent hang-out time at my aunt's family beach house with several yarn-crafty cousins, I managed to finish this scarf up. (It was fun....we had my crocheting sister-in-law, a crocheter cousin-in-law who was trying to learn to knit, a knitter cousin who was attempting crochet, and another cousin who'd never tried either but was interested, so I taught her the knit stitch. Also, the five of us girls drove the two guys--my brother and the one male cousin who were there at the time--kind of nuts because we were all sitting there in front of the tv doing crafts!)

Guardian's Tail closeupThe pattern is the Guardian's Tail scarf that I started way back in last October, to use up the leftover yarn from my Counterpoint hat. The pattern was simple enough that I didn't really have any difficulty in following it, except the repeat was long enough that I never did manage to memorize the pattern. I'm sure that setting it aside for several months probably didn't help there. I was kind of surprised that I finished it up at the beach that weekend, actually, because I didn't realize I was that close to finishing up with the skein of yarn! So it ended up being a rather short scarf. The pattern had said it would make a short scarf with the yarn/amount listed, and suggested pinning the scarf. I knew that wasn't going to happen, because I am not going to take the time to pin and unpin a scarf when I can just grab a longer one and wrap it around my neck and go. So, logically, the only thing to do so that I'd actually wear the thing was to make it into a cowl. So that's what I did. Warmth-wise, it would probably be better if it was still even longer so I could double it around my neck without choking myself, but I think it looks pretty good. And hurrah for stashbusting!

#2: I feel like I need a drumroll for this one! Because guess what.... I HAVE JEANS!!!

Jeans 1If you haven't taken it yet, I would very highly recommend Kenneth King's Jean-ius class on Craftsy. It was so amazingly helpful to actually see how he did certain steps, and his method for sewing in the fly zipper alone made the price worth it. (Even though I got it on sale so it really wasn't that expensive. Believe me, it's worth the full price!) I am so unbelievably excited to have jeans that actually fit me! And I love that the class videos never expire, so I can go back and reference those tips again and again.

Jeans 2And here's a side view--pardon the silly poses, Doug was having fun playing photoshoot director and telling me exactly how to stand/what to do with the scarf! I wore these jeans all day today, and I'm very happy with the fit. The gapping is quite minimal, they were comfortable to wear, and they look pretty darn good, if I may say so myself!

For my future reference, since it'll be awhile before I get around to making a second pair, I will need to make several tweaks to the pattern itself:

a) Fortunately, I had the foresight to baste the legs together and try them on to see how it would fit in actual denim vs. the somewhat lighter twill that I'd used as my muslin. As a result, I ended up tapering the seam allowances to 1/2" in the upper inner thigh, and from just below the zipper to about 2/3 of the way up the back crotch seam. (At the risk of TMI, the crotch area had felt a little uncomfortably snug. I don't know if that's because it actually was, or my "strong thighs", as Tasia words it, generally makes it so that I have this unflattering pooch of excess fabric right above my thighs in the front of my RTW jeans, and therefore I'm used to a looser fit.) I also ended up taking in the very top in the back seam more than the 5/8" seam to remove a bit of gapping....rats, I can't remember the number. I'm going to guess a 7/8".

b) Speaking of seam allowances, I learned early in the construction process that if I want to do the flat-felled inner thigh and crotch seams like in "real" jeans, I'm going to need to allow more fabric in those particular seam allowances. I would have only had enough to do a super-skinny, very-awkward-to-sew one. So I serged it and went for the faux look.

c) I need to make the pockets deeper. I can barely get my hand in. Of course, this might also have to do with the curve of the actual pocket cutout itself....or perhaps that I'm not used to my jeans actually fitting in the front, as previously mentioned. So probably a combination of a deeper pocket and a somewhat deeper cutout curvature.

d) Waistband seamed in the back to aid in avoiding the dreaded gaposis = good. But next time, I need to shift that seam over so it lines up with the topstitching, not the actual back seam. I didn't realize until I went to put the belt loops on that lining up the belt loop with the topstitching means that seam is still completely showing. (Good thing I'm not one who usually tucks my shirts in.)

e) A little extra length in the hem could be useful. They were a great length for the flat sandals I wore today. But after serging, pressing, and turning up, I just barely had enough fabric to make that. work with the 1-1.5" (I think) heeled sandals I was wearing at the time. I'll have to check this against my two pairs of boots to make sure this will work. I usually favor lower heels anyway (and Doug isn't a whole lot taller than me, so I'll probably stick to that), but I'm not entirely sure they won't be too short for my favored brown boots that have miraculously held up since my college days.

One more note to myself: I'm happy to report that my serger (which still needs a name) worked like a dream on the denim! Which was a pleasant surprise, because I did something wonky on the Engagement Shirt and parts of it are coming unstitched already from threads breaking because of too-tight tension, Oops. But the denim was flawless. I'm very glad I got it serviced a few months ago. The really smart thing to do would be to write down these particular tension numbers for future reference!

August 21, 2012

Random thoughts

First off--thanks for the kind words about the scarf! That was pretty different for me, but it was fun to make.

Second off--once again, not being able to do a craft compelled me to add to my stash. I spent part of the weekend and yesterday at the beach with my family. And while we were there, my mom/aunts/yarn-crafty cousins decided they wanted to check out this cute little local yarn shop. So this is what I brought home. The greenish one on the left (really more of a green-blue mix) is Chacabuco Multy from Araucania Yarn--it's exciting because it's from Chile, which I've actually been to, and it's hand-dyed, and it's cotton. You have no idea how exciting it is for me to find hand-dyed cotton, since I can actually use it! The brown and blue are Milky Whey by Kollage Yarns, and it's a super-soft soy/milk blend. I'm excited to have some new-to-me wool-free yarns to play with! And I think going to the store was inspiring for others in my family too. One of my cousins decided that she wanted to give knitting a shot, so we got her some cheap needles and yarn and I taught her how to make the knit stitch. She seemed to be getting the hang of that pretty well by the time I had to leave to come home (had to work today, boo), so I'm excited to see if she sticks with it!

I already have projects in mind for both of these yarns. I'm thinking the Whittier Hat from last fall's KnitScene for the Chacabuco, and I specifically bought the Milky Whey to try out the Branching Out fingerless gloves from Coastal Knits. My best friend and I have been making bucket lists lately, and I have several sewing/crafty-related items on mine. One of the things I added was to knit at least one project from every knitting magazine or book that I own. And since I didn't really have stuff for either of these publications yet, that means I'm justified in buying the yarn, right?

As for that background....several yards of dupioni silk that arrived yesterday. Guess I'm committed to that wedding dress thing. Or, as it's gotten dubbed by some of my geekier friends and family, the "One Dress To Rule Them All."  So now I have the lace and the outer fabric taken care of, and I just need to get some underlinings and linings. And bodice support stuff.

Between the beach and some wedding-related stuff, there hasn't been much sewing going on in the last several days! But I did get the basting in the jeans ripped out, at least, so now they're ready to sew together for real.

August 12, 2012

What's in her pocketses?

Nothing, at the moment. But while the rest of the jeans remain to be sewed, I have pockets!

I thought maybe I'd done something wrong with making the pattern for them, because the one side is obviously way more slanted than the other.


But when I put it on top of my jeans, except for being a little longer, the angles were just right. So I guess that was a design feature.


So this, and the pocket on the other side, is all of my progress on the jeans so far. At least if they don't work out, I can make a pretty darn good-looking pocket, if I may say so myself!


August 8, 2012

midweek musings

  • I'm trying something new with my sewing this week, in the name of just getting something done, darnit!! So I'm just trying to do one sewing-related task a day. Yesterday, I got my real jeans all cut out! Well, the wearable test, anyway. But they're denim. (Monday, all I got done was laying the denim out on the table. But it's one less thing I had to do yesterday, so it still counts!) I actually have enough left that I just might be able to squeeze out a pair of shorts, after The Dress. Which is good, because I have been seriously hurting for a lack of shorts that fit this summer, denim or otherwise.
  • I really need to get my remnants and scraps better organized, so I can find cooler pocket fabric next time. All I could find in the 5 minutes before Craft Wars started, that I was certain I had enough of to cut all of the pocket pieces, was a solid. Oh well....this is still basically only a test.
  • The wedding is 10 months from today! Which brings me to...
  • I have a plan now for all of my wedding dress fabrics! Except for the green bit. But at least I know where to order from now. Bonus-- I discovered that the Dharma Trading Co. fabrics, while not a good color for the outside, don't change the color a bit as underlinings and linings. So I can save myself some money there!
  • Since I've got that part figured out, other than purchasing, my mental energy during the slow times at work has been far more occupied with sewing rooms. That's right--I'm getting my own sewing room! My fiance is rather generous, isn't he? I'm thinking of going with a turquoise & coral color scheme--something really bright and happy, so I'll feel energized and creative! So I've been pondering various solutions for how I'm going to fit all of my fabric, my sewing machines, a cutting table, all of the other various tools, my yarn, my scrapbook stuff, and my beads into one room. It's a good thing Doug likes organization challenges, because I am a walking one...
 And so this isn't an entirely picture-less post, look what came in today! This prettiness is going to be my future kitchen curtain! He already had the bright green on the main wall in there, and really likes it. And I've always wanted a sunflower-themed kitchen. So this was the perfect compromise fabric. I wouldn't be stockpiling home dec fabrics so soon, except I was kind of afraid this one would get sold out before next year. But one accent curtain shouldn't take me too terribly long to finish up. After The Dress, of course.

Ok, off to grab some dinner and catch up on some blogs, since it looks like all of the rest of you have been way more productive than me this summer!

August 6, 2012

Weird.

The good news: aside from the waistband, which I still have NO idea how to draft even after watching the Craftsy video due to having to make a dart in the muslin, therefore throwing off the grainline in anything I draft unless I just seam it at the center back, the jeans pattern is done. And I know it's hard to see, but I think the front turned out pretty good.

The bad news: The back is another story. I just keep looking at it and saying "whaaaaaaaaaaaat?"
I mean, look at that back crotch seam. After all that muslining (because you know that's a verb), this is the curve I ended up with in my attempt to fit what my Trinidadian friend refers to as my "black girl booty" without making it too tight. Plus trying to fix my usual gapiosis issues, and altering the seamlines to attempt to make them look like a straight line going down the side of my leg.

This is, undoubtedly, the weirdest-looking pants pattern piece I have seen in my entire life. Does that mean it's crazy enough to just possibly work? Stay tuned...

August 1, 2012

July in review, and a design decision

Honestly, looking back over this month...it doesn't look that great on paper at all! The only project I finished during the entire month was the knit top that I wrote about in my last post. And while I'm still close to finishing my little accessory project, it's not done. But as I'm looking back, it turns out I didn't really make any specific goals for July anyway. So in this case, nothing ventured, nothing failed! Works for me!

As for August, I only have one real goal: To finish those darn jeans! I spent some time yesterday working on the pattern, and have a back and most of a front, and a yoke, and a pocket. I still need to draft the front pockety bits, the fly front bits, the waistband and the belt loops (because if I don't at least include a pattern piece for them, I will most certainly forget to cut them out). I was originally going to work on that tonight, but decided I needed to do a little of cleaning and exercising instead, so it's not going to happen. Especially since I still have to do the workout. Darn you, real life responsibilities!

Ok, so it's probably my own fault for spending an extra-long dinnertime making a sewing room board on Pinterest. But I actually have one to think about designing now! And I need ideas!!

Back to the sewing. I guess that it doesn't help that a good chunk of what little sewing time I had this month was spent sorting through patterns and fabric swatches and such to get a plan for my wedding dress. But now my hand has been forced. Meaning I had to just make a design decision and go with it, Here's the story: n Monday, a particular fabric store that regularly appears on a particular sewing-related tv show that we all know just happened to announce a 15% off sale for silks, including every single piece that I was eyeing for wedding dress potential. So I needed to figure out estimated yardage needed, stat.

The plan is now to use the back of the Cambie pattern for the bodice, mostly as is, though I'd like to use some nude organza in the sleeve cap and upper back in order to strengthen the lace, and then leave it white on the bottom.

Special Occasion
As for the skirt, I decided to go with none of the options I'd posted before. Instead, I'll be using this. The picture didn't copy so well from the website this time, but if you look at the ivory sketch, hopefully that gives a good indication of what this dress is. I figured it would be pretty simple to make the seams line up with the darts, the skirt is still pretty full but doesn't use gobs of fabric (4 yards at most for the skirt per layer--i.e. outer, lining, underlining, etc.--if I estimated right), and things will stay nice and smooth around my waist, which is what I preferred. Also, this one has a center back zipper, which means that the only potential alterations I'll need to make will be to move seamlines to line up with darts, and lower the top of the skirt a bit to line up with the Cambie waistband. Even with my woefully limited pattern alteration skills, I should be able to handle that. It'll be a fairly simple design, but since my wedding is going to be late morning and as casual as a church ceremony can be, I'm good with that.

So that's the good news. The bad news is that my swatches, which I ordered last Thursday before I knew about the upcoming sale, have not yet arrived. And the sale ends in about 4 hours. And when I called, I was told that since the sale on the website is computerized, so there's nothing they can do to give me the sale prices even though I do have swatches on order. Well, crap. 

On the brighter side, I did get a few swatches from fabric.com, and found something I liked for the outside of the dress that compliments the lace well. It's reorderable, so I should have no problem getting the yardage, and they run sales on a pretty regular basis, so I figure there's a pretty good chance I can get some kind of discount between now and October, which is my self-imposed deadline for actually ordering fabric.

Now I just have to figure out the following:
  1. What to use to underline this with
  2. A skin-toned organza for lining the upper part of the back and the sleeve lining, so it looks like just the lace but has that extra strength. And perhaps for concealing the lace in the seams, since I am 98% sure that particular design decision is going to result in more handwork.
  3. What to line this with, since I'm pretty sure I'll still need a separate lining to hide the mess
  4. What to do about the green waistband. Also, Doug requested that I sew him a tie, and it would make sense to use the same fabric. This is largely dependent on what my bridesmaids decide they want to do for dresses, since I don't want to choose a shade until I know.
  5. The biggest decision at the moment: What to do about that bra. I am strongly leaning towards building it in, since I'm concerned that a longline strapless bra underneath a bodice that will pretty much require boning of some kind for stability purposes would be rather uncomfortable to wear all day. It's just a question of how, since my built-in recycled from the old underwire bra cups didn't quite lay as well when wearing my Lonsdale as I hoped it would. 
I was flipping through my copy of Couture Sewing Techniques this morning, and Claire Schaeffer recommended making a corselette out of cotton tulle. (If my brief Google search is any indication, I'm not sure this exists for a non-wholesale buyer, so I'm not sure what fabric to actually use yet.) The instructions for how to make the actual corselette look good, though so far I've completely missed any how-tos on actually getting it into the dress. The one picture showed the dress front flipped down, so I'm not sure if I'm supposed to leave it detached at the top or not! The other option I've been toying with is signing up for Gertie's Bombshell Dress class on Craftsy, and just using that pattern to basically make a bra. The neckline looks pretty similar to the Cambie's. But using the book I already have is free.

Have any of you dabbled enough in formalwear and/or bra-making to give me any advice here? I'd greatly appreciate it!

June 11, 2012

Muslins, muslins everywhere...

....and not a project to show! Seriously, everything is in that completely not safe for work zone. Or safe for public consumption, period. But I actually have made some progress, so I figured you all wouldn't mind if I at least talk about it a little, right?

First off, the Lonsdale dress. Long story short, I have to start over completely on the muslin stage. I thought I was being all smart--after double-checking my measurements, I figured that since it looks like I fit perfectly into a size 10 at the bust and a size 6 at the waist and hips, I could just cut it as a 10 at the top and grade down those two sizes and it would work. WRONG. It was so ridiculously gappy at the top (and surprisingly a little too small at my waist--that pretty much never happens). So then I tried taking it in at the top, and letting it out a little at the waist. The waist was fine, but now the top pretty much doesn't cover enough of anything I want it to cover. Of course, it wasn't until about halfway through this adjusting process that I remembered that Tasia has a post about making an FBA for this particular pattern. Oops. So I'll be starting over with that in a proper fashion once I get some time to do so--probably not today, but maybe tomorrow. I've also gotten the boning, and I decided that I'll make the rest of the support (hopefully) easier for myself....to be explained in a future post. So, over a third of the way through the month and I have zero visible progress for the Summer Spark Sewalong....can I finish this in time? Stay tuned....

So since I didn't have the time to go through that process at the moment, I worked on the jeans muslin some more. And I think I've actually got that pretty close! I still need to test it with a waistband, and perhaps let out a teensy bit more in the thigh area, but I've just about got it to the point where it's not too tight-looking in the back, there isn't a whole lot of wrinkling in the front like the last attempt and I can pretty much sit down in it without feeling like my circulation is being cut off. (I probably should let that extra bit out, just to be safe, since I'm making this is a non-stretch denim.) So then the next complication is figuring out how to transfer the multitude of changes back to the pattern, seeing as how the only pattern tracing paper I can get around here is crap that won't even mark on other paper. That, and seeing if I can still add pockets if I straighten out the side seams like Mr. King says to do. Because wow, if I drew this line right, the wedge that I have to take out of the front is HUGE.

(Incidentally, has anyone reading this ever purchased from Sil Thread? I found this, after reading the recommendations in the question section of the Jean-ius class, but there's no descriptions on anything so I'm not entirely sure this is the right stuff. A shame, because this is waaaaaay cheaper than the other site he recommended. Plus I'm not sure if I could find enough useful stuff on the other site to make the $35 minimum order...)

I can show one thing, at least. This is how far I've gotten on the Strafford Tee. It doesn't look like much other than a block of purple, but you see that little twisty bit towards the right? My self-figured "darts" are working out much more nicely on take 2. I've actually started increasing again, sooner than I'd done the math for, because this is about 6-7" long now and according to the pattern I only need to do 10" before I have to start actually following the instructions again. But I figured that I'll just get it back to the right number of stitches and take it from there--I don't mind if it's a little longer than what it calls for.

May 23, 2012

And Mr. King made it look so EASY....

The good news: I've managed to scrape together a couple of hours over the last couple of days to cut out and baste together my test "muslin" for the jeans.

The bad news: the fitting is going to be way more complicated than I thought! I'm going to assume it's probably my own fault for tracing the pattern the way I did-- for lack of good paper to use with the tracing wheel (the only option at Joann's is terrible), I had to approximate with a wash-off fabric marker. But somehow, not only were the jeans too small all around my thighs, the rise sits lower to the point where my cut line is probably where my seam should be, and they gap in the back. And I still don't know how to draft the waistband. So no pictures of the progress so far, because it is not going to look good. Or safe for public consumption, for that matter.

On the plus side, the wrinkles in the front that I had so much trouble with on my last jeans-fitting attempt weren't that bad, and when I have a waistband to hold the top up, that problem just might be solved. (I won't know for sure until I have a waistband, because I also need to see what happens when I try to sit down.)

So I've already abandoned the idea of trying to reuse this particular piece of fabric-- I'm going to have to do a lot more marking up than I thought, and possibly re-cut the yoke entirely. If it's bad enough, I may have to just suck it up and make another one with regular muslin, because I don't want to blow another $18 on twill that I'm just going to destroy. I'm a bit bummed that I blew this one. But I guess it's better than ruining the more expensive denim, right?

So far, I've let out both the inner and outer leg seams about 1/8" (for a total of 1/2" per leg) down to about the knee, and that made a big difference already. At least I can put them on without breaking the zipper now! I think I still might let it out a little bit more, because it's still a bit tighter around the thighs than I want to do with non-stretch fabric. I can't continue on it any more tonight, because I have some chores around the house that need to get done, but at least I have something started. And if I can get this figured out, it'll be a great learning experience!

I may need to look into getting some of that better tracing paper from some website or other....I'm already cringing at the thought of transferring this back to the pattern!

May 21, 2012

Of muslins and me-mades and major craft withdrawl

Seriously....with all of that fabric that I have lurking in the basement, taunting me, how is it that I had nothing that would make a good jeans muslin? I mean, sure, I had some khaki twill. But only enough to make a pair of shorts, and I'm going to save that for my actual pants-making tests. And, well, everything else was stuff like the denim I actually want to make the jeans out of. No good. I didn't want to use regular ol' muslin, because it's too thin and I felt like it wouldn't give an accurate idea of what a thicker denim would look like. And of course I didn't want to bust into all of that twill-type fabric that I just bought, because I got those specifically to make pants that I actually want to wear. So it was off to Joann's with me. I considered getting an inexpensive denim, if I could find one with a light enough color that I could mark on it like I'd need to, but all of that had a bit of spandex in it and that's no good for testing before my non-stretch final fabric. But in the end, the least expensive feasible option (after my handy 40% off coupon) ended up being a white twill. Not my first choice of color, but the only other options were brown, black, or paying $3 more per yard for a slightly different twill to get khaki.

Of course, I'm trying to figure out a way that I can actually get something wearable out of this in the end, once I work out the fitting kinks. So I got one of those marking pens that's supposed to wipe off with a damp cloth, since the only ones I have fade after exposure to air and that's no good for this either, in hopes that I can get as many marks off as possible. I'm also thinking that dye will more likely than not be involved at some point, because white twill bootcut pants do not sound like a good option for my actual wardrobe! It'll probably also end up being a pair of shorts or capris or something. But that's ok. It's just that sewing time is a complete luxury right now, and even though I know the fitting is a Really Important Step, I don't want to "waste" that time on sewing things that will just get thrown away, you know? (Especially since I had to buy fabric just to test!)

I've got some MMM to catch up on from the last several days. I spent the weekend hanging out with some friends--I had to practically beg for the Saturday off, but we had a great time, and the friends that met my boyfriend for the first time liked him, so that was a good thing. (I did attempt to do some knitting, but it ended up being negative progress, as I had to frog several inches of it.) I'm definitely paying for it this week, with a 6-day run at the retail job, including what will end up being about 11 hours on Saturday. If I fail any day of this challenge, that will probably be the one. We'll see how I do. In the meantime....
MMM'12, Day 17Day 17:

Shirt: the vaguely Celtic Renfrew top
Jeans: Express, via Goodwill
Sandals: Auditions
Earrings: See below

Worn after work, to help my boyfriend transport his dogs to his parents' for the weekend, and then a quick dinner at Pizza Hut. Someday, I will make at least 5 more of these shirts. They're that comfortable.


MMM'12, Day 17 earrings


And look-- turtle earrings!


MMM'12, Day 18


Day 18:
Shirt: "Shakespeare on the Green" top
Skirt: "Cha-Cha" skirt
Sandals: Same as yesterday. (And since these were the only shoes I brought with me, you get to see them for the next two days as well!
Earrings: I forgot to get a close-up, but they're me-made with dragonflies.

The greens don't quite match up between my shirt and the skirt, but I don't care. It looked fine, and the green in the skirt is only a stitching line anyway so it's not like it was a big block of clashiness. I wore this for teaching, and then to drive up to my friends' house. I ended up changing into jeans once we got there and had eaten dinner, but the skirt's pretty comfortable so it was fine for driving. I was just getting cold.


MMM, Day 19
Day 19:
Shirt: Reconstructed T made from a self-drafted pattern--pre-blog, but I did talk about it a bit in the last Self-Stitched September that I did.
Jeans: A different pair of Express jeans, also from Goodwill
Sandals: Can't see them, but they're the same as the last two days.
Earrings: A repeat from Day 4. (And the one day I wore this for SSS, apparently. How uncreative....but then, I don't have much red jewelry, so I guess it's understandable.)

This was our bum around/play hours' long board games/watch a movie/picnic by a little lake day, so jeans and a t-shirt was definitely the thing. Thus the reason I need more Renfrews. Also, this one is a little too short....I guess that's what I get for making it while I was in college.
MMM'12, Day 20
Day 21
Dress: The "Convertible" dress
Bracelet & earrings: me-made, but again, I forgot a pic
Sandals: What do you think?

Today was this dress's public debut, and it ended up working really well--nice enough to wear for church, but comfortable enough for an afternoon involving more board games. If you look at my blog post on it, I kind of ended up morphing between the 2nd and 4th options from the left in the top row--more shoulder coverage for Mass and a little cooler for later. I think this dress is going to see a lot of use this summer!


And last, but not least, today's outfit:
MMM'23, Day 21 Day 21:
Top: the "Frankenblouse"
Camisole: purchased
Skirt: The quickie batik skirt reconstruction that I may or may not have originally made. (It was either me or my mom.... I honestly can't remember which.)
Sandals: Montego Bay Club
Necklace: Repeat from day 2
Earrings: Me-made with butterflies

This outfit was a bit of an experiment for me. Ever since I found her blog, I've had a great admiration for Oona and her crazy print mixing. As much as I love prints, I've tended to be a bit boring in that it's usually a print with a solid. (See basically every outfit with a print I've ever posted on this blog.) So this was a pretty subtle way to ease myself in--stripes with a floral, but the stripes are thin and metallic and practically a neutral. I'll be honest and say this shirt only stayed on for a few hours-- I ended up changing into a t-shirt once I got done teaching because I wanted to get that twill washed up in case I have some time to trace the pattern onto it tomorrow evening, and my light-colored laundry tends to get put off for awhile (since nearly everything I wear is medium-to-dark colors) so I had to take advantage of having some things to wash it with.

So that's 2/3 of the month down! Like I said, I think this week is going to be the biggest challenge, seeing as how I'm practically full-time at a job that I can't wear anything fun or me-made at this week. Also, I miss sewing. So I'll just keep chanting my mantra that I'm thankful I have a job....and hope it slows down a bit once June hits.

May 16, 2012

adventures in pattern drafting

I finally had a chance to go through the next portion of the Jean-ius class, so I thought I'd post a couple of pics of what I spent the evening doing.
PhotobucketOoh, sparkly. Part of the drafting process involves tracing onto organza. I had some silk organza left over from the LBD, and originally started on that since that's what the class called for, but my organza got so wrinkled and distorted in the dryer that it was basically impossible to work with. (Mental note to self: I probably should not throw silk organza in the dryer ever again.) I couldn't even get a straight grainline drawn on there, because it kept shifting to some wavy thing on me. So I used some black polyester organza instead. I have a rather large piece of this--it used to be the curtains to my brother's rather dungeon-like bedroom, and when he got married a few years ago he passed it on to me so I could use the fabric for things. I was still able to see the thread tracings pretty easily through the black, it just took a little longer on occasion because I'd have to retrace the colored pencil lines. But I thought the somewhat neon effect was kind of fun to play with!

I rather enjoyed the process, actually. The Craftsy videos make it really easy to follow, and it's a technique that I could most certainly use again (assuming I have something RTW that I like the fit of enough! And, well, I'm not sure how well the process would work with knits. But it's still a good technique to know.)
PhotobucketAnd so I have a preliminary pattern now! No seam allowances added as of yet, So here's the front....

Photobucket


And a closeup view of the back.Getting the pocket placement was a little tricky to transfer, and I'm still not 100% sure it's right. But I guess that's an easy enough change to make.

I only have 3 pieces so far--the front, the back, and the yoke. (And the start of pockets as marked on the pattern--my big concern is the waistband, since these jeans have a contoured band, and I hope that gets covered in a later video.) It felt good to finally get something done! And I'm hoping that I can remove the thread tracings soon so I can actually wear my jeans again. I've definitely been missing this pair over the last several weeks!

The next adventure, according to the end of the video, is making a muslin. I'll have to figure out if there's any way I can swing a wearable one--only problem is I may not have any appropriate fabric on hand. And with something that takes more heavy-duty fabric like jeans, I'm not convinced a regular muslin test will cut it. Guess I'll just have to watch and see!

April 14, 2012

Meet my favorite jeans.

After a little deliberation, I've decided that I am going to go ahead and give this Colette Palette Challenge a shot. I saw a post on the Coletterie this morning where one of the editors had decided she'd just focus on three pieces, and it was a lightbulb moment for me....I can actually make this work without completely derailing my plan to work through those "kits" I've made from my stash, and without overwhelming myself with an overly ambitious plan that I just can't get through while I'm in my busy season at work. (I hope. Given that I don't have a day off for at least the next 13 days after today, I might not get to sew much at all!)

So I'm going to use this challenge to focus on three of those pieces, with a rather basic palette of black, white, dark blue and red. The dark blue will be my jeans, which I'd already planned to do this month while working through the Jean-ius class on Craftsy. I'm also going to aim to work on the blouse from the BurdaStyle Sewing Handbook, using a black and white print I finally caved on after about a month of deliberation back in December, and the Beignet in a red organic cotton twill that I've had sitting around for awhile to make a skirt out of. That seems like a manageable amount for the 6ish weeks that the challenge goes on, and if I can manage to finish all three pieces, I'll have two complete outfits, since the top can easily pair with both bottoms.

So, to kick things off and to gear myself up for starting the Jean-ius class, since I'm this close to finishing the convertible dress and will most likely finish it up this evening, this is me taking a look at the jeans I'm going to be basing this class on.

I bought these jeans a few years ago at Goodwill. The brand is Southpole, which is not one I would have ever picked up new since it's more of an urban style type shop and that just isn't me. (Also, their website now says it basically focuses on kids' and juniors' clothes.) But they fit me amazingly well.

They don't gap in the back at all. And the rise is absolutely perfect--low enough to be comfortable and stylish, but high enough that I don't have to worry about flashing my undies at people.

Even the length is perfect--they're long enough that they work with my heeled boots, but short enough that I can wear them with flats without stepping on the hem.

These are the jeans I go to pretty much every time I go hang out with friends, when I want to be comfortable but still look good. And they've been washed and worn so many times that the fly is starting to pull back and expose the zipper, the fabric around the button is beginning to fray and I'm getting worried that one of these days it'll just completely fall out, and the pocket stitching is beginning to come undone. And so it's definitely time to clone them before they fall apart completely, because I haven't found a pair of jeans that fit as well since.

April 1, 2012

March in review

Since I'm doing the monthly round-up thing now, figured I'd start the new month off right! So here's how I did on my goals for March, as stated here....

#1: The Renfrew top--done, great pattern, will definitely use that again sometime.

#2: Finish knitting the Camille shrug--check. And since I had a request from my Onyx sweater partner-in-crime, I did get an action shot of it with the dress at the wedding (this was at the reception, in a side room of the church.) Overall, it worked very well with this dress that I'd originally envisioned it with. (Aside from some fitting issues in the dress bodice itself, which I'm now in the process of resolving since I was apparently too lazy to do it right the first time. Basically, I'm taking in the side seams above the black waistband, stitching it by hand because I have to take apart less of the lining than I would by machine. I need practice on handstitching anyway, right?)

p.s. The sleeves are actually full-length, I just had them pushed up in this picture since it ended up being a bit warmer than I'd anticipated.

#3: Reconstruct that brown suedecloth skirt. Check, although I still need to do something with the lining.

#4: The next step of the Onyx sweater. See previous post for the reason I didn't finish this. (I have a phone date with my KAL partner tomorrow to see if she can help me figure out what on earth I did wrong.)

#5: Blue corduroy jacket. It's not quite done, but it's getting close.

#6: Swatch for my Strafford Tee. I did actually do one earlier this week, and am now debating what to do--according to the swatch, I had about a stitch more per inch than I was supposed to. Which honestly doesn't seem like a big deal to me, and I might just go with it since I was trying to figure out how to incorporate some more fitting into it anyway. It looks like it's pretty loose at the waist.  So I guess this confirms that I am a too-tight knitter.Maybe I should just re-knit the swatch and try to relax a bit, since I'm actually using the right yarn for once...

Essentially, though, I got 4 out of 6 done, and the Onyx was pretty much due to circumstances beyond my control. Not too shabby at all!

So here are my goals for this month:

#1: Finish the blue corduroy jacket.

#2: Go through the Jean-ius class that I have from Craftsy. Which will hopefully result in a new, well-fitting pair of jeans!

#3: I'd like to get a quick project in between the jacket and the jeans, since they're both pretty detail-heavy projects (and that's been on my mind since reading Tasia's post last week about how long sewing projects should take.) I'm not entirely sure which one yet, but I'm thinking either Butterick 5606 or a reconstruction project. (I've decided to hold off on the knit shirt I already have cut out, since that's long-sleeved and it's increasingly unlikely that I'll get any use out of it in the next several months, by the time I finish. So I may just knock that one out later in the summer when my brain turns to thoughts of preparing for fall.)

#4: Get my Onyx sweater sorted out so I can continue that.

#5: Cast on my Strafford Tee.

#6: Finish putting my fabric swatches in their new notebook.

#7: Make one scrapbook page. Gotta start somewhere if I'm serious about getting myself back into this.

One last note: The patterns have all been claimed. Sarah and Muireann, I'll get those to you asap.

February 9, 2012

So, so close....

My goal for yesterday was to finish the raincoat. And I almost made it. But then disaster struck, in the form of eyelets...
All those raggedy sharp edges.... apparently all of that trouble I was having with the belt for the Licorice dress wasn't a fluke. The eyelet setting went even worse this time. I even asked my tool-savvy dad for help, and he couldn't get them to go in right either. So we concluded that the eyelet setting tool is a piece of crap, and that I'll need to get a new one. He thinks he can get the eyelets out without messing up the belt itself, which is hopefully going to be the case. So I'll have to talk to him about that soon... I can salvage the buckle either way, but worst case scenario, I found just enough fabric to make a new belt if needed. I just need to remember to keep an eye on the A Fashionable Stitch shop for when the eyelets come back in stock so I can get those, the hammer-in tool instead of the awful pliers tool, and some new belt backing if necessary. Sunni's customer service is great-- I emailed her last night to ask if she carried those aside from the entire belt kit, and got a response back within half an hour! So I would definitely highly recommend her shop. (As an aside, Sunni, if you manage to find jeans rivets to stock, I will love you forever!)

On a happier note, I think the coat itself turned out pretty good!
Not quite the same look as what was in the magazine-- let's just do this properly and I'll do a pattern review, shall we?


Pattern: Burda Magazine 3/2009, #119


Pattern Description: Double-breasted trenchcoat with gun flaps on both sides, knee length, inverted box pleat in the back.

Pattern Sizing: 34-44. I made the 40.

Did it look like the photo/drawing on the pattern envelope once you were done sewing with it? Close, but not quite...I just realized now, while looking at the line drawing vs. my photo, that I should have pulled it closed more in the front when I was figuring out button placement and that's why the double row of buttons would have just looked silly. Oops. Oh well, it's probably more functional this way, anyway! I also left off a few of the extra details, like the mini-belts around the wrists and the epaulettes. And the belt, obviously, but that will come.


Were the instructions easy to follow? They're Burda magazine instructions. 'Nuff said. Truth be told, I didn't follow them too closely, because I had to rework half of the order to accommodate the waterproofing, and my desire for a full lining. But hey, look how nice it looks! Inverted box pleat and everything! Um, don't look too closely at the internal hem, ok? That was a bit of a wrestling match, but hopefully it won't show too badly.)


What did you particularly like or dislike about the pattern? I liked the styling of it, and would have quite happily incorporated those extra details if they wouldn't have added extra holes in unnecessary places that I would have had to waterproof. There wasn't really anything I seriously disliked about the pattern itself, more my construction process. But that's not the pattern's fault.

Fabric Used: A waterproof taffeta from Gorgeous Fabrics for the outside, and some polyester stuff I was given for free years ago for the lining. The lining is also fully underlined with flannel for warmth. (I also used the flannel for interfacing where needed.)


Pattern alterations or any design changes you made:
As already mentioned, I fully lined the coat, rather than the yoke/sleeve only lining that the pattern called for. And the accidental design change in the front with the buttons. I did a lot more topstitching than it called for, since the taffeta was very prone to fraying and I needed to finish all of those seams accordingly (lots and lots of flat-felled seams. Great practice for those jeans I still plan to make.) I also used a belt-making kit from A Fashionable Stitch, rather than the directions that the pattern called for. I made no sizing alterations, since I wanted to allow extra room for bulky winter clothes, other than maybe making the sleeves a bit longer.

Would you sew it again? Would you recommend it to others? I think it makes for a nice, classic trench-coat look. I might sew it again whenever my lightweight spring jacket wears out--wouldn't this be fun in a bright, cheery twill print or something? 


Conclusion: This has nothing to do with the pattern itself, but I am SO glad to be done with this thing. And I really hope this raincoat holds up for a long, long time, because I don't want to waterproof anything again for a long, long time!

In other sewing news:
1. In one of the recent interims of letting waterproofing stuff dry before I could continue, I made these:

 Yes, I have another bridal shower to go to! This time, for a cousin getting married in March (the wedding I'm knitting that black shrug for.) So I whipped up yet another of my go-to apron pattern, along with the potholders I tried out back in the fall for a last-minute addition to a friend's shower gift. These seem to be along the lines of the colors she wants in her kitchen, so hopefully my cousin will like them! I can probably make the apron in my sleep by this point. The potholders still need a bit of work, as I still haven't quite figured out the best system for getting the bias tape around the top, (Probably because I keep insisting I can do better than the pattern, and making the loop out of the bias tape instead of a ribbon like the pattern calls for.)


Speaking of that black shrug, I'll do a knitting update soon.... in about 3 rows, it will make a better picture than what I can take now. But there has been progress. Honest.

2. My next project is mostly cut out and ready to go. And it's....(drumroll)....another brown coat! More specifically, the brown corduroy one that was #1 on the list. Hey, I've been meaning to make that thing for 2 years now. So I have the outside all cut out and interfaced where needed, with some extra-large seam allowances. My plan is to baste it together, tweak the fit where needed, mark that on the pattern, and then cut out the lining. Corduroy's tough. It can take being a muslin and a finished jacket. Now if only I could find what's left of my old fabric notebook so I can remember how many yards I can take off my stash list...

3. I also need to sit down soon and figure out what I need for the next several projects I'm going to tackle. Especially since the button packs are buy one get one free next weekend! (And maybe check out the Simplicity patterns, since they're 5 for $5...)

4. I got an early birthday present today...I'm signed up for one of the sewing classes at Craftsy. I got an email this morning saying that the pants-fitting one is currently half-price, and since I have both jeans and trousers coming up in the queue, I figured this would help immensely. I do have two pairs of jeans that I love the fit on (one boot-cut and, surprisingly, my one pair of skinny jeans, both purchased from Goodwill), and a pair or two of pants that I also think fits pretty well. Actually, I was thinking just yesterday that I wish I could replicate this one brown pair I have, because the fit at the top is great but I've washed and worn them so often that there's starting to be some obvious wear-and-tear on places like the back welt pockets. Plus they're just too short to look really good with my boots. So since the whole idea is reverse-engineering the fit without destroying the original jeans or pants, this could be just the thing! I've liked the Pattern Review classes I've taken in the past, but I'm excited to try the Craftsy ones since they have video and no set dates, so I can just do it as I can without stressing about falling behind. (Plus they're less expensive. Always a plus.) I'm thinking for the jeans, I can use this to make whatever last tweaks are needed to the muslin I already made for the last jeans class, and use the pattern I already have from there. So then I can finally cross that off the list, since I've been saying for, oh, only the last 3 or 4 years in a row that this is going to be the year I successfully make jeans!

September 1, 2011

Fall Essentials Sew-Along!

I was excited to see this announcement over at Rhinestones & Telephones today--I was curious to see what the categories would be this time! Of course I'm participating--even though I didn't quite get through my entire list by the end of August (though I at least started everything by then!), I love the flexibility of getting to choose my own patterns. And this one especially seems rather conducive to allowing for knitting to be part of my wardrobe scheme. So, in almost no particular order, here's what I'm hoping to be up to for the next couple of months. The sew-along information is copied from Sarah's blog, with the rest of it being my own plans. (Lots of pics ahead!)


ABOUT THE SEW-ALONG
Fall is often a very busy season for many of us, filled with activities that often have us running hither and yon. Making your items should be a form of relaxation; a time to slow down and enjoy the creative process.

The goal: Stock your wardrobe with quality pieces that you will wear again and again.

The benefit: A group of creative people who will encourage and inspire you, not to mention talk you off the ledge when you need it!


Well, she's got that right....fall is almost always really busy for me, and it looks like this one will be no exception. Since I'm still having no luck in the job-hunting department, though, I should at least be able to find some time to sew during the weeks, even if it seems like almost every weekend between now and the end of October has something going on!

Fashionable Foundations for Frosty Weather
Trousers, skirts, legwarmers and more! Anything that keeps your lower portion fashionably cozy fits perfectly here! The chilly weather necessitates the donning of bifurcated bottoms and sassy skirts!


I've said it before and I'll say it again-- I'm determined that this will be the fall that I finally conquer The Jeans. So I'll be revisiting my latest muslin from the twice-taken PR Jeans class, which I set aside once the LBD plans started happening, and hopefully using this denim to make a fabulously fitting pair!


There will also be some skirt action happening, though I'm not entirely sure how much. I do have one currently in the works that I started last night in an attempt to participate in the latest Refashion Co-Op weekly challenge. If all goes according to plan, it'll fill a long-standing hole in my wardrobe...but more on that in a later post. I did also pull out these couple of things so I could have some quick projects if needed in the midst of the more complicated plans I have for the fall. (Though I wonder how quick they'd actually be, seeing as how those prints mean that both skirts would be lined...)


Also, on a random note, I love that they used the word "bifurcated".


Chic Chemises for Cool Climates
Blouses, tops, vests, cardigans, and sweaters! These wardrobe essentials can carry you from day to night, not to mention provide necessary layering to keep out the chill. 


Blouse #1, which I mentioned in my last post, is already in action! But again, more on that later. I've also pulled out this knit...

I'm not sure what pattern I'm actually going to use for it yet, but this was one of my fabrics I got from Mood last year. And while this is a bit of a departure fabric for me, I think it would go fabulously with that red skirt if I get to it. I looked through my patterns a bit today, and came up with these four possibilities:
From left to right, I'm thinking either the 3/4 print top, the reddish twist-front top, the white basic top, or that stripey drapey v-neck top. I know you're normally not supposed to break up large prints with patterns that involve a lot of seams, but at the moment I'm leaning towards either the twist-front top or the drapey-front top. Seems to me that smaller pattern pieces in front might make it easier to avoid unfortunate print placement, given all of those circles!


Also, there is that sweater knitalong that's going to be happening very soon. And another refashion idea I've had bouncing around in my head for awhile, which again may be a quicker thing.

Fabulous Frocks
Dresses of all styles; mini, short, or long! Keep yourself warm in your modish designs, layering with tights and boots!


Two words (actually a word and a number): Vogue 1253. Which I will be making out of these: The jersey, which I've had for a couple of years, is on top, and this is the tricot lining and organza I recently picked up to go along with it. (It's ok to buy fabric to help me bust stash fabric, right?)


This will most likely be the next thing after the blouse and the recon skirt--since it's sleeveless, I need to finish it while I still have a shot at being able to wear it.


Underneath It All
When you're spending months covered from the neck down, a glamorous underpinning of your choice adds a secret, luxurious touch that chases the cold away!


No plans for this category currently.

Tender Tootsies
Let's not forget your frosty feet! Socks, slippers and the like are the order of the day. Keep those tootsies warm and dry! 


I did cast on a new knitting project the other day that actually fits this category! Which I'm only 7 or 8 rows into, so it still counts. But again, more on that later.

Those Cozy Nights
Is there anything better than snuggling up in a cozy pair of pajamas with a hot drink and a book whilst Jack Frost works his magic outside? I think not! Sleepwear of all types are the way to go here!


You know, I think I'm actually good on cooler-weather PJs for now! So again, no current plans for this category.

Baby It's Cold Outside
Coats, hats, and mittens donned to keep the cold at bay, especially when out enjoying the spectacular fall colours!


I have hopes of being able to work in a knitted hat, in this (the yarn I got at my inaugural visit to the local yarn store):

And, well, Gorgeous Fabrics lured me in with their current sale....which includes that raincoat fabric I wanted. So I bought 4 yards of that, and it arrived in the mail today. I think it'll be lovely to sew with--more taffeta-like and less vinyl-like than I expected! (And I did flick some water on it to see--it does repel!) Given that I have other things I need to get done sooner, this may not actually be part of the sew-along. I'm just going to say I'd like to have it done by around Decemberish.


But I do also have this pulled out, to make another brown coat. This one more for layering purposes. Isn't the lining fun? And I love the look of this jacket (from the 11/09 Burda magazine)--it reminds me of those 70's jackets of my mom's that I used to wear all the time as a teenager, before they got worn out/too small for me. (I'm a bit taller than she is, so they were always a bit snug across my back and such.)


I realize that this is a lot of stuff, and the chances of me actually getting through all of this are pretty slim. But it'll be fun to try!