...I find myself daydreaming about sewing when things get slow at my day job. In my head, that red Beignet skirt has been finished twice by now. My wardrobe also has a perfectly-fitting imaginary pair of jeans, a summery Lonsdale dress that I haven't even queued to cut out yet, and some nifty new refashions that may or may not ever happen in the real world.
....I also find myself daydreaming that some friendly singing mice and birds will come in and finish all of my mending projects while I'm working, Cinderella-style.
....I took advantage of not having time to do anything with them to take both my machine and my serger to the shop. Bernadette (my sewing machine, which has recently picked up a name after being just "my sewing machine" for years) just needs a little tuning up, because she hasn't had one since my mom handed her down to me oh, 14-15 years ago. I oil her regularly and do my best to keep her cleaned out, but every so often, it's probably good to let the professionals at her. I'm also hoping that, since I mentioned it to the repairman, the mystery of why her automatic buttonhole feature no longer works since getting the new foot can be solved. My as-of-yet nameless serger....well, I'm hoping that when I get it back, the left needle actually makes a good stable row of stitching and I won't have to have Bernadette finish all of its dirty work when it comes to seaming together my knits.
...I'm culling my wardrobe. Don't get me wrong, it's still wonderfully overstuffed, but I've actually managed to create a good-sized pile of clothes to go to the great big thrift shop in the sky. Things I just don't like anymore, things I've been meaning to alter and realized I just don't care enough to bother, things that don't fit me right at all, etc. I still have another under-the-bed bin or two to go through before I can actually send them off, but so far, most of my shorts have ended up there, despite the fact that I need some for work. I learned last summer that working outside registers with shorts that are way too big at your waist and a radio dragging them down even further at the pockets is not a fun experience. (I got them to fit my hips, and so even belts didn't help.)
....I went thrift shopping. In deference to my lack of time, I completely managed to avoid buying anything that was simply for the fabric/refashion potential. Of course, I still ended up with two things that need slight alterations-- a strapless red dress that could use at least the option for straps, and a lovely lime green dress that, after bringing it home and taking it out of the bag, I realized that it's almost an identical color to my convertible dress! Basically, the knit dress is a bluer shade and the thrifted dress is a yellower shade. So I need to mix it up a bit. I have some lace trim that I got for free ages ago that I think might look great with it. I'm debating whether to throw some dye into the mix as well--a little dip-dye ombre effect, perhaps?
....yeah, that's the other thing I'm daydreaming about. Dyeing things. I already have a small mental list of clothes that could use a little color alteration. And a piece of white gauzey fabric that I want to dye and make into a maxi-skirt. In my head, it's turning orange and yellow and red and I'm calling it my "Girl On Fire" skirt. Yes, I still have The Hunger Games stuck in my head.
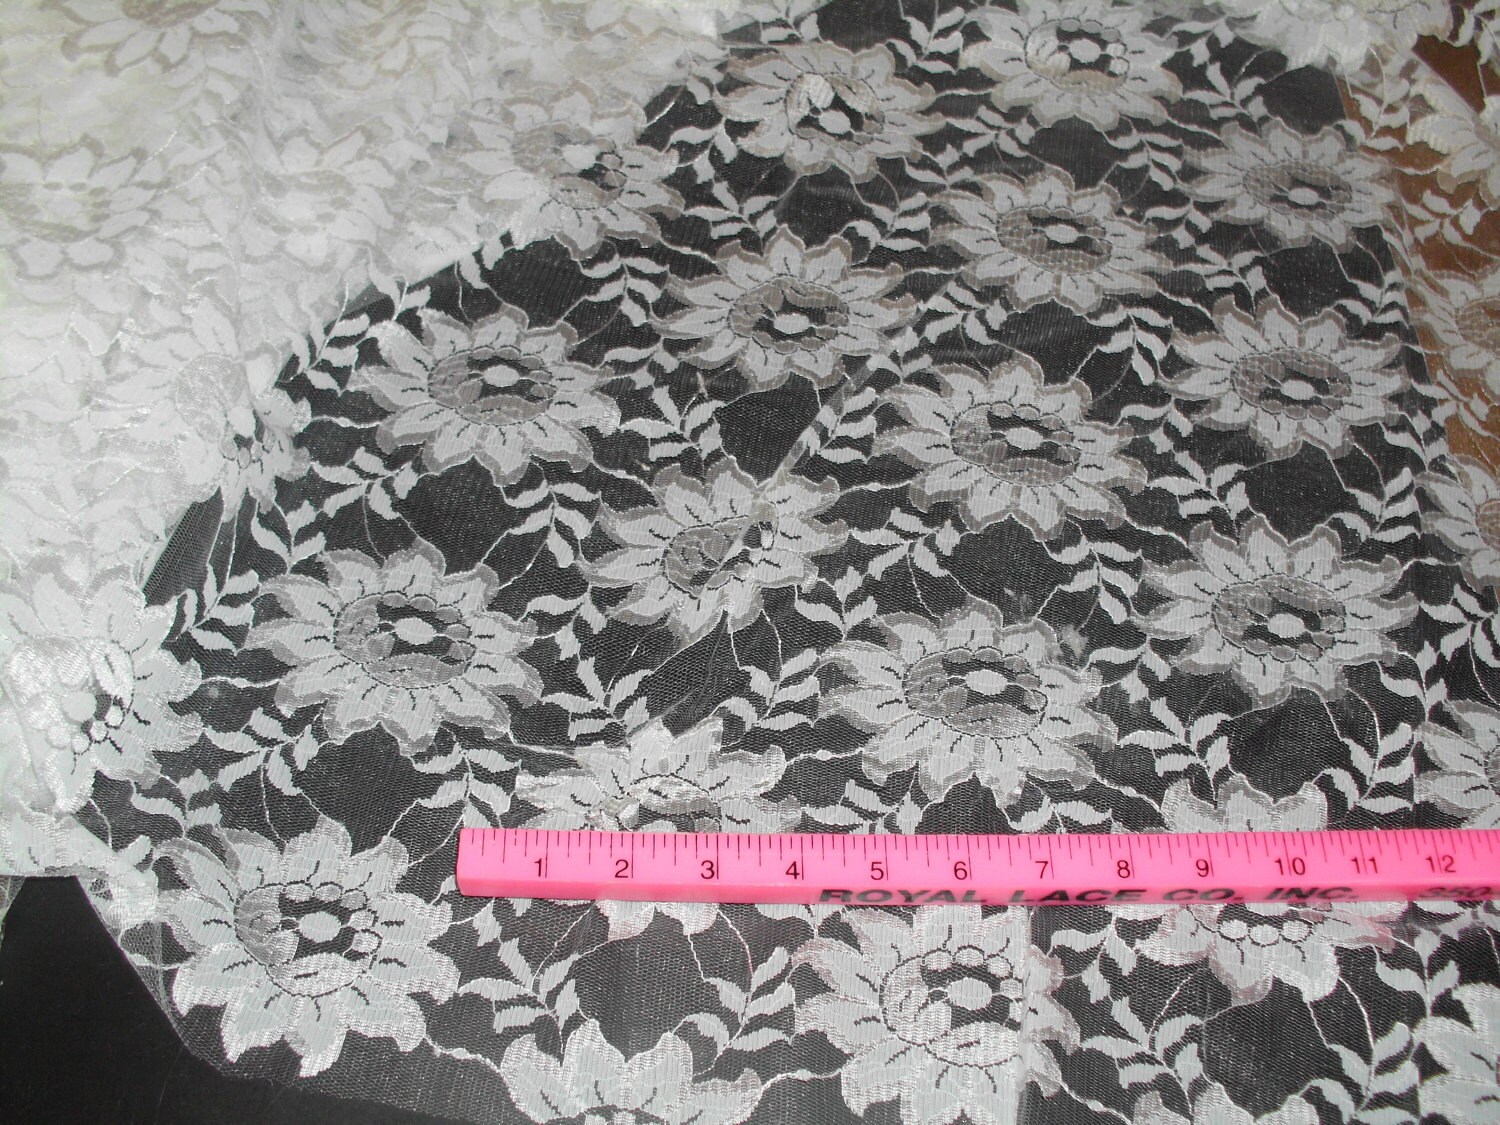
....I want to buy fabric. In fact, I did cave and buy this...though I'm normally not attracted to traditional lace fabrics, I have been liking the lace shirt trend this spring. Plus it's sunflowers, and that makes it pretty much my Favorite. Lace. EVER. I'm not entirely sure what I'll do with it yet. But I'll find something.
I thought that would pretty much scratch the fabric itch, but noooo, I still want to buy more fabric. Which is just bad, because if I can manage to find enough sewing time to get through my Colette Palette challenge, I think that just might make me finally crack that 200-yard mark on my fabric stash! I'm even justifying it in my head. I do need a few pairs of pants, and I don't have all of the colors I need in my stash in sufficient quantities. And Fabric.com currently has a sale running on organic cotton bottomweight twill, which only lasts until Monday. And I also have a 13% off coupon code, which does not say that it doesn't work on sale items. So I could totally justify this. And possibly this, since my trouser jeans get a lot of use despite being obviously too short for me--I would love to replace them with a better-fitting (and especially longer!) self-stitched pair.
Solid colored neutral pants are basics, and I will need to make those happen at some point. What I'm having a little more trouble justifying is my desire for this. I saw it, and it's screaming at me that it wants to be a sweater dress based on the Renfrew top pattern. Especially since my one thrifted sweater dress (more of a sweater tunic, since I only ever wore it over jeans) has ended up in my "to donate" pile....I still love it, but it's time to acknowledge that it was always too small for me and therefore too tight all over and I need to let it go. But then there's still the problem of "I have barely any sewing time right now."
I did get through the first two videos of the jeans class, and my jeans are all thread-basted up and ready to go for lesson 3. I think. I may have to re-do the last line or something, I'm not sure if it's right and I haven't gotten an answer on the messageboard for that lesson yet.

Showing posts with label serger. Show all posts
Showing posts with label serger. Show all posts
April 24, 2012

April 9, 2012
another finished jacket

I'm happy with the fit, and since the color is pretty close to a dark denim, I think it will be fairly versatile in my wardrobe! Here's some more detail shots:


Incidentally, I have about a yard of this floral fabric left, so I need to figure out what to do with it. I'm thinking maybe a simple sleeveless top, but I'll have to figure out what pattern since the Sorbetto doesn't really suit me, and I'm a little afraid to use the Pendrell again after what happened with the leftover raincoat lining!

I've sort of started my knit dress, though that's really a technicality. So far, all of my sewing time on it has been spent
March 7, 2012
A 2-for-1 quickie post
Answering a few questions via the comments on my last post::
Christina-- I used this tutorial to make the outlines for the croquis, though with Oona's modifications of using Photoshop instead since that's what I had. (I found the tutorial via her blog.) Hope that helps!
Hana-- my bust is pretty full. I think it's more that my waist is kind of surprisingly small in comparison to my hips, and I've learned over the years that if I wear things that aren't fitted or cinched in one way or the other, it just gets completely lost. Thus the reason that most empire-waist stuff just doesn't seem to do it for me, unless it does the fit-and-flare thing underneath.
Thanks for the other comments, ladies!
After spending basically 2 months sewing nothing but complicated, fully-lined jackets, not to mention the shrug that I'm still knitting, I just wanted to make something simple and fast. So I've actually managed to knock out two projects over the course of two days, which is what I'm sharing today.
 The first project wasn't one that I found on my Pinterest, but I did have it saved there, so that counts as Pinterest being useful, right? Anyway, I found this tutorial for a simple roll-up knitting needle case on Design*Sponge, and figured it would be perfect for my small collection of non-circular needles. I slightly adapted it a bit-- instead of canvas, I used this thick textured cotton stuff that my mom had leftover from some project of hers, and instead of the twill tape, I made double-fold bias tape from a fat quarter I'd had sitting in my scrap bin from ages.
Making bias tape is a pain, even with that little tool thingy. It wouldn't be, except that anywhere I'd seamed it together, it wouldn't go through. But I'm seriously considering taking some more of those scraps and turning it into bias tape, just to give me a way to use some of it up. It's so handy. And I can't close the lid on my scrap bin. But I digress.
 When I said small collection, I wasn't joking. I did leave one pack of my double-pointed out, but that's because I accidentally bought a second pack of size 11s after I forgot that I already had one. Thus the need to see what I have. You can tell that I prefer to use the circulars whenever possible, can't you?
 I actually did something smart, and decided to stitch the bias tape on with one of the machine's decorative stitches. Bias tape is really a pain to line up, and I figured that this particular stitch would catch the edge on both sides, no problem. It worked like a charm, and I didn't mind this particular project having more of that "homemade" look, since the channels for the needles weren't exactly going to be in matching thread, either. I knocked this one out in its entirety on Friday night, including making the bias tape (aside from pre-cutting the strips during my cutout binge day I had last week), while helping my friend Nicole figure out the best way to take in a vintage dress that she was working on, and introducing her to Downton Abbey. And I'm quite happy with the results, especially since I tend to procrastinate a lot on that more utilitarian sewing!

The second project, which I cut out later last week, was the newest Sewaholic pattern--the Renfrew top! I decided to go for the 3/4 cowlneck, with this knit print that I was given for Christmas about 2 years ago. (Please ignore the sideways picture-- apparently I forgot to save it after turning it in Picasa, and I didn't want to bother with uploading it again.)
This fabric print is kind of interesting-- when I look at it close-up, the somewhat Celtic knot-like is what stands out to me more. When I look at it from further away, the X's stand out more. And closeup, the X's look more like V's. It's like an optical illusion!

And here's my finished top! As seen with my corset-laced pants, because it's always fun to find something new to wear with those, and the weather is warm enough today that I'm feeling good about breaking out the linen pants after their winter hiatus. I think the stripe-ish bits lined up pretty well, overall. And this pattern sewed together like a dream-- I got it stitched together in its entirety within the few hours I had to sew on Monday, and that was with going back over nearly every seam with my sewing machine after serging it. (As per my Check The Technique, I did work on playing with the tension on here. It looks great on one side, but not so much on the other side, and everything I've done to fix it so far looks terrible on both sides. So I didn't trust it to not pull apart. I did learn, however, that if I serge it first, machine-sewing it doesn't make the fabric ripple. So I guess that's something.
Anyway, back to the pattern. As I said, it was super-quick to sew together, and I'm really happy with the fit. On a hunch, I actually did some grading before I cut it, from the size 8 for the chest and hips down to the size 4 for the waist, and it worked great! I didn't have to take it in at all. The length is perfect to be able to raise my arms without my stomach showing, which is a must when you play an instrument that pretty much requires that movement at all times. And I wasn't sure how the neckline would cut, thus the cowl neck for this version, but it seems like it wouldn't be too low-cut at all. So I'm absolutely certain that I'll be going back to this pattern again--it's pretty much the perfect basic knit top! Thanks, Tasia!
The one thing I would have changed was the cowl-- I love the look of it, but I had to piece one side of it together due to the way I had to lay it out with the stripes. Before I sewed it on, I went back and forth multiple times as to which way I should flip it in hopes that the un-seamed side would end up on the outside. And I guessed wrong. So there is a seam running down the front of the cowl, though I don't think it's very visible unless you're really close-up. I didn't want to re-do it and risk stretching the neckline out irreparably (ah, the joys of ripping out serger thread), and think this particular print needed the cowl to balance out the grid-like nature of it. So I just left it.
2 more things:
1. With this top, and factoring in those couple of fabrics that I got for my birthday, that takes my stash down to about 216 yards. This is down 57 yards from where I started at the beginning of last year, which I don't think is bad at all! The count will be even lower soon, since I already have 3 pieces chopped up for the next couple of projects, but I have that information written down elsewhere so I'm not counting it yet.
2. Sarah at Rhinestones and Telephones did an interesting post yesterday where she did more of a monthly roundup/goals for her sewing, and kindly said that I could borrow the concept. I'm definitely one who gets too many ideas for things I want to make, and therefore I stress myself out. So I'm hoping to use this as a way to focus a little more, and maybe even work in some of those mending and utilitarian projects that I've been meaning to do for ages. I can pretty much sum up February and January with the browncoat-fest post that I already did, so instead, I'm just going to share my goals for the rest of March. (Since the top I'm wearing today was goal #1.)
#2: Finish knitting that shrug, since I need it by the 31st. I'm getting close-- about 30ish rows left on the sleeve, then blocking, then seaming and adding the final ribbing around the back and neck. I can do this!
#3: Reconstruct a skirt that I took apart late last week. That will be this afternoon's project, at least in part.
#4: Get the next step of my mini-knitalong going. It's only about 30 rows, I can do this too!
#4: Sew that blue corduroy jacket that I cut out last week. I may be able to start this later this week, depending on how said reconstruction goes.
#5: If I get 2 and 4 done and still have some time left, I have a short-sleeved top in my Ravelry queue that I'd like to get the swatching done up for. I'm hoping this one will be fairly simple, since for once in my life, the yarn was one that was both wool-free and still affordable, and therefore I'm actually using what the pattern calls for. So I guess this will be the big test to see just how ridiculously tight my knitting tension is...
I'm trying not to go too overboard and stress myself out, since I'll be getting back to a more normal work schedule probably next week, and will have less time. So hopefully this is a realistic list!
Christina-- I used this tutorial to make the outlines for the croquis, though with Oona's modifications of using Photoshop instead since that's what I had. (I found the tutorial via her blog.) Hope that helps!
Hana-- my bust is pretty full. I think it's more that my waist is kind of surprisingly small in comparison to my hips, and I've learned over the years that if I wear things that aren't fitted or cinched in one way or the other, it just gets completely lost. Thus the reason that most empire-waist stuff just doesn't seem to do it for me, unless it does the fit-and-flare thing underneath.
Thanks for the other comments, ladies!
After spending basically 2 months sewing nothing but complicated, fully-lined jackets, not to mention the shrug that I'm still knitting, I just wanted to make something simple and fast. So I've actually managed to knock out two projects over the course of two days, which is what I'm sharing today.
 The first project wasn't one that I found on my Pinterest, but I did have it saved there, so that counts as Pinterest being useful, right? Anyway, I found this tutorial for a simple roll-up knitting needle case on Design*Sponge, and figured it would be perfect for my small collection of non-circular needles. I slightly adapted it a bit-- instead of canvas, I used this thick textured cotton stuff that my mom had leftover from some project of hers, and instead of the twill tape, I made double-fold bias tape from a fat quarter I'd had sitting in my scrap bin from ages.
Making bias tape is a pain, even with that little tool thingy. It wouldn't be, except that anywhere I'd seamed it together, it wouldn't go through. But I'm seriously considering taking some more of those scraps and turning it into bias tape, just to give me a way to use some of it up. It's so handy. And I can't close the lid on my scrap bin. But I digress.


The second project, which I cut out later last week, was the newest Sewaholic pattern--the Renfrew top! I decided to go for the 3/4 cowlneck, with this knit print that I was given for Christmas about 2 years ago. (Please ignore the sideways picture-- apparently I forgot to save it after turning it in Picasa, and I didn't want to bother with uploading it again.)
This fabric print is kind of interesting-- when I look at it close-up, the somewhat Celtic knot-like is what stands out to me more. When I look at it from further away, the X's stand out more. And closeup, the X's look more like V's. It's like an optical illusion!

And here's my finished top! As seen with my corset-laced pants, because it's always fun to find something new to wear with those, and the weather is warm enough today that I'm feeling good about breaking out the linen pants after their winter hiatus. I think the stripe-ish bits lined up pretty well, overall. And this pattern sewed together like a dream-- I got it stitched together in its entirety within the few hours I had to sew on Monday, and that was with going back over nearly every seam with my sewing machine after serging it. (As per my Check The Technique, I did work on playing with the tension on here. It looks great on one side, but not so much on the other side, and everything I've done to fix it so far looks terrible on both sides. So I didn't trust it to not pull apart. I did learn, however, that if I serge it first, machine-sewing it doesn't make the fabric ripple. So I guess that's something.
Anyway, back to the pattern. As I said, it was super-quick to sew together, and I'm really happy with the fit. On a hunch, I actually did some grading before I cut it, from the size 8 for the chest and hips down to the size 4 for the waist, and it worked great! I didn't have to take it in at all. The length is perfect to be able to raise my arms without my stomach showing, which is a must when you play an instrument that pretty much requires that movement at all times. And I wasn't sure how the neckline would cut, thus the cowl neck for this version, but it seems like it wouldn't be too low-cut at all. So I'm absolutely certain that I'll be going back to this pattern again--it's pretty much the perfect basic knit top! Thanks, Tasia!
The one thing I would have changed was the cowl-- I love the look of it, but I had to piece one side of it together due to the way I had to lay it out with the stripes. Before I sewed it on, I went back and forth multiple times as to which way I should flip it in hopes that the un-seamed side would end up on the outside. And I guessed wrong. So there is a seam running down the front of the cowl, though I don't think it's very visible unless you're really close-up. I didn't want to re-do it and risk stretching the neckline out irreparably (ah, the joys of ripping out serger thread), and think this particular print needed the cowl to balance out the grid-like nature of it. So I just left it.
2 more things:
1. With this top, and factoring in those couple of fabrics that I got for my birthday, that takes my stash down to about 216 yards. This is down 57 yards from where I started at the beginning of last year, which I don't think is bad at all! The count will be even lower soon, since I already have 3 pieces chopped up for the next couple of projects, but I have that information written down elsewhere so I'm not counting it yet.
2. Sarah at Rhinestones and Telephones did an interesting post yesterday where she did more of a monthly roundup/goals for her sewing, and kindly said that I could borrow the concept. I'm definitely one who gets too many ideas for things I want to make, and therefore I stress myself out. So I'm hoping to use this as a way to focus a little more, and maybe even work in some of those mending and utilitarian projects that I've been meaning to do for ages. I can pretty much sum up February and January with the browncoat-fest post that I already did, so instead, I'm just going to share my goals for the rest of March. (Since the top I'm wearing today was goal #1.)
#2: Finish knitting that shrug, since I need it by the 31st. I'm getting close-- about 30ish rows left on the sleeve, then blocking, then seaming and adding the final ribbing around the back and neck. I can do this!
#3: Reconstruct a skirt that I took apart late last week. That will be this afternoon's project, at least in part.
#4: Get the next step of my mini-knitalong going. It's only about 30 rows, I can do this too!
#4: Sew that blue corduroy jacket that I cut out last week. I may be able to start this later this week, depending on how said reconstruction goes.
#5: If I get 2 and 4 done and still have some time left, I have a short-sleeved top in my Ravelry queue that I'd like to get the swatching done up for. I'm hoping this one will be fairly simple, since for once in my life, the yarn was one that was both wool-free and still affordable, and therefore I'm actually using what the pattern calls for. So I guess this will be the big test to see just how ridiculously tight my knitting tension is...
I'm trying not to go too overboard and stress myself out, since I'll be getting back to a more normal work schedule probably next week, and will have less time. So hopefully this is a realistic list!
March 17, 2011
Mission accomplished!
I've just been posting up a storm lately, haven't I? Don't worry, it'll slow down very soon, as this is my last day "off" (other than my flute teaching and band work) before I go back to job #3 at the garden center. Thankfully, I had some warning as to when I'd be starting back up. So my main goal this week was to finish all of the machine work on my mom's dress so I could do the handwork on Saturday. (Being the not-so-closet geek that I am, Saturday's plans consist mainly of playing a game over the internet with a few friends. But it's the sort of game where there's more talking via a headset than actually typing on the keyboard or clicking with a mouse, so it's been a good way for me to also get several concentrated hours of off-machine craftiness in so far.) As of about 15 minutes ago, the machine work is done!
 Don't worry, it'll hang better than this. I haven't put the zipper in yet, because I'm going to use one of the methods I learned from the LBD class and hand-pick that. This zipper only goes partway up the back and there's a sheer part that will extend above, so the greater control of handwork is definitely desirable here. Plus, since part of the plan is for me to resize this slightly if needed to fit me after the wedding, it'll be much easier for me to tweak the back as needed if I'm working with hand stitches instead of the tinier machine ones! I'll also need to hem those sheer edges a bit, sew the bodice lining down over the zipper and skirt, and hem the skirt itself. So far, I'm rather pleased with how it's looking! (And also glad that I decided to serge the edges of the skirt pieces before sewing the seam-- I left the top of the skirt and the bodice pieces unserged, and they were a horribly fraying mess!)
Speaking of the serger, guess what? It's not broken again--I took it to the shop on Friday and the mechanisms are just fine. The problem was that the thread had gone bad! Which, I guess, shouldn't be a surprise, because there's a strong possibility that most of the serger thread I've been using is older than I am. (It was mostly stuff I got for free from a doll/craft supply shop that my grandparents used to run.) So I tossed a bunch of the stuff that I knew was older, and am going to have to start replacing it as I can. And because I did the brocade bits before this, the serged edges are not the cleanest at all. But the sheer, which was done with the new thread, is much, much better. I'm quite happy that I didn't have to get it repaired again so quickly!
 The cat, who decided to be my sewing buddy for today, was rather more ambivalent about the whole thing. In fact, she was quite unhappy that I dared interrupt her nap on top of my pattern pieces to take a picture. Sorry, Cleo.
 One last thing for today....decided to have a little St. Patrick's Day fun on a whim. Now, I'm not one who will just celebrate any and every holiday that happens around this time of year. I could care less about Mardi Gras, and I have a rather strong loathing for Valentine's Day. But St. Patrick's Day has always been a fun one-- I'm quite happy to dress the part (today it's my Shakespeare on the Green top, along with some Celtic-knot embellished jewelry), and I've been having fun with listening to some of my favorite Irish bands today (namely The Frames and Flogging Molly so far, but there's still a good chance I'll fit in some U2 and/or The Cranberries). Hey, I really am part Irish, so of course I want to have some fun with this! But anyway....on a whim, I decided to make some scones, since I had a little time to kill. They're total cheater scones because they're made with Bisquick that was already in the pantry, and I even cheated on the cheater recipe. (No heavy cream, so I used the nonfat milk that I had instead, and I didn't have chocolate chips, so I chopped up a dark chocolate-raspberry organic chocolate bar. There. Now they're healthier.) On an even bigger whim, I added some green food dye to make them festive. For total cheater baked goods, I thought they turned out pretty good! Once they fully baked, at least... I may have made them a little too thick to cook through properly until I cut them up and stuck them back in the oven.

Speaking of the serger, guess what? It's not broken again--I took it to the shop on Friday and the mechanisms are just fine. The problem was that the thread had gone bad! Which, I guess, shouldn't be a surprise, because there's a strong possibility that most of the serger thread I've been using is older than I am. (It was mostly stuff I got for free from a doll/craft supply shop that my grandparents used to run.) So I tossed a bunch of the stuff that I knew was older, and am going to have to start replacing it as I can. And because I did the brocade bits before this, the serged edges are not the cleanest at all. But the sheer, which was done with the new thread, is much, much better. I'm quite happy that I didn't have to get it repaired again so quickly!


May 8, 2010
Darn you, Pattern Review!
I had my next several sewing projects plotted out--I even made a list at work the other day to figure out a good order to work on things in. I even started on that list yesterday (at least until I had to stop for reasons I will disclose later in this post), and then you just had to go and offer a jeans-making class! Which of course you knew I couldn't resist signing up for, since I've been trying for what, 2 or 3 years now to get a decent pair sewn up? And especially drawing me in with that class outline saying that two of the topics covered would be denim selection (since that was probably the first major problem with the ill-fated jeans of last summer) and adjusting the pattern to avoid things like gapiosis (which is always a problem with my jeans, and the fit of the last pair wasn't so hot overall either).So much for the best-laid plans....but at least I'll (hopefully) get a successful pair out of this!
I also ordered this pattern, which I've heard a lot of good things about both from PR and from sewing bloggers that I follow. I'm hoping it will be nicer to me than this one, which was a resounding failure on me and didn't even make it past the muslin stage. And let's not talk about that self-drafted one that I had to make out of masking tape....it fit better, but was still somewhat disappointing. I guess that's what I get for using "imperfect-but-basically-best-fitting jeans", as I put it. Oh wait, I guess I just talked about it!
 Well, the class doesn't start until the 26th (which is fortunately after I'm done with band for the school year and will therefore have a little extra time!), so I've got a little bit of time. And as I said, I did start on some other projects. Like, for instance, I had an idea awhile ago to turn this sweater into a more summery cardigan. I picked it up at the thrift store earlier this year with the intent to wear it as a winter layering piece, but the open-knit parts of it made it not work quite so well for that purpose, and then I got one I liked much better off of the clearance rack at Kohl's. So my idea was to cut this one up a bit, serge the edges to keep them from unraveling, and piece it back together so I'd have a shorter, waist-defined, short sleeved cardigan that would still preserve that cool zig-zag hem. The kink in the plan is actually my serger, sadly...I don't know if it just didn't like those more open bits when I was trying to go along the edges of the stripes in the chopped-off middle section to use as a waistband, or if something just went really weird in the mechanism, but I had to stop using it because one of the needles is now hitting one of the loopers. I replaced the needle twice (I had to do the first one because it broke), checked the instruction manual, cleaned it, oiled it, tested it again multiple times with just turning the wheel,and it's still making that clicking noise and rather obviously hitting the looper. So I'm not really sure what to do with it at this point, other than take it to the repair shop! :-( So I had to abandon that project for now, as I don't have quite enough serge-edged pieces to start sewing it. But hopefully I'll get this taken care of quickly, as I'd like to have it for my projects again soon!
On a brighter note, I did cut out a pair of summer pajamas today, which I just might be able to get sewn together quickly. Since I can't use the serger right now, I'm thinking I can either zig-zag the fabric edges or just trim them with pinking shears to keep the fabric from unraveling. The latter might be more comfortable, actually, and since they're just pajamas, I can probably be a little more lax on the inside finishing than I've been allowing myself to for awhile now. (And this one was on the planned summer sewing list-- #7, to be exact. I did decide to go with the Jane pajamas, and it's probably a good thing as I had barely enough fabric to do it! Particularly since I'd already lengthened the shorts...)
Oh yeah, and the black skirt is done as of Wednesday night. Or yesterday, I suppose, as that's when I pressed the hem as the last detail. Just haven't taken pics yet.
I also ordered this pattern, which I've heard a lot of good things about both from PR and from sewing bloggers that I follow. I'm hoping it will be nicer to me than this one, which was a resounding failure on me and didn't even make it past the muslin stage. And let's not talk about that self-drafted one that I had to make out of masking tape....it fit better, but was still somewhat disappointing. I guess that's what I get for using "imperfect-but-basically-best-fitting jeans", as I put it. Oh wait, I guess I just talked about it!

On a brighter note, I did cut out a pair of summer pajamas today, which I just might be able to get sewn together quickly. Since I can't use the serger right now, I'm thinking I can either zig-zag the fabric edges or just trim them with pinking shears to keep the fabric from unraveling. The latter might be more comfortable, actually, and since they're just pajamas, I can probably be a little more lax on the inside finishing than I've been allowing myself to for awhile now. (And this one was on the planned summer sewing list-- #7, to be exact. I did decide to go with the Jane pajamas, and it's probably a good thing as I had barely enough fabric to do it! Particularly since I'd already lengthened the shorts...)
Oh yeah, and the black skirt is done as of Wednesday night. Or yesterday, I suppose, as that's when I pressed the hem as the last detail. Just haven't taken pics yet.
February 1, 2009
Mwahaha!
Had a sewing day with my friend Nicole yesterday, so she could use my serger to make a knit dress. And she loves using the serger now. She's going to have to come down again because she didn't finish, but I think I've made a convert.
And I got a pretty significant chunk of the bridesmaid shrugs done yesterday-- did a test and discovered that yes, I can machine-sew the trim! So I'm at 2/3 done for that. And then I just have to assemble and sew in the linings. Guess I'd better get on that... I just want them done so I can sew MY stuff again!
And I got a pretty significant chunk of the bridesmaid shrugs done yesterday-- did a test and discovered that yes, I can machine-sew the trim! So I'm at 2/3 done for that. And then I just have to assemble and sew in the linings. Guess I'd better get on that... I just want them done so I can sew MY stuff again!
November 23, 2008
Taming the Pants Monster, part 5
They FIT!!
It took me all day yesterday, and they're not completely done yet-- I still have to sew on some hooks and eyes, and I'm letting them hang up for now just in case they stretch out a bit on the legs before I hem them, and I have to clean up all the stray threads from the waistband and the markings. But I have pants that fit.
Admittedly, they're a little more snug than I would have wished. They still fit, but if I ever gain weight, they won't. The problem is, the interfacing eliminated every bit of give that the fabric had for the yoke. I couldn't get the yoke onto the pants without a lot of puckering, even though I clipped the seams a lot to try and get it to stretch more. (Thus the stray threads at the waistband.) So I ended up having to take the seams in a bit near the top of the pants, to try and work out some of that excess cloth. Thankfully, I can still get them on (though I have to do the hip shimmy thing to make it work!)
Had a little bit of trouble with the fly front, namely because I ended up sewing it shut when doing the external stitching. I wish I could say it was an accident, but I think it was just a case of not knowing how to construct it. Once I went to put the yoke on, I realized my mistake and (with the help of a pair of RTW pants so I could see what it was supposed to look like) fixed it. But it's not bad for my first fly front since I was a teenager! (Probably better than that one was, actually.) So that gets me one step closer to what is currently my sewing Holy Grail (since I'm in no position to get to make myself a wedding dress) --jeans that fit!
I'm really glad I have a serger now. I know I've had it since February, but since it was a combined birthday/Christmas gift for this year, I'll say it again. Having that was the best thing that could have happened to these pants, because the fabric got so easily frayed and without it, I probably would have had to double-stitch a bunch of seams to try and keep the fabric from pulling apart within a couple wearings. Or French-seam all the straight ones. And then it would have taken twice as long. The pattern instructions actually did call for French-seaming the outer curved edge of the pockets, but I just regular stitched it and then serged the edges instead. Probably not quite the couture thing that the Vogue pattern was going for, but I'm glad I did it, because I'm certain that the pocket seam would have showed through the front of the legs with that excess bulk. It's just that kind of fabric. I'm also thinking that it's a good thing I decided to skip the back welt pockets, because I probably would have rectangles showing through on my backside--not a good thing, when I'm going to be wearing this to conduct a band at their Christmas program and that's what all their parents are going to be seeing!)
No pictures yet, because I don't want to take them before I sew on the hooks and eyes. And, well, I would like to get the hemming done first so they're actually done. Maybe I'll get that done later today. We'll see, because Joy and I are going to be spending the afternoon blueifying Susannah's wedding dress again. And dyeing her shoes. I've never dyed shoes before, so this should be an interesting experience!!
Edit, 11:24 AM: Trying out a new color scheme, because I'm feeling festive. I really wish I was better at this HTML editing... I can't figure out how to change the tag boxes at the bottom of the posts from that clashy blue-grey! And I can't pick a new template, because I can't remember how I got my scrolling sidebars on here. Meh.
It took me all day yesterday, and they're not completely done yet-- I still have to sew on some hooks and eyes, and I'm letting them hang up for now just in case they stretch out a bit on the legs before I hem them, and I have to clean up all the stray threads from the waistband and the markings. But I have pants that fit.
Admittedly, they're a little more snug than I would have wished. They still fit, but if I ever gain weight, they won't. The problem is, the interfacing eliminated every bit of give that the fabric had for the yoke. I couldn't get the yoke onto the pants without a lot of puckering, even though I clipped the seams a lot to try and get it to stretch more. (Thus the stray threads at the waistband.) So I ended up having to take the seams in a bit near the top of the pants, to try and work out some of that excess cloth. Thankfully, I can still get them on (though I have to do the hip shimmy thing to make it work!)
Had a little bit of trouble with the fly front, namely because I ended up sewing it shut when doing the external stitching. I wish I could say it was an accident, but I think it was just a case of not knowing how to construct it. Once I went to put the yoke on, I realized my mistake and (with the help of a pair of RTW pants so I could see what it was supposed to look like) fixed it. But it's not bad for my first fly front since I was a teenager! (Probably better than that one was, actually.) So that gets me one step closer to what is currently my sewing Holy Grail (since I'm in no position to get to make myself a wedding dress) --jeans that fit!
I'm really glad I have a serger now. I know I've had it since February, but since it was a combined birthday/Christmas gift for this year, I'll say it again. Having that was the best thing that could have happened to these pants, because the fabric got so easily frayed and without it, I probably would have had to double-stitch a bunch of seams to try and keep the fabric from pulling apart within a couple wearings. Or French-seam all the straight ones. And then it would have taken twice as long. The pattern instructions actually did call for French-seaming the outer curved edge of the pockets, but I just regular stitched it and then serged the edges instead. Probably not quite the couture thing that the Vogue pattern was going for, but I'm glad I did it, because I'm certain that the pocket seam would have showed through the front of the legs with that excess bulk. It's just that kind of fabric. I'm also thinking that it's a good thing I decided to skip the back welt pockets, because I probably would have rectangles showing through on my backside--not a good thing, when I'm going to be wearing this to conduct a band at their Christmas program and that's what all their parents are going to be seeing!)
No pictures yet, because I don't want to take them before I sew on the hooks and eyes. And, well, I would like to get the hemming done first so they're actually done. Maybe I'll get that done later today. We'll see, because Joy and I are going to be spending the afternoon blueifying Susannah's wedding dress again. And dyeing her shoes. I've never dyed shoes before, so this should be an interesting experience!!
Edit, 11:24 AM: Trying out a new color scheme, because I'm feeling festive. I really wish I was better at this HTML editing... I can't figure out how to change the tag boxes at the bottom of the posts from that clashy blue-grey! And I can't pick a new template, because I can't remember how I got my scrolling sidebars on here. Meh.
July 6, 2008
The Oceanside Dress-Coverup Thingy: An illustrated story
 Once upon a time, there were two and a half T-shirts of identical color that lived in a bin. One day, these T-shirts met a pair of capris that had been banished to the refashion pile because they made the author's legs look as if they were covered in upholstery. The shirts and the capris realized they looked surprisingly good together, and decided to work together to make something that might actually get worn.
 The first of these T-shirts lost its sleeves and neck ribbing, but realized it was making a noble sacrifice to the cause. Even after it got slit down the center front all the way to the nearly-invisible pin. And then got cut off at the waist, and slit up the sides, after this picture was taken.
  The half-T-shirt was the perfect size to cut a hood out of. Fortunately, since it was totally winged, it ended up being the perfect width from front to back to accomodate the neckline.
 The second of the full T-shirts got cut off just under the sleeves to make the skirt. Some leftover pieces were used to make some patch pockets.
 The hood was sewn together first....
 ...and then attached to the rest of the shirt. Then the shirt was happily reunited with its neck ribbing, because it was the perfect amount of stretch to hide the black serger thread.
 The capris leg was the perfect length to cut half the trim for the hood from, and the author was quite happy to find that sergers make sewing stretch wovens onto knit quite painless.
Not wanting the trim on the hood to be lonely, more strips were cut from the leg, this time on the bias so they'd go around the curve of the pocket easier.
 And so, the pocket edges were trimmed, and then the long straight edges were folded under and pressed to make this lovely patch pocket.
 About this time, it was realized that the top and skirt as is would be too short for comfort. To that end, strips were cut from the remaining T-shirts to add to the waist. Four of these strips became ties, while the other two were added to the front and back. However, not being content to leave it plain, reverse appliques were added to the front waistband....
 ...and then cut out.
 The pockets were then added to the skirt. Ties for the back were also made.
 The next step was to sew the waistband and skirt onto the top. After this picture was taken, the ties were basted onto the front waistband, and the side seams were sewn in.
 The sleeves from the first T-shirt went back to its original home, but in a shorter and more fitted condition.
And so, after a small incident involving an inside-out sleeve....
 Ta-da! (Just ignore the blurry background-- I photoshopped it to hide how messy my sewing area is.)
And a few more pics...


The end!
(Also on the agenda today besides fixing my sleeve mistake: made a muslin bodice for my next project.)
June 17, 2008
Adventures in knitwear
 I love having a serger. I have never had such an easy time in assembling anything made out of knit fabric. It's not done yet by any means-- still have to add the zipper, the belt, hem the sleeves and skirt, and, um, probably try to tighten up the waistline a good bit. But this is the dress I've been working on so far.
 I'm really glad I had that serger class before I made this. These were the most painless sleeves I've ever set in. No basting, no gathering, all I had to do was pin it in, start serging, change the differential feed between the dots, and voila!
Two perfectly set-in sleeves with no stretching, no puckering, and no basting stitches to rip out! Which, now that I look at it, you can't really see in this picture. You can, however, see the gorgeous fabric that I got from, where else, Gorgeous Fabrics!
June 15, 2008
new project
Ok, the wedding's over now. Had a good time, the bag worked out well, the jewelry was a hit (people kept commenting about it), totally drained and exhausted, but it was a good day. And now that it's over, I have more time to craft again!
So I started on a dress today-- all I got done was cutting it out, since I had to take the time to trace out some of the pattern pieces first (the fabric that I ended up being a bit short on, so I needed to do a single-layer layout). No pics yet (still have to unload my camera from wedding pics), but hoping to get started on the sewing tomorrow. A knit one, so this will be an adventure in serging.
So I started on a dress today-- all I got done was cutting it out, since I had to take the time to trace out some of the pattern pieces first (the fabric that I ended up being a bit short on, so I needed to do a single-layer layout). No pics yet (still have to unload my camera from wedding pics), but hoping to get started on the sewing tomorrow. A knit one, so this will be an adventure in serging.
May 3, 2008
Class day!
 When I got my serger back in February, the store said that I'd get one free class on basic serger use as part of the package. It took a couple months for them to get their new class schedule out, but I went this afternoon. And let me say, it was totally worth it, if only for the instructor (Loretta, who was so nice!) informing me that the problem I'd been having with loops hanging off the edge was not actually due to the looper tension-- the blade had been cutting too far into the fabric. So she showed me how to readjust that, and it made a huge difference. I also learned several other cool tricks-- clockwise from the top, how to gather fabric (also useful for edge-finishing/easing sleeve caps quickly, she said), rolled hems (no more tiny seam allowances on sheers, hurrah!), curves like necklines (also how to adjust the serger to get knits to lie flat-- I really need to make myself something with knits so I can try it!), and how to do corners, both inside (like for V-necks) and outside (like for doing napkin edges and such).
  And here's a closeup of the rolled hem.
Another fun story from the class-- I was the youngest one there (by several years, for the most part), and I'm wearing my Beatles logo-bling shirt (the logo done in those iron-on gem-type things, metallic silver so it's very reflective. And no, I did not make this one.) So after the class, one of the women asked me if I like the Beatles, I told her I did, and she told me that she'd gotten to meet Paul McCartney and shake his hand (back when Linda was still alive.) So that was neat.
The other thing I did today: made a gift for one of my pregnant friends, who's due to have the baby in a couple of weeks. I'd wanted to make something for her anyway--some women at my church had a baby shower for the girls at my old Bible study who were all pregnant with their second-or-later child (this is my friend's fourth), just so they'd get a little something. I couldn't go, and she's the only one of the four that I'm really friends with (and she still goes to my current one anyway.) So this past Sunday, when my current Bible study had a surprise baby shower for another of the pregnant couples (this is their first), she got this nursing cover that looked kind of like an apron with an overalls buckle that had some stiff plastic in the top so she could look down and check on the baby without potentially flashing people. This particular friend of mine, who was sitting next to me, said she thought that was neat, and she'd have to see if she could find one to buy for herself since she wouldn't have time to make one. (She sews too, but like I said, this is her fourth!) So I told her that I had been planning on making something for the baby girl anyway, so if she wanted me to, I could try to figure one out and that would be her gift. She really liked that idea.
 So this is what I ended up with, as modeled by my curtain rod. I sort of used the tutorial by Made By The Mama Monster that I linked in yesterday's favorites, to get an idea of the size, but then ended up kind of winging it because I wanted it to be bigger and I'd already got fabric to line it with (was afraid the lighter-colored fabric that just looked so much like her style would be a little too see-through for public use, you know?) It was really easy-- basically two rectangles, one about 1.25" taller than the other, that I sewed together on three sides like a pillowcase, then folded the taller side over the lining to make a casing, sewed the strap in along with the casing, inserted the boning, sewed up the other side, topstitched the whole thing, and added the overalls buckle.
And a view of the buckle...
 ...and of the lining. So now I can give it to her tomorrow, and she'll have it for when the baby comes.
 February 18, 2008
The retrotastic iPod cozy, part 2, and....
...an early happy birthday to me. Since I was off the after-school teaching job again for President's Day, my mom and I went shopping. Now that I'm into my simplifying/wanting less stuff kick, there was really only one thing I could think of to ask them for that would be fun and useful. So this year I got....

Ta-da! It's a Baby Lock 450. The price was right around what I was thinking, it has the free arm to make it easier for me to sew things like armholes, according to the in-store demonstration it'll sew both knits and wovens just fine, it does the rolled edges like I was hoping for sheers, I get a year of free service and a free 2-hour class there on how to use it, and it looks like it's a lot easier to thread than my mom's. (Which, by the way, we discovered is actually kind of broken. It's now in the shop.)
 I think the big challenge for me is going to be figuring out how to get the tension just right. So far I've just tried on a basic stitch, and it took me about 30 minutes of adjusting, serging, readjusting, serging, consulting the pictures in the manual, etc. But it looks like this is a good starter stitch. Next step: rethreading it in colors I can actually use on my current project and testing it out on leftover pieces of the brocade-like fabric I'm using on the Kaylee shirt. (Now that I think about it, trying to learn how to use this thing on different fabrics just might eat up my scrap problem. :P )
In other news, here's my finished iPod cozy.

 It was entirely sewn by hand, but I think it turned out pretty good in spite of that. Actually turned out to be a good project for practicing that on. To make it stronger, I actually sewed the binding on both sides. This has two pockets in it-- one for the iPod itself, and one to store my headphones.
Subscribe to:
Posts (Atom)