Showing posts with label geek crafting. Show all posts

September 13, 2015

Rae, a drop of golden sun...

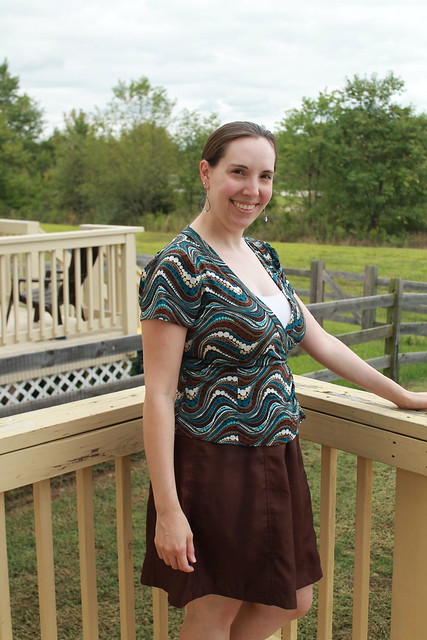
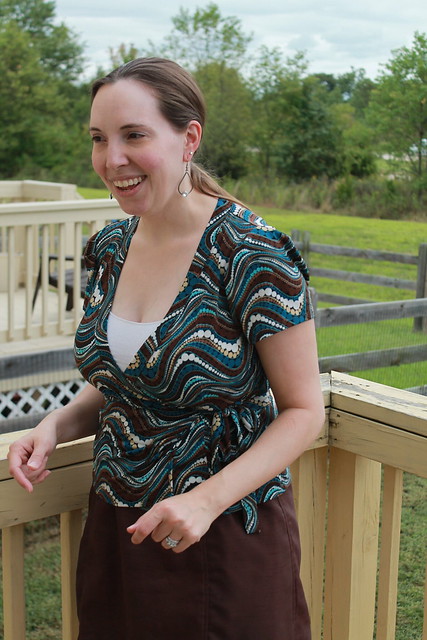
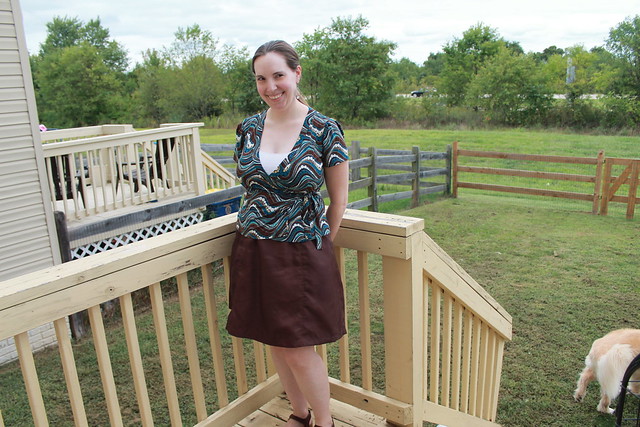
Yeah, I made two more of the Sewaholic Rae skirts, in two very different fabrics. Since I already briefly talked about the construction before, this is more to show how they ended up-- and also my monthly post for Gillian's #betterpicturesproject!

IMG_2736This month's assignment was to find a new spot to take photos, ideally 5 minutes or less from your house. Admittedly, the thought of setting up a tripod somewhere while lugging around Hobbit's car seat (and quite probably listening to him scream the whole time, since the car seat is one of his least favorite things EVER so far) was not very appealing to me. So my big brave move was out to the back yard! I've avoided it so far, because we're in a central townhouse, and pretty much all we ever do with the yard is mow it and let the dogs out to do their business. That, and that tan strip behind the trees just happens to be one of the busiest highways in the state. But the lighting really is better out here than in my sewing room, and Doug was kind enough to take some pictures for me. Which is much easier than running back and forth between me and the tripod. I just may have to reserve my outfit photos for weekends for awhile, that's all.
Recycled Rae 2I also experimented with setting the camera to portrait mode. I think it turned out well, and the bonus was that keeping it on a more automatic setting made it really simple for Doug! So I'll save the more manual settings for when I'm the one behind the lens, I think. (Mastering that really is something I'd like to do sometime, but I think that will be better for trying to get artsy with the kid photos and landscapes while traveling.)

I guess I should say something about the actual sewing, right? This particular skirt is half a refashion. Several years ago, I made a dress for my brother's wedding that was a complete and utter disaster from start to finish. Once the wedding was over, I promptly threw the dress into my refashion bin, along with an extra yard and a half or so of the same fabric that I purchased later, with the intention of turning it into something else. I was originally thinking maybe some kind of longer, fitted, belted vest. But that never came to fruition. I've finally redeemed it with this skirt, though. The fabric itself is a polyester shantung, and I was able to cut half of the skirt out of the original dress. I didn't have the extra piece on my original stash list, since it was out of sight in the bin and I'd honestly forgotten it was there. But I have about 2/3 yard left, so I'm estimating I used half a yard for the other half of the skirt.

recycled RaePardon the slightly derpy face here-- I'm including this one because it's one of the best for showing the skirt detail. I had forgotten how absolutely awful this fabric frays, so I French seamed the whole thing. And since it's polyester, of course it didn't really press all that great, so I also ended up topstitching over all of the seams to give it more of a flat-fell look. Honestly, the effect makes me think of nylon parachutes. But since I'm coming to terms with the fact that my generally casual lifestyle doesn't necessarily fit the shiny fabrics that I often adore, I think it's for the best here, because it definitely helps the skirt look a lot less formal than I originally intended the dress to be.


I can also say that this skirt was for the Monthly Stitch's August theme of twos, since this was my second Rae skirt that month. (I finished it on August 31!)

exploding TARDIS Rae

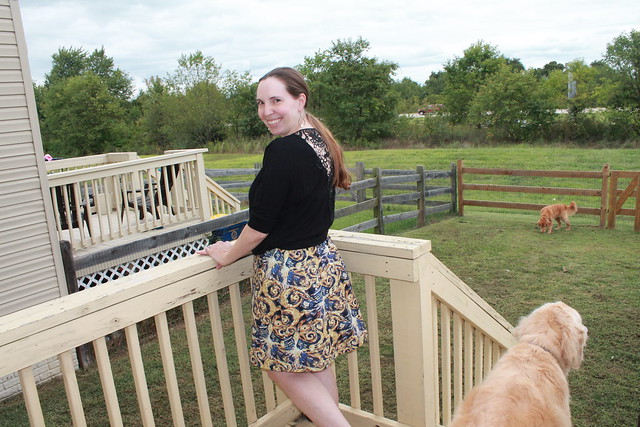
The third skirt sewed up a lot faster, since I made it out of quilt cotton and could just serge all the seam edges to finish it off! I kind of like this artsy black top that I bought for our Paris trip last fall with this particular print, and will definitely use this combo again when it gets its out-of-house debut. (I was waiting until I got pictures, mostly because I didn't want to have to iron it again first.)

exploding TARDIS!


A closer-up view of the print. Why, yes, that is a print designed around Van Gogh's lesser-known "Exploding TARDIS". And this little Whovian is rather psyched that the colors just happen to fall into the realm of the palette that I'm overall attempting to work with for my future wardrobe cultivation. (Especially because yellow/gold is one of the ones I've been meaning to add more of.)

dog photobomb

Finally, even though this is an attempt at better pictures, and I'm fully aware that the flash went off and left a weird shadow behind me, it seemed fitting to continue the tradition of golden retriever photobombing!

August 2, 2015

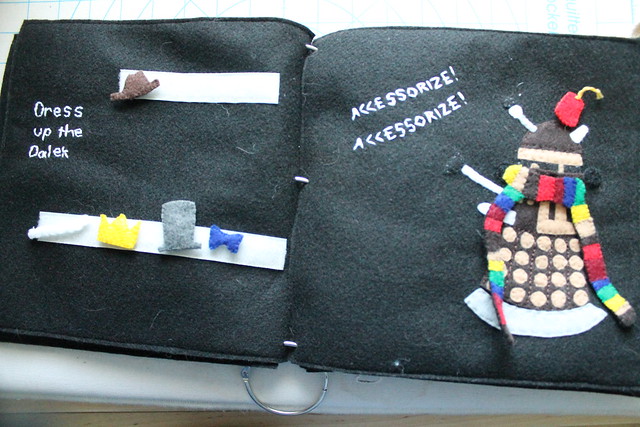
Quiet Book the Second: the Whovian edition

Given how long it took me to assemble the Lord of the Rings book, I'm utterly amazed at how quickly the second book came together! Granted, I had all of the pieces cut out and ready to go, since I cut out everything for both books at the same time. But the pages on the Doctor Who book were smaller and overall simpler, and had a lot less of sewing two layers together to make one piece. So even with my limited ability to use the sewing machine, both due to the small size of a lot of the pieces and the large size of my baby bump, the pages were all sewn/embroidered and ready to assemble into a book in about a month. I think the LotR one took about 4 times as long! So I'm really glad that I did that one first.

Of course, it probably also helped that Hobbit was quite comfortable where he was, and I had about a week and a half of end-stage/past-due pregnancy where I had nothing to do except watch tv, work on the book, and see if I'd actually go into labor or not. I did wait until after he was born to do the final assembly, since my sewing machine was needed. But aside from that, I'm pretty sure the kiddo was waiting until I finished his toy!

Anyway, here is the Doctor Who quiet book. Once again, I did not design this pattern, it was from an Etsy seller named BantamBB-- I'm guessing the designer discontinued his/her shop, because I can't find it on the site anymore.

coverThe cover page, which is pretty self-explanatory.


page 1
The pattern originally called for a piece of plain black felt inside, but that wasn't exciting, since the background is also black. So I raided my mom's quilt scraps, and found this swirly space-looking print. Much more wibbly-wobbly timey-wimey, don't you think?


pages 2-3The accessories for this were a little fiddly. Especially the scarf-- I did glue it all together first, but didn't trust the glue to hold long-term. I was having enough trouble getting it to stay short-term! But the Dalek wears a fez now. (Which can be easily removed and swapped out for another hat.) Fezzes are cool.

Also, I guess these are the WWII Daleks, given the colors.


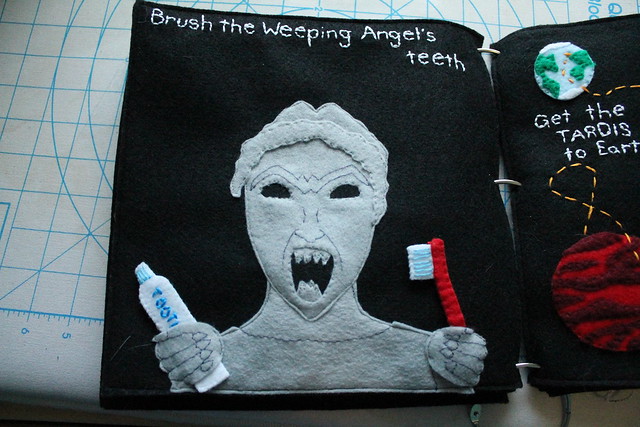
page 4The difficulty with geeky quiet books, which I encountered to a lesser degree, is trying to make some of this stuff a little less creepy for a kid. Which was really hard to do for a Weeping Angel. The toothbrush/toothpaste does make me laugh, though. I'm hoping they aren't too hard to get in and out of the hand "pockets".


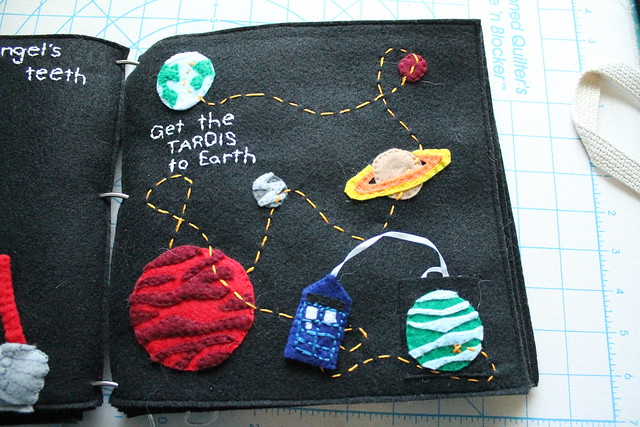
page 5The thing about the pattern for this page that didn't make sense to me was that it was a line to follow to get the TARDIS to Earth, but the pocket that holds the TARDIS was located right underneath Earth! So I moved it to the opposite diagonal corner.


page 6


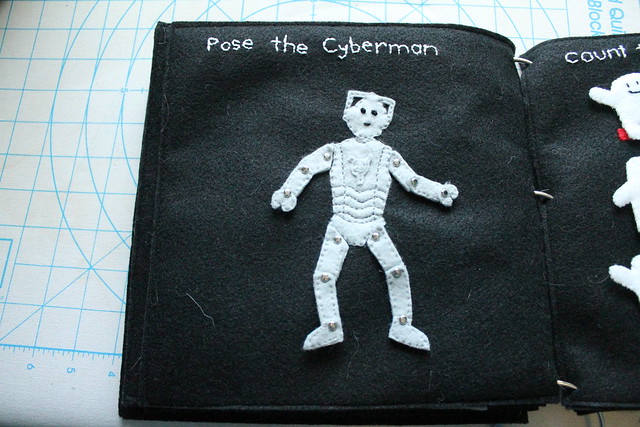
I'm not 100% sure this page is going to function the way it's supposed to, because I was having trouble getting the brads loose enough to actually make the limbs move, yet tight enough to hold it all together. I guess only time will tell. (I really don't mean that as a pun, considering the subject matter of this show.)


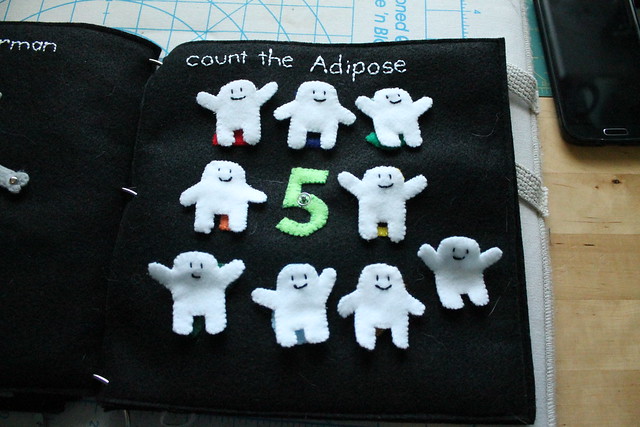
page 7See, it's educational! And the other quiet book didn't have anything for number recognition, so I like that this one does.


page 8

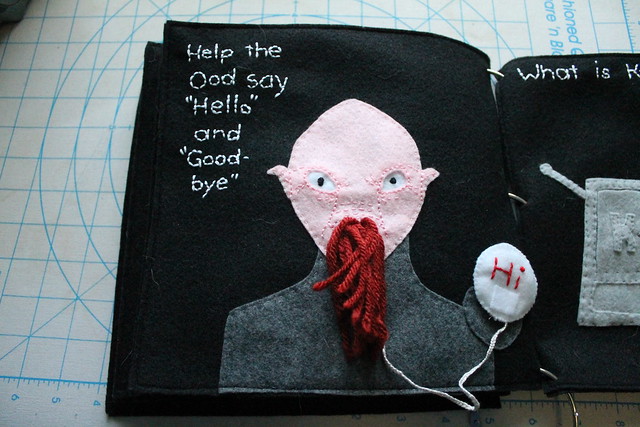
This was another one that I had to try to make a little less creepy. It didn't help that the pattern example had the red-eye version that wants to kill you. So I opted for the less creepy one, since this is supposed to be a friendly Ood. The ball flips over to say "Bye".


page 9


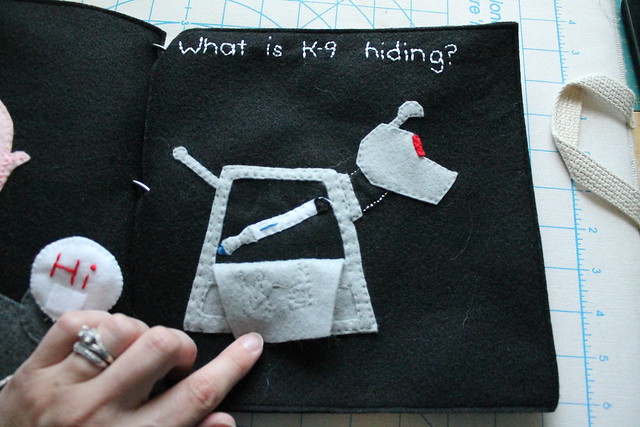
The pattern didn't actually specify what K-9 would be hiding. So I did my best felt approximation of the Tenth Doctor's sonic screwdriver. Because, seriously, a Doctor Who book without a sonic screwdriver would be blasphemy.

So that's it! I'm quite happy to take a break from anything too hand-sewing intensive for awhile, though I'm sure this won't be the last toy I make for Hobbit. In the meantime, I'm reacquainting myself with knitting, since I've found I can somewhat awkwardly hold the needles over him and knit for short bursts during his post-feeding food comas. It's been a refreshing change, after 6 months of hand-stitching tiny bits of felt.

May 12, 2015

The Quiet Book and The Ring

I'll be honest-- I was not expecting this project to take so long. I thought I could easily finish both this and the second felt quiet book that I cut out shortly after Christmas before my due date. With only 4 1/2 weeks to go, I don't think that's going to happen now. But I'm proud of how this turned out. I just really hope that Hobbit will enjoy playing with it, when he's a little older!

So, without further ado, I present the Lord of the Rings quiet book, in all of its thick glory. (Seriously, this thing measures over 3" thick! Though I'm sure it would compact if I put something on top of it.) And I cannot take credit for the design, it's a pattern from the juliebell shop on Etsy. (With a few minor modifications on my part here and there.) One picture-heavy post, coming up!

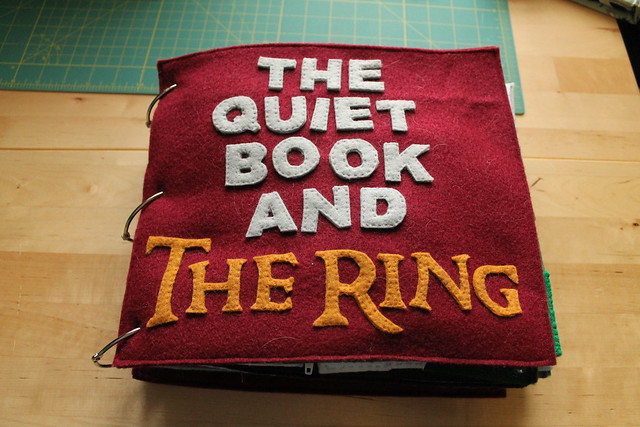
Cover pagePage 1: The front cover. In the original pattern, it called for a brown cover, but I used maroon instead-- I'm justifying it by saying it ties in with the Red Book of Westmarch, from the books. But really, it's that I'm cheap. I couldn't quite find that "copper canyon brown" and I had a bunch of the maroon that I was able to get from my mom for free. (All of the felt in this book was either specially purchased for this project, or mooched off my mom, who wanted to get rid of it anyway in preparation for moving. All of the threads, embroidery floss, and miscellaneous notions, however, were part of my stash.)

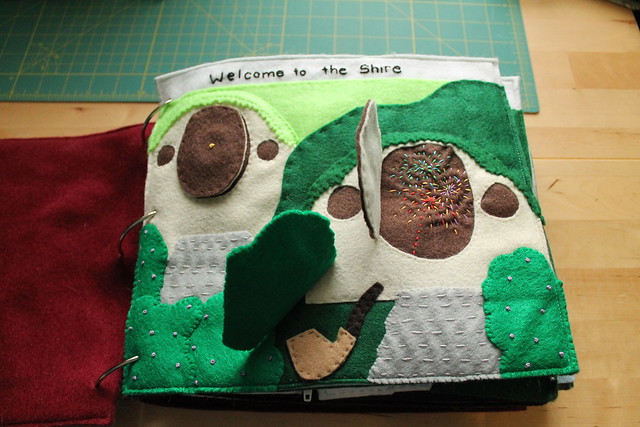
ShirePage 2: The Shire, with some panels you can lift and peek under. I'll admit I thought long and hard about adding the pipe, because I don't want to encourage smoking, especially given that the smell really makes me sick even when I'm not pregnant (and far, far worse when I am, apparently. Truthfully, frequent exposure to that was one of my major incentives to not go back to my old retail job this spring.). But in both the books and the movies, it's kind of unavoidable that there is pipe smoking, especially in hobbit culture, and I couldn't think of anything else to go there. So I left it.

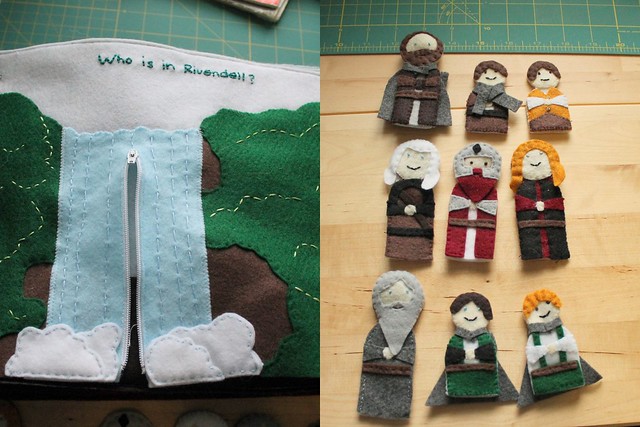
Rivendell pagePage 3: Rivendell, with one of my favorite--and bulkiest--features of the book...the Fellowship of the Finger Puppets! Seriously, how cute is that? I did change up some of the suggested colors for things to coincide a little more closely with the movie costumes, since a lot of the styling seemed to be based on the films anyway.


Gollum PagePage 4: Help Gollum find the Precious. He really is a friendly-looking Gollum here...but hey, this is basically baby's first introduction to my #1 fandom, so why scare him right off? I did end up tweaking the face a bit, because my embroidery floss was so close to the color of the felt that he just looked weird with no nose. All three of the pieces under the water snap on and off, but I only took off the one hiding the Ring for this photo.


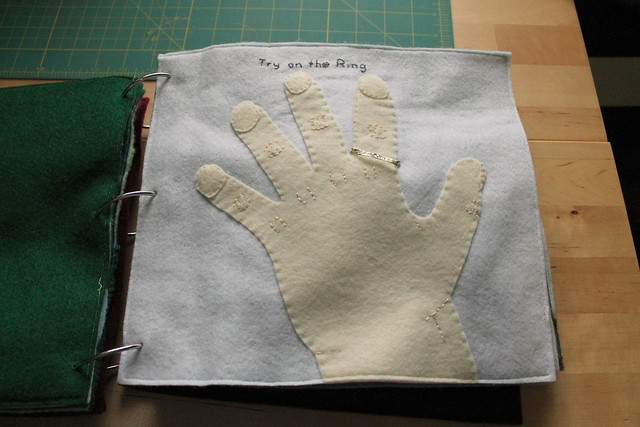
Try on the RingPage 5: Try on the Ring. This was the one I changed up the most. The original page had just an embroidered Ring, and I wasn't sure what the action was here. Lay your hand over it and watch the Ring disappear? If I can't figure it out, there's no way a toddler could. So I used some wired gold ribbon in my stash to make a Ring that you can slip your fingers under. (The hand was also originally facing the other way, but that was just me making a mistake and not wanting to unpick the embroidery.)

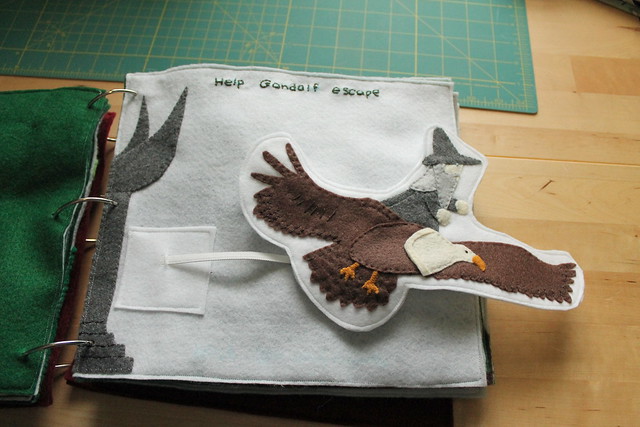
EaglesPage 6: Help Gandalf escape. Technically, this should probably come before the Rivendell page, but this is the order the instructions had it in. And the bulk of the pages meant the eyelets I'd originally planned to use didn't work, and I ended up basically just punching holes with an awl and threading the binder rings through, so they're not the easiest to rearrange. It's just an eagle on elastic, so he can get some distance between him and Orthanc. I also made sure to machine-sew both ends down as securely as possible, in hopes that the boy won't be able to yank it off first try!
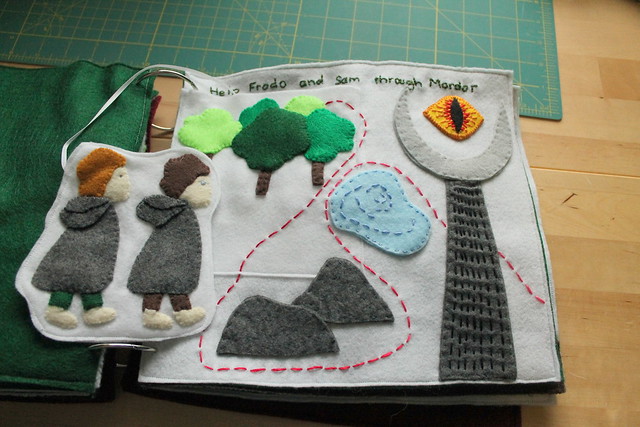
MordorPage 7: Help Frodo and Sam through Mordor. Again, a somewhat less bleak and dreary Mordor, given that there's trees and a pond. (I'm guessing this path leads through Ithilien first.) I'm especially proud of the Eye on here--maybe I spent a little more time embroidering on it than necessary, but it didn't look as fiery and evil as I wanted it to after adding the initial embroidery. So I added more color, and I think it helped.

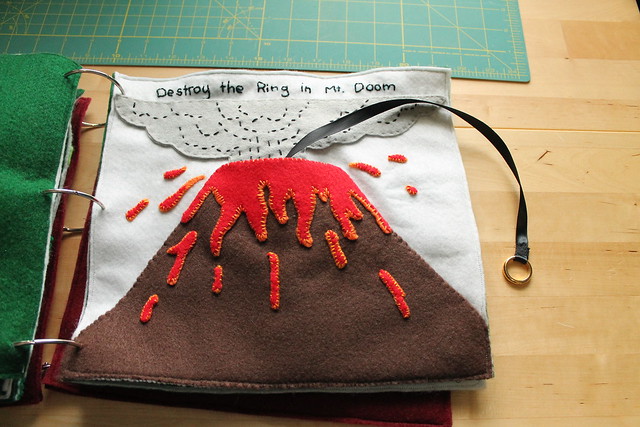
Mt DoomPage 8: Destroy the Ring in Mt. Doom. Again, I was having a little fun with the embroidery on the lava, mostly to make sure the orange showed up well. As for the Ring itself, it actually is a replica of the One Ring-- it fell off of a bookmark I had gotten back when the movies were first out, and I had left it sitting with my jewelry supplies for years. Fortunately, I actually remembered that I had this now that I had the perfect excuse to finally use it--crafty pack rat tendencies for the win! (Again, this is machine stitched on as securely as I possibly could, to try to avoid any choking hazards.)

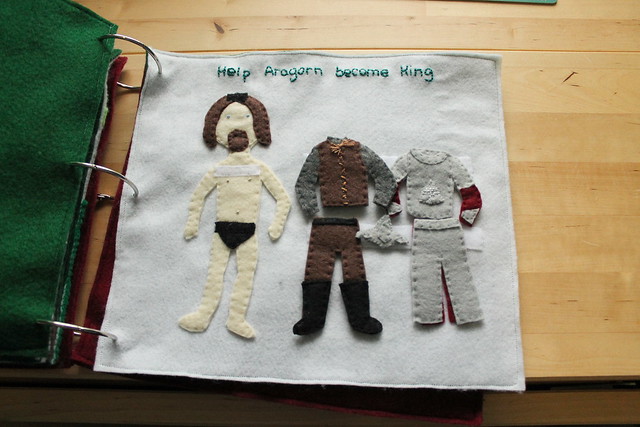
AragornPage 9: Help Aragorn become King. I was working on this one while having a craft day/My Little Pony marathon with some friends recently, and we all had a good laugh over Aragorn in his undies! Again, I slightly altered the embroidery to do a white tree instead of dots on the king outfit, because Gondor demanded it. I know it's hard to see in this picture, but it's there.


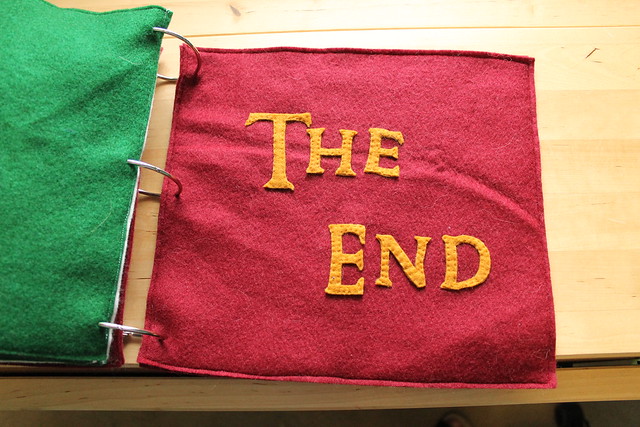
The EndPage 10: The End. Pretty self-explanatory. I wish that E was straighter, but the glue-tacking didn't work so well and it was already falling off by the time I got through sewing on the first two letters. It probably would have worked better if I'd been sewing on a flat surface, but I wasn't, and I was just trying to get it done by this point.

This was definitely a labor of love, and I'm completely amused by it, at least. And even though it took a lot longer this way, I'm not sorry that I took the time to sew everything instead of glue it, because I think it will be much more durable--especially given that on the occasions I did tack things down with glue, it was often peeling off before I even finished sewing the pieces! Even so, I'm thinking I might rely a little more on glue-tacking and especially machine sewing where I can for the Doctor Who one I have cut out next. After all, I'd like to start knitting again sometime this year!


April 27, 2015

Sewing for boys: My Little Jedi


I have a feeling this is going to be a sporadic, ongoing series, at least while Hobbit is in the age range that I can sew things for him without him protesting. Because one of the first things I've learned about being a (future) boy mom who sews is that it's a lot harder than it should be to find cute patterns/good fabric with boys in mind. I'm more hopeful about the patterns than I was initially, since recently finding an Ottobre magazine at the local Barnes & Noble/joining a Facebook group specifically focused on sewing for boys. But the fabric is still tough. Especially if I'm looking for anything that isn't quilt cotton or doesn't cost over $10 for just half a yard. (Which is all the fun prints I've found so far.)


Yoda shirtAll that to say, I made a baby shirt. And it's geeky. Because that's how I roll. (Though, for the record, I think this totally counts as gender-neutral. After all, girls like Star Wars, too!)

My fabric stash is going to be challenging to shop for boy clothes, because frankly, I don't have a lot of stuff that suits--if the color is right, the fabric is usually wrong (too delicate/drapey/etc) and so on. So I was quite pleased that I was able to construct this shirt completely from my scraps! The black is leftover bamboo-blend rayon pieces from the maxi-dress I recently made, and the cream is some leftover scraps from a knit top I made years ago. I guess I'd been thinking they were large enough scraps that I could use them to attempt to make undies or something, and that's why I still had them? But both pieces are very soft, which are perfect for baby wear. And since I used the same multi-piece pattern that I used for those hockey pants, this shirt was essentially free! I'm happy that I finished it within the SHB Sewalong timeframe, too.

Stencil closeupAs for the stencil, I remembered that I have a scrapbook cutting tool that will use any True Type font that I have on my computer to cut shapes. (Why didn't I remember this when I was making those bibs last fall? Oh well...cutting those stencils was one of the only crafty things I was feeling up to at the time, anyway.) So I used that and some freezer paper to cut this Yoda quote out of a Star Wars-looking font. It worked pretty brilliantly, other than my evil, possessed ex-iron deciding to spew water all over the stencil when I ironed it on. The result was a little bleeding here and there where the fabric was still damp when I started working. It ended up being for the best, though-- I used some other paint in my stash to outline the letters in yellow to help cover the messy bits up, and ended up liking it so much better with the pop of color than I did when it was plain black! I can still sort of see the parts where it had bled, especially around that comma, but it looks a lot better than it did.

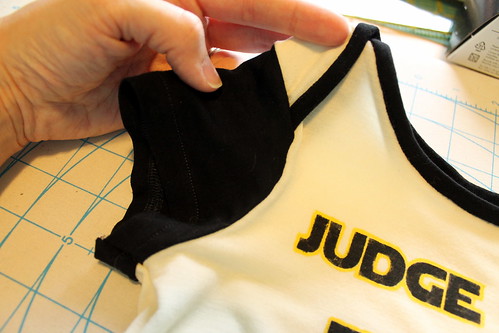
Neckline detailThe one major change that I made to this pattern was the shoulder edging. The original instructions called for turning those little curved edges under and hemming them. That seemed rather fiddly to me, and like I'd just be setting myself up for rippling and frustration--especially given the state of my iron. So I cut an extra 1/4" off each edge instead, cut some bias strips out of the black knit, and treated it more like a binding. So much easier, even with trying to stitch in the ditch around tiny curves to get the underside to stay in place, and I like the contrast better than I think I would have liked the plain cream.

I made this in the medium size, which looks like it corresponds roughly to somewhere in the 6-12 month range. Baby clothes sizing still baffles me, to be honest. I've actually resorted to hanging the onesies that I currently have in the closet by length, because they're all supposed to be the same size, but they don't look it at all! So I figured that if I go by length, I might be able to make faster guesses at what might fit him vs. not. Anyway, the point of all that is that I'm hoping this means he'll still fit into this shirt next May 4th. Yes, I already made him a shirt for his first Star Wars Day. I already have his first Halloween costume plotted out, too. What's your point?

On a side note, I've also learned that it's almost impossible to find boy clothes with a sports theme that actually reference hockey. At least in the US--it's all baseball and football and occasionally basketball. Since Doug only cares about hockey and especially dislikes baseball, we've actually been passing the sportsy hand-me-down clothes we've been given to a good friend of mine who's due to have a boy about 6 weeks after me--clothes are all she's needed, since she already has a young daughter, and her husband is a lot more into sports in general. Also, now that Doug knows I have a machine that will let us make custom stencils, he requested that I help him decorate one of the plainer onesies that we've had passed on to us. The result?

https://igcdn-photos-e-a.akamaihd.net/hphotos-ak-xfa1/t51.2885-15/11085068_1558879861044348_2079045648_n.jpgAccording to him, this font is one that gets used on some professional hockey gear. I did the machine set-up/ironing, he stenciled the black, and then I outlined it with the gold again so it would be closer to Pittsburgh Penguins colors. He had a lot of fun showing this one off to various local friends--we live in Flyers country, of course, and he likes trash-talking them--and I have a feeling he'll want me to make more hockey-themed clothes in the future!

(Completely unrelated side note: Blogger is telling me this is my 900th post on here--crazy!)

December 23, 2014

geek in training

It's no secret that I like my geeky sewing projects, right? I mean, look what I spent half the year sewing for. So I was pretty excited when The Monthly Stitch announced that this month's theme was going to be sewing all things fandom-related...

Except, you know, that whole pregnancy thing I've got going on means that my usual tactic of secret costumes is currently out. Plus I just did Disney, and I don't really have anything else in my stash right now that would make good geeky maternity clothes. Unless I wanted to do a Starship Enterprise-esque maternity top, and I've just never really been that into Star Trek.

Ok, I'll admit that copying this shirt was really tempting. But I didn't.

So I made stuff for Hobbit instead. I'm not messing with clothes yet since we don't know if we're having a boy or a girl, but you always need bibs, right? This is the same pattern as every other bib I've ever posted on here. And these first four aren't even all that original, since I made a set for a friend years ago. But I did do a few things differently this time.

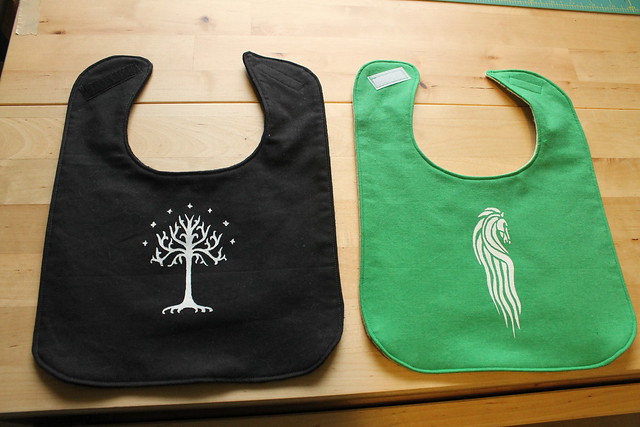
Rohan/Gondor bibs
Hobbit bibsSince Lord of the Rings is my all-time top geeky love, of course I had to start with that. So I did a White Tree for Gondor and a horse for Rohan. Instead of the DIY screenprinting I did last time, I tried out the freezer paper stencil method. (Mostly because my screenprints kind of cracked in storage and are now useless.) And ohmygosh, even though cutting out all those little bits was kind of tedious, this worked SO much better than the screenprint! I think the lines came out much cleaner, too.


I also re-made the two hobbit-themed bibs I did last time, except I also did the stencil for this instead of what I had to resort to with the previous set, which was re-painting the letters with a tiny paintbrush because the stamps didn't work. Since I'm calling the kiddo "Hobbit" anyway, it fits, right?


Space bibs
I also did a couple sci-fi type ones, though these were much easier thanks to the fabric. The TARDIS one is leftover fabric from my Cooper bag lining, and the Star Wars one is pieced together from the leftovers of the bibs I made for my friend Julie a couple of years ago. Yay, scrapbusting! Though I had to steal some fabric from my mom's quilt stash to finish this one off.

I will admit that I also printed a Firefly-related stencil, but then opted not to actually cut and paint that one yet. Because since it said "I aim to misbehave", I figured that would be better for a t-shirt when Hobbit is mobile. Or a toddler. Probably the latter. I know these probably read as "boy" colors for the most part, but I figure girls can like blue and Star Wars and Doctor Who too! I do!

Aside from the Star Wars bib, which has more of the darker blue print fabric on the back, the rest are backed with flannel like I usually do. I also inserted another layer this time, because my mom suggested that it might help keep stuff from soaking through the two layers of cotton too quickly. So I have a layer of polyurethane laminate inside each of these. 

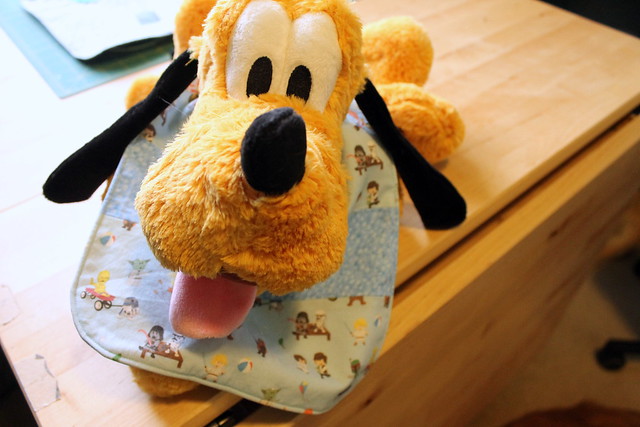
PlutoGoing a little different for the canine photobomb today. I've been trying not to go crazy buying toys and stuff--ok, I've also been having to talk Doug out of a lot of these--but we couldn't resist this stuffed Pluto that we found on Friday because it was on sale and it's soooo soft. I finished the Star Wars bib first, and Doug put it on Pluto and has left it on ever since. I told him I needed it back for these photos, and he said that was fine as long as I left the bib on Pluto. So I'm doing this one for you, Doug!


I will be making a few more bibs, because I promised Doug I'd also do some hockey-related ones. My mom's also made a bunch already, too, so I should be very well-stocked on these!

December 17, 2014

2014's top 5, part 3: Reflections and Goals

Top 5 2014 #sewingtop5 

Finishing up my series today, with what I've learned this year and what I'd like to accomplish next year.

Reflections: 
1. I am not the fastest of makers. This is especially true when it comes to knitting, but it's true for sewing as well. I looked back at last year's reflections, and this was actually the first thing on my list then, too! I think the difference this year is that I'm more ok with it. Looking at my top 5 makes for this year, aside from the Tiramisu dress, everything on there was projects that required more thought and detail-- welt pockets, underlinings, linings, bound seams, etc. But they ended up fitting really well and getting a lot of use. Yes, I know two of them are coats, but still.

2. That being said, I've also learned that I really like having a quick "palate-cleanser" project between the more detailed stuff. Usually some kind of knit project.

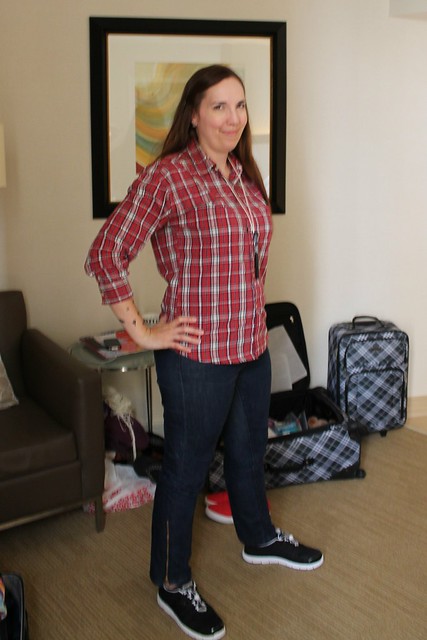
me as Amy Pond3. I feel like I've kind of rediscovered how much fun refashioning clothes can be this year. I didn't really do any last year, but I've definitely picked up on that more this year. I've ended up wearing these zipper leg jeans quite a bit, as well as my Amy Pond shirt. (Generally minus the tally marks, though.) I've definitely been doing more of that lately, since I'm literally running out of things to wear! So I've been maternifying unwanted pants. Since one pair I'd had since college wasn't fitting so great anymore anyway, and the others were pants that my mom was getting rid of, it's been gratifying to be able to get some much-needed maternity pants into my wardrobe for just the cost of a half-yard of black knit.

4. The Wardrobe Architect project was really an invaluable process for me to go through. Even though I was trying to buy less fabric overall anyway, and I'm pretty sure I succeeded, I feel like what I bought will mostly fit in well with my existing wardrobe. It's also easier to weed out some of the new patterns now, since I have a better idea of what I actually like the look of on me. Of course, this is all subject to change now, since I also have no idea what sort of a waistline I'll have when this whole pregnancy thing is over!

5. I've actually developed some self-control on adding to the stashes. Though I sort of fell off the wagon at actually tracking pieces of stash used up before buying more, as stated in my Stash Diet pledge, I did a good job of sticking to my plan! Aside from pieces of fabric that my mom gave me because she didn't want them, almost everything I bought this entire year fell into one of three categories: a) Fabric I bought on vacation, b) Fabric I bought because I needed it for a specific project and I literally did not have anything else that would work (i.e. Thinsulate for my coat, yellow knit for the minion costume, etc) c) Stuff I would categorize as the "extenuating life circumstances" exception--mainly buying a few pieces specifically to make things for the baby, or the 3 things I've bought specifically for maternity clothes. I also didn't buy much yarn at all this year--I think the one skein I bought in Paris may have been it--and I didn't really buy many new patterns this year, either. Maybe 6 total, and 3 of those were ones I won in a Pattern Review drawing because my Robson coat randomly got picked when they were highlighting Sewaholic. So yay me?

Maybe not. I just looked at the numbers, and I actually added 10 more yards to the fabric stash than I started with at the beginning of the year! But it does look like I used about 70 yards overall this year, and I'm already in the process of using up those baby-related fabrics. So not too bad.

Goals:
If you had asked me this three months ago, I probably would have said "learn to make bras and/or undies". I don't think that's going to be happening this year, lol! Especially the former. So here's what I think will be the best things for me to focus on for 2015...

1. Finish a capsule wardrobe that will get me through the first half of the year. I've quietly been working on this anyway, between my most recent makes and things I've bought. I'm attempting to use the Wardrobe Architect principles for this, and I do have a definite palette emerging. But I definitely need more clothes, since I didn't have too many things in my wardrobe already to get me started. That's definitely a downside to favoring styles that are more fitted at the waist! So once I sort out what I need to survive/see if I get any fabric for Christmas (a safe bet, knowing my mom), I'm going to see if I can sort out a decent plan of attack.

2. On a related note, I need to work on my pattern hacking skills. I've noticed that there really aren't that many good maternity-specific patterns out there. I have managed to acquire Megan Nielsen's wrap top pattern, also this pattern that can double as a maternity and a nursing top. The latter sounds like a really good use of my precious sewing time. But aside from that, I really haven't found anything that looks interesting to me, so I guess I'll have to create my own. I've got my Renfrew hack to keep tweaking, and I did pull out several other patterns from my stash that looks like they might be useable for this purpose. If I can figure out how to do a couple of other things that will be good for both pregnancy and nursing, great.

3. Get as much sewing for "Hobbit" (what I've been calling the baby while we don't know the gender) done as possible, before June. Obviously, though I may sew a few outfits, I'm not going to make every little piece of clothing. They'll get too small too fast. But I will need to do some things like curtains for the nursery, and I have some bibs that I'm already working on (which will hopefully be done by the end of December, since I'm using them for The Monthly Stitch's current theme). I have a piece of printed suedecloth that has stumped me for a couple of years on what to use it for, but I think it would make an excellent gender-neutral diaper bag. And my mom and I are planning on working together over the winter to make cloth diapers. I know it'll be a lot of laundry, but it's cheaper to make cloth diapers than buy them, and it'll definitely be cheaper in the long run than buying all disposables. More money saved means more money to spend on fabric, right? I still need to get most of the supplies for that, but I did get some of the waterproof outer fabric already. Because there was one yard left on the website and it has TARDISes on it. Seriously. I couldn't pass it up.

4. Since basically everything I'm going to be able to sew for myself for awhile is knits anyway, I might as well work on things like finishing techniques and getting my serger tension right. Right?

5. I think probably the biggest goal for after Hobbit comes will be finding time to make things. I know it'll be a challenge, and probably impossible for at least the first month while I'm a sleep-deprived zombie cow. (Not the best time to work on a hobby that involves sharp cutting/pinning implements, I'm guessing.) And I do also need to prioritize music time, since I do plan to continue teaching lessons. I've been following Cindy's blog with a lot of interest lately, given that she recently had a baby herself, and I think what jumped out at me the most is the idea of doing one thing a day that lasts, since so much of caring for a newborn is laundry and feeding and changing over and over again. Practicing music can also feel repetitive and like it's never done, since you spend so much time working on the same passage or the same piece for days or weeks in a row. So hopefully I can find a way to make that happen. Even if it's just sewing one seam, or knitting one row, or sticking just one picture in a photo pocket. I guess it's a good thing I've gotten more ok with being slow, right?

September 5, 2014

a traveling companion bag

Last bit of Dragon-Con related sewing, I promise!

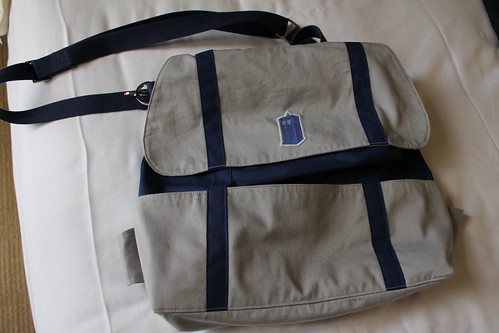
IMG_1575The one thing I finished up just before the Con that I didn't say much about earlier was a new bag--I wanted something that I could use for both day trips and airplanes, and this one worked out beautifully. This is the Cooper bag from Colette Patterns, and I pretty much mashed together the messenger bag and backpack versions. My original thought was to make the backpack straps so they could zip into the back, but at the end of the day, it was far more simple to just make a removable messenger bag strap, so that's what I did.

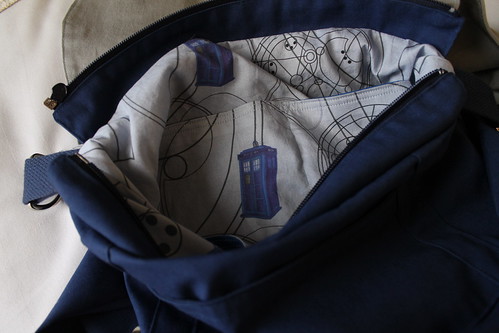
IMG_1578Under normal circumstances, I probably would have passed on solid grey and navy. But my planning revolved largely around this Spoonflower print of TARDIS (Tardises? Tardii? How do you even pluralize that, Whovians?) and Gallifreyan writing that Doug gave me last Christmas. Since it was the quilting cotton, I figured it would be best utilized as a bag lining. As for the outside, it's leftover grey twill from my Thurlow pants, and some stiff poplin-esque fabric that my mom destashed on me. I didn't manage to completely use up any of these fabrics, which particularly surprises me with the grey since it was already leftovers, but it's a start.

And yeah, I stuck a TARDIS on the outside. Because I could. And also because since I have this habit of taking a little plastic TARDIS with me on trips and sticking it in random places, I figured it was fitting. 

The one non-pattern addition I made was the separating zipper--I figured if I was planning to carry this around for day trips and such, I'd feel more comfortable if I had more than a flap and a couple of magnetic snaps standing between me and potential pickpockets. My mom, who is quite experienced at making bags, was kind enough to sew this one along with me and help me figure out the best way to do the zipper, since she added one to hers as well.

IMG_1576And here's the back! The only thing that somewhat annoys me about this bag is that the straps tend to flop out past the sides when I'm carrying this messenger-style, but it's not annoying enough to undo the straps and try to come up with something different. I was also pleased to learn when carrying it around this past weekend that the webbing straps were surprisingly comfortable, though I'm not sure they would have been if I'd been wearing anything sleeveless.

All in all, I think this bag will be quite useful, and now that I know how it works, I'd definitely use the pattern again. Maybe Doug will actually let me sew one for him sometime?

August 12, 2014

Extermi-knitting

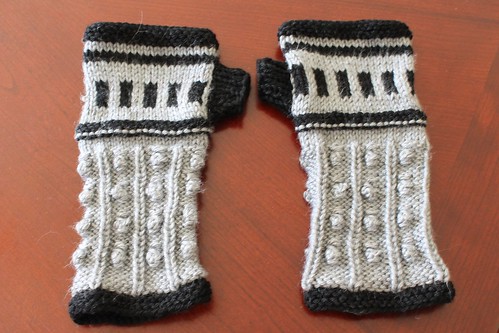
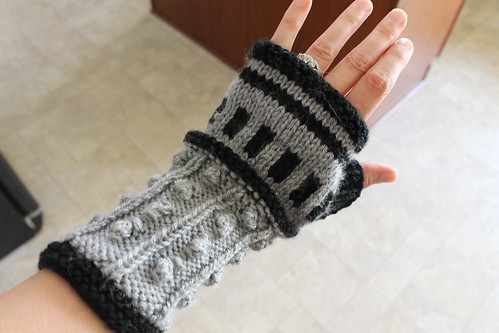
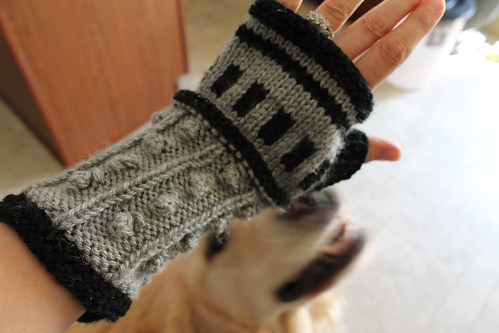
IMG_1517So I finished a knitting project. Despite all of the crafty geekery that's been going on around here lately, these handwarmers are not for DragonCon! They were a birthday gift for my sister-in-law, who is also very much into all things Doctor Who. (Happy birthday, Julia!)

The pattern is "The Oncoming Storm" by Laura Isaacs. She gives options for knitting in the round and flat, and I chose to do the flat version since this already had a couple of things going on that were new or fairly new to me-- I haven't done that much knitting with multiple colors of yarn, and I'd never had to pick up stitches for a thumb before. So for the latter in particular, I figured it would be simpler to just leave a hole when sewing it up instead of lots of binding off for a thumb hole or whatever.

IMG_1520The black yarn was leftover from Doug's hat, and I'd actually purchased the grey yarn for this (Caron's Simply Soft) about 2 years ago, because I've been meaning to make these for her for that long. But, time being the wibbly-wobbly thing it is, it got away from me a bit and I just never seemed to be able to get them started. So I started knitting these back in January, because I figured if I did that, surely I could finish them by August! I probably would have finished them a lot faster, if I hadn't been doing things like taking Craftsy knitting classes with my mom, working on that never-ending cardigan, and having my usual springtime work-induced carpal tunnel flareups. So it was very stop and start. But I did finish these around the end of July, save a quick wash and light blocking that I had to do last week. I don't think the blocking made much of a difference in the stitches since it was all acrylic yarn, but one of the silly dogs likes to carry things around in his mouth, so he's perpetually stealing things like any sock he can get his paws on, and my pajamas. And apparently, one handwarmer, because I was dumb enough to leave my knitting bag on the sewing room floor. You just can't give family members gifts that are coated in dog slobber, you know?

IMG_1519Aside from having to figure out the picking up stitches thing, they went together pretty easily, and I'm feeling a little more comfortable with switching between colors now. I do still have a pretty good chunk of that grey skein left over, and a little of the black, but I figure I can always use that to make Doug another hat or something. Hopefully it won't take me another two years to get to that.

I didn't manage to get a picture of both mitts on, because Doug was working on a messy house-related project outside at the time and I didn't want to interrupt. But I can leave you with a canine photobomb shot!


December 23, 2013

Top 5's of 2013, part 3: Hits and Misses

Time to look back at what I actually made this year! Let's start with the hits, shall we?

Top 5 Hits of 2013: 
Wedding dress front 1. My wedding dress, aka the "One Dress To Rule Them All"! Yes, I only wore it once, but this was easily the most time-consuming and expensive thing I've ever sewn, so I have to include it, right? Plus, I never showed a really good full shot of the finished product, so here's my excuse to share some of the professional pics. Don't worry, they gave me the copyright as part of the photo package! We did get a couple of outdoor shots, but the lighting on the ones inside the church actually shows off the details of the dress better, so I went with those.

At Gillian's request, I'm including a mini top 5 of things I learned or loved about making my wedding dress.

a) I loved working with the fabrics! It's not every day that I can justify using a whole bunch of different silks, so this was both a lot of fun and a very big learning experience.

b) I learned and/or developed skills in a lot of different couture techniques. I'd worked with underlining before, for instance, but this had underlining, sometimes multiple layers of underlining, boning (and not the cheap plastic kind ,either!), regular lining, the works! So I think my handstitching improved quite a bit in this process!

Wedding dress backc) I love that I was able to design an entire dress around that sunflower lace, since the only two things I'd wanted for my future wedding for ages was having sunflowers, and making my dress! So I got to combine them! I also love that my pattern modifications to the Cambie top worked so well for really showing it off. (Now I just need to figure out what to do with the rest of it, because I have probably at least 3 yards left! Any ideas?)

d) I learned that sometimes muslins, or even multiple muslins, are a necessary evil. I'm really glad I allowed myself the time to do that. My usual attitude towards them is to try to make them as wearable as possible, or just skip them altogether, because I have so little sewing time and "ain't nobody got time for that." But I'm glad I really took the time to perfect the fit before I started--especially since I was just barely able to squeak out the skirt with the yardage I had estimated! Plus, now whenever I do get around to making a "real" Cambie, I have it all modified and ready to go. Assuming I can find those muslin pieces. Gah.

(Disclaimer: I'm still probably going to stick more with wearable muslins for most things, because I still mostly don't want to take the time for that.)

e) I love that being able to sew helped me keep the costs down significantly! All together, I think the supplies ended up costing about $500. I think the most expensive fabric I got was the dupioni for the outside, at around $16 a yard. Given that I have a hard time paying more than $12 a yard for most fabrics, that's a LOT. But at the average bridal shop around here, that would get you a pretty low-end polyester dress. Mine was silk, custom-fitted, and I didn't have to deal with sorting through all of the trains and strapless bodices to find something I was ok with!

And now, on with the rest of the hits...

Thurlow trousers2. The Thurlow trousers. I'm quite happy with the fit, they're very comfortable, and I've worn them at least once a week since I finished them. In fact, I've washed and worn them so much that the fabric is already starting to pill on the thighs a bit! Not a huge loss, since this was only ever intended to be a wearable muslin, and the fabric was free, but that means I may have to make a new brown pair sooner than I thought. (After I finish the other 4 pairs that I actually bought fabric for.)

TARDIS-inspired skirt 


3. The TARDIS Hummingbird-esque skirt. Subtle geekiness for the win! This got a lot of love on Flickr (by my standards, which is pretty much anyone commenting at all), and I'm always happy when my pattern alterations turn out as I envision them. Plus, since it's basically a denim skirt, I have a feeling this is going to be a rather versatile addition to my wardrobe!


Plaid matching4. My plaid flannel shirt. Even though I'm still not a huge fan of the collar, it's warm and cozy, which is exactly what I need in my life right now. I'm also still feeling a bit smug about how many sewalongs I was able to apply this to! (And now I'm wondering if it's a crime against fashion to wear flannel shirts that aren't plaid, because I want a lot more flannel in my life!)


purple tank front
5. The purple Sadie tank top, which has proved to be quite versatile, even though it's not the most exciting thing I sewed this year. (Aaaaahhhh, look how sunny and warm it is there! Much nicer than looking out the window--it's actually pretty unseasonably warm here today, but it's also grey and rainy, which is why I'm home to finish this post. Work is soooooo sloooooow on rainy days that the manager told me to stay home!)

Thankfully, since I didn't have a huge output this year, I don't feel like I really had a lot of misses as far as my actual finished projects went. So I'm taking a slightly more tongue-in-cheek approach to this.

Top 5 misses of 2013:
Pavlova cardi
1. The one true sewing fail I had this year was my Pavlova cardigan--the one that tore apart in the washer before I even had a chance to take a photo of me wearing it. I hardly even got a chance to wear it, either. Despite my usual cold-blooded ways, I was sufficiently comfortable both indoors and out to not wear it at all while I was in Jamaica, so I only wore it on the plane there and back. If I were to be honest, it didn't turn out as cute and flattering as I'd hoped, either. I still plan to make a Pavlova top again, but maybe more of a wrap top as intended. Or with knit fabric so it drapes better.

2. My timing in finishing my Tiramisu dress. It's not the dress itself, because I do like it. And if I'd made it earlier in the fall or even the summer, I think it would have been worn a lot more. But I only wore it once, because it got too cold almost as soon as I'd finished it! I'm definitely not one of those people who can go short-sleeved in the cold. I wonder how it would look with my brown corduroy jacket--too much brown in the middle?

3. Online fabric shopping. This wasn't a 100% fail. I did manage to find the right shade of nude organza for the wedding dress. I do like the rayon challises that I picked up for a couple of dresses that I didn't get to this year. And I recently got some organic cotton knit that is super-soft and I think it will make a great basic black maxidress next year! But I did have multiple issues here, from trying to find a solid emerald green to make wedding accessories (color of the year, huh?!), to the paisley I'd intended for a Darling Ranges dress that looked quite different when it arrived, to the stretch denim I recently ordered that looked like teal, but showed up more of a robin's egg blue and a lot thinner than I'd anticipated! And, of course, I also recently had issues in buying both fabric and yarn online, because in both cases, the website said they had more in stock than they actually had by the time they got to processing my orders. Both times, I had to make substitutions for things that cost more money. Aside from higher cost, the most annoying thing in both cases was that they were things I'd spent hours searching for in order to avoid wool! Blasted allergy...anyway. Hopefully I'll have more hits on that count next year, since I can't necessarily rely on Joann's to have what I need or want.

My pattern/fabric combo4. Pantsapalooza. It's not that I regret doing it, though I think I really could/should have managed the sewalong aspect of it much, much better. I guess since it was my first time hosting one, it's a learning experience, right? And I did get usable trousers, but only one pair out of my intended five. So that's not a palooza, that's just pants! (Guess what I'm most likely sewing first in January...)

5. Buying vs. using. Yes, a few of these were projects I intended to get to quickly--my Darling Ranges dress that I actually bought fabric for twice (see #3 above), or the Reglisse dress that I found the perfect print for almost right away, for instance. And then the summer just disappeared. A few of these I actually did get to right away--I'm thinking specifically of the Hummingbird pattern, since I actually managed to jump in on the official sewalong and use up some stash to boot! And I did buy and use the plaid flannel in a timely fashion, which is unusual for me. But overall, I think I acquired a lot more fabrics and patterns this year than I have in recent years past, and didn't necessarily use things up in a way to balance that out. (And it's not even Christmas yet, and I can usually expect to get fabric for Christmas from my mom, too!) My husband and I are planning to really crack down on the budget come January so we can pay off some debt and save for some things we're hoping to do, so this is something I really need to get under control again, and focus more on using what I have and being creative with it. (Incidentally, I loved the idea of the Sewcial Bee that I did last year, since it forced me to jump on fabric and patterns that were already in the stash! I hear rumors that there's going to be more next year, and I hope that's true!)

I did also lose track of yardage in vs. out this year, which is something I've been trying to keep track of. If I do succeed in my plan to get the room straightened up to start the new year, I do plan to re-tally everything that has significant yardage (like a yard or more) so I can start keeping tabs on that again.

Honorable mention: My #greendecember project. I got it cut out, then got caught up in a secret sewing frenzy, so that's as far as it got. But it only gets honorable mention, because it's another Renfrew top, which means there is a chance I can still actually get it sewed up before January 1!

November 28, 2013

Come along (to the grunge show), Pond

I had been planning on making a plaid flannel shirt for the Doctor Who Sewalong from the earliest days of my planning. After all, when I think of Amy Pond, her Impossible Astronaut/Day of the Moon outfit is the one that immediately jumps to mind.

https://blogger.googleusercontent.com/img/b/R29vZ2xl/AVvXsEj-GlROkPRh5NA2lUkWiomVv6ZuizO5-EsHzMnV2f-iAytkDGic0HnNu1ssYbpc6uXwOMx3PlDFC6PWHUMQUG_7DjwPpzzzdsvae_olSt2uIbZmYxwW7xQ4pKsmLS8rPNP1QaX90A/s1600/ImpossibleAstronaut_04.jpg

(Though, with the right white button down, I could definitely wear River's outfit, too. Minus the gun holster. And let's face it, my hair is definitely more like Amy's!)

For once in my life, the timing on this project was quite serendipitous, because it enabled me to participate in three sewalongs with one project! It would have been four, but I just couldn't quite get this done in time for the official dates of the Fall Essentials Sewalong. I can, however, claim this shirt for both the Grunge Sewalong and the Flannel Shirt Sewalong that Kelly is hosting!

What's with the silence?My initial thought was to find a plaid as similar to Amy's shirt as possible, but then I remembered that I hardly ever wear red. And I already have this shirt. And I also found that lovely blue plaid that I showed in its half-done state in the last post, and figured that would mix in with my wardrobe much better.

I'm quite pleased overall with how it turned out. I can wear it with the sleeves rolled up like Amy's, with some skinny jeans and boots...


Wait, what was I doing again?

Oh, right, project details. I'll get to those after the fashion show.


Grunge styleOr I can wear it with the sleeves rolled down for warmth, which is how I'll be rocking it today, since it's still stupid cold out there. Going grunge-style here and wearing it over a t-shirt, which is how I was most likely to wear a flannel in the 90s. I guess my musical experience was more "grunge-lite" than anything else--I was still a pretty young teenager in its heyday, and my fashion choices were largely dictated by my school's dress code. I did listen to bands like Pearl Jam and Soundgarden, but I was also just as (or more) likely to listen to U2 or Counting Crows. Or the Beatles. Yes, I was the weird kid who preferred 60's music to all those boy bands that were so ridiculously popular by the time I graduated. Every time they play the Backstreet Boys on the radio station at work, which they do on a disgustingly regular basis, it still takes me back to walking the halls of my high school and hearing my female classmates singing it while they sat against the wall before class.
(For the record, yes, there's a Weeping Angel on my shirt. My intention was to do a "Don't Blink" photo, but I was having trouble getting one where it didn't look like it was yawning. On the plus side, you can look away from your screen now.)

Ok, back to those pattern details. I'll do a proper review, since it's been awhile.

Finished!Pattern: I used #114 out of the April 2010 issue of BurdaStyle. I was originally going to use my beloved New Look 6407 and mash it up with the BurdaStyle pattern I used for that other plaid shirt I linked to earlier. Then I decided it would be easier to just trace out a new pattern, and I needed a little more length and a little less front darting for a plaid. (And I didn't have enough time to jump on the Archer bandwagon and order that.)

Description:  The magazine just calls it a "casual shirt-blouse".

Pattern sizing: Size 38-46. I made the 40.


Did it look like the photo/drawing on the pattern envelope once you were done sewing with it? Mostly.

Were the instructions easy to follow? For Burda patterns, they were surprisingly straightforward! The annoying thing was that it referred me to instructions for two other patterns in this particular issue, but all things considered, I can live with that.


What did you particularly like or dislike about the pattern? Overall, it's a pretty good basic button-down. I also like that the sleeves are actually long enough for my arms with no alterations. That's pretty rare. I do not like this collar, though. It's crazy wide, and just looks kind of weird.

Fabric used: A cotton plaid flannel that I bought at Joann's. I know there's a lot of Joann's haters out there, but aside from some fraying when I prewashed it, the fabric turned out very soft and cozy. Since they're literally the only apparel fabric store option in my entire state, it's good to know that they still have nice fabric sometimes!

Plaid matchingPattern alterations or any design changes you made: I left off the pocket, and that little back loop thing. I cut a few pieces on the bias, like the cuffs, collar and yoke, just to avoid more plaid matching. I also used my New Look pattern as a guideline for lowering the bust dart. It would have been super-high on me otherwise. I also didn't bother putting buttons on the collar stand, because I will never button this that high. Good thing, since I would have been one button short otherwise. 

Quick note on the plaid matching--I honestly forgot to factor in the dart when working on this, so I went for the next best thing and intentionally alternated the lines. Because Amy kept alternating between Rory and the Doctor...yeah, something like that. But hey, look at that matching in the sleeve and under the arms!

Would you sew it again? Would you recommend it to others?   I might sew it again, with some tweaks.
I'd probably add a little more front shaping, and a bit more flare at the hem. It's a little tighter around my hips than I'd like. Or maybe I'll just jump on the Sewcialist bandwagon and buy the Archer....hey, look, she's having a sale this weekend!

But first, time to change out of these skinny jeans. After all, it's Thanksgiving here in the States, and that is not a good fashion choice for stuffing my face with turkey and mashed potatoes.