Showing posts with label shirt. Show all posts

January 13, 2015

ooh, sparkly.

First of all, thanks for the advice offered on my last post! You gave me some great ideas for what to avoid (my entire wovens stash, I'm looking at you), and there were also some rather brilliant thoughts on how to make some of my ideas more nursing-friendly, and therefore able to be worn longer. Yay!

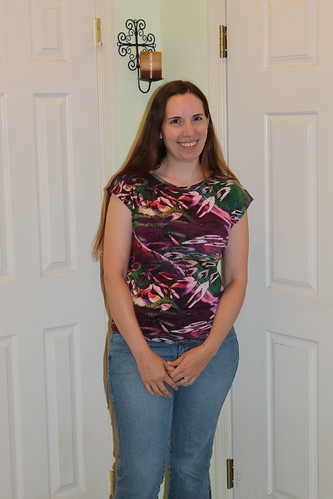
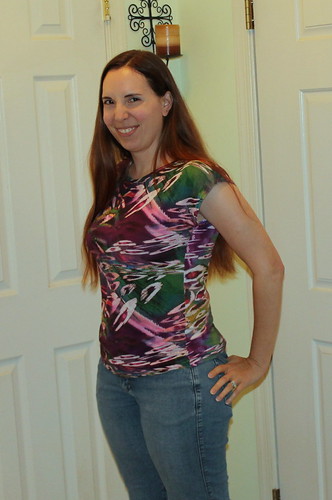
Today, I actually have two finished projects to show! Late last year and after I already knew about the pregnancy, I got lured into buying a couple of knits at Joann's while there for an unrelated shopping trip, because I knew that the bulk of my knits stash were solid colors and I was craving some printed goodies. Also, look how sparkly they are! My original intent was to get these done in time to wear for Christmas, but due to all the sickness issues, that obviously didn't happen. So I decided to get these sewn up quickly. I need some color in my extremely pared-down winter wardrobe anyway.
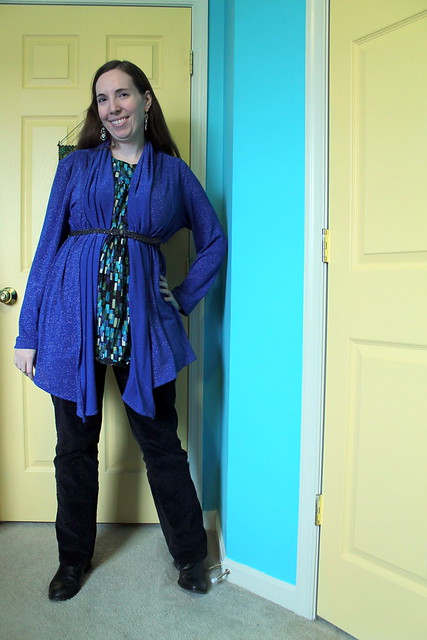
McCall's 6084The cardigan is McCall's 6084, and the top is Simplicity 2852. For the cardigan, I didn't really change much of anything, other than add a little length to the sleeves to accommodate my monkey arms. I do that pretty much automatically for long-sleeved things now, but in this case, it looks like I actually didn't need to! So I just gave it a bit of a wider hem on the sleeves than it called for.

The pattern claimed it could be made up in an hour. It took me a little longer than that. For one thing, this knit was really awful about clinging to itself, so it took me awhile to smooth it out enough that I could cut the pieces well! I did construct it completely in one sitting, and it especially helped that I was able to skip a couple of awkward-looking steps due to having a serger. But then I let it hang overnight so the hem could settle a bit before finishing that.
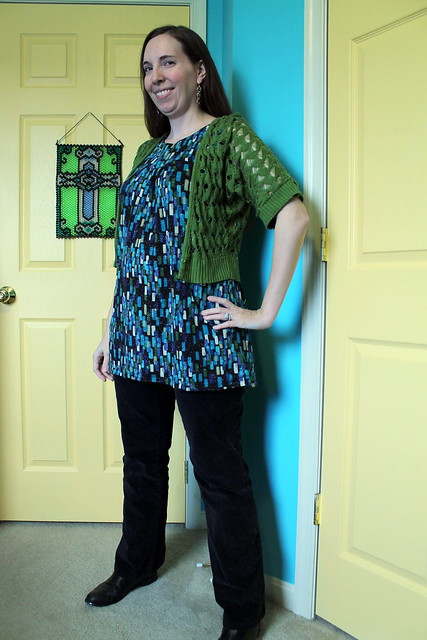


Simplicity 2852The top is one that I actually have made before, though I did view E for that one. That's actually one of the shirts I already had that I've been continuing to wear anyway, and so far, it's worked. I do think that I'll have to toss that shirt at the end of this cold season, though, because the fabric is getting horribly pilled. Especially now that I'm wearing it at least once a week! I honestly didn't think this view was one I'd ever sew, especially because I hated that bubble hem trend! The gathered front made it look like it would give me some room to grow, though.

I made the sleeveless view so I could wear this into the warmer weather. I even already had another cardigan that coordinates! I did make a couple of changes to the pattern to maternify it even further--besides leaving out the hem elastic, because ugh, I added 2" width to the center front and 2" to the hem. I like this a little longer, actually--if I was the type who wore leggings as pants, this would actually work! I think I'll stick to wearing it with things that cover my lower half a little better, though.

Honestly, if I wore it with a belt to cinch it in, this top does have some non-maternity potential as well, I think. We'll see whenever I get a waistline back. (Actually, now that I'm looking at this picture, it probably needs a belt somewhere anyway, doesn't it? It really is kind of a sack. A sparkly sack in a fun print and a color scheme I love, but a sack nonetheless.) In the meantime, I had nothing but scraps left over from both of these pieces, so at least they didn't live in the stash long! Between the two pieces, that's 4.25 yards down.
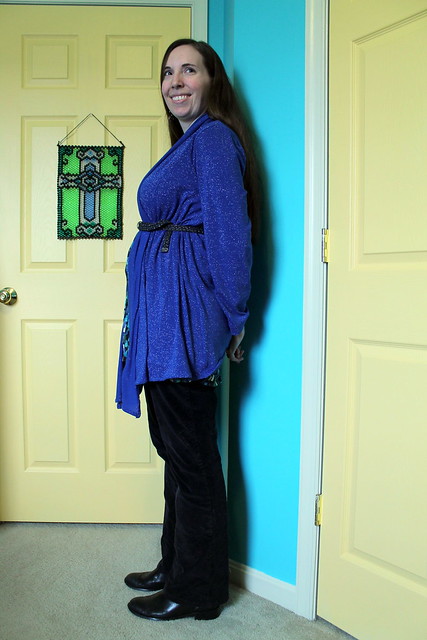
IMG_2288The belt really highlights that the bump doesn't want to hide anymore, doesn't it? I have to keep reminding myself that it's ok to not suck my stomach in for pictures! The more exciting thing is that we have the ultrasound scheduled for next week, so hopefully we'll be finding out if the baby is a boy or a girl soon!

I think I also need to work on the camera setup--Doug's been working hard to get the former office/library ready to turn into a nursery, so all the furniture there has been cleared out and the room is repainted. So these pictures are in the sewing-now-slash-computer room. (At least I still have one!) But I think I'll have to experiment with where to put the tripod so I don't look like such a giant next to the door. I already feel like I look big enough!

December 2, 2014

one day I'll be part of your world

First off, thanks for all the kind words on my last post, both on here and Twitter! It's been hard to keep things quiet, and while quite a few of my friends and family have known already, it's nice to have the support of my sewing friends as well. :) Of course, the baby is also the reason I could only show a preview of my Sew Disney project, and why the Gabriola skirt I'd originally planned wasn't going to work! It's a shame, because I did have enough fabric to do so, but non-stretchy waistbands don't make sense right now since I have no idea how my sizing will end up when this is all over. Or if it would even fit now, tbh.

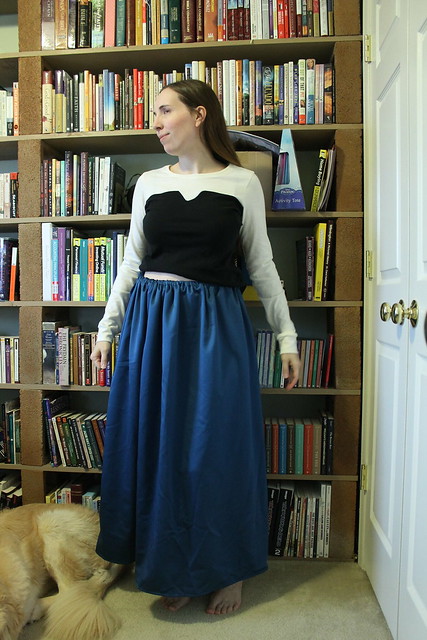
Ariel-inspired outfit
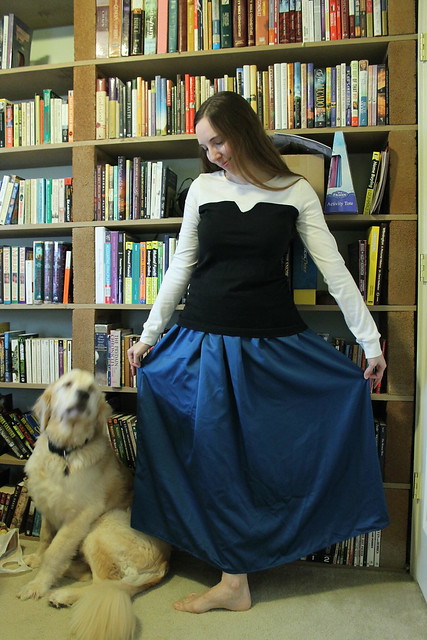
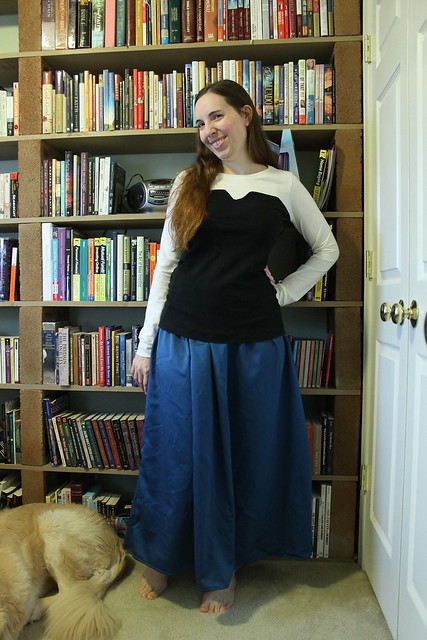
So here's my whole outfit, with a little help from Malkin--and my hair even looks slightly red here! I wasn't sure if it would, since it's very cloudy here today. As I said before, the top is a Renfrew, though I did make a few additional modifications that I hadn't mentioned before. I added a little extra width to the front (about 1/2" total, I think), and I added some length--more in the front than the back, so I could do a little ruching on the side. I also left the bottom band off, simply because I didn't have enough fabric left to cut it, even if it had been pieced together! The length looks all right for now, but since I'm sure I'm going to use this pattern to make a couple more tops, I think next time I'm going to add even more length to the front and put the band on anyway, just to accommodate any expansion and hold things in place. I'd definitely like to avoid that baby belly hanging out from underneath my clothes look if I can!


Ariel skirtSince the Gabriola was a no-go, I raided my pattern stash for ideas. I picked out an elastic-waist maxi skirt, then realized that the hips were still pretty fitted and that this skirt wouldn't work for too long as a result, either. So, believe it or not, it was a boxy Burda magazine pattern to the rescue! This is #119 from the June 2010 issue, and it's literally two rectangles with two drawstrings that tie at the sides. No elastic, even. But I figured that could be a good thing, because then I can tighten and loosen this to fit exactly where needed. I'll admit the result is a bit bulky around the waistband, but you can't really tell as much when it's under the shirt, I think. I did change the pattern slightly by doing a drawstring casing instead of a lining piece at the top, and I also did a French seam finish inside. If this ends up looking like a high-low hem in a few months, I wanted the insides to look good!


Ariel- side view
Here's the side view--you can sort of see the ruching, but my hand's in the way. Now that I'm seeing the top on, I kind of wish that I'd started the black a little bit lower so it wasn't running directly into the sleeve seam. Oh well.

You can also see that I'm not really showing much, if at all, at this point. I'm sure that will change soon, though. It's been very hard to wrap my head around the fact that I've lost a few pounds overall, due to the nausea and the very limited, bland diet I've been eating to try to get through the days, and yet I'm still having trouble with my pants fitting! For the record, my Thurlow pants have fared much better than most of my thrift store jeans, and it's just been this week that I haven't been able to button the top anymore. So that does give me hope that they'll fit again! (I haven't tried my last pair of jeans, because I need to do a little repair on the waistband before I can wear them. But honestly, I've already worn maternity jeans a few times and they stayed up, so I may not bother trying.)


Stashbusting totals:
Top: about 2 yards (1 of the ivory jersey, and 1 of the black interlock left over from the summer's black tank dress. Both pieces completely used up, hurrah!)
Skirt: 2 1/4 yards of the teal. I have about 2 3/4 yards left, which I'll need to come up with a use for at some point. (I already bought a similar-colored short-sleeved maternity top on clearance at Target, so that option is out.)

Ariel outtakeAnd I'll leave you today with an outtake--  I've got the standard Disney princess animal companion, and we can just pretend his name is Max for this picture, even if he is the wrong breed. But apparently Ursula's spell messed up, because this mermaid only has one foot!

November 18, 2014

Making plans, Disney-style

If you follow the Sewcialists blog, then you've probably heard that this month's theme is all things Disney. And I'm co-hosting! So I'm really glad to be done with the coat so I can actually, you know, make an outfit for this.

Since I already channeled my favorite Disney bookworm earlier this year for DragonCon, I decided to look a little further back into my childhood for this one. I grew up watching Disney cartoons--one of the things that I always looked forward to during family gatherings was that my grandmother would try to get the latest Disney movie on VHS, and my cousins and I would all watch it together. And if there wasn't anything new, we'd watch older classics like Cinderella or Peter Pan. I enjoyed those, of course, but the first one I really remember latching onto was this one:

I have this vague memory of this being the first movie that I actually saw in a movie theater, though I guess that depends on how accurate my memory is--after all, I would have been around 7 at the time. But I loved this one. Especially the music, and all of the underwater prettiness, though I'm also pretty sure this is where I got the idea that my hair should be red and if it doesn't agree, then I should just give it a little help! (Now if I could just get her volume...)

I don't want to go all-out costume for this one, especially since a shell top and tail just isn't something I want to be seen in out in public! So I'm taking my inspiration more from her going around town/"Kiss The Girl" outfit:


I actually already have the top done, so I'll give a little sneak preview!

It sits a little wonky on Donna, but here's what I came up with! I really thought about making the black neckline more of a sweetheart shape, but with some careful basting, managed to get a mostly clean line for the notch.

It's a Renfrew, of course, with some modifications for the color-blocking and also a raised neckline. Now that I look at the Ariel picture again, I probably could have left it a little more scooped, but I'll be warmer this way. Since I'm all about the stashbusting, and some of the pictures look more off-white and some more light blue, I used an ivory jersey for the top/sleeves and the leftover black interlock from the dress I made over the summer for the "corset".  I just barely had enough to squeeze this out--I couldn't even cut the band for the bottom, so it's just hemmed. I'm hoping this won't look too blatantly costumey if I pair it with cardigans or jackets or whatever, but I do like the look of it, and I'm quite happy that my hack turned out the way I wanted it to! There may have to be more color-blocked Renfrews in my future. Because that's a way more interesting use of plain colored fabrics, IMO.

More pics to come once I figure out what I'm doing about that skirt--I was originally planning to make a Gabriola, but it isn't going to work at this point. So I'll have to improvise. Looks like it might be my old Burda magazines to the rescue...

September 6, 2014

The Sorbetto that was late for everything

I love sewalongs! Especially when I can work things so that one project fits the parameters of multiple ones. What can I say, I guess I have a hard time not wanting to participate in All The Things. I mentioned in a recent post that I'd been planning to make a Red Velvet that I could use for both The Monthly Stitch's birthday sewalong, and the Sewcialists' Tribute month, and that it didn't work out. So my plan B was to revisit my original list of things I planned to sew this summer, and make the Colette Sorbetto. My thought process, since I was still in DragonCon prep mode at the time, was pretty much this:

"A lot of cake has flowers on it, so a floral print top would work for cake. Even if they're daisies and not roses. And I'm sure somebody out there likes Sorbettos enough that I could say this is a tribute to her, right? Right!"

And then I didn't finish this until yesterday anyway, which makes it too late for both sewalongs. Oh well. I'll probably throw this one up on TMS anyway.

Oh, right, you probably want to see that shirt, don't you?

IMG_1583
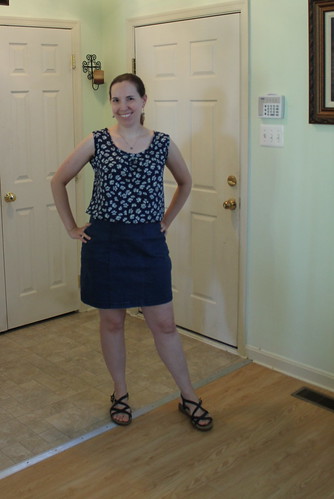
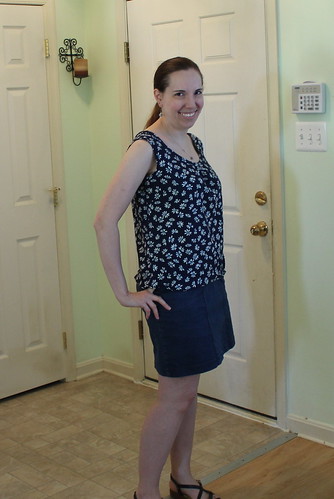
So here it is, in all of its slouchy glory. I'm still not convinced this is a good pattern for me, to be honest. It's all right when tucked in, though that's not a look I often go for, and I guess I'm a little stuck on looser top + fitted skirt still = waist definition. But it is pretty comfortable to wear outside, which is good, because September and July seem to have traded places this year! So while I was enjoying mostly that golden range of 70-85 degrees most of the summer, now that it's unofficially fall, we're back to 90 degrees and 200% humidity. Go figure.

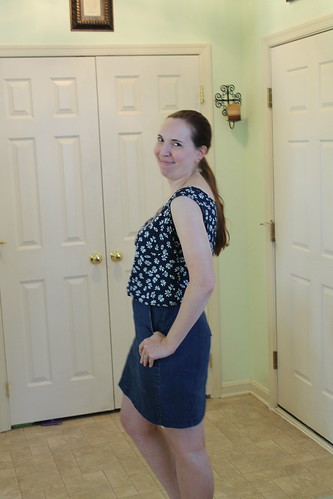
I did make a couple of changes, which are completely unoriginal, given how long this pattern's been out. I lowered the darts about 1", because they were way too high on the original pattern. I'm pretty sure they're in an ok place now, but the shirt tends to slide forward on me and bring them too low, so it's hard to say. I also replaced that front pleat with some gathering--I thought that might help it work better with both the pattern and, well, my chest. In that, I do think this was more successful than my last attempt. Finally, I lengthened the pattern as much as the fabric would let me.

IMG_1586
Untucked, it just looks like a sack. So while I was considering/planning to bring this on my upcoming France trip, now I'm not so sure.

As for the fabric, it's a rayon challis that I acquired via a swap with Kat about a year and a half ago. I hadn't sewn with challis since, oh, the 90s. And I forgot how lovely it can be to work with--which is good, since I have 2 more pieces stashed for dresses! And I guess a year and a half really isn't all that bad, as far as my stash habits go. I literally still have fabric that I purchased back when I was in college (over a decade now, yikes!), though at least by now, it's a piece leftover from a finished project.

The time of year pretty much demands that I move on to more fall sewing now. So let's evaluate how I did with my summer sewing plans overall, shall we?

Tops:


  1. A navy daisy-print tank, most likely a slightly modified Sorbetto. See above.
  2. A royal blue button-down blouse, from a Burda mag. Not even close to thinking about this one.
  3. A navy Archer blouse, which will probably be closer to the fall. I did think about this one, but it obviously didn't happen.
  4. A striped ivory knit tee--hoping to use the Plantain but we'll see if I have enough fabric. Done, cardigan-style.
Bottoms:
  1. Fitted/skinny-ish jeans. Check!
  2. Thurlow shorts. Too bad I didn't have time for these, because I really could have used some shorts that fit for when I was at work, if nothing else. Maybe next year?
  3. Solid black Thurlow pants, which I do not currently have fabric for. And I still don't have fabric for them, but I still should do this sometime. My black RTW pants that I've also had since college are finally starting to fall apart!
  4. Possibly some black Clover pants-- I have fabric that will work, but have not tested this pattern yet. Maybe I should just use that fabric with the Thurlows?
  5. If I have time, a Pavlova skirt. I didn't have time.
  6. I also have a plum skirt that I can do a quick refashion of to make it a better skirt. Maybe this fall?

Dresses:
  1. A navy/ivory Cambie  Done!
  2.  A plum/yellow/royal/white Darling Ranges. I'm bumping this one to my fall plans.
  3. A yellow/white/turquoise Reglisse dress. Part of me is tempted to say I want to make this in October, since The Monthly Stitch is using that pattern as one of their Frocktober contest ones, but the colors are just sooooo summery. I dunno.
  4. A plum/green/white/ knit Tiramisu maxi-dress Done!
  5. A black tank knit maxidress, from McCall's 6559. Done, though shorter than planned.
Layering pieces: Honestly, I didn't touch this category.
  1. a 3/4 sleeve jacket, from the ivory/black embroidered twill I got at Mood and Simplicity 4491 (which I'll modify to shorten and cuff the sleeves.)
  2. An ivory Carmine shrug.
  3.  a yellow knitted cardigan, which I already have yarn and a pattern for, but starting it will have to wait until I finish my grey cardigan. Considering I haven't even finished my Roheline cardigan yet, this was a definite no-go.
IMG_1592So all in all, I had 18 things on my list, only made 6 of them, but also made about 6 things that weren't on this list at all for DragonCon. Plus that Kimono tee from the maxi-dress leftovers, and a couple of refashions. So I guess that isn't too bad for this summer!

Next post: FESA plans!! Did I mention I love sewalongs? But for now, I'll leave you with my "smug model" photo. Because I can. And this particular picture makes me think that maybe tucking in a looser top could actually work on me. Maybe.

September 3, 2014

DragonCon, and what I wore!

Well, I'm back.

The trip to my very first fan convention was a ton of fun, despite the lines and sleep deprivation. I got to hang out with a friend who I'd previously only met in the real world once (hi, Faith!), I met several actors from favorite tv shows and movies, and got a couple of books signed by one of my favorite living authors. Oh, yeah, and it was basically one giant 4-day costume party, so of course I was all over that!

Several of the things I wore were me-mades that I just ran out of time to blog, so I'm sharing them now. (This will probably be a fairly picture-heavy post, so consider yourself warned.)

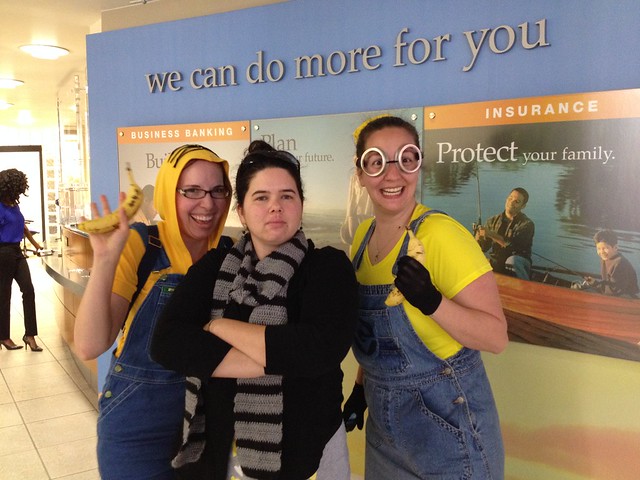
IMG_2517For Thursday, we decided to do a Despicable Me theme-- Cassie went as Gru, and Faith and I as her minions! We even found bananas to carry! I went the cheap/lame way out for my goggles and just wore my glasses, partially because I ran out of time to make more accessories, and partially because I had to get up at 3:30 AM to make it to the airport. My me-made for this one was the yellow hoodie. I'd originally planned to take this opportunity to try out the Disparate Disciplines Avocado Hoodie. But due to time/thrift shop constraints, I decided to keep it simple and short-sleeved.  The result is a Renfrew with an Avocado hood. The "hair" on top is just basted-on scraps of black leftover from my recent dress, so I can remove that anytime.I'm actually really happy with how this quasi-hack turned out, and could definitely see more hooded Renfrews in my future! But I'd still like to try the Avocado for real at some point.

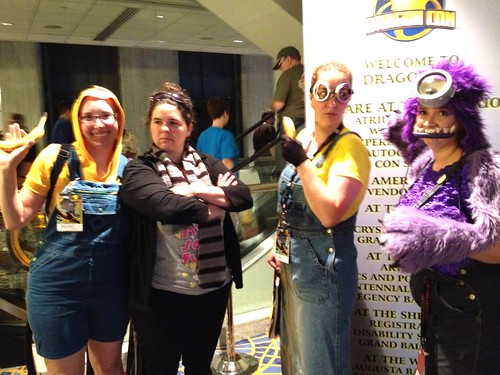
IMG_2521As for the overalls, they're just horrendous shorts I found at the thrift store. I should be nice, since some other sewist took the time to resize the legs and turn them into shorts. (The inside seams are basically raw and obviously home-sewn, while the hem was hand-stitched.) But it ended up fitting me really oddly--almost too-tight around the thighs, with the torso and straps being too long and baggy. The original overalls were XL, which probably explains it. And if I ever do this costume again, I'd definitely try for different overalls, but  they were literally the only ones I could find that weren't made for toddlers! I added a hand-painted patch with the Gru logo on it. You can see it a little better in this photo. And look, we found a monster minion!

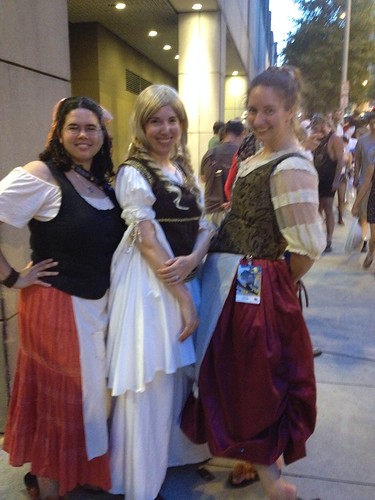
IMG_2552I started Friday off with a Firefly t-shirt, but changed into my old Eowyn costume partway through the day, because one of our main activities that we all wanted to do in the evening was the Tolkien track's "Evening in Bree" party. (Which was SO fun.) I don't have much to say about this costume, since I've mentioned it here and there on the blog before--the only new addition was the blonde wig. Which did get a little snarly in the back by the end of the party, so I need to figure out how to untangle it without ripping all of that fake plastic hair out. The only other thing I'll say is that the costumes in the contest were amazing, and I felt very out of my league. But I did have a kid come up to me at the end of the party and hand me a sketch that she'd made of my costume, which I thought was really sweet.


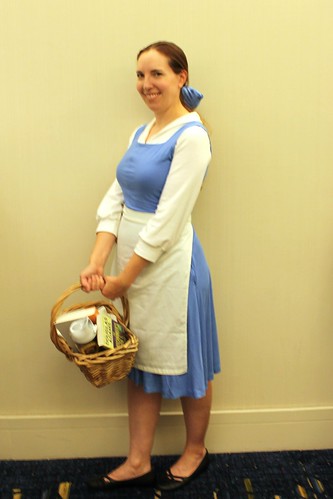
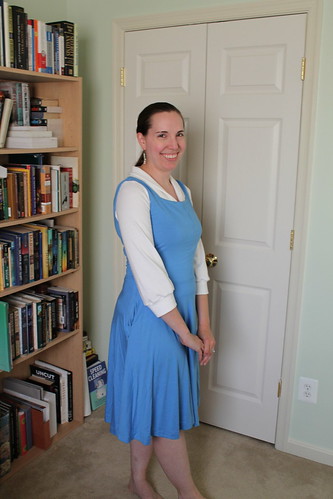
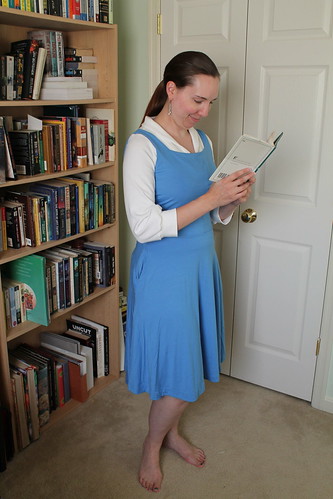
IMG_1565Saturday was Belle day for me, and easily the crowd favorite! I've talked about the blue dress and the top here recently. Since then, I added an apron made from an old bedsheet in my muslin pile, and a bow made from scraps of the blue dress. (Just a tube, stuffed with some leftover tulle from my wedding dress to keep it perky, sewn around a hair elastic with another scrap of knit.) I also carried around a basket, which I swapped with Faith, who was doing Red from Once Upon A Time that day because all she needed was a stuffed wolf, and my book didn't fit in mine. I got lots of compliments from passers-by on how "cute" my Belle was, and several people asked to take my picture. But the two best moments were when I was getting a couple books signed by Jim Butcher, who saw me coming up and sang a line from her intro song in Beauty and the Beast ("Look there she goes, that girl is so peculiar..."), and the little girl I passed in the skybridge between hotels whose face lit up as she squealed, "Belle!" Making a kid happy made me feel rather good about my life that day.

I did have a couple people ask me where the Beast was. I told them that he was back at home, taking care of the library. (Sorry, Doug.)

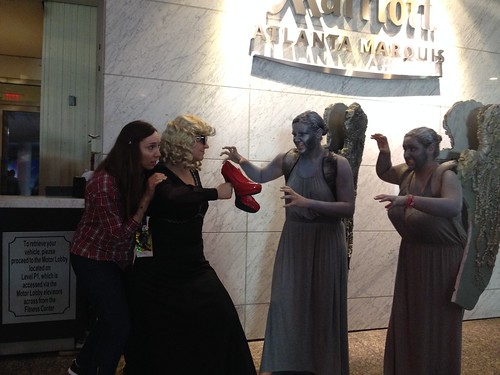
IMG_2606Sadly, I didn't make it to any Doctor Who-related activities, but Cassie, Faith and I did go around dressed as companions on Sunday. I don't have any pictures at the moment of Cassie as Oswin/Clara, since that's on another girl's phone, but we ran into a couple of Weeping Angels (yikes!), so this is Faith as River Song and me as Amy Pond. This costume was super-easy-- just the zipper-leg jeans from earlier in the spring, (because after all of that time sewing the skinny jeans, I saw a picture where the cropped jeans she was wearing in my chosen outfit had that detail!) and a thrifted and slightly modified plaid shirt. Also, tally marks on my arms with liquid eyeliner, because as one person I met put it, "Amy without the hashmarks is just a girl in a plaid shirt".

This was an easy recon overall, though I guess "regeneration" would be a more appropriate term here! I shortened it to get rid of a tear, took in the sides and sleeves a bit, and cropped the sleeves to more of a 3/4" length before sewing the cuffs back on. And since one of my costuming goals was clothes I can wear in the real world, I can quite confidently say that I will be wearing this one over the fall.

I saw so many amazing, creative costumes, and it really makes me want to step up my costuming game! Sadly, not all of my pictures are the clearest-- they looked fine on my camera, but the ones from the first day or so, while I was still trying to adjust my settings, ended up slightly blurred. But I did go ahead and make a Flickr album of ones that I wasn't just passing in the hallways and therefore couldn't stop, and thought were funny, creative, or just plain amazing, along with the pictures I've already shared here. (I'll admit there's a disproportionate amount of Lord of the Rings-related costumes, and Disney costumes. But I have an excuse for the Disney, since I'm co-hosting the Sewcialists' sewalong in November!) I'd definitely love to go back again sometime if circumstances/money allows, especially if I have time to do some real costuming beforehand!

August 4, 2014

I want much more than this provincial life

Let's be honest here: pattern hacking is not my strongest sewing skill. Given enough time and the amount of stubbornness I'm willing to throw at a project, I can sometimes make it work, like the three-muslin wedding dress bodice. Sometimes I get lucky and things turn out as planned right away, like the TARDIS skirt (aside from my occasionally wonky reverse applique.) But most of the time, I end up with something patched-together and not very pretty, like the last major Franken-shirt I attempted. And then I just wonder where my math went wrong (somewhere around the 6th grade, probably) and envy Heather's mad hacking skills.

IMG_1501This project is somewhere between the two extremes. I think I may have had better luck with it because it's a knit and those are generally more forgiving.

In true mad scientist fashion, I mashed together three patterns, from three different companies. The collar and the general shape of the front came from New Look 6922, the sleeves were a narrowed-out-of-necessity version of Simplicity 2852, and the back/reshaping of the front and sleeve caps/cuffs came from my Sewaholic Renfrew. I knew I wanted a slim fit for the top, because the only reason I made this shirt at all was for my Belle costume for DragonCon, and I needed it to fit smoothly under my Monetta-Tiramisu mashup from June.

This wasn't without its drafting issues, for sure. I picked the New Look pattern for the general shape of the collar, because I had no idea how to get something that looked like the shape of what's on her shirt. And I did things like hold the pattern pieces up to myself and measure and everything, but it still ended up being a much lower-cut neckline than I intended. I also ended up having to rip off one of the cuffs and resize it, because it wasn't nearly as fitted as I wanted. I think I ended up cutting about 2" off of it.
IMG_1504
You can see the sleeves a little better here, as well as the general shape of the collar. I was originally thinking of making this a cardigan, but when I realized the collar was way too long, I just sewed it down the center front instead to give it a little more shaping. Draping it over myself didn't help here, either. Like I said. My franken-patterning needs work.

You can probably also see that greyish dot on the collar... I ended up sewing two sets of hooks and eyes on there to close it up some so that the collar comes together where I want it to for costume purposes.

I did bust an entire piece of fabric for this one! I had a tube of rib knit that was pretty useless for t-shirt making, because I'd have to dye tiny little pieces to match whatever shirts I was making, and who wants to do that? So I just managed to squeeze the whole thing out of it. The fabric was free anyway, in the category of things that people gave my mom that she couldn't use for quilts, so no loss on my end except to the yardage tally on my stash. I'll take it.

IMG_1506

And here's the costume so far! I still need to make a half-apron and a hair bow, but the two major components of this outfit are done, at least. I think this one will be a pretty comfortable one to wear all day, too, given that it's all knit.


IMG_1509


And of course I had to do a pose with a book, given that I was in a library and it is Belle.

So I think the costume end is shaping up nicely, though unlike the dress, I'm not sure I'm ever going to wear this shirt outside of this weekend. It just doesn't feel like me, you know? Maybe if I dye it or something. I don't know...what do you think?

July 15, 2014

a simple tee

IMG_1445
Does this fabric look familiar? It should, since I just used it for my Tiramisu maxi-dress. For once in my life, I got on the stashbusting right away! (I made this in June, but didn't get a chance to post until now.) After I realized that I had a decent yard left over after I cut the dress out, I grabbed this untried top pattern and cut it out, since it was only two pieces. I figured that if it didn't work out, I still had the Tira, but I think it worked out pretty nicely!

This is the Maria Denmark Kirsten Kimono tee, which is a free download! I really do love that so many of the indie companies are generous enough to offer some simple patterns for free. I grew up sewing mostly the Big 4, which you can easily get for $1 on sale at Joann's, so the frugal part of my brain really likes getting to try a company out before spending the average $10-25 dollars that the indie patterns usually cost. (I'm not complaining about the price, because I think they're well worth it! I'm just saying that I have a tendency towards being cheap. It's a necessary survival skill when you went into the arts.)


Kirsten Kimono TeeThe top went together quite quickly and easily, since there were only two pieces and a neck binding. The only issue I had with it was that I didn't read the directions before I started, so I didn't realize that seam allowances weren't included! So I just did as narrow a seam as my serger would allow, and then did a narrow hem on the sleeves and shirt bottom as well. It still fits, and actually is quite loose around my waist compared to, say, my Renfrew tops. You can't see it so well in these pictures, since I had to resort to using indoor flash photography in order to get any pictures at all. But the busy print and the drapiness of the knit camouflages it pretty nicely, and keeps it from looking too baggy. Good thing, since it is still quite fitted at my hips. So mental note to self, a thicker knit with less drape probably wouldn't work out so well for me.

Whenever I make this again, I think I'd add some length to the bottom, and especially the sleeves, to make them a little less cap once they're hemmed. But overall, this was a great instant-gratification project!

I'm going to end this post with something I haven't done in awhile, at least for my sewing--an in-progress shot.
IMG_1451 As I've mentioned before, I'm doing the jeans sew-along that Sew Busy Lizzie is hosting. And my progress has been a little slower than I would have liked-- I didn't get much in last week because I had my annual teaching-flute-at-middle-school-day-camp job, and on the night that I'd actually reserved to do some sewing, the power in the entire town went off for the whole evening and didn't come back on until it was too late to start anything! I was home all day on Saturday, so I did make quite a bit of progress then--pretty much everything you see on the front, plus the inseam. But then the power went off again before I could do the topstitching there, so that's where it's stayed. I do have a little extra time off from my retail job this week, so I'm hoping I can finish this up rather quickly now that the hard part (the fly zipper, obviously) is over. At least the sewing part, since I realized I didn't have enough silver rivets on hand and had to place an order.

This is the same denim that I used for my TARDIS skirt back in the fall, and would you believe I still have a yardish of this left? I'm running out of ideas for what to do with shiny metallic stretch denim!

May 15, 2014

happy accidents

Trying to catch up a little here, and I figured it's better to have phone photos than none at all, right?

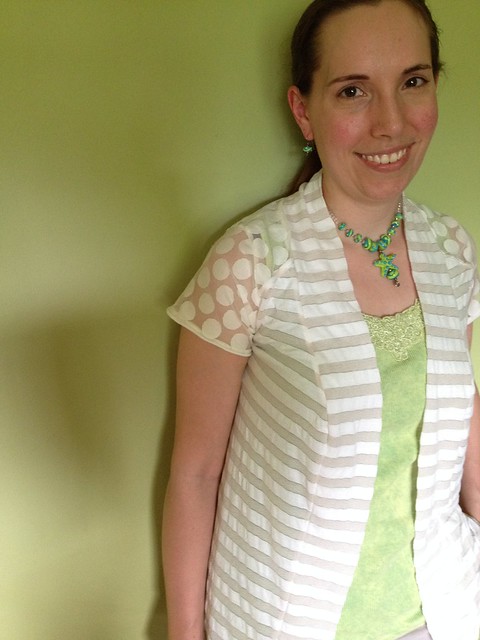
Anyway, this month's Stashbusting Sewalong theme is knits, and since I've been pretty short on sewing time lately, I thought it would be good to try and knock something out. I had a striped ivory knit tee on my capsule wardrobe list, and decided that it might be more useful as a layering piece rather than a more traditional tee. So here's what I ended up with!
Untitled

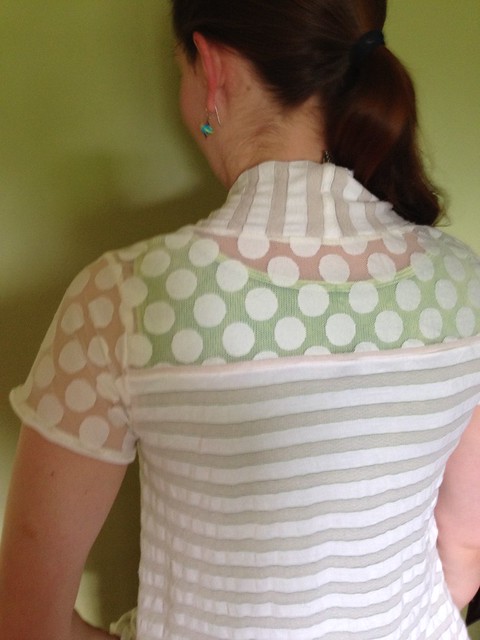
I still based this on the Plantain pattern, as originally planned, with a few modifications. I got the fabric from Kerilee in last year's Sewing Surprises swap, and there wasn't a whole lot of either piece. So I used Heather's yoke modification again, so I could work in the polka dot mesh and use that to stretch the stripes. (I'm print-mixing! It's a start.) Short sleeves, obviously, which are bound at the edges with the striped fabric.


Untitled


The polka dots look cooler from the back, obviously. I like that it lets some color from whatever tank top I'm wearing show through, and I think it will be a very versatile summer layer as a result.


Untitled


Ugggh, I look so tired in this picture! Anyway, the collar/front was sort of a happy accident. My pattern drafting skills aren't the hottest, and when I was cutting this out, I had the presence of mind to slope the neckline downward to the center front, but I forgot about silly little things like adding seam allowances! So when I tried this on partway through, the front looked pretty wonky because it was so skinny. I had a fairly largeish, mostly rectangular scrap left. So I cut it in half lengthwise, seamed it in the middle, and basically made it a big wide binding strip. The inner edge is just a fold, so it looks pretty nice and clean. I'm actually really happy with the finished look of it, so one of these days, I might actually draft this as a pattern piece to use for a future pattern hack!

So now I just have one other fairly quick project and a refashion to post, and I'm all caught up. Unless I actually have time to sew something else. We shall see, since I haven't been able to sew a single stitch this week.

February 13, 2014

Everybody else was doing it...

In typical fashion, I'm one of the last ones on the bandwagon. Usually it's either that, or I miss it altogether. But, since I'd already mentioned that I needed a mental break from pants, I made a Deer & Doe Plantain tee!

Plantain FrontThis was super-quick to make up, even with me modifying the pattern. I used Heather's tutorial for making a contrast yoke, because the busyness of the print made me think that it could use some more solid to tie in the neck binding and elbow patches better. I'd already printed out and taped the PDF together, but I like re-tracing PDF patterns onto thinner paper to make laying out and cutting easier. I was able to get this traced, cut out, and sewn together in the span of one afternoon! It definitely helped that I did the bulk of the construction on my serger, so I didn't have to worry about seam finishes. But it was still nice to knock a project out so quickly.

I'm pleasantly surprised by this pattern, to be honest. The website describes the fit as "loose but elegant", and I don't usually care for a looser fit in my tops. But I figured I'd give it a shot, because the pattern was free, and I figured that as a worst-case scenario, I could just wear this as a bum around the house shirt. But this doesn't hang off me like a sack, like I half-expected it to--it's actually a lot more flattering than I thought it would be. If the knit wasn't as drapey as it is, I don't think it would have worked as well, so I'll have to keep that in mind for any future versions.
Plantain BackA shot of the back, modeled with the charcoal version of the latest Thurlows. It makes me look really curvy!

Aside from the modifications to make the yoke, including a little extra topstitching to make the pieces lie flatter, I made this a straight-up size 40. The only other sizing modification that I made was to add an inch to the sleeves, in what I call my "monkey arm adjustment". It worked perfectly, and I was able to go ahead and use the 3/4" hem allowance that the pattern called for and still cover my wrists in their entirety. I was also surprised that the elbow patches ended up actually hitting at my elbows without any adjustments.

Plantain closeup


One more shot on Donna, for a closeup of the fabrics!  I love this stylized floral knit--it feels somewhat Asian to me. I've been hoarding both of these for awhile, and had been thinking for a long time about using them together, since the teals are so close in color. My long-term thought had been to make some kind of knit dress out of it, but I've been putting it off for a long time because the print is on the thinner side, and I figured I'd have to try and line it somehow to keep my underwear from showing through. While working through all of the Wardrobe Architect stuff so far, though, I realized that I'd probably get a lot more use out of this as a top. I'm pretty good on summery dresses (even though I do have definite plans to make more), and this fabric is too thin to make a good colder-weather dress. So I guess this process is helping me make smart sewing decisions!


Infinity scarfI still have enough of the solid teal left to make a short-sleeved or sleeveless top, since I really only used a tiny segment to cut all three pieces. As for the print, I had less than 3/4 yard left of the full width. So I basically cut the ragged ends off, sewed it into a tube, sewed the ends together--instant infinity scarf! Which will be great for adding interest to more solid outfits, and nice to wear. This knit is super-soft. And since all I have left is scraps that are maybe just large enough to make undies out of (I really need to learn to do that), I shall consider this piece of stash officially busted.

Pattern: Deer & Doe Plantain tee - third pattern used this year.

Amount of time it took to make: A couple of hours from start to finish, plus about 30 minutes for the scarf

Fabric used: Two pieces of rayon knit (one used up, for a total of 5 pieces so far this year.)

Amount of fabric used: 2.25 yards of the print, plus a tiny bit more of the solid

Stashed since: Print was from Christmas 2010, not entirely sure about the solid except that it's been there longer than that.

Current stash total: Approx. 333.25 yards.


December 30, 2013

Two last projects for 2013

Now that Christmas is over, I can show one of my more recent secret projects! And even though most of my "craft" time since then has been "completely reorganize the craft room" time, I did take a break from it on Saturday night to knock out another project. So I thought I'd share.

Christmas placematsFirst up are these placemats, which I (partially) made for my mother-in-law. I can't take credit for too much on here--making them in the first place was Doug's idea, and I honestly would not have been able to get these done even remotely on time without some greatly appreciated help from my own mom. I did the quilting and cutting, but she cut and sewed on all of the binding strips and also did the majority of the hand-sewing for that. Thanks, Mom!


Christmas placemats


A close-up of the fabrics. The penguins are because my mother-in-law is pretty much obsessed with them--seriously, she loves anything with a penguin on it! And Doug thought this would be more practical than another figurine. The flip side with the Christmas puppies are because the lighter one in particular strongly resembles the older of our two dogs, which she also loves a lot. It's really hard to find penguin fabric that isn't blatantly Christmas, but I'm glad I succeeded, because then she can use them more often.

Another Renfrew topThe other project I finished over the weekend was for the #SewGreenDecember sewalong that the Sewcialists on Twitter have been doing. It's another Renfrew, my third one now, so there's not too terribly much to say, other than this:

1. This was my first time doing the V-neck. It's not quite as crisp of a V as I would have preferred, due to the fabric, but I'm proud of how it turned out nonetheless.

2. The fabric itself is a very drape-y, more or less a textured slinky knit. Thus the not-crisp V. The other effect that this had was that this one seems to have ended up a little longer than my other ones. The sleeves in particular do bunch around my wrists a bit, and pull down to handwarmer length. I don't mind this, actually, since my hands do get cold frequently. My only regret is that I didn't think to add thumb holes until after I tried it on! As for the print, all I can think when I look at it is that it's like a closeup of Impressionist shrubbery. Which is probably what this shirt will end up being called on the sidebar, because I'm not-clever like that.

3. Since it was already cut out, this was super-quick. It's really nice to have a TNT pattern that I can knock out in a few hours while watching tv. It's also nice that I was able to use up a piece of fabric that has been sitting in the stash since before I started this blog!

So now I've done all 3 neckline options, and two of the three sleeve lengths on this pattern. I'm sure there will be more, though I don't have any more planned for the semi-immediate future.

I do have one more end-of-year post I'll need to do, since I did get some fun crafty/handmade things for Christmas that I wanted to show off. I'm also in the middle of inventorying my fabric (on a spreadsheet) and my yarn (on Ravelry), to give me something tangible to track in my stashbusting efforts. I do have to say that the numbers on my fabric are embarrassing at the moment--I haven't quite finished due to finding some things in unexpected places (and another fabric purchase that Gillian and Heather completely enabled me on, when I commented on Twitter that I had an Archer pattern and literally nothing to use for it), but at last count, I was over 320 yards! And that's not even counting scraps! Yikes!


November 28, 2013

Come along (to the grunge show), Pond

I had been planning on making a plaid flannel shirt for the Doctor Who Sewalong from the earliest days of my planning. After all, when I think of Amy Pond, her Impossible Astronaut/Day of the Moon outfit is the one that immediately jumps to mind.

https://blogger.googleusercontent.com/img/b/R29vZ2xl/AVvXsEj-GlROkPRh5NA2lUkWiomVv6ZuizO5-EsHzMnV2f-iAytkDGic0HnNu1ssYbpc6uXwOMx3PlDFC6PWHUMQUG_7DjwPpzzzdsvae_olSt2uIbZmYxwW7xQ4pKsmLS8rPNP1QaX90A/s1600/ImpossibleAstronaut_04.jpg

(Though, with the right white button down, I could definitely wear River's outfit, too. Minus the gun holster. And let's face it, my hair is definitely more like Amy's!)

For once in my life, the timing on this project was quite serendipitous, because it enabled me to participate in three sewalongs with one project! It would have been four, but I just couldn't quite get this done in time for the official dates of the Fall Essentials Sewalong. I can, however, claim this shirt for both the Grunge Sewalong and the Flannel Shirt Sewalong that Kelly is hosting!

What's with the silence?My initial thought was to find a plaid as similar to Amy's shirt as possible, but then I remembered that I hardly ever wear red. And I already have this shirt. And I also found that lovely blue plaid that I showed in its half-done state in the last post, and figured that would mix in with my wardrobe much better.

I'm quite pleased overall with how it turned out. I can wear it with the sleeves rolled up like Amy's, with some skinny jeans and boots...


Wait, what was I doing again?

Oh, right, project details. I'll get to those after the fashion show.


Grunge styleOr I can wear it with the sleeves rolled down for warmth, which is how I'll be rocking it today, since it's still stupid cold out there. Going grunge-style here and wearing it over a t-shirt, which is how I was most likely to wear a flannel in the 90s. I guess my musical experience was more "grunge-lite" than anything else--I was still a pretty young teenager in its heyday, and my fashion choices were largely dictated by my school's dress code. I did listen to bands like Pearl Jam and Soundgarden, but I was also just as (or more) likely to listen to U2 or Counting Crows. Or the Beatles. Yes, I was the weird kid who preferred 60's music to all those boy bands that were so ridiculously popular by the time I graduated. Every time they play the Backstreet Boys on the radio station at work, which they do on a disgustingly regular basis, it still takes me back to walking the halls of my high school and hearing my female classmates singing it while they sat against the wall before class.

(For the record, yes, there's a Weeping Angel on my shirt. My intention was to do a "Don't Blink" photo, but I was having trouble getting one where it didn't look like it was yawning. On the plus side, you can look away from your screen now.)

Ok, back to those pattern details. I'll do a proper review, since it's been awhile.

Finished!Pattern: I used #114 out of the April 2010 issue of BurdaStyle. I was originally going to use my beloved New Look 6407 and mash it up with the BurdaStyle pattern I used for that other plaid shirt I linked to earlier. Then I decided it would be easier to just trace out a new pattern, and I needed a little more length and a little less front darting for a plaid. (And I didn't have enough time to jump on the Archer bandwagon and order that.)

Description:  The magazine just calls it a "casual shirt-blouse".

Pattern sizing: Size 38-46. I made the 40.


Did it look like the photo/drawing on the pattern envelope once you were done sewing with it? Mostly.

Were the instructions easy to follow? For Burda patterns, they were surprisingly straightforward! The annoying thing was that it referred me to instructions for two other patterns in this particular issue, but all things considered, I can live with that.


What did you particularly like or dislike about the pattern? Overall, it's a pretty good basic button-down. I also like that the sleeves are actually long enough for my arms with no alterations. That's pretty rare. I do not like this collar, though. It's crazy wide, and just looks kind of weird.

Fabric used: A cotton plaid flannel that I bought at Joann's. I know there's a lot of Joann's haters out there, but aside from some fraying when I prewashed it, the fabric turned out very soft and cozy. Since they're literally the only apparel fabric store option in my entire state, it's good to know that they still have nice fabric sometimes!

Plaid matchingPattern alterations or any design changes you made: I left off the pocket, and that little back loop thing. I cut a few pieces on the bias, like the cuffs, collar and yoke, just to avoid more plaid matching. I also used my New Look pattern as a guideline for lowering the bust dart. It would have been super-high on me otherwise. I also didn't bother putting buttons on the collar stand, because I will never button this that high. Good thing, since I would have been one button short otherwise. 

Quick note on the plaid matching--I honestly forgot to factor in the dart when working on this, so I went for the next best thing and intentionally alternated the lines. Because Amy kept alternating between Rory and the Doctor...yeah, something like that. But hey, look at that matching in the sleeve and under the arms!

Would you sew it again? Would you recommend it to others?   I might sew it again, with some tweaks.
I'd probably add a little more front shaping, and a bit more flare at the hem. It's a little tighter around my hips than I'd like. Or maybe I'll just jump on the Sewcialist bandwagon and buy the Archer....hey, look, she's having a sale this weekend!

But first, time to change out of these skinny jeans. After all, it's Thanksgiving here in the States, and that is not a good fashion choice for stuffing my face with turkey and mashed potatoes. 

October 23, 2013

A quickfire shirt

Renfrew TopAnother FESA project down! I usually feel like I'm pretty slow at sewing, compared to a lot of bloggers that I follow, but this shirt took me only two days from start to finish--and that includes some single-layer cutting! I had two unexpected days off of work recently, due to some nasty, rainy days. (My garden center job involves sitting at an outdoor register, and it's already been pretty slow lately, so rain = even more dead. So they told me to just stay home.) The Thurlow pants were already at the point where I just needed to sew the hems by hand, so I figured I'd save that for tv time and make something new instead.

It's a Renfrew, of course, since I've been talking about revisiting this pattern since the first one I'd made. And I think that was actually the best possible choice for this fabric. It's hard to tell how a fabric will handle as flat yardage sometimes, and I discovered as I was working with it that the edges have a very strong tendency to curl to the outside, and develop little tiny runs in the fabric in the process. So a pattern with bands at the sleeves and hem was the perfect counterbalance, and I'm glad I didn't try to do one with a more traditional hem! Especially since I'd been going back and forth for quite some time about what this fabric wanted to be.

Renfrew CloseupI did have to fiddle with the print placement a bit, due to the stripes, and I think it worked out well overall. I do wish the stripes were a little more matched up at the seams, though. Despite all of my pins and careful placement, it did shift around a bit during serging. (Which was surprising, since the fabric generally clung to itself quite a bit.) But I like the way the thin stripe looks as the neck binding, and even though I didn't quite have the yardage to make that stripe line up between the body and the arms, I think it still looks pretty good overall!

I'd originally altered this pattern to make the waist curve in a few sizes smaller, but for this one, I cut it more of a straight size 8. The fabric is sheer enough that I knew from the start I'd have to wear this as a layering piece, and with its clingy tendencies, I wanted to give it a little extra wiggle room to make it easier to pull over my camisoles. I also did a cheater adjustment on the arm length, and just cut that to the largest size with the width of the regular size 8. It worked perfectly, and I'm quite happy to not have my wrists hanging out like they often do with long-sleeved shirts! I'll be cranking out at least one more of these before the cold weather ends, and this pretty much clinches it as my favorite knit top pattern!

Renfrew, Take 2And hey, look, a different backdrop than usual! We spent the weekend in Lancaster, Pennsylvania, since I was in a friend's wedding. The ceremony and reception were held at the Landis Valley Museum, in and around this barn. I managed to get my husband to take these pics before the rehearsal started, since we got there about an hour before everyone else and had time to walk around. It matches my shirt pretty well, doesn't it?

IMG_0845

This was my artist friend (the one I made that apron and placemat set for recently), and I have to say, her vision turned out quite lovely! The grapevines with the twinkle lights were already there, but we hung the paper lanterns ourselves. There were a lot of people helping to set up, so even though there was a lot of work, it was still a relaxing, fun time.


Bridesmaid


I did a little more crafting for this, too! The night before the wedding, the rest of the bridesmaids, the bride and I made our bouquets.None of us had really done floral arranging before, unless you count my trial-and-error artificial centerpieces that I made for my own wedding, but I think they turned out nicely! It just took us a few tries, that's all.


IMG_0852
I also made that little banner hanging up there by the dessert table. I don't have a decent close-up because there wasn't time, but I brought it home with me, so I can take one if anyone is interested.

I have one more recently finished project that needs photographing (knitting this time), and I'd better get on it, since the Doctor Who Sewalong is officially on now!


June 28, 2013

It's a bird! It's a plane! No, wait, it is a bird.

Fun fact I learned on the honeymoon: apparently, the hummingbird is the national bird of Jamaica!

Another fun fact we learned: marijuana is not actually legal there. But we saw some growing in an herb garden there by the place we went bamboo rafting anyway. No, really. There was a sign and everything. But I won't post the picture that D took, because I don't really want to post pics of drugs on here, you know?

A third fun fact I just looked up on Wikipedia is that the plant used for hemp, while part of the same species of plant, is not actually marijuana. Which is good, since that's what I used to make my Hummingbird skirt.

So, on to the finished products, shall we? Starting with the top.
Hummingbird front
Yes, this is that top I was having a ridiculous amount of difficulty with last week. Thankfully, I'm overall pleased with the results. I got this fabric a few years ago from Mood, and while I was able to use the other piece from that batch fairly quickly (hey, a year is pretty good for me!), this one had me stumped for some time due to the large scale of the print. So this definitely took some thinking, and some tweeting, but I think I managed to handle the print and any potential chest-placement issues as well as I possibly could have!

Changes made to the top:

IMG_0601
  • I added a center front and center back seam, to accommodate dealing with the print.
  • I rolled the facing under and stitched it down--it was just not working in this particular fabric. (Case in point, see left--this is literally as good as it would get.)
  • As a result, I serged a rolled hem on the sleeves instead of the facing strip. I did this on the peplum hem as well.
Hummingbird BackChanges that I'll make next time I make this top, because I would make this again:
  • Use a knit that stretches both ways instead of just one. I think this would have made the neckline work better.
  • Shorten the top at the waist by 1". I used a 19" for the shoulder seam, and I think I measured it badly since it was pretty late at night when I did it and I was still tired from the honeymoon.
  • Lengthen the peplum by 1" + hem allowance, because I do like the finished length of it.
I was pretty satisfied with the print matching on the back, but looking at it in this picture, the big green and black diamond shapes pop out kind of oddly! Overall, this shirt is kind of like a polka-dotted, multicolored Rorschach test, isn't it? But I kind of like it. I still have about a yard of this to use up, so I'm thinking I might just make some pajama shorts or something like that where it won't matter if I match the print or not!
    IMG_0604Moving on to the skirt--I just barely managed to squeeze this one out of the hemp, since there was a huge chunk cut out on one side. I have a scrap that's most likely big enough for a small bag left, and therefore, I'm considering this piece stashbusted!

    The one major change that I made to the skirt, which I need to remember to add to the pattern, is a bit of reshaping towards the top. Which, again, could have easily been bad measurements on my part. Thankfully, I had the foresight to just baste the side seams together before I tried it on, because it was huge! I ended up making the seam allowance at the top of the side seams 1 3/8" instead of 1/2", tapering back down to that 1/2" by close to the bottom of the pockets. I also took in the top of each of the seams surrounding the center panel and the top of the back darts in an additional 1/8" apiece. Again, those tapered back down to the original seaming. I did go ahead and just leave the side seams wide, since they were all nicely serged and everything. As a result, I also had to reduce the length of the waistband by about 4".

      Hummingbird front 2Let's have another look at that skirt, shall we? Along with an introduction to one of my two new sewing buddies! This furry little photobomber is Crosby. (His big brother, Malkin, is the one trying to knock me over in the back view shot. My husband had these two when I met him, and named them after two of his favorite hockey players.)

      I think this picture nicely highlights the other change I would make the next time I make this skirt, which is to add an inch or so to the hem. I'm used to knee- or full-length skirts, so this one feels reeeeeally short to me! And wearing it outside of the house is definitely going to be a bit of a stretch to my comfort level. But hopefully I can work myself up to it, because I bet the hemp is going to be really cool and comfortable for the mid-Atlantic heat and humidity!

      So there you have it, two new finished garments! If there's one thing I learned from this sewalong, it's that I'm a much slower sewist than I thought. So it'll be interesting to see what I can actually get done in 30 minutes a day, because pretty much every step took me nearly twice as long!