Showing posts with label skirt. Show all posts

September 13, 2015

Rae, a drop of golden sun...

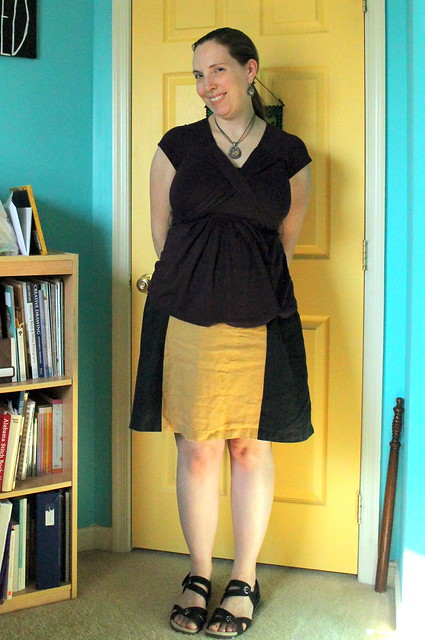
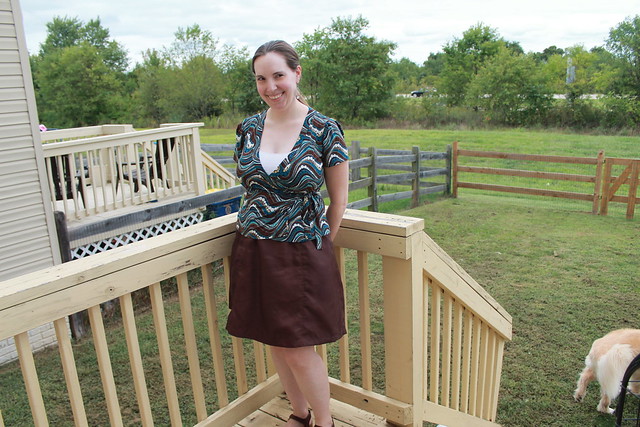
Yeah, I made two more of the Sewaholic Rae skirts, in two very different fabrics. Since I already briefly talked about the construction before, this is more to show how they ended up-- and also my monthly post for Gillian's #betterpicturesproject!

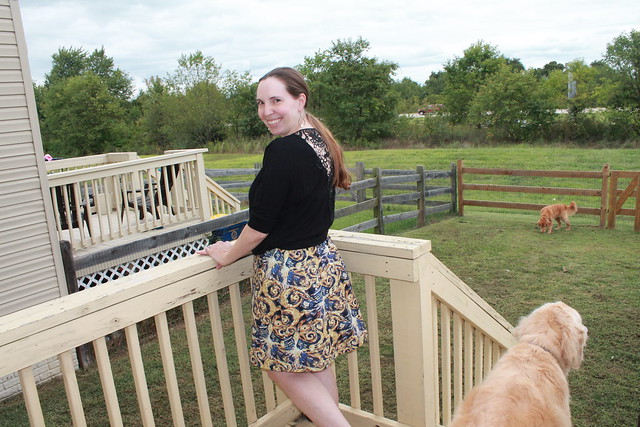
IMG_2736This month's assignment was to find a new spot to take photos, ideally 5 minutes or less from your house. Admittedly, the thought of setting up a tripod somewhere while lugging around Hobbit's car seat (and quite probably listening to him scream the whole time, since the car seat is one of his least favorite things EVER so far) was not very appealing to me. So my big brave move was out to the back yard! I've avoided it so far, because we're in a central townhouse, and pretty much all we ever do with the yard is mow it and let the dogs out to do their business. That, and that tan strip behind the trees just happens to be one of the busiest highways in the state. But the lighting really is better out here than in my sewing room, and Doug was kind enough to take some pictures for me. Which is much easier than running back and forth between me and the tripod. I just may have to reserve my outfit photos for weekends for awhile, that's all.
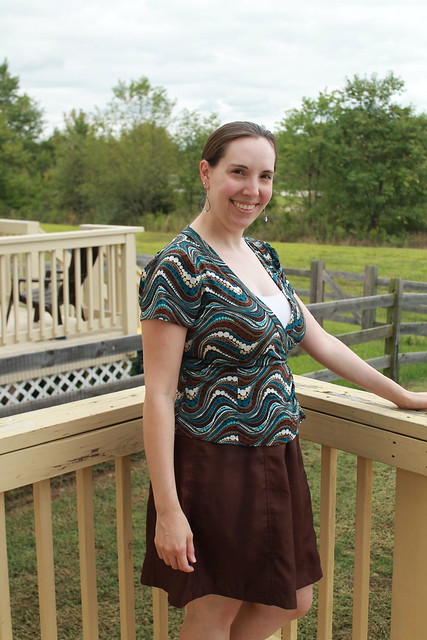
Recycled Rae 2I also experimented with setting the camera to portrait mode. I think it turned out well, and the bonus was that keeping it on a more automatic setting made it really simple for Doug! So I'll save the more manual settings for when I'm the one behind the lens, I think. (Mastering that really is something I'd like to do sometime, but I think that will be better for trying to get artsy with the kid photos and landscapes while traveling.)

I guess I should say something about the actual sewing, right? This particular skirt is half a refashion. Several years ago, I made a dress for my brother's wedding that was a complete and utter disaster from start to finish. Once the wedding was over, I promptly threw the dress into my refashion bin, along with an extra yard and a half or so of the same fabric that I purchased later, with the intention of turning it into something else. I was originally thinking maybe some kind of longer, fitted, belted vest. But that never came to fruition. I've finally redeemed it with this skirt, though. The fabric itself is a polyester shantung, and I was able to cut half of the skirt out of the original dress. I didn't have the extra piece on my original stash list, since it was out of sight in the bin and I'd honestly forgotten it was there. But I have about 2/3 yard left, so I'm estimating I used half a yard for the other half of the skirt.
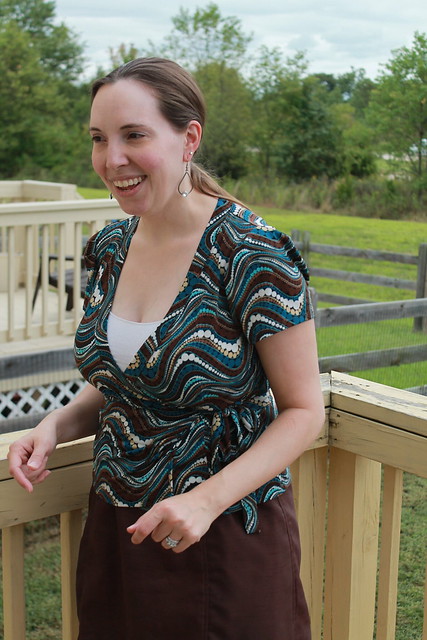
recycled RaePardon the slightly derpy face here-- I'm including this one because it's one of the best for showing the skirt detail. I had forgotten how absolutely awful this fabric frays, so I French seamed the whole thing. And since it's polyester, of course it didn't really press all that great, so I also ended up topstitching over all of the seams to give it more of a flat-fell look. Honestly, the effect makes me think of nylon parachutes. But since I'm coming to terms with the fact that my generally casual lifestyle doesn't necessarily fit the shiny fabrics that I often adore, I think it's for the best here, because it definitely helps the skirt look a lot less formal than I originally intended the dress to be.


I can also say that this skirt was for the Monthly Stitch's August theme of twos, since this was my second Rae skirt that month. (I finished it on August 31!)
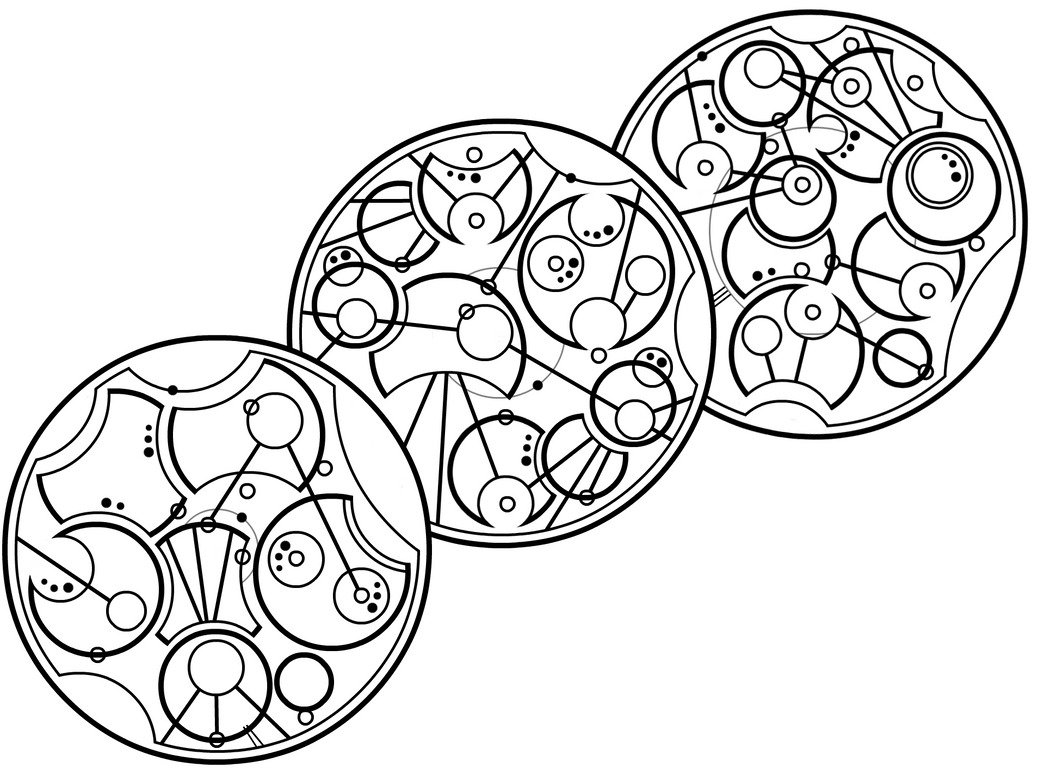
exploding TARDIS Rae

The third skirt sewed up a lot faster, since I made it out of quilt cotton and could just serge all the seam edges to finish it off! I kind of like this artsy black top that I bought for our Paris trip last fall with this particular print, and will definitely use this combo again when it gets its out-of-house debut. (I was waiting until I got pictures, mostly because I didn't want to have to iron it again first.)

exploding TARDIS!


A closer-up view of the print. Why, yes, that is a print designed around Van Gogh's lesser-known "Exploding TARDIS". And this little Whovian is rather psyched that the colors just happen to fall into the realm of the palette that I'm overall attempting to work with for my future wardrobe cultivation. (Especially because yellow/gold is one of the ones I've been meaning to add more of.)

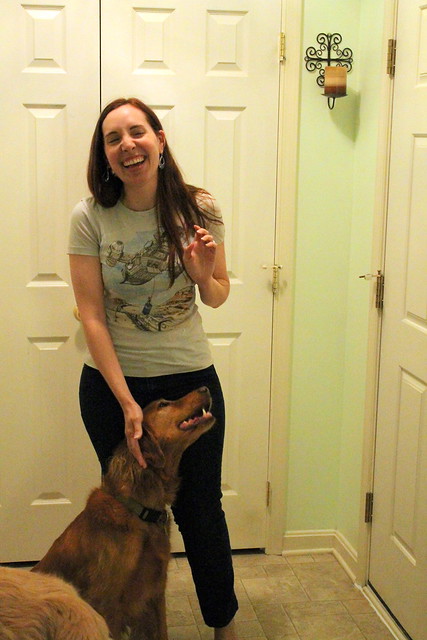
dog photobomb

Finally, even though this is an attempt at better pictures, and I'm fully aware that the flash went off and left a weird shadow behind me, it seemed fitting to continue the tradition of golden retriever photobombing!

August 23, 2015

a study in improvisation

Sometimes, I feel like I'm not a very creative person.

Sure, I look creative. After all, I have a music degree (two, actually), and I mange my own clothes. I also enjoy cooking, most of the time. But here's the thing: I'm a classically trained musician. Which is basically the equivalent of not being the author who creates the story, but the translator who takes a different language and rewrites it into English. The times I've gotten the most nervous performing have been the times I've been told to just make up a part. And I see this in the other things, too. I can follow a recipe well, but I struggle to take a handful of ingredients and turn them into a tasty meal without one. And I choose the fabrics and tweak the fit, sometimes I mash together two patterns if I'm feeling brave, but it's almost always someone else's design that I'm just interpreting.

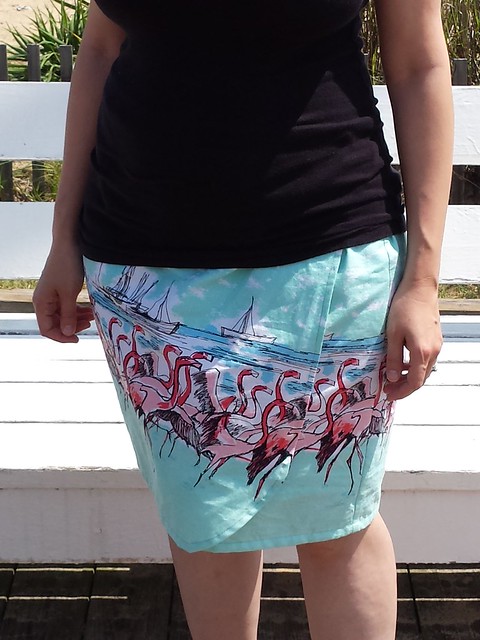
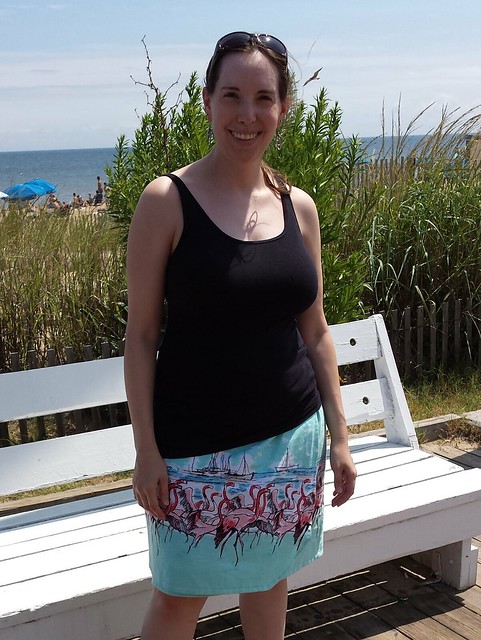
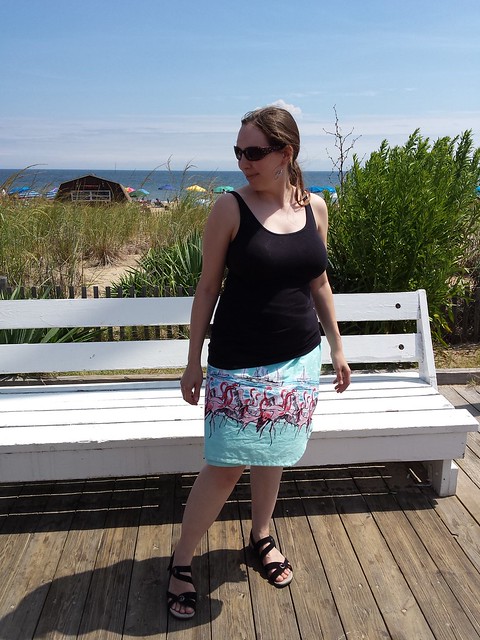
Self-drafted wrap skirtThat being said, this skirt was definitely out of my comfort zone. And it's certainly not perfect. If this was Project Runway and Michael Kors was still a judge, he'd probably pull out that Becky Home-ecky phrase, furthering my dislike of him for making my name synonymous with bad sewing. But I made it, without a pattern, and it did what I wanted it to do. And that's pretty huge for me.

So here's the details: it's two yards of quilt cotton that should be all wrong for me--mint green? Pink? Really? But the flamingos called to me. I cut it to the length I thought would be good, plus seams and hems, then cut that piece into thirds. The back is adjustable, with buttonhole elastic courtesy of Brooke, who kindly sent me some from her own stash when she learned via Instagram that I didn't have any. Aren't sewcialists the best? The front waistband is flat, and secured by two buttons-- one inside, one out. I fully lined it with some white polyester from my stash, which took my totals down another 2 yards. 

Self-drafted wrap skirtI think my favorite detail is the front curve. I had to wing it, because I didn't have anything in the room that was round and large enough, and our plates aren't round either. But I think it turned out really nice!

I was also pleased that I was able to avoid any wardrobe malfunctions, as wrap skirts are prone to. I first wore it for a morning out with Doug and Hobbit, on the boardwalk at one of my state's busiest beaches, as we had a couple of errands to run at specific stores in that area. It was quite breezy, but my legs stayed covered!


Self-drafted wrap skirt


I'm also pleased that I was able to finish it in time for the end of the month, since this fabric just screams summer and probably won't really work once it starts getting colder. I may have a long way to go to truly get the hang of designing my clothes from scratch, but I think this is a step in the right direction.

(Note: the stupid Blogger app on my phone ate about half of the original post when I was trying to get off of the original draft, so I've reconstructed it as best as I could.)

August 16, 2015

transitional sewing

Sewaholic Rae

Just a quick project to share today. This was the only photo that sort of turned out, to be honest, and I'm limited on time while the baby's napping. I tried a couple of side shots, but I'll admit I'm feeling a little self-conscious about how I look in those-- I know I should be kind to myself, since 8 weeks ago I was just going into labor, and lots of people around here have been telling me that I look great. But I think I'm ready to not look like I have a baby bump on here, you know?

Anyway, the skirt. I'm trying to focus on projects that are relatively quick to make and forgiving on the fit, while I restock my wardrobe with a few basics to help me get into the fall. This is the Sewaholic Rae skirt, which was designed as a beginner skirt, so I figured it would work up fast. Also, elastic waists are my friends right now. I was really happy with how this turned out. It was a fairly instant-gratification project-- I think it only took me 3 or 4 afternoon naptimes to sew up, and those have been quite variable in length so far, so that's not bad. The fabrics are leftover pieces from this skirt and these pants, and I think they pair well together. I'm calling it my Zelda Rae skirt, because I have to admit that black and tan makes me think of German shepherds, and in particular, the very sweet one that my parents had while I was in college and beyond. But I also figured the black and tan combo means that it would go with a lot. Aside from that, there's not much to say about the construction. There's only two pattern pieces. Which also makes it quick to cut out, and since that's not my favorite part of sewing, that's fine by me.

It's a little wrinkly looking, yeah. But the tan is linen, while the black is a linen-type. So let's call this "embracing the nature of the fabric" instead of "I'm too lazy to iron while trying to get us out the door", ok?

All in all, I think this is a great skirt for both the seasonal transition, and my sizing transitions. I'm definitely going to attempt at least one more of these, assuming the refashion I have in mind has enough fabric. I'm also debating about two more. I used a gift card I've been hoarding to buy some chambray, since none of my old skirts that weren't already elastic waist were fitting. But then last week, I made the happy discovery that I've shrunk down enough that my TARDIS skirt fits again, even though it's snug, and this other denim skirt is also right on the verge of fitting (snugly).  So now I'm questioning whether that chambray would be more useful as another type of garment. I also splurged on another piece of fabric just before the baby was born, because the Whovian in me demanded it, and I was originally thinking a different Sewaholic skirt pattern, but I think I might go with this instead. After all, the sizing is more versatile. And we know we'd like to have at least one more kid a little ways down the road, assuming we can, so I'd rather use my precious sewing time to make things that aren't just going to fit for a few months before doing this all over again.

March 21, 2015

it's the time of the season

Happy spring, right? Here in the good old Mid-Atlantic, ours started with winter trying to get in one last sucker punch! I think it's time for a breakup with cold weather, because I am OVER winter clothes. I know I say that every single year, but with my currently limited wardrobe choices, it's even worse. I've been wearing the same 2 pairs of pants (with the jeans mixed in as I can) and the same 3 cardigans almost every single day. And my one purchased winter maternity top is looking rather dingy and sad. I guess that's what I get for buying a cream sweatery-looking top.

That being said, with the limited window I have remaining in which making clothes for myself to wear throughout the rest of this pregnancy still has a point, I'm trying to focus on things that will carry me through the spring and into the summer. And, hopefully, still be wearable afterwards.

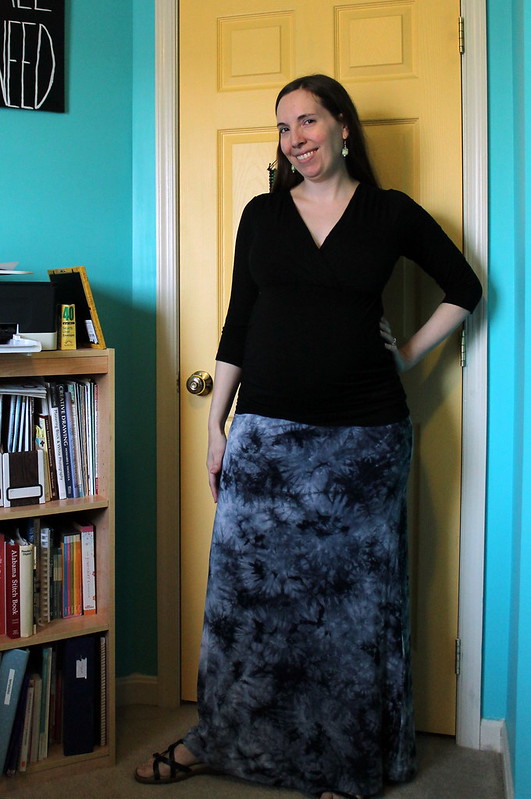
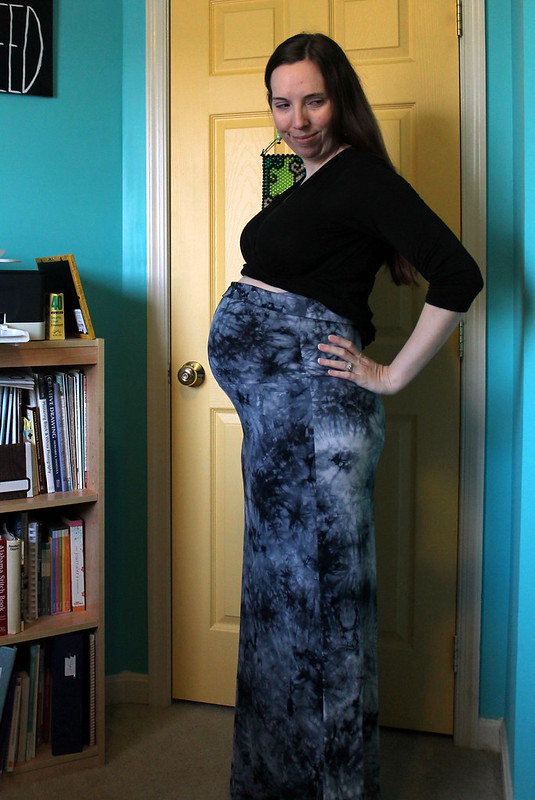
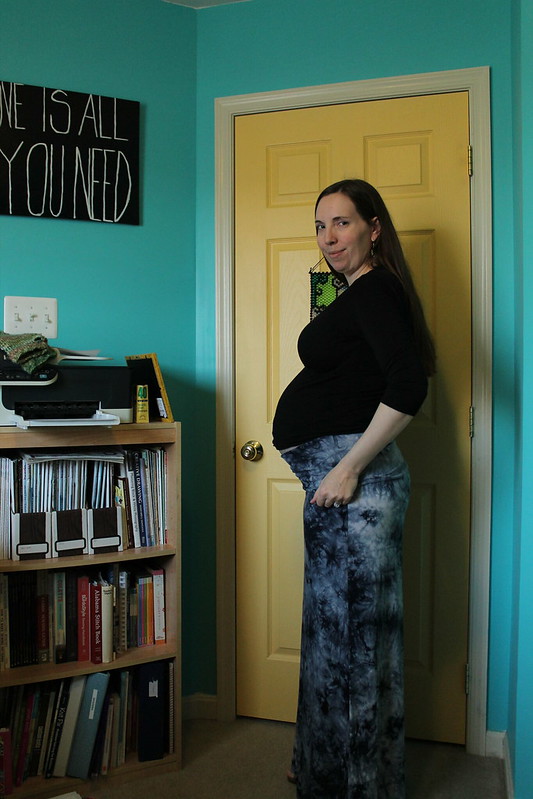
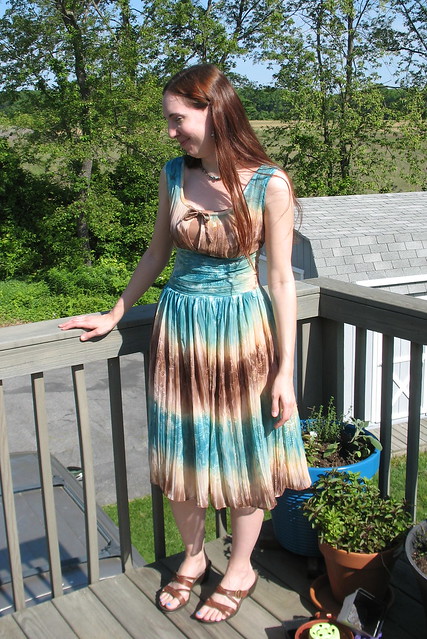
Tie dye maternity skirt frontEnter my new maxi-skirt! The fabric is a luscious-feeling bamboo-rayon jersey blend, part of the mini-stash of knits that my parents gave me for Christmas. It took me a lot of thinking initially about whether this fabric wanted to be a skirt or a top, but once I realized that I only have 2 pairs of non-jeans maternity pants left that still fit (I've outgrown the third, which were a little small on me when I first chopped them into maternity pants), and they're both reconstructed corduroy pants, a warmer-weather friendly piece of bottomwear won out.

This month's Stashbusting Sewalong theme is sewing with patterns that you already have. So I based this skirt rather loosely on Simplicity 7229, which I've used a few times before for skirts and capri pants. (I'm having to link this to my Pinterest since it's out of print, so hopefully it'll work!) The original skirt is pretty basic-- the two pieces for the front and back are the same, and it has a wide yoke with a drawstring top. I'd always made it in wovens before, but here's the changes (aside from knit fabric) that I made to make it more maternity-friendly:
    skirt full panel
  • Added several inches to the length of the front/back pieces. Which I actually did the last time I made this pattern, because the original pattern was this awkward mid-calf length, and I ended up hating that and chopping off the previously made skirts to a shorter length.
  • I did also have to narrow that at the bottom a bit, because my fabric wasn't quite wide enough to accommodate the extra width. But since it's stretchy, that's ok. Especially since I'm starting to get into the waddle phase and my steps aren't quite as big as they used to be.
  • While I used the yoke/drawstring waistband pieces to get a general idea of how wide to cut it, I replaced that with a slightly skinnier but much longer rectangular piece. The idea is that I can use it to cover up the baby bump for now--the over-bump stuff sits on me way better than under-bump stuff, which just feels awkward and like it's constantly on the verge of falling down. It's a little loose at the very top of the band, around the rib area. But I'm not too worried about it.
skirt yoga waistband
    It folds down into a yoga-style waistband, so I'm hoping that it'll be snug enough that I can wear this skirt once I'm a little smaller around the waist again, too! It's obviously hard to tell how that will work right now, but a girl can dream, right? 

    Overall, I'm really pleased with how this adaptation worked out, and how fast it was to sew together! I did all of it, including cutting out, in 2 sewing sessions. Which is pretty speedy for me. Depending on how this works out to wear afterwards, this just may be how this skirt pattern ends up getting used from now on. It's so tempting to find more of this type of knit and whip out a few more! But I have several pieces of knit that I still want to make other clothes out of to wear in the meantime, so I shall try to restrain myself.

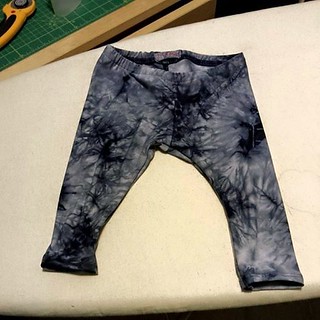
    I used up pretty close to a full 2 yards on this. As an added bonus, I had just enough fabric left to make a little something for the Hobbit! We're actually doing pretty well with collecting baby clothes so far, largely thanks to my mother-in-law, who's brought over multiple bags of things that neighbors and acquaintances were getting rid of.  At least, we're doing pretty well with onesies and pajamas. What seems to be largely lacking is pants. Given his nickname, all I can think of is that old Lord of the Rings movie meme where certain words get substituted with "pants". The most famous being...
    Which never fails to crack me up, but Hobbit is going to need some pants eventually. So I made some.

    tie dye leggingsThe pattern was a freebie that I found on Craftsy, the Go To Baby Leggings. I wasn't entirely sure about tie-dyed pants for a boy, but a few kind sewcialists on Instagram talked me into it, and I hope these actually end up fitting him because I think they turned out pretty cute! I made these in the 3-6 month size--partially because lightweight jersey pants going into the fall make sense, and partly because I literally did not have enough fabric left to make them any bigger. Doug was pretty impressed, I think--I cut and sewed these in their entirety on Thursday, along with finishing the skirt, and his instant reaction was that they were adorable and I should post them on Facebook. Always a good sign. I wish I knew how they were actually going to fit him, because I had these cut out and sewn together entirely in basically no time! But at least I have the pattern tested, so if it works out, I can always fall back on this as a quick project while he naps or something.

    December 2, 2014

    one day I'll be part of your world

    First off, thanks for all the kind words on my last post, both on here and Twitter! It's been hard to keep things quiet, and while quite a few of my friends and family have known already, it's nice to have the support of my sewing friends as well. :) Of course, the baby is also the reason I could only show a preview of my Sew Disney project, and why the Gabriola skirt I'd originally planned wasn't going to work! It's a shame, because I did have enough fabric to do so, but non-stretchy waistbands don't make sense right now since I have no idea how my sizing will end up when this is all over. Or if it would even fit now, tbh.

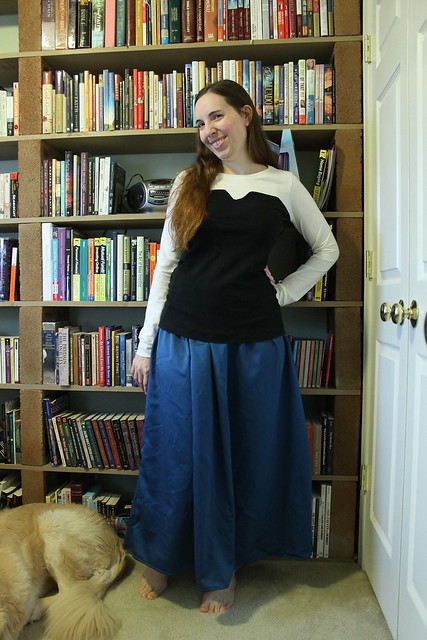
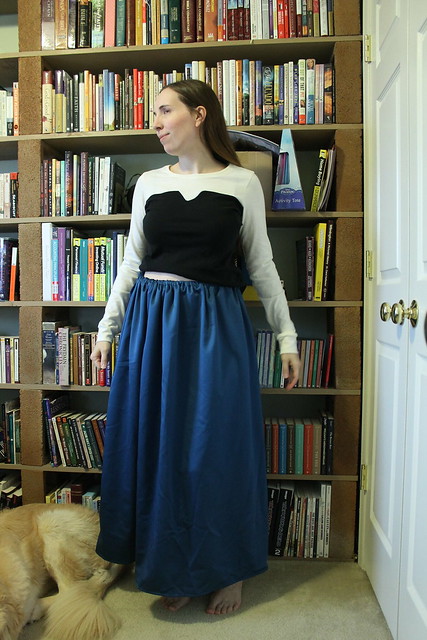
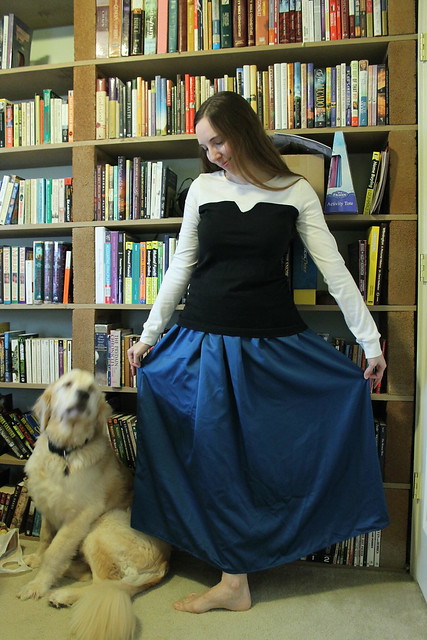
    Ariel-inspired outfit
    So here's my whole outfit, with a little help from Malkin--and my hair even looks slightly red here! I wasn't sure if it would, since it's very cloudy here today. As I said before, the top is a Renfrew, though I did make a few additional modifications that I hadn't mentioned before. I added a little extra width to the front (about 1/2" total, I think), and I added some length--more in the front than the back, so I could do a little ruching on the side. I also left the bottom band off, simply because I didn't have enough fabric left to cut it, even if it had been pieced together! The length looks all right for now, but since I'm sure I'm going to use this pattern to make a couple more tops, I think next time I'm going to add even more length to the front and put the band on anyway, just to accommodate any expansion and hold things in place. I'd definitely like to avoid that baby belly hanging out from underneath my clothes look if I can!


    Ariel skirtSince the Gabriola was a no-go, I raided my pattern stash for ideas. I picked out an elastic-waist maxi skirt, then realized that the hips were still pretty fitted and that this skirt wouldn't work for too long as a result, either. So, believe it or not, it was a boxy Burda magazine pattern to the rescue! This is #119 from the June 2010 issue, and it's literally two rectangles with two drawstrings that tie at the sides. No elastic, even. But I figured that could be a good thing, because then I can tighten and loosen this to fit exactly where needed. I'll admit the result is a bit bulky around the waistband, but you can't really tell as much when it's under the shirt, I think. I did change the pattern slightly by doing a drawstring casing instead of a lining piece at the top, and I also did a French seam finish inside. If this ends up looking like a high-low hem in a few months, I wanted the insides to look good!


    Ariel- side view
    Here's the side view--you can sort of see the ruching, but my hand's in the way. Now that I'm seeing the top on, I kind of wish that I'd started the black a little bit lower so it wasn't running directly into the sleeve seam. Oh well.

    You can also see that I'm not really showing much, if at all, at this point. I'm sure that will change soon, though. It's been very hard to wrap my head around the fact that I've lost a few pounds overall, due to the nausea and the very limited, bland diet I've been eating to try to get through the days, and yet I'm still having trouble with my pants fitting! For the record, my Thurlow pants have fared much better than most of my thrift store jeans, and it's just been this week that I haven't been able to button the top anymore. So that does give me hope that they'll fit again! (I haven't tried my last pair of jeans, because I need to do a little repair on the waistband before I can wear them. But honestly, I've already worn maternity jeans a few times and they stayed up, so I may not bother trying.)


    Stashbusting totals:
    Top: about 2 yards (1 of the ivory jersey, and 1 of the black interlock left over from the summer's black tank dress. Both pieces completely used up, hurrah!)
    Skirt: 2 1/4 yards of the teal. I have about 2 3/4 yards left, which I'll need to come up with a use for at some point. (I already bought a similar-colored short-sleeved maternity top on clearance at Target, so that option is out.)

    Ariel outtakeAnd I'll leave you today with an outtake--  I've got the standard Disney princess animal companion, and we can just pretend his name is Max for this picture, even if he is the wrong breed. But apparently Ursula's spell messed up, because this mermaid only has one foot!

    June 13, 2014

    they've been chopped

    For all of the refashioning that I used to do, I really hadn't done any in awhile. Over the last couple of years, I've been super-focused on stashbusting and making from scratch, so much so that I forgot how fun, and how instantly gratifying, transforming something that's already around can be. It's a whole different group of problems to solve, and a good challenge.

    I have two refashions from May to show today. The first is one of my all-time favorite dresses, that sadly wasn't zipping at the top anymore.
    MMM'12, Day 13 Remember my Titania dress? I was so proud of this one, since I basically designed it and hand/draped it myself. Though, to be honest, the top wasn't holding up so well. Since I was more or less winging it, the insides weren't finished so great, the fabric was starting to sag around that slit in the front, and gaps were starting to appear where the ends of the binding met around the sleeves. I still love the fabric, and that hand-pleated skirt would have been the hardest thing to let go of. So naturally, I chopped off the top and made this dress into a skirt.

    Aside from one random Instagram, I didn't take the time to do too many in-progress shots this time. So what I did was to pin a length of grosgrain ribbon to the midriff panel, leaving an extra-long tab at one end, stitch it, flip it, and use that to make a waistband. The extra-long tab was used to make an underlap, which has a couple of hooks and eyes and snaps and things sewn to it. Aside from that, the only thing I did was to shorten the zipper in the center back.

    Titania skirt

    And here's the result! It feels a little weird to me since I'm not used to skirts that hit at my natural waist. But with the fullness of the chiffon bit, this skirt makes me think of ballet. I feel like this will be a lot more versatile as a skirt than it was as a dress, since I can also dress it down depending on my top and footwear. So all in all, I feel like this was a success.


    Skinny-ish jeans


    As for the second project, this one had a preview during Me-Made-May. I bought a few pairs of jeans at the thrift shop near the end of the winter, because I had a couple of pairs shrink or wear out completely (to the point where they had to be relegated to work jeans--yes, I have a separate set of jeans that I only wear to the garden center, because I don't care if they get messed up by dirt or paint or whatever other random things I have to get into there--or just gotten rid of completely), and I knew I wouldn't have time to make jeans anytime soon. Yay, spring. One of the pairs I bought fit me adequately well through the waist and hips, but they were just a little too short to look good with regular flat shoes. I don't have a before picture, so just think flared jeans that were awkwardly hitting right around my ankle.

    Here's the after--I was intending to make it more of a skinny jeans silhouette, but discovered while I was working with it that the fabric would be much happier with a straight, slightly tapered cut. There wasn't any stretch to the denim, so it made sense. All I did was take the side seams apart up to about the knee, pin them down the length of my leg (much to Doug's amusement, since I was also wearing them inside out at the time), sew in the zippers, and re-stitch the hem. The zippers ended up being unnecessary in the end, since I can pull them on and off easily without unzipping them, but I like the detail that they add. I do still plan to make some more jeans, and am hoping to tackle some skinny jeans this month because I do need them before DragonCon. Because of reasons.

    I do have to say that I was really surprised at how easily these jeans came apart! The nice thing for refashioning purposes was that each side of the outer leg seams was individually finished on the serger, so I didn't have to unpick a bunch of serging. But if I unpicked it in the right place, the seams came apart quite quickly, and the hems pretty much entirely unraveled with the tug of a thread. I would have thought the quality would have been slightly better, given the Tommy Hilfiger label on them!

    IMG_1405
    And, since it's Friday, I'll leave you with a silly outtake picture. Silly dog can't resist an opportunity to photobomb me!


    March 13, 2014

    Throwback Thursday

    Between the Stash Diet/Stashbusting Sewalong efforts, and the Wardrobe Architect challenges, I've been in the mood lately to take a good, long look at my closet and see what maybe doesn't belong there anymore. A lot of the things I've been pulling out so far are thrifted or RTW items, but I've also found a few things I made that mostly predate my blogging days. So, I figured I'd feature them for a moment here before I repurpose them.

    1. The denim jacket, circa 2005 (I think). This is the coat that my Robson is replacing. I made it using a slightly shortened version of a Vogue coat pattern (1266). It hasn't aged well, as far as denim jackets go--instead of looking broken-in and casual like the more traditionally-styled ones do, it just looks faded in all the wrong places. You can probably see those collar wrinkle fade marks all the way from here.


    The lining is still in good condition, though. I love all of the fun colors in this fabric!


    2. The retro skirt, circa 2006. This one was actually one of the first things I shared on this blog, though not in much detail, since it was only my second post and all I did was mention some things I'd made over the previous summer. (Incidentally, aside from this skirt, the only things in that post that I still have are the bag and the long wrap skirt. I occasionally pull out the bag for days that I don't need to carry much weight, because I can't bring myself to get rid of the hand-painted panel but it won't hold up to more. And I do still wear the wrap skirt fairly regularly during the summers.) My original intention was to wear this skirt for my grad school graduation, but I was too busy with classes and such to finish it in time. So I finished it up the following summer. I still think this fabric is really fun, but the proportions of the skirt were never quite right. (Or the fit, if the way the waistline just hangs off of Donna is any indication.) I tried to draft my own pattern, and it didn't work out well. So then I used McCall's 4783 for the yoke, and I should really just ditch that pattern because the yoke is too wide and it means there's a seam right on the widest part of my hips. Not flattering. And then it ended up too short, which is why there's that white band on the bottom. Which is now somewhat dingy-looking.

    I do still think the piped faux pockets are a cute detail, and I may have to revisit that one sometime, but they'd work out a lot better if they were several inches higher. And stopped curling. If I do revisit this, interfacing would probably not be a bad thing.


    3. The Japanese maxi-skirt. I think this one was one of the few things I actually managed to crank out in college, which would put it around 2002-2003. I still like the skirt, honestly. It's Simplicity 7097, which I've used for another project or two over the years. Even though it's straight, it has a slit that's a good length for me to still be able to move freely. And I think the fabric is really fun. According to the website where I bought it, the symbols are kanji for "moon". The thing is, I only wear this skirt maybe once a year, tops. It's partly that I don't really have anything to wear with it, other than black tops. Though 3/4 of the colors are definitely in my palette, the red is what stands out to me and gives me mental blocks on wearing it. The other thing is, I love prints that evoke other cultures, but I often feel a little weird wearing them as a white girl of primarily German/UK descent. It's like I have this subconscious fear that, say, I'll offend my students that come from Asian families if I wear a skirt with Japanese writing. It's probably weird, and my thought line is more "I like this thing about your culture well enough to borrow it for my wardrobe", but it's still there.

    Rather than just pass these on to the thrift store, I'm going to recycle them here. I'm in the very beginning stages of planning a quilt, and spent a snow day chopping up smaller pieces of cotton prints and old muslins to do so. So since they're all quilting cotton prints (I'm thinking the lining of the coat, not the denim), why not add them? This thing's probably going to take me 5 years to make anyway, so I might as well include little pieces of my fashion history.

    Plus, you know, free fabric, and I can hoard the zippers and buttons for future projects. I love free stuff!

    And yes, I am sewing. Though I'm at a bit of a standstill for March of the Shieldmaidens while I wait for dye to arrive/frantically try to finish the sewn part of a gift before a baby shower next weekend. With any luck, I should be able to start this costume by April...

    February 24, 2014

    The Gabriola Skirt!

    Can I just say how hard it's been to keep this a secret? I've had this skirt done since December, but waited to post it till now, because I was one of the lucky ladies selected to test Tasia's latest Sewaholic pattern! It just came out today, so go check it out!

    IMG_1154This is the Gabriola skirt. I was super-excited when I got the email calling for testers when I read that she was designing a maxi skirt, and even more excited when I got selected! I love a good maxi.

    Aside from one incident where I accidentally cut one of the yoke pieces the wrong way, this came together really nicely. I love the interest that the diagonal yoke seaming adds to the hip area, and it's so swishy!

    Of course I had to do the contrast version. The hardest part for me was choosing the fabric. This uses a lot of fabric, so I didn't have anything in the stash that came remotely close to having enough yardage. (Or so I thought--after I finished this and was cleaning out the sewing room at the end of the year, I found something like 6 yards of a lightweight teal satin! Oh well. I guess I'll just have to make another one!)


    fabricI told my mom about this opportunity, and when I showed her the design lines, she suggested that a leather-looking yoke would be really cool. I completely agreed, and I kind of had my heart set on that idea. Since I was short on time, I had to go to Joann's, and figured I could just go for one of their silky prints along with something leathery. And it figures, this was the one time where they really didn't have a big selection of silky prints! I guess I went right between clearing out the fall/winter stuff and getting the spring stuff in. I did manage to find a suedecloth that looked very much like leather, which is even still hand-washable! And for the rest of the skirt, the best option ended up being this print.

    Guess I sort of did Jungle January after all! Just in December. I'm really not that big into animal prints, but this one was subtle enough that it worked for me. Plus the color scheme is right up my alley--browns, olive greens and orange? Totally in my palette. Most of the challenges I had in putting this skirt together came from trying to mix the two fabrics, so there's a few wrinkles in the yoke that wouldn't have been there otherwise. But aside from needing to take a wedge out of the back seam, this one fit me pretty much right out of the envelope.

    The most challenging thing for me right now is figuring out what tops to wear with it! After all, I don't often tuck a top into a skirt. I tried it for the initial photos I sent back to Tasia, so she could see the waistband and yoke clearly. In the interest of, um, science? here's one of those photos...this was the best shirt option I had, and it was not working. At. All. (It probably doesn't help that the waistband gaps away from me a little bit, which is completely the fault of the fabric. It's not really that stiff, but it's stiff enough compared to the print that it didn't really mold to my waist well.) So since I've been playing around with the Wardrobe Architect challenge anyway, I decided to throw a few different top options on and see what silhouettes would work. The first one was the green top in the above photo, which didn't really have a good cut for this skirt. But I did find a few other options, complete with photobombing dogs...


    Gabriola Skirt


    For one look, I embraced my geeky side and threw on my Firefly t-shirt. You can only see part of the yoke in this, but it's a very fitted t-shirt, which makes it work pretty well! If I really wanted to go all the way with this look, I'd probably swap out the flats for my brown sneakers or something.


    IMG_1160


    A more summery option would be to embrace the flowiness and throw on a looser top. This one (my "French Vanilla" top) has waist fitting, so it worked a lot better than many other tops would have.


    IMG_1161


    I wanted to come up with a more wintery look, too, so I threw it on with a more fitted white top and my orange cardigan. I guess the key to the tucked in look for me is to have a layer that isn't! I feel very teachery in this. Which I guess isn't a bad thing for days that I'm teaching, right?


    And just for fun, here's an outtake from the photoshoot: proof that those other pictures really were as good as it got!
    IMG_1159 I really enjoyed getting to be a part of the testing process for this! So go check out Tasia's versions--and I'm sure there will be lots of lovely things popping up soon from the other testers! I definitely plan on making this again at some point! (Along with maybe a few other tops to go with...though I guess I had more than I thought!)

    January 17, 2014

    Two for the price of one

    My pantsapalooza is back on! I finally made the olive pair of Thurlows, and now have 3 more to go. I also learned as I was cutting these out that, once again, I did err on the side of too much fabric. So rather than fold up the remaining large piece of fabric, I just went ahead and cut out a Hummingbird skirt while I was at it! I already had a zipper in my stash that would work, aside from the one I'd bought specifically for the pants, and I used the same buttons for both, which means that aside from sewing time, this skirt was essentially free. Can't beat that!

    Of course, this also means I'm going to have leftovers for the other 3 pairs of pants, too. I already have an idea for my grey twill, but I'm also going to have some charcoal and navy lightweight denim (as two separate yardages) to figure out what to do with. I'm hoping that I can get my cutting table cleared off today so I can cut as much of this out tomorrow as possible, given that I'm actually going to be a working musician tomorrow as well. (I love playing weddings, they're such easy money!)

    Anyway, on with the projects, shall we? I'm attempting to track stash usage as I go this year, since I'm on the Stash Diet. So that information will go below.


    Olive Thurlows- Front

    Pattern: Sewaholic Patterns- Thurlow Trousers (worn here with my Simbelmyne top)

    Amount of time it took to make: about a week, I'm going to estimate about 10 hours total

    Fabric used: A cotton olive green twill, plus a quilter cotton for the pockets and waistband facings

    Amount of fabric used: Approx. 2 1/8 yards (really more, I was left with 1.5 yards of the twill, half the original width.)

    Stashed since: 2012

    I think this is going to be my new indoor spot for photos. The light just seems so much better in here than in our living room! Plus, you know, books. Anyway, aside from an hour or so spent basting and unbasting the back seam to tweak the fit, the second round of these went together much, much easier than the first.

    Olive Thurlows- backThe welt pockets look pretty good this time, I think! It helps that it's a better-quality fabric than what I used for the brown pair for certain. But practicing the construction with the first pair helped a lot, too. They're still not perfect in the corners, but certainly passable.  I did also realize some things about the waistband construction that made the end result look much better--it was probably obvious to a lot of people, but I figured out that stopping the stitching 5/8" away from the raw edge made the zipper area fit in much, much better! I got the pockets sorted for what side needs to be out for the insides to look pretty this time, too. Which is good, because I'm actually super-excited about what I get to use up for one of the next pairs, and I want to show it!


    Thurlow insides"Guts" picture! This quilt cotton has been around forever, from some fabric my mom gave me from her own stash when I was trying to get this quilt planned out. It didn't quite work out for that, so I'm glad I finally found a use for it. I did discover that the twill creases quite a bit during wearing, but nothing that a little dryer or iron action won't fit. The creases are mainly in the front from sitting, anyway, and I generally wear my shirts untucked, so I'm not worried. Incidentally, I'm pretty sure I can count these pockets as "Itty Bits" for the Stashbusting Sewalong, too.

    And now for the skirt...

    Olive "Tapenade" skirtPattern: Cake Patterns- Hummingbird skirt (worn here with the "Autumn in Lancaster" Renfrew, since there is some olive in the print.)

    Amount of time it took to make: Probably about 5 hours, if you count the time I had to spend ripping out my fitting mistakes.

    Fabric used: same as the Thurlows. I'm calling this my "Tapenade" skirt, because that's the sort of thing you'd make from leftover olives, right?

    Amount of fabric used: a 1.5 yd x approx. 30" piece of twill, cut crosswise, + 5/8" yard cotton

    Stashed since: 2012

    Despite the fact that I've made this skirt twice already, I had a surprising amount of trouble with the fitting! When I made the hemp Hummingbird, I had to take the top in at a pretty extreme angle, which you can see much better in the pocket detail picture for the TARDIS skirt variation. I don't know if it's because the twill has much less give than the hemp, or because there was no stretch involved like there was with the denim, but it didn't work at all this time! The skirt sits pretty tightly against my waist, and when I first tried it on, there were these weird wing-like protrusions at my hips. Which is pretty much the last place I want wing-like protrusions. So I had to rip out the seam, the serging, and the topstitching (argh) that I'd already done, soften the angle quite a bit, and then restitch it. I guess this means I may need to rethink my pattern alterations before I use this one again!

    Also, I completely blanked on constructing the pockets--the good news is that I got the right edges lined up first try, but that means the wrong side of the pocket fabric is showing from the inside. Oh well, it could be much worse.

    Aside from fitting, a few minor tweaks I made was doing a centered zipper instead of invisible, just because that's the sort of zipper I had on hand. I also added topstitching to the front and side seams, to give it a more casual look.


    Total yards out: 4.25 (twill used up, only large scrap left of cotton left, so I'm counting it.)

    Current stash total: ~334 yards


    Diet rules: 2 pieces of fabric, 2 separate patterns out of 4 before I can buy more of either. Which I'd better get cracking on, because Doug and I are planning a weekend trip to NYC in February, and he said we could go to Mood! I've never actually bought anything from the physical store, though I did have a chance to step inside it once, so this is really exciting! I do have things I can legitimately buy to finish already planned projects, like a winter jacket lining, and I did build in a travel exception, but I still want to be very thoughtful about what I do buy there.
    November 17, 2013

    Time And Relative Dimensions In Skirts

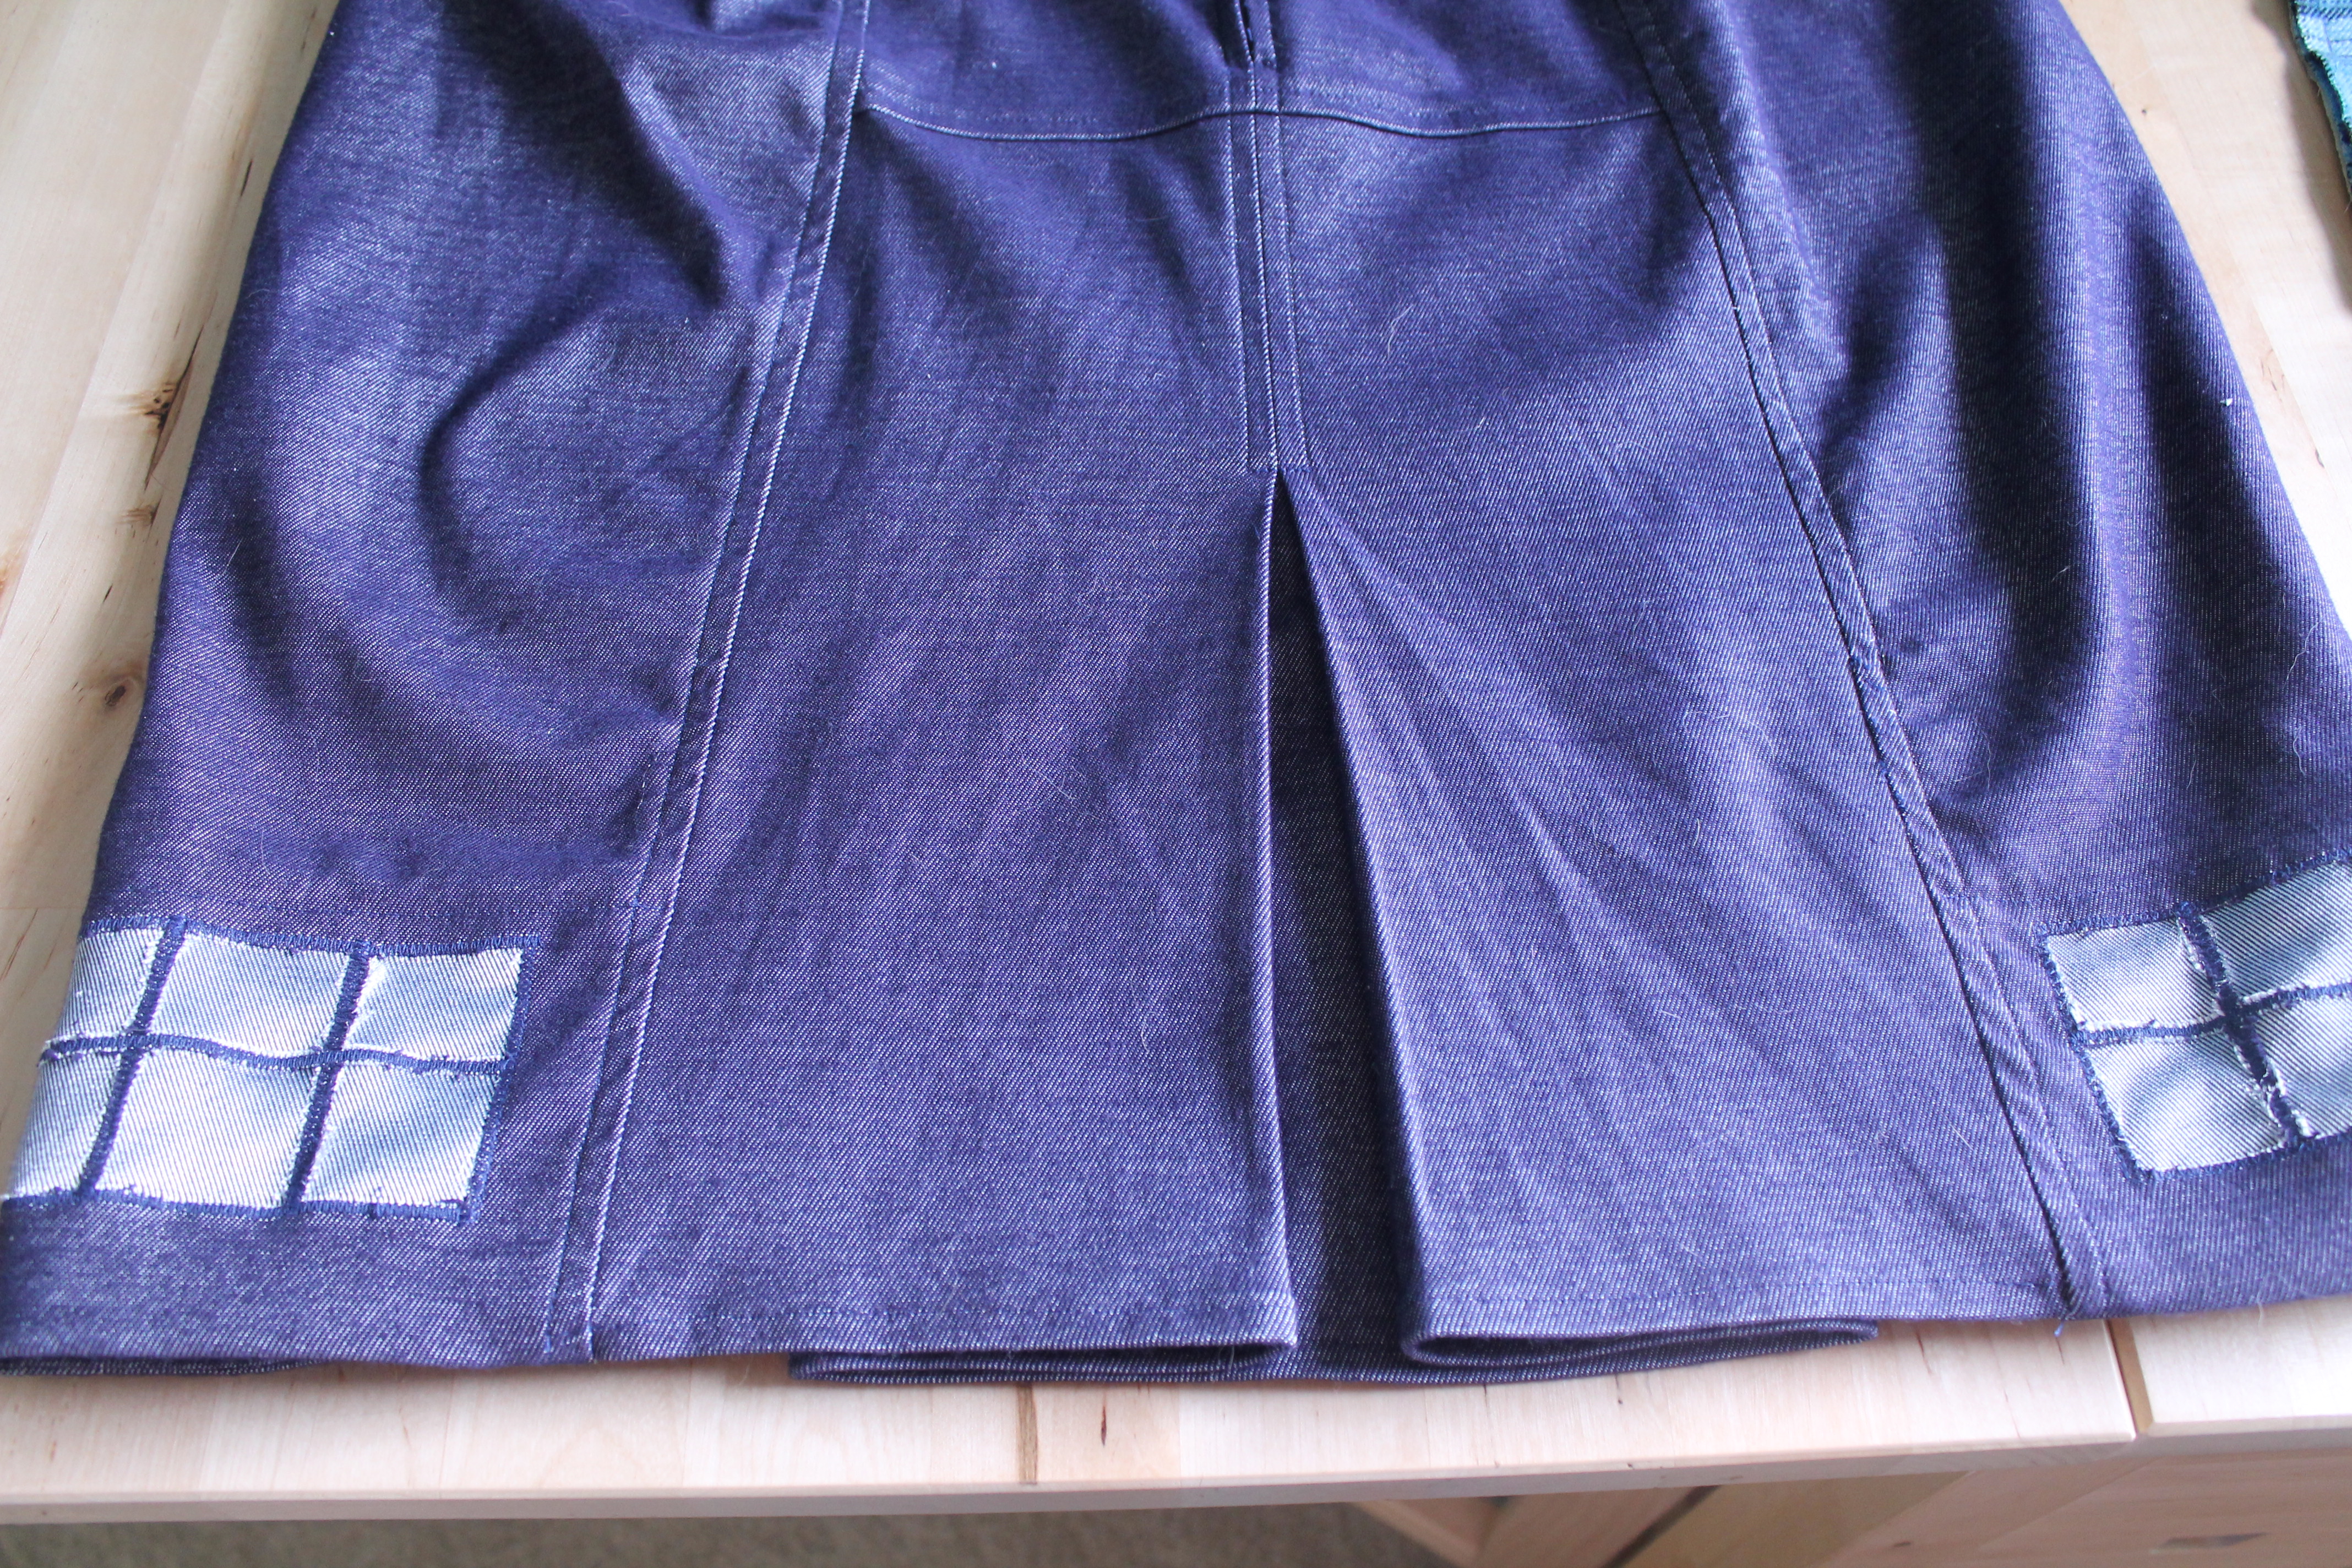
    TARDIS-inspired skirtI finally finished my first project for the Doctor Who sewalong! Here it is, with a little help from my K-9 unit. This skirt took longer than I thought it would, to be honest. It really didn't help matters that I had one of those weeks earlier this month where I basically didn't have time to sew a single stitch. But this week, I only have to go to my retail job one day (!), so I should be able to get in a decent amount of sewing!
    This is the project I've been plotting the longest for the sewalong, actually. It just seemed natural to take inspiration from the TARDIS, because that's one of the most iconic elements of the show. But I didn't want to go too literal with it, or any of my projects, so I can get maximum wearability. Aside from my collection of t-shirts, I'm a fan of subtle geekiness in my clothes--definitely inspired by a fandom, but not costume-y so I can incorporate it easily into my everyday wardrobe. Kind of like these two shirts, which were directly influenced by Lord of the Rings (a description of a cloak in the book, and Eowyn's white dress from the movie, respectively. I borrowed the embroidery motif directly from the latter.) So my thought was, if I used the TARDIS windows as a border on a skirt, the cool people would get it, and those who aren't in the know would just see "geometric border". Either way, it works.

    IMG_0878And I finally got a way to feature this particular fabric! Pretty neat, right? This denim is metallic silver on the back side, and so I've been hoarding it until I could come up with a project that I could play around with using both sides. So when this sewalong came up, I knew it would be perfect! Not quite as perfect as I'd hoped when it came to stashbusting, since I have nearly 3.5 yards left. So I guess I'll have to make some jeans out of it after all. Or maybe a motorcycle jacket. Hmm...

    Oh, and did I mention that it's stretch denim? That means--you guessed it--it's bigger on the inside!

    IMG_0876The technical details: I modified the Hummingbird skirt from Cake Patterns. The "pink" view, this time. Aside from some fitting tweaks that I made up-front based on the skirt I made during this past summer's sewalong, here's what I did...
      1. Straightened out the curve of the pockets, because that made an angle more like a TARDIS roof. (I know, that hip curve looks pretty extreme, right? But that's how much I had to take out of the green skirt, and it fits, so...)
        2. I turned the back dart into a seam, mainly to facilitate the next step.
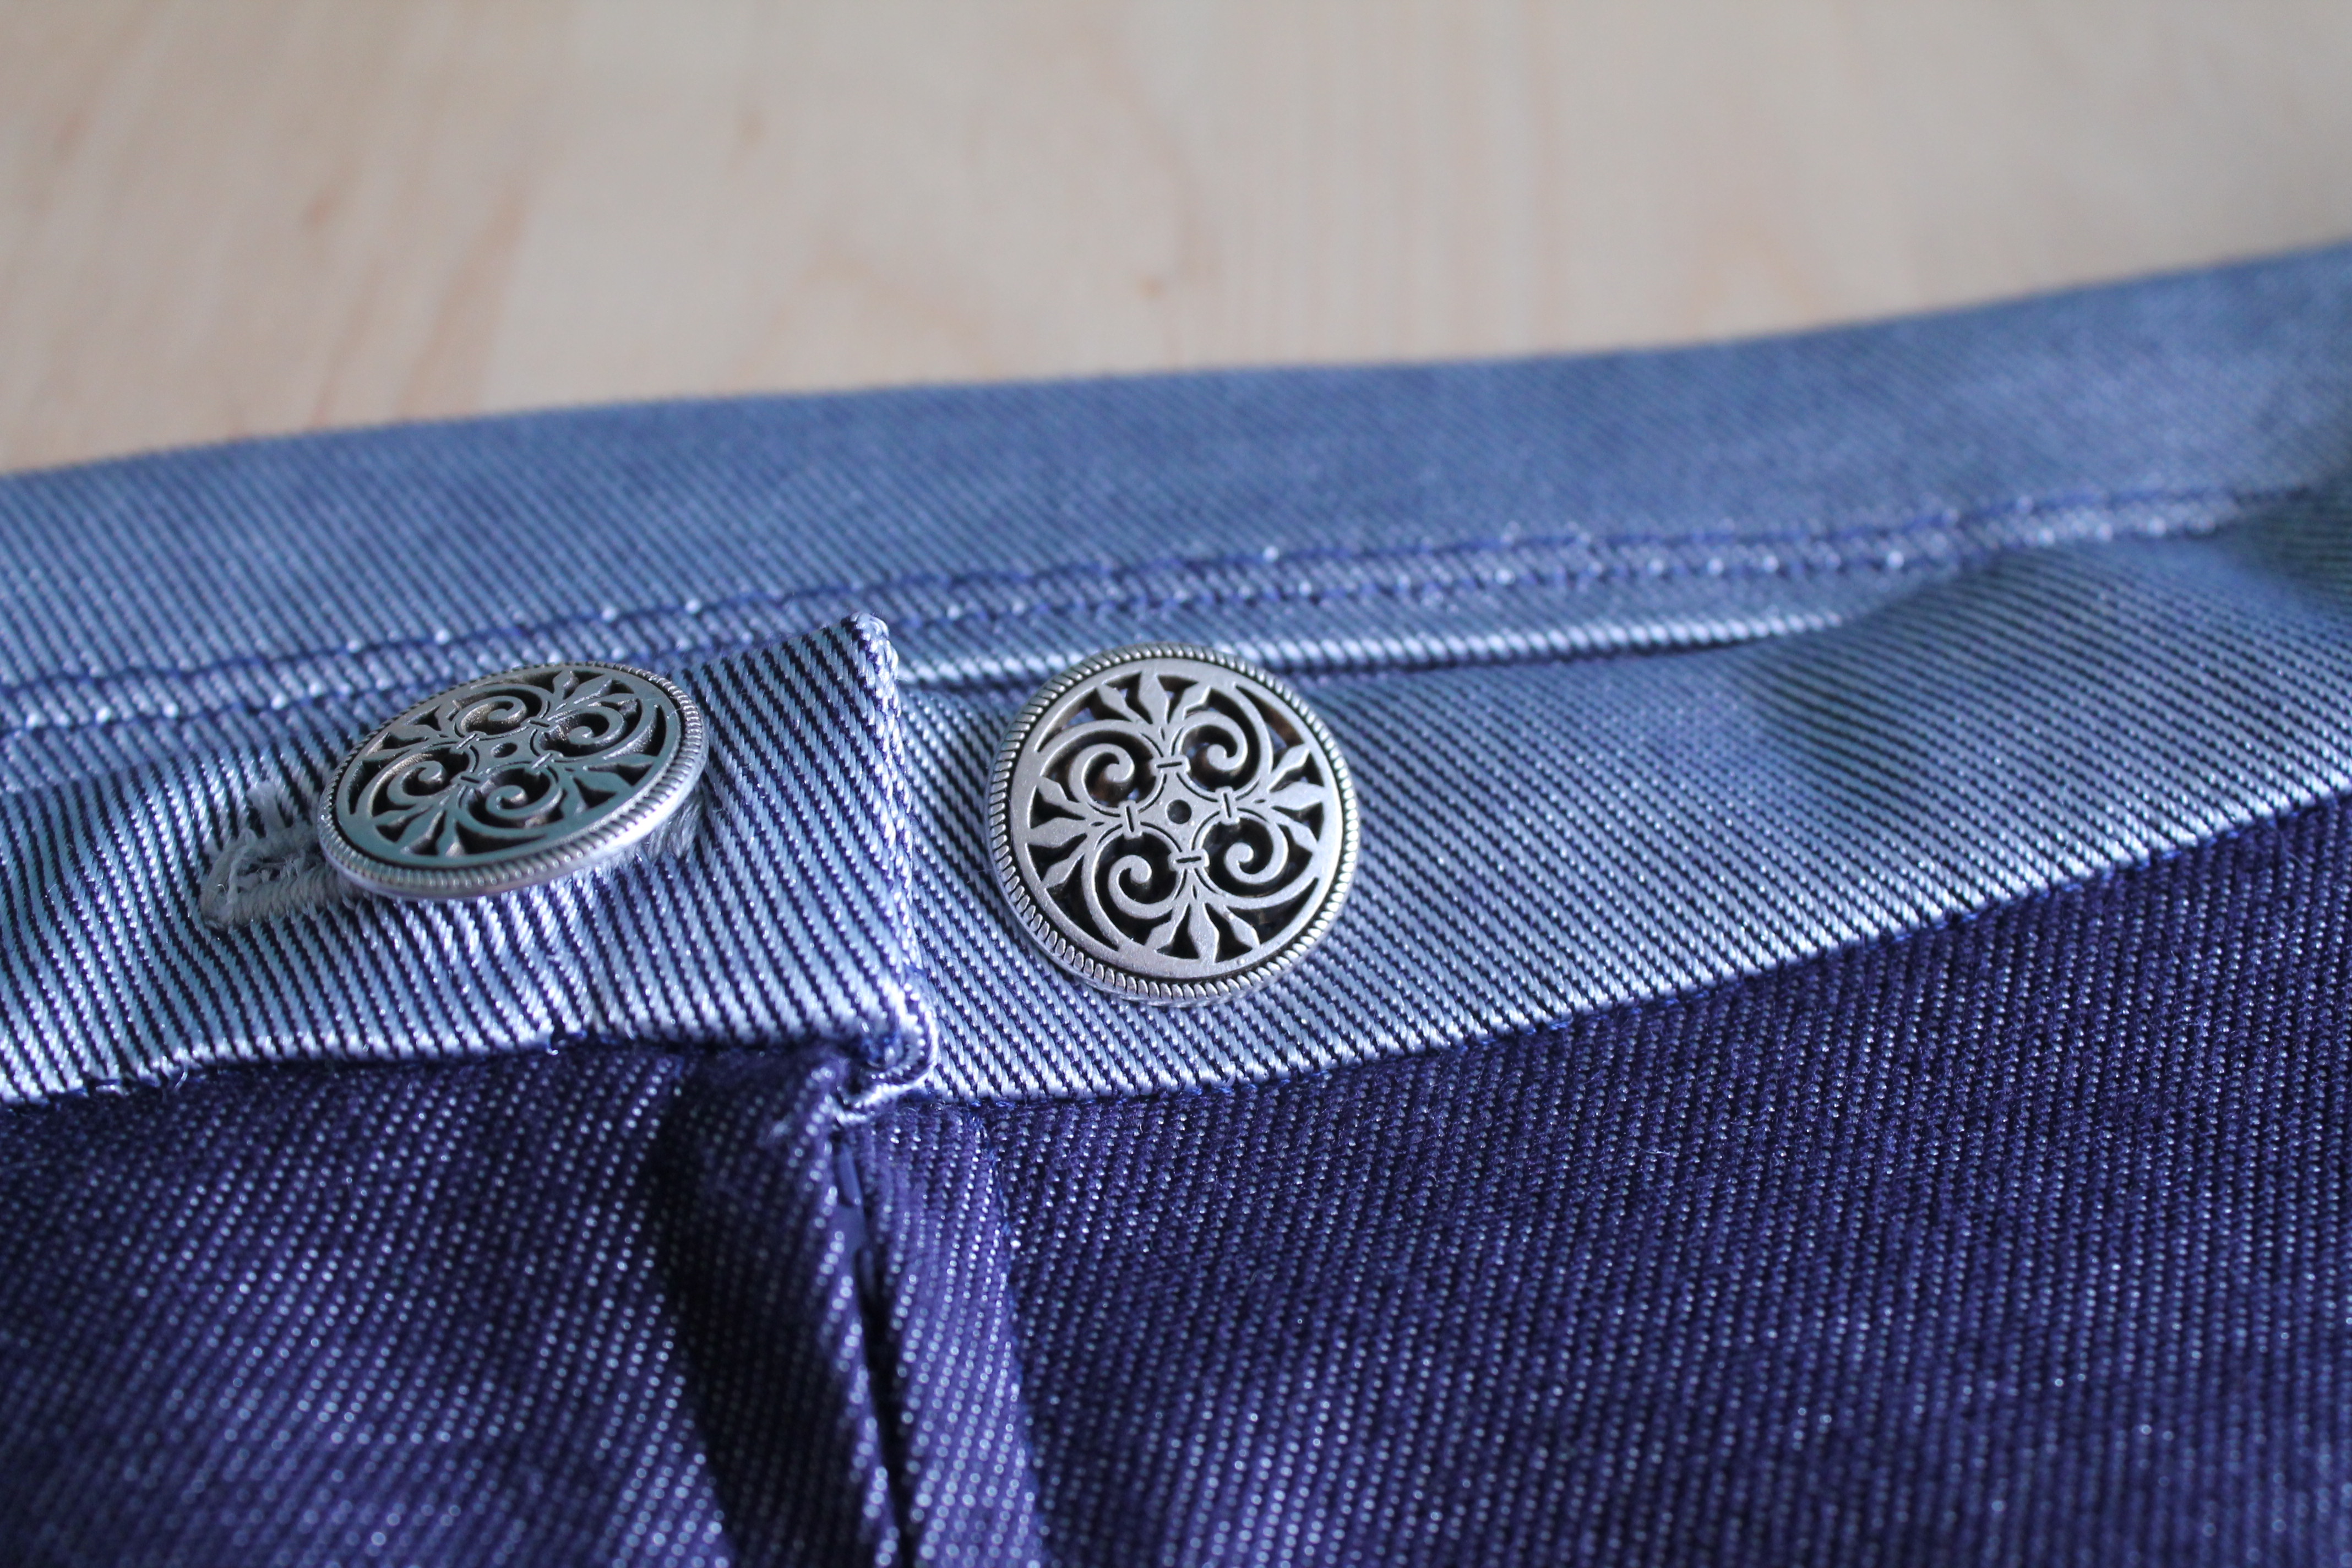
          TARDIS skirt backGallifreyan buttons? 3. Rather than a flounce cut on the bias, which would be a disaster in denim, I made a box pleat in the back. After all, a box pleat is perfect for a blue box of a time machine/spaceship, right? (Sorry for the wrinkles, I'd been wearing this for several hours first.)
            4. I did a (mostly) faced hem. I didn't want to do that to the pleat section and add extra bulk, so that section got a normal hem. I also reverse appliqued on the faced hem section to make those TARDIS windows.
              5. I did a centered zipper rather than an invisible one,also because the invisible zipper would probably be a disaster in denim.
                6. I made the waistband using the wrong side of the fabric, so I could tie in the silver on the border better. Though I'm not sure how often this part will be seen, since a) I don't really have any shirts that work with a high-waisted skirt and b) I'm also not really convinced I can rock that look. Maybe it's because the only option I could find for today's styling of the waistband was a plain black tee, but it might be a little over-emphasizing on my hips. Anyway.

                Yes, I also left the basting in, because I was too lazy to rip it out at the end. Sue me.
                  7. I also added a second (non-functional) button, because I didn't like the asymmetry of how the functional one sat above the zipper. Incidentally, these buttons were the closest thing I could find in the store to Gallifreyan writing.
                  IMG_0875One more "guts" picture, this time to show off the lining fabric. It's not quite as vivid as I intended, because I seem to have a problem with figuring out which way to cut a pocket piece and end up having the right side showing on the outside, unless you're looking directly in the pocket. I had the same problem with the recent Thurlows, so hopefully I'll figure it out before the next several pairs. But I actually hand-dyed and batiked that fabric myself, many years ago. I got this idea in my head that I wanted a star-covered ceiling, and my parents wouldn't let me paint the ceiling, so I dyed several yards of muslin and hung it up on my ceiling with thumbtacks instead. Then they became curtains in front of my broken-sliding-door closet a few years later, and actually feature as a backdrop for many of my early blog posts. Like this one. Since I have a different closet now with an actual door, I don't need that, anymore, but there's no reason to let several yards of perfectly good hand-dyed fabric go to waste, right? The batik job is honestly way too wonky for me to even think about making a dress out of it. Batiking even basic asterisk-like stars with straight lines was a lot harder than I'd thought.  (Thus all the dots.) But this will probably end up being a lot of inner waistbands and pockets.

                  I'm quite proud of this, overall. Particularly since I altered a flat pattern and it pretty much did what I wanted it to!

                  Next up: I'll give you the same preview I put on Twitter/Instagram the other day. More coming soon.


                  June 28, 2013

                  It's a bird! It's a plane! No, wait, it is a bird.

                  Fun fact I learned on the honeymoon: apparently, the hummingbird is the national bird of Jamaica!

                  Another fun fact we learned: marijuana is not actually legal there. But we saw some growing in an herb garden there by the place we went bamboo rafting anyway. No, really. There was a sign and everything. But I won't post the picture that D took, because I don't really want to post pics of drugs on here, you know?

                  A third fun fact I just looked up on Wikipedia is that the plant used for hemp, while part of the same species of plant, is not actually marijuana. Which is good, since that's what I used to make my Hummingbird skirt.

                  So, on to the finished products, shall we? Starting with the top.
                  Hummingbird front
                  Yes, this is that top I was having a ridiculous amount of difficulty with last week. Thankfully, I'm overall pleased with the results. I got this fabric a few years ago from Mood, and while I was able to use the other piece from that batch fairly quickly (hey, a year is pretty good for me!), this one had me stumped for some time due to the large scale of the print. So this definitely took some thinking, and some tweeting, but I think I managed to handle the print and any potential chest-placement issues as well as I possibly could have!

                  Changes made to the top:

                  IMG_0601
                  • I added a center front and center back seam, to accommodate dealing with the print.
                  • I rolled the facing under and stitched it down--it was just not working in this particular fabric. (Case in point, see left--this is literally as good as it would get.)
                  • As a result, I serged a rolled hem on the sleeves instead of the facing strip. I did this on the peplum hem as well.
                  Hummingbird BackChanges that I'll make next time I make this top, because I would make this again:
                  • Use a knit that stretches both ways instead of just one. I think this would have made the neckline work better.
                  • Shorten the top at the waist by 1". I used a 19" for the shoulder seam, and I think I measured it badly since it was pretty late at night when I did it and I was still tired from the honeymoon.
                  • Lengthen the peplum by 1" + hem allowance, because I do like the finished length of it.
                  I was pretty satisfied with the print matching on the back, but looking at it in this picture, the big green and black diamond shapes pop out kind of oddly! Overall, this shirt is kind of like a polka-dotted, multicolored Rorschach test, isn't it? But I kind of like it. I still have about a yard of this to use up, so I'm thinking I might just make some pajama shorts or something like that where it won't matter if I match the print or not!
                    IMG_0604Moving on to the skirt--I just barely managed to squeeze this one out of the hemp, since there was a huge chunk cut out on one side. I have a scrap that's most likely big enough for a small bag left, and therefore, I'm considering this piece stashbusted!

                    The one major change that I made to the skirt, which I need to remember to add to the pattern, is a bit of reshaping towards the top. Which, again, could have easily been bad measurements on my part. Thankfully, I had the foresight to just baste the side seams together before I tried it on, because it was huge! I ended up making the seam allowance at the top of the side seams 1 3/8" instead of 1/2", tapering back down to that 1/2" by close to the bottom of the pockets. I also took in the top of each of the seams surrounding the center panel and the top of the back darts in an additional 1/8" apiece. Again, those tapered back down to the original seaming. I did go ahead and just leave the side seams wide, since they were all nicely serged and everything. As a result, I also had to reduce the length of the waistband by about 4".

                      Hummingbird front 2Let's have another look at that skirt, shall we? Along with an introduction to one of my two new sewing buddies! This furry little photobomber is Crosby. (His big brother, Malkin, is the one trying to knock me over in the back view shot. My husband had these two when I met him, and named them after two of his favorite hockey players.)

                      I think this picture nicely highlights the other change I would make the next time I make this skirt, which is to add an inch or so to the hem. I'm used to knee- or full-length skirts, so this one feels reeeeeally short to me! And wearing it outside of the house is definitely going to be a bit of a stretch to my comfort level. But hopefully I can work myself up to it, because I bet the hemp is going to be really cool and comfortable for the mid-Atlantic heat and humidity!

                      So there you have it, two new finished garments! If there's one thing I learned from this sewalong, it's that I'm a much slower sewist than I thought. So it'll be interesting to see what I can actually get done in 30 minutes a day, because pretty much every step took me nearly twice as long!