Showing posts with label pattern drafting. Show all posts

August 23, 2015

a study in improvisation

Sometimes, I feel like I'm not a very creative person.

Sure, I look creative. After all, I have a music degree (two, actually), and I mange my own clothes. I also enjoy cooking, most of the time. But here's the thing: I'm a classically trained musician. Which is basically the equivalent of not being the author who creates the story, but the translator who takes a different language and rewrites it into English. The times I've gotten the most nervous performing have been the times I've been told to just make up a part. And I see this in the other things, too. I can follow a recipe well, but I struggle to take a handful of ingredients and turn them into a tasty meal without one. And I choose the fabrics and tweak the fit, sometimes I mash together two patterns if I'm feeling brave, but it's almost always someone else's design that I'm just interpreting.
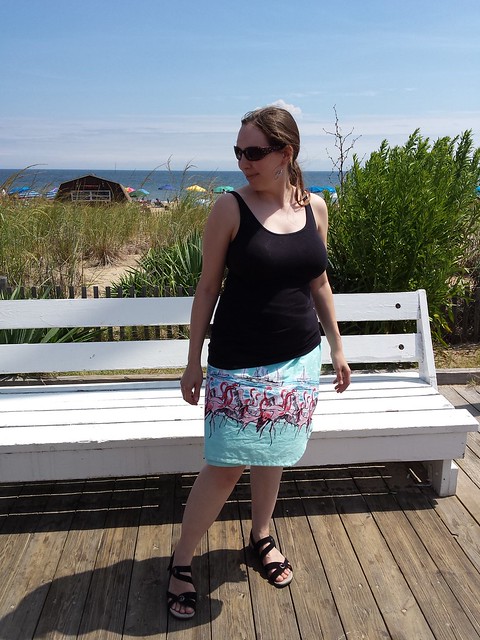
Self-drafted wrap skirtThat being said, this skirt was definitely out of my comfort zone. And it's certainly not perfect. If this was Project Runway and Michael Kors was still a judge, he'd probably pull out that Becky Home-ecky phrase, furthering my dislike of him for making my name synonymous with bad sewing. But I made it, without a pattern, and it did what I wanted it to do. And that's pretty huge for me.

So here's the details: it's two yards of quilt cotton that should be all wrong for me--mint green? Pink? Really? But the flamingos called to me. I cut it to the length I thought would be good, plus seams and hems, then cut that piece into thirds. The back is adjustable, with buttonhole elastic courtesy of Brooke, who kindly sent me some from her own stash when she learned via Instagram that I didn't have any. Aren't sewcialists the best? The front waistband is flat, and secured by two buttons-- one inside, one out. I fully lined it with some white polyester from my stash, which took my totals down another 2 yards. 
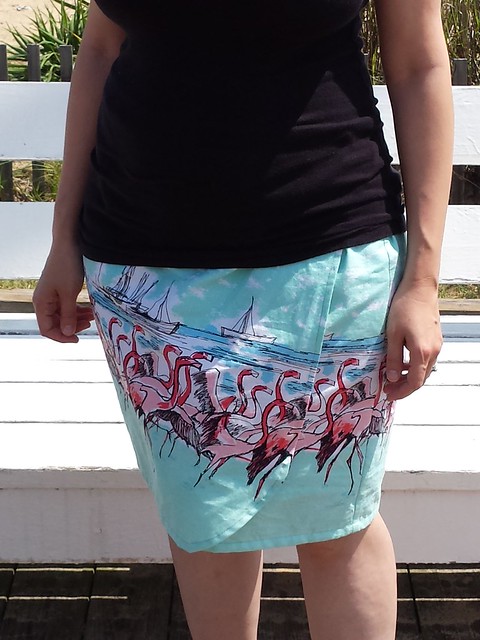
Self-drafted wrap skirtI think my favorite detail is the front curve. I had to wing it, because I didn't have anything in the room that was round and large enough, and our plates aren't round either. But I think it turned out really nice!

I was also pleased that I was able to avoid any wardrobe malfunctions, as wrap skirts are prone to. I first wore it for a morning out with Doug and Hobbit, on the boardwalk at one of my state's busiest beaches, as we had a couple of errands to run at specific stores in that area. It was quite breezy, but my legs stayed covered!
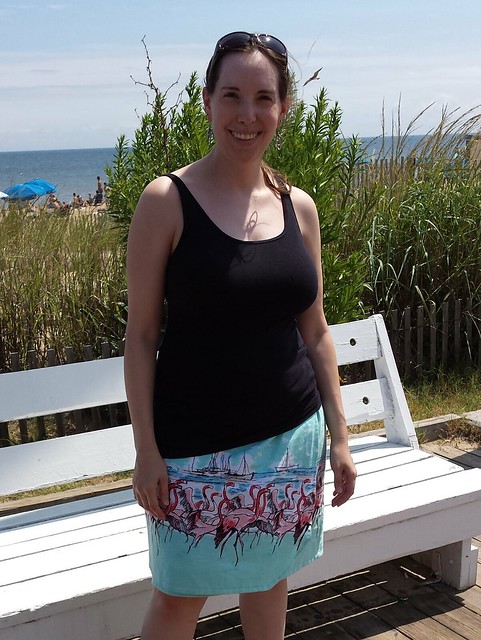

Self-drafted wrap skirt


I'm also pleased that I was able to finish it in time for the end of the month, since this fabric just screams summer and probably won't really work once it starts getting colder. I may have a long way to go to truly get the hang of designing my clothes from scratch, but I think this is a step in the right direction.

(Note: the stupid Blogger app on my phone ate about half of the original post when I was trying to get off of the original draft, so I've reconstructed it as best as I could.)

January 21, 2015

fabric fail

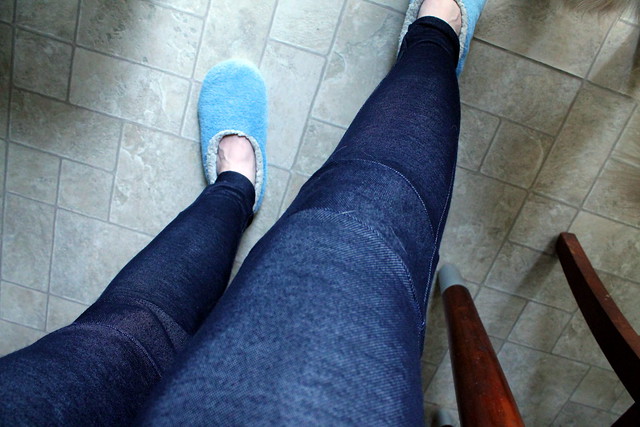
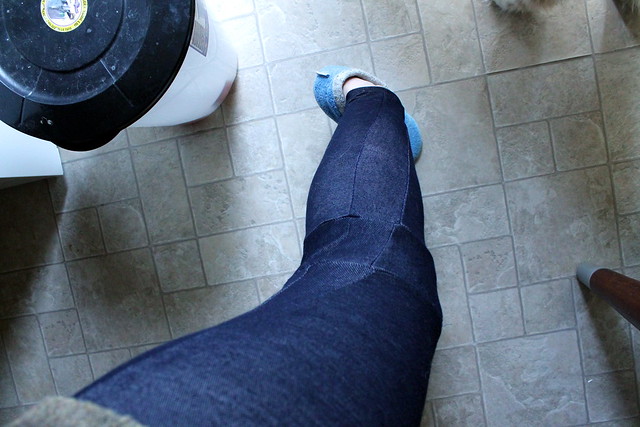
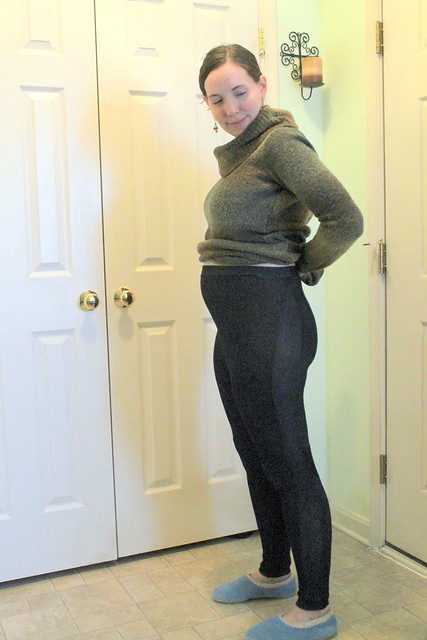
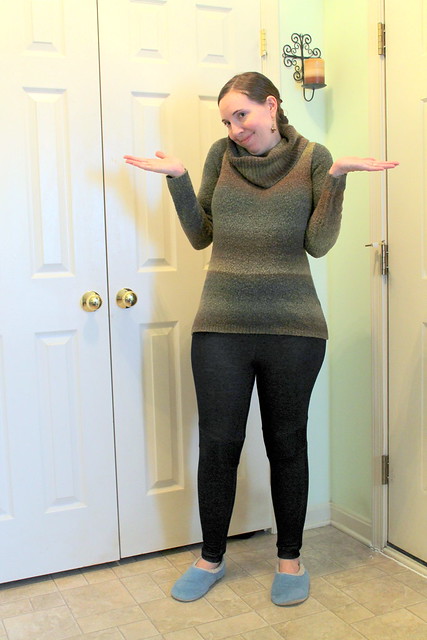
Not my best project ever.I was so excited for this project. So to say I'm a little disappointed in the outcome is an understatement. But, since I believe that the fails should be documented along with the victories--mostly so I don't make the same mistake again later--I'm going to share the sad story of these leggings anyway. Slippers, ridiculously lightened photos since it was the only way I could show the seams, and all.

(Hey, from this angle, I don't look pregnant at all! Anyway.)

The pattern is the Manila leggings, from the current month's issue of Seamwork magazine. (Doug bought me a year's pattern subscription for Christmas, which made me very happy since the whole point is quick projects, and I'm going to need those in the coming months!) I had one pair of maternity leggings, which I've been wearing instead of tights under the few skirts I have that fit. So I was quite happy to see this pattern and give the leggings-making thing a try, given that I just wasn't in the mood to play connect-the-dots on my Espresso pattern to try and get a fit when I wasn't sure what standard to use for the waist/I'd have to modify it anyway. The pattern itself is pretty simple: front piece, back piece, cute petal-like cuffs for the ankles, waistband, done. I knew I'd be altering the top to add a panel for the growing belly, but aside from that, I thought this would be a quick, straightforward make.

But I made two mistakes right away:
  1. I didn't realize that my chosen fabric--a cool denim-looking knit that I got on sale at Mood when I was making my last online purchase there--didn't have enough stretch to work for something like this. Honestly, why would you make a knit that stretches more cross-wise, when basically every single pattern ever made would have you cutting so it stretches horizontally? Especially for something that's pretty much screaming to be some kind of bottomwear. But still. I should have checked this more closely.
  2. I also didn't realize that, even though there is a full-length view shown in the pictures, the only view included in the pattern was the cropped version. Leggings that only come down to my upper calves are absolutely useless for anything but exercise wear. Especially this time of year.
IMG_2310The result? Yeah, not quite so chic as I hoped. It took so much hacking to even get these to the point where I could pull them on all the way! (And sorry for the weird looking-down pictures-- I just couldn't get the seaming to show up well enough in the others.)

IMG_2311What I probably should have done with the legs was add the extra length around the knees first, and then add the extra width so the stripe would be unbroken. But I did still have hopes that once I managed to get the leggings all the way around my calves, the cuffs would add enough extra length that I could get by with my boots. Didn't happen. Neither did seam-matching, despite multiple efforts and a lot of seam ripping.  Ugh. It honestly got to the point where I was so fed up with them, that I didn't even bother with the cute cuffs (which I wasn't sure would stretch around my legs all the way anyway, given the way things were going) and just cut a strip to give them a sweatpants-like finish.

I was hoping that this would give me another color option to wear with skirts, though I'm not sure why, since the only skirts I have are black, denim, or that long teal one that would hide them anyway. (I'm generally of the school of thought that leggings are not pants, the fabric on my store-bought pair is way too thin for that, but for the sake of these photos, I'm wearing them as such. The things I do for the blog.) I'm not going to say they're a wadder yet, since I can wear them on days I don't have to leave the house, like today, and save my jeans for the days I do, but they're definitely not a project I'm proud of.

IMG_2309On the plus side, the maternity panel alteration seemed to work great. Especially once I went back and cut a new panel on the cross-grain so it would actually stretch. (Yes, I know it's not really a cross grain for knits.) It does make me feel a little better to know that, at least in this, my pattern hacking skills are beginning to improve.

I do have a decent-sized remnant of this left, which I think is probably just enough for some kind of babywear or undies, though I wouldn't even try the latter until things are back to more of a normal state. I.e. I'm not being told to put on a pound a week. But essentially, this takes 2 yards out of the stash, for a total of 6.25 yards out so far this year.


Speaking of kid stuff-- we had our ultrasound on Monday, and I know the gender now! So I cut out a simple baby outfit last night, am hoping to get it all sewn up today, and my next post should be me telling you all what we're having. Just warning you now, because this very well could be a double-post day.

One last, unrelated, administrative-type detail-- I've turned my Instagram into a private account, since it's at the point where more kid-type stuff will be going up and I don't want just anyone on the internet to be able to find it. I have still been posting a lot of crafty stuff on there, so if you are a friendly sewcialist (seriously, what other kind is there?) and want to follow, don't be afraid to send a request! My screenname there is different than my blog/Twitter handle, but I do have a link to the profile on the sidebar.

August 4, 2014

I want much more than this provincial life

Let's be honest here: pattern hacking is not my strongest sewing skill. Given enough time and the amount of stubbornness I'm willing to throw at a project, I can sometimes make it work, like the three-muslin wedding dress bodice. Sometimes I get lucky and things turn out as planned right away, like the TARDIS skirt (aside from my occasionally wonky reverse applique.) But most of the time, I end up with something patched-together and not very pretty, like the last major Franken-shirt I attempted. And then I just wonder where my math went wrong (somewhere around the 6th grade, probably) and envy Heather's mad hacking skills.

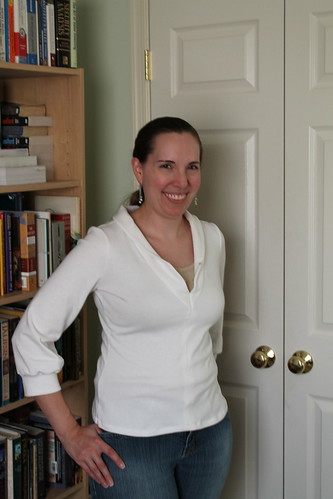
IMG_1501This project is somewhere between the two extremes. I think I may have had better luck with it because it's a knit and those are generally more forgiving.

In true mad scientist fashion, I mashed together three patterns, from three different companies. The collar and the general shape of the front came from New Look 6922, the sleeves were a narrowed-out-of-necessity version of Simplicity 2852, and the back/reshaping of the front and sleeve caps/cuffs came from my Sewaholic Renfrew. I knew I wanted a slim fit for the top, because the only reason I made this shirt at all was for my Belle costume for DragonCon, and I needed it to fit smoothly under my Monetta-Tiramisu mashup from June.

This wasn't without its drafting issues, for sure. I picked the New Look pattern for the general shape of the collar, because I had no idea how to get something that looked like the shape of what's on her shirt. And I did things like hold the pattern pieces up to myself and measure and everything, but it still ended up being a much lower-cut neckline than I intended. I also ended up having to rip off one of the cuffs and resize it, because it wasn't nearly as fitted as I wanted. I think I ended up cutting about 2" off of it.
IMG_1504
You can see the sleeves a little better here, as well as the general shape of the collar. I was originally thinking of making this a cardigan, but when I realized the collar was way too long, I just sewed it down the center front instead to give it a little more shaping. Draping it over myself didn't help here, either. Like I said. My franken-patterning needs work.

You can probably also see that greyish dot on the collar... I ended up sewing two sets of hooks and eyes on there to close it up some so that the collar comes together where I want it to for costume purposes.

I did bust an entire piece of fabric for this one! I had a tube of rib knit that was pretty useless for t-shirt making, because I'd have to dye tiny little pieces to match whatever shirts I was making, and who wants to do that? So I just managed to squeeze the whole thing out of it. The fabric was free anyway, in the category of things that people gave my mom that she couldn't use for quilts, so no loss on my end except to the yardage tally on my stash. I'll take it.

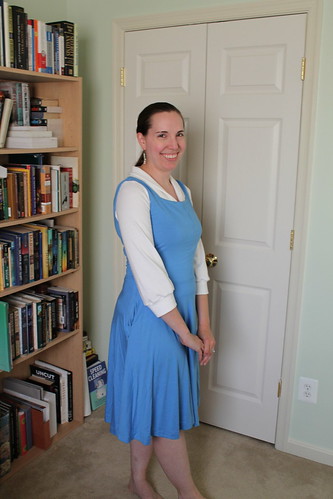
IMG_1506

And here's the costume so far! I still need to make a half-apron and a hair bow, but the two major components of this outfit are done, at least. I think this one will be a pretty comfortable one to wear all day, too, given that it's all knit.


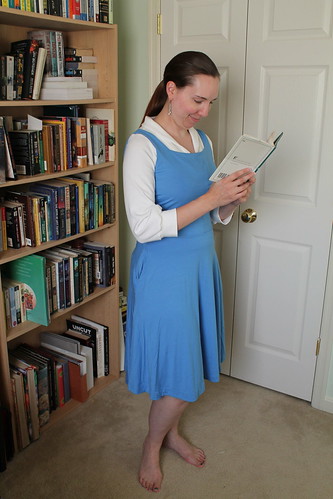
IMG_1509


And of course I had to do a pose with a book, given that I was in a library and it is Belle.

So I think the costume end is shaping up nicely, though unlike the dress, I'm not sure I'm ever going to wear this shirt outside of this weekend. It just doesn't feel like me, you know? Maybe if I dye it or something. I don't know...what do you think?

November 17, 2013

Time And Relative Dimensions In Skirts

TARDIS-inspired skirtI finally finished my first project for the Doctor Who sewalong! Here it is, with a little help from my K-9 unit. This skirt took longer than I thought it would, to be honest. It really didn't help matters that I had one of those weeks earlier this month where I basically didn't have time to sew a single stitch. But this week, I only have to go to my retail job one day (!), so I should be able to get in a decent amount of sewing!

This is the project I've been plotting the longest for the sewalong, actually. It just seemed natural to take inspiration from the TARDIS, because that's one of the most iconic elements of the show. But I didn't want to go too literal with it, or any of my projects, so I can get maximum wearability. Aside from my collection of t-shirts, I'm a fan of subtle geekiness in my clothes--definitely inspired by a fandom, but not costume-y so I can incorporate it easily into my everyday wardrobe. Kind of like these two shirts, which were directly influenced by Lord of the Rings (a description of a cloak in the book, and Eowyn's white dress from the movie, respectively. I borrowed the embroidery motif directly from the latter.) So my thought was, if I used the TARDIS windows as a border on a skirt, the cool people would get it, and those who aren't in the know would just see "geometric border". Either way, it works.

IMG_0878And I finally got a way to feature this particular fabric! Pretty neat, right? This denim is metallic silver on the back side, and so I've been hoarding it until I could come up with a project that I could play around with using both sides. So when this sewalong came up, I knew it would be perfect! Not quite as perfect as I'd hoped when it came to stashbusting, since I have nearly 3.5 yards left. So I guess I'll have to make some jeans out of it after all. Or maybe a motorcycle jacket. Hmm...

Oh, and did I mention that it's stretch denim? That means--you guessed it--it's bigger on the inside!

IMG_0876The technical details: I modified the Hummingbird skirt from Cake Patterns. The "pink" view, this time. Aside from some fitting tweaks that I made up-front based on the skirt I made during this past summer's sewalong, here's what I did...
    1. Straightened out the curve of the pockets, because that made an angle more like a TARDIS roof. (I know, that hip curve looks pretty extreme, right? But that's how much I had to take out of the green skirt, and it fits, so...)
      2. I turned the back dart into a seam, mainly to facilitate the next step.
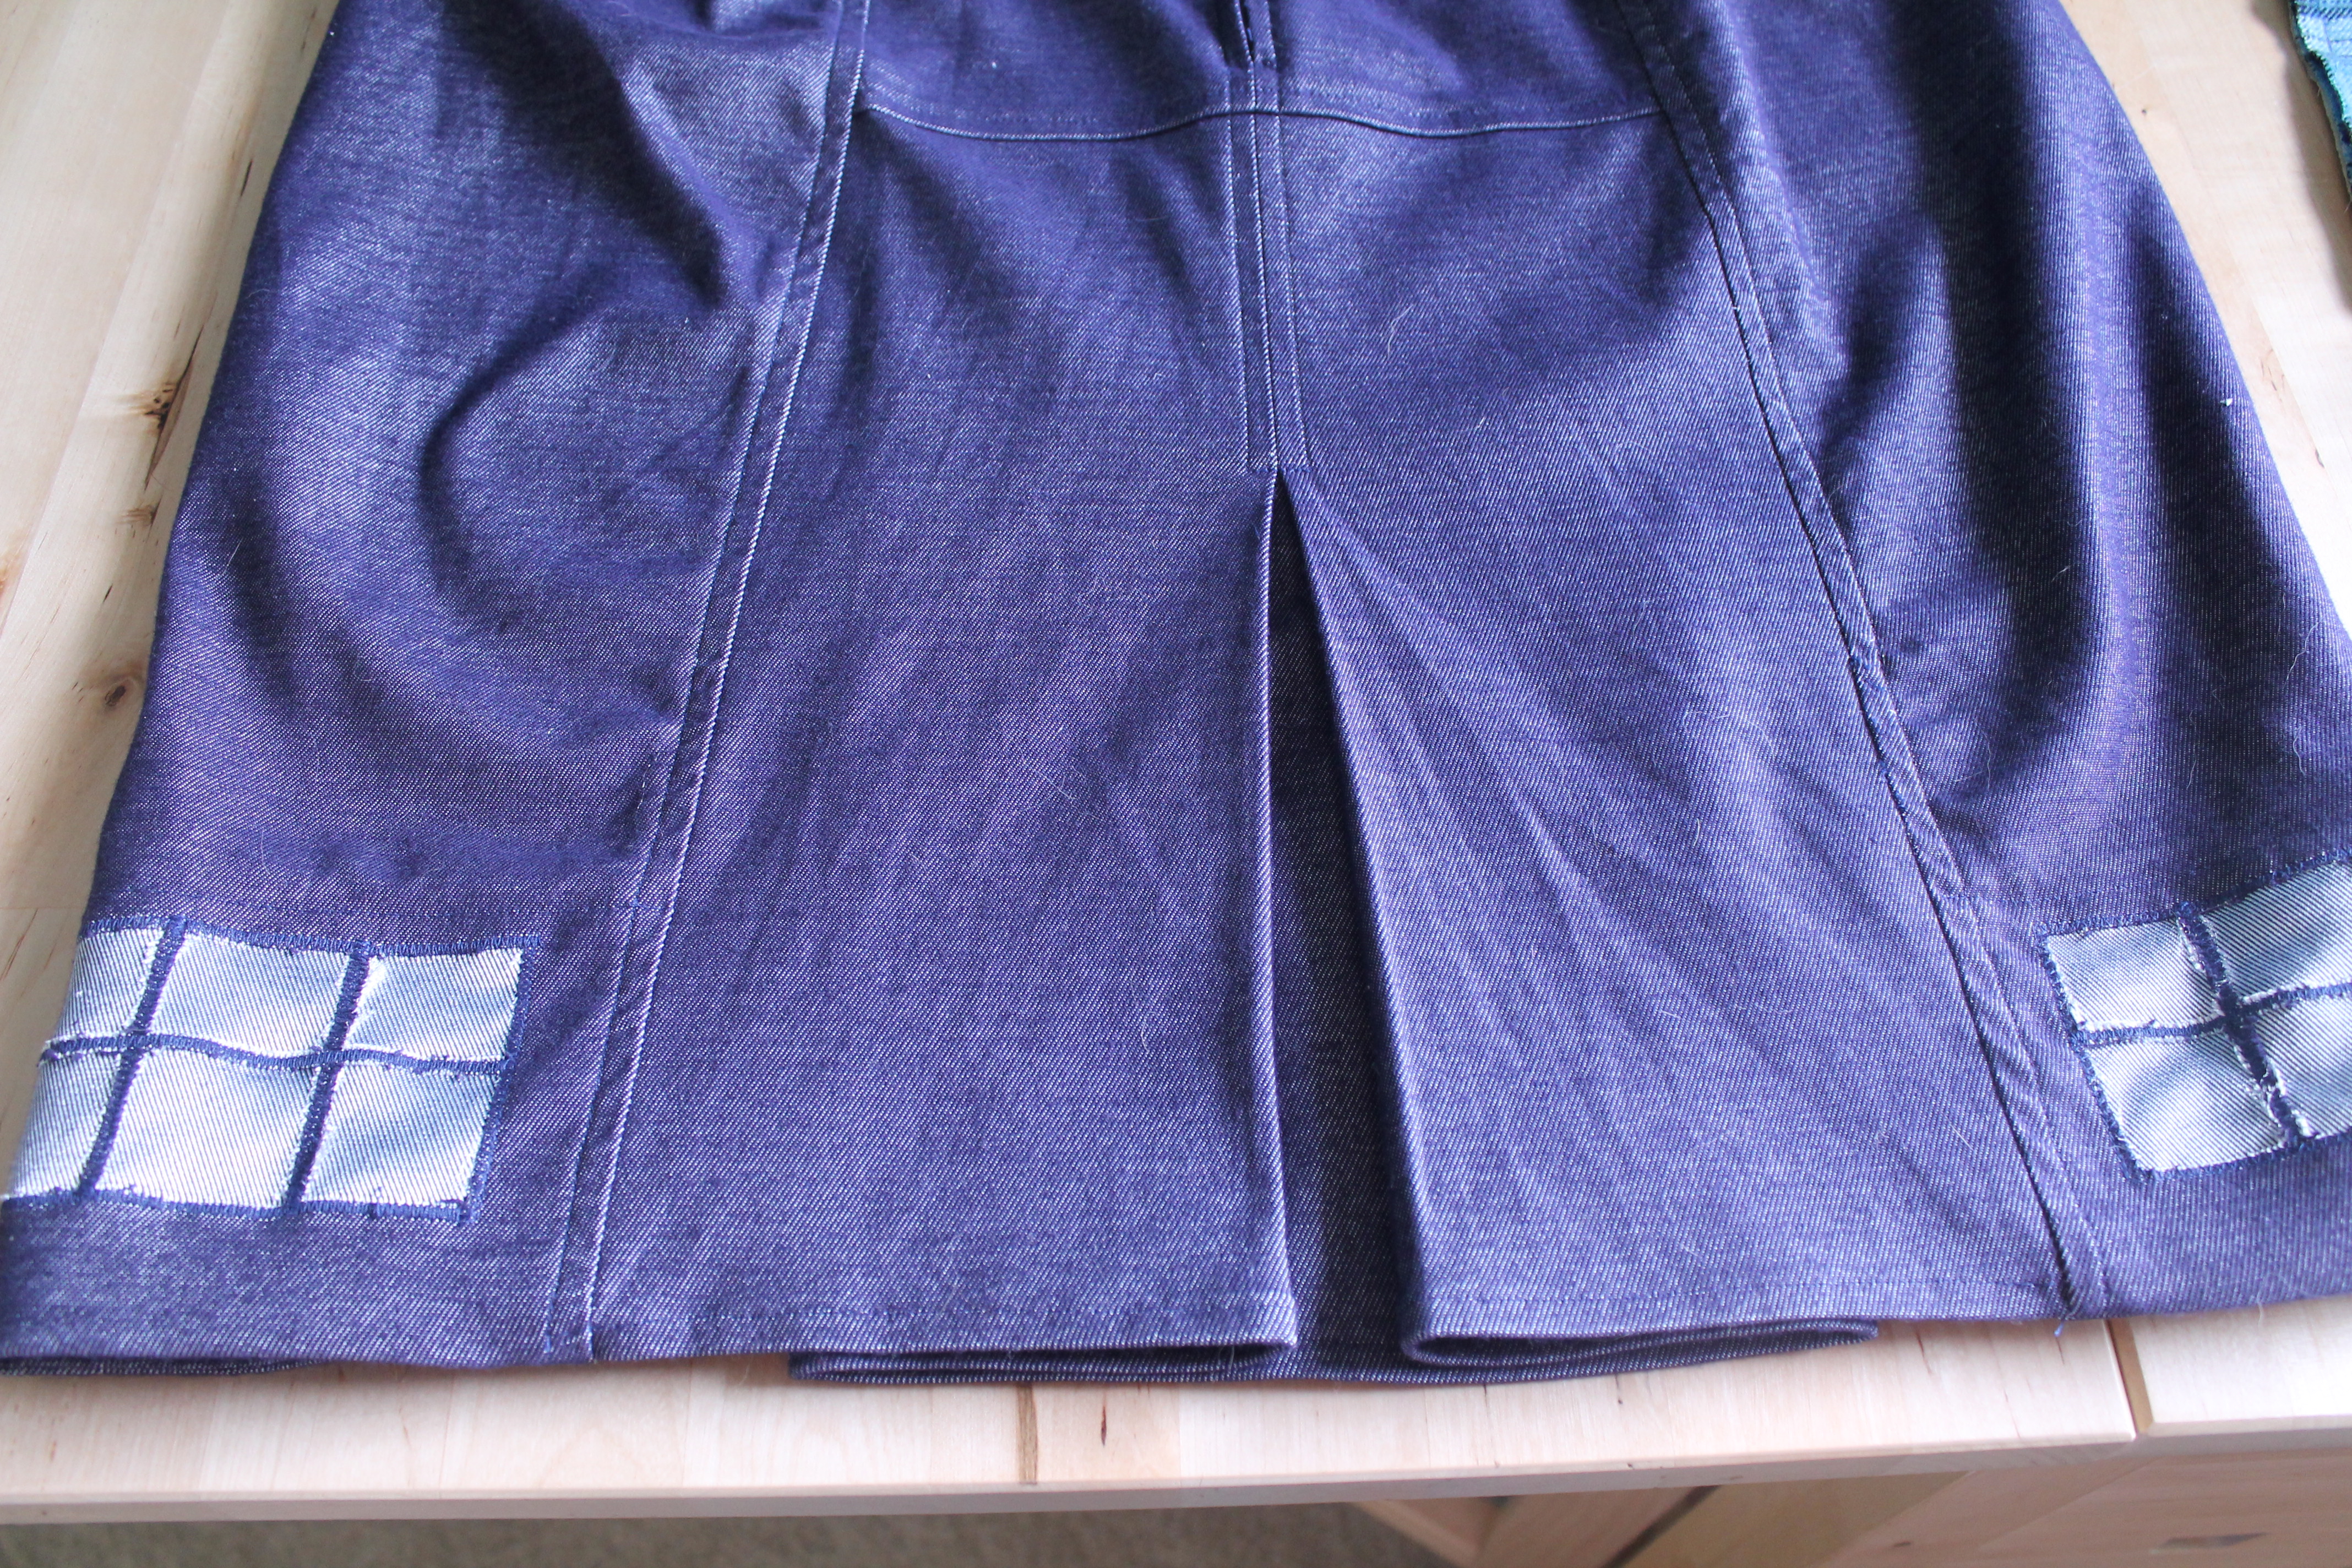
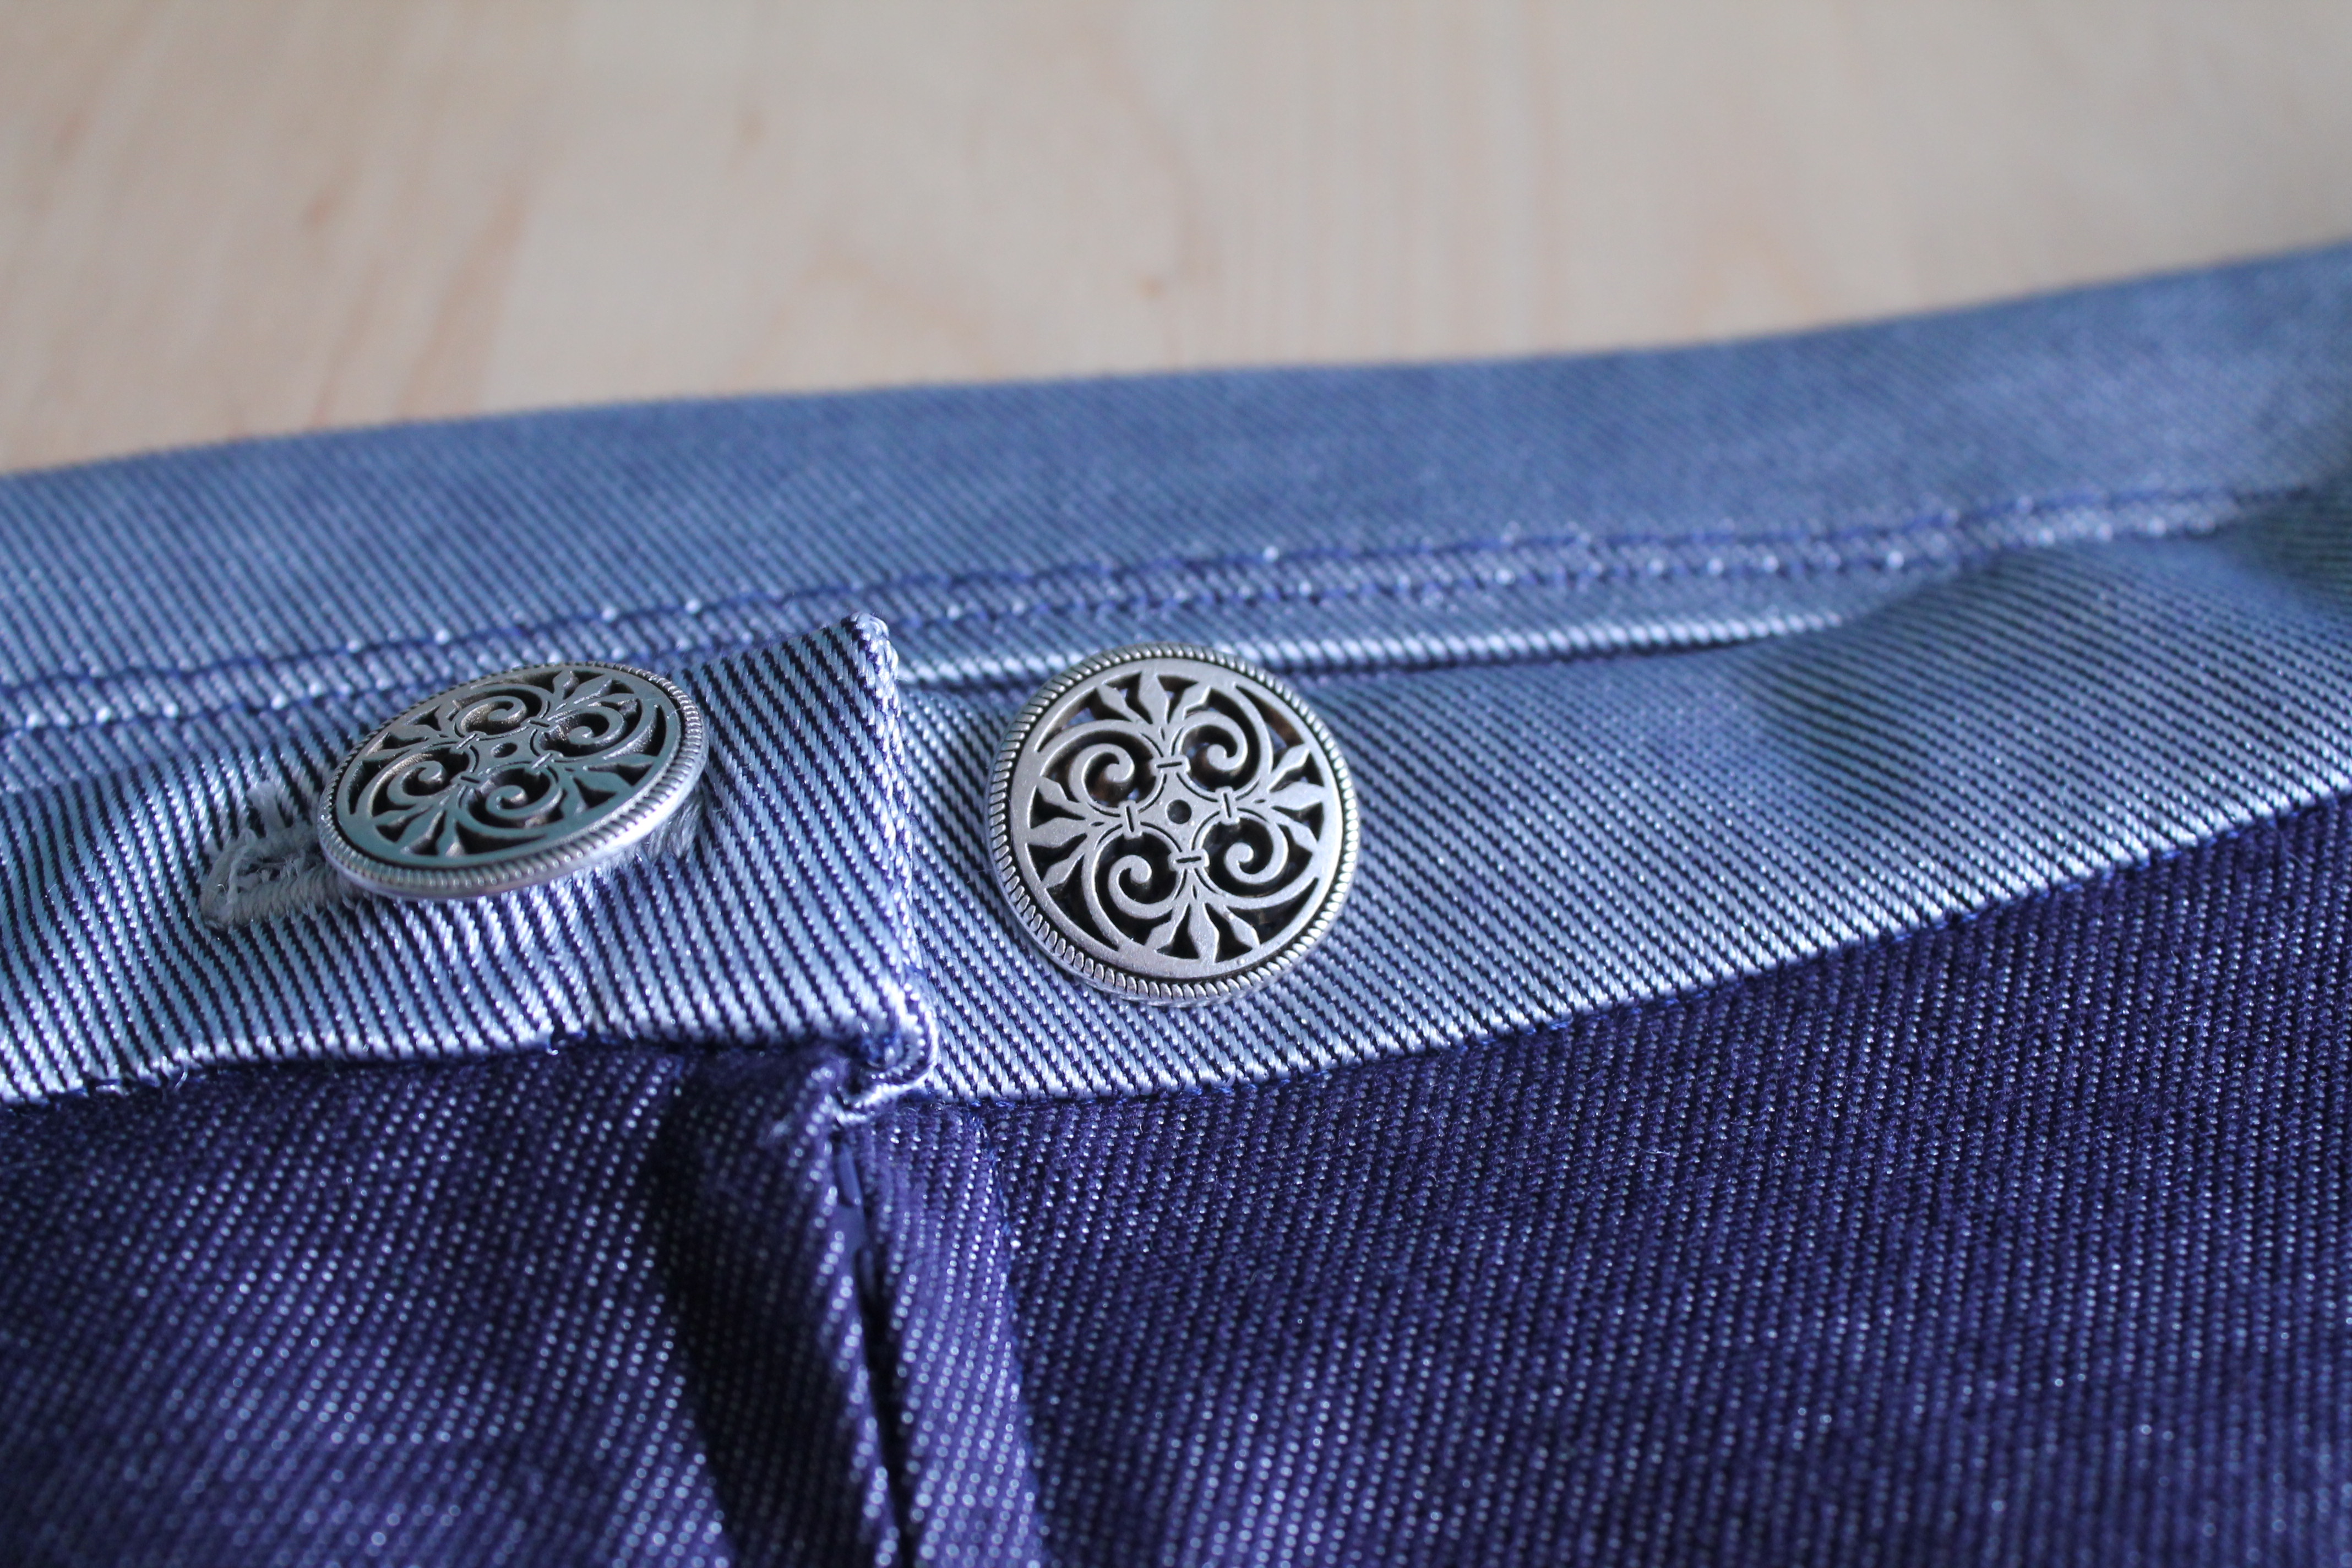
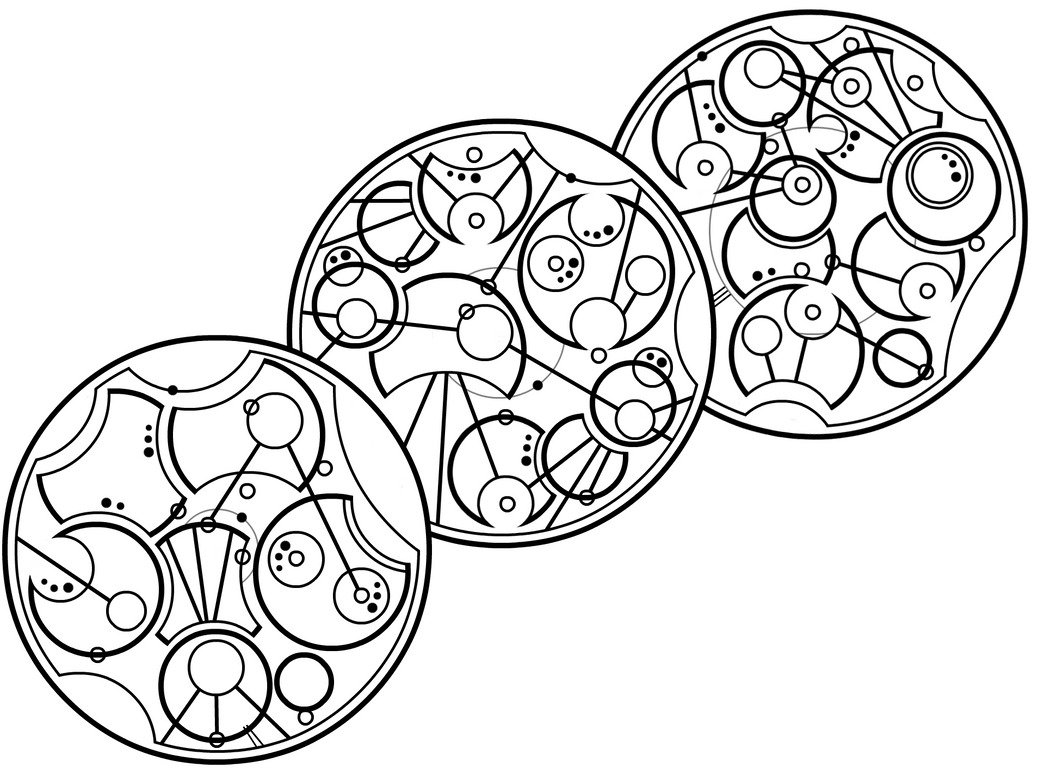
        TARDIS skirt backGallifreyan buttons? 3. Rather than a flounce cut on the bias, which would be a disaster in denim, I made a box pleat in the back. After all, a box pleat is perfect for a blue box of a time machine/spaceship, right? (Sorry for the wrinkles, I'd been wearing this for several hours first.)
          4. I did a (mostly) faced hem. I didn't want to do that to the pleat section and add extra bulk, so that section got a normal hem. I also reverse appliqued on the faced hem section to make those TARDIS windows.
            5. I did a centered zipper rather than an invisible one,also because the invisible zipper would probably be a disaster in denim.
              6. I made the waistband using the wrong side of the fabric, so I could tie in the silver on the border better. Though I'm not sure how often this part will be seen, since a) I don't really have any shirts that work with a high-waisted skirt and b) I'm also not really convinced I can rock that look. Maybe it's because the only option I could find for today's styling of the waistband was a plain black tee, but it might be a little over-emphasizing on my hips. Anyway.

              Yes, I also left the basting in, because I was too lazy to rip it out at the end. Sue me.
                7. I also added a second (non-functional) button, because I didn't like the asymmetry of how the functional one sat above the zipper. Incidentally, these buttons were the closest thing I could find in the store to Gallifreyan writing.
                IMG_0875One more "guts" picture, this time to show off the lining fabric. It's not quite as vivid as I intended, because I seem to have a problem with figuring out which way to cut a pocket piece and end up having the right side showing on the outside, unless you're looking directly in the pocket. I had the same problem with the recent Thurlows, so hopefully I'll figure it out before the next several pairs. But I actually hand-dyed and batiked that fabric myself, many years ago. I got this idea in my head that I wanted a star-covered ceiling, and my parents wouldn't let me paint the ceiling, so I dyed several yards of muslin and hung it up on my ceiling with thumbtacks instead. Then they became curtains in front of my broken-sliding-door closet a few years later, and actually feature as a backdrop for many of my early blog posts. Like this one. Since I have a different closet now with an actual door, I don't need that, anymore, but there's no reason to let several yards of perfectly good hand-dyed fabric go to waste, right? The batik job is honestly way too wonky for me to even think about making a dress out of it. Batiking even basic asterisk-like stars with straight lines was a lot harder than I'd thought.  (Thus all the dots.) But this will probably end up being a lot of inner waistbands and pockets.

                I'm quite proud of this, overall. Particularly since I altered a flat pattern and it pretty much did what I wanted it to!

                Next up: I'll give you the same preview I put on Twitter/Instagram the other day. More coming soon.


                August 6, 2012

                Weird.

                The good news: aside from the waistband, which I still have NO idea how to draft even after watching the Craftsy video due to having to make a dart in the muslin, therefore throwing off the grainline in anything I draft unless I just seam it at the center back, the jeans pattern is done. And I know it's hard to see, but I think the front turned out pretty good.

                The bad news: The back is another story. I just keep looking at it and saying "whaaaaaaaaaaaat?"
                I mean, look at that back crotch seam. After all that muslining (because you know that's a verb), this is the curve I ended up with in my attempt to fit what my Trinidadian friend refers to as my "black girl booty" without making it too tight. Plus trying to fix my usual gapiosis issues, and altering the seamlines to attempt to make them look like a straight line going down the side of my leg.

                This is, undoubtedly, the weirdest-looking pants pattern piece I have seen in my entire life. Does that mean it's crazy enough to just possibly work? Stay tuned...

                May 16, 2012

                adventures in pattern drafting

                I finally had a chance to go through the next portion of the Jean-ius class, so I thought I'd post a couple of pics of what I spent the evening doing.
                PhotobucketOoh, sparkly. Part of the drafting process involves tracing onto organza. I had some silk organza left over from the LBD, and originally started on that since that's what the class called for, but my organza got so wrinkled and distorted in the dryer that it was basically impossible to work with. (Mental note to self: I probably should not throw silk organza in the dryer ever again.) I couldn't even get a straight grainline drawn on there, because it kept shifting to some wavy thing on me. So I used some black polyester organza instead. I have a rather large piece of this--it used to be the curtains to my brother's rather dungeon-like bedroom, and when he got married a few years ago he passed it on to me so I could use the fabric for things. I was still able to see the thread tracings pretty easily through the black, it just took a little longer on occasion because I'd have to retrace the colored pencil lines. But I thought the somewhat neon effect was kind of fun to play with!

                I rather enjoyed the process, actually. The Craftsy videos make it really easy to follow, and it's a technique that I could most certainly use again (assuming I have something RTW that I like the fit of enough! And, well, I'm not sure how well the process would work with knits. But it's still a good technique to know.)
                PhotobucketAnd so I have a preliminary pattern now! No seam allowances added as of yet, So here's the front....

                Photobucket


                And a closeup view of the back.Getting the pocket placement was a little tricky to transfer, and I'm still not 100% sure it's right. But I guess that's an easy enough change to make.

                I only have 3 pieces so far--the front, the back, and the yoke. (And the start of pockets as marked on the pattern--my big concern is the waistband, since these jeans have a contoured band, and I hope that gets covered in a later video.) It felt good to finally get something done! And I'm hoping that I can remove the thread tracings soon so I can actually wear my jeans again. I've definitely been missing this pair over the last several weeks!

                The next adventure, according to the end of the video, is making a muslin. I'll have to figure out if there's any way I can swing a wearable one--only problem is I may not have any appropriate fabric on hand. And with something that takes more heavy-duty fabric like jeans, I'm not convinced a regular muslin test will cut it. Guess I'll just have to watch and see!

                October 31, 2011

                Finally, a new FESA project!

                I meant to post this yesterday, but I didn't have time to take any pics until well after dark, and I just could not get an un-blurred one of the skirt as a whole. So Monday it is. I'm wearing this right now. This probably isn't the best top to be pairing it with, but I usually tend to wear things un-tucked and I wanted the fun waistband details to actually show. I'm also wearing this with my black military-style jacket, since it's kind of cold now, but obviously then you can't see the skirt so well.

                Since the weather here completely unseasonably sucked on Saturday, effectively cancelling any potential plans I had, I stayed indoors and sewed all day. And finally finished this skirt. (Though I really wasn't expecting it to take as much of the day as it did!)So here's my quick n' dirty review of Burda 4/09 #101: I'm a little disappointed in the fit of it-- I pin-basted the skirt when I was working on it last week and marked where it fit perfectly, but I guess the fabric stretched, because after it was all sewn together, it ended up a little loose. I think it would be more comfortable if it sat just a little higher on my hips, but I can deal. Now that I think about it, it might help if I tack the very top above the buttons. That doesn't have to be functional since it has a side zipper, and I'm thinking that when I had it pinned, I must have had that part pinned a little more snugly because the buttonholes weren't cut yet.


                I do love the color of it, and the suede-like texture. And the pockets, though I wish they'd press a little flatter at the top. I'll keep trying. (They are rather useful in that they're the perfect size to fit my phone!) I like the style of it too. And I think I would use this pattern again, though with some definite tweaking in the fit. I'll just have to find things to tuck into it to show off the waist details. Maybe my Sorbetto? I wish I had a shorter grey cardigan to throw on with it...

                I probably would have gotten this together a lot faster, except I lined it and that added quite a bit more time to what otherwise would have been a fairly simple skirt. For one thing, I drafted the lining myself. And, well, when I draft things, it never goes right. All I did for this one was to overlap the pattern pieces to take out the seam allowances, trace, and then take a facing-sized-minus-seam-allowance chunk out of the top. Even so, the lining ended up too big and I had to chop about 2" out of each piece. I'm glad I finally got it working in the end, because I think it makes the skirt so much nicer to wear. And perhaps easier, given that the fabric seems clingy. Plus solid-colored things are more fun with print linings, IMO.

                In knitting news, I've hit a bit of a snag on my Cadence sweater...


                .


                I was working on the last row of the chart last night, and most of the pattern looks like this. (Which, as far as I know, is what it's supposed to look like.)

                But then I discovered that two of the diamonds look like this. Which, at least to my eye, is pretty obviously wonky.

                I have this great book called Knit Fix (or something along those lines) that taught me how to fix a mistake in the pattern vertically, that has already saved me frustration on several occasions. Unfortunately, the concept doesn't seem to work quite as well for fixing things with decreases. I think I made this one worse.

                So I'm waiting to hear back from Kristin (the "Knitter" for Newbie and the Knitter) on if there's a good way to fix this....but I may have to just unravel this. It's kind of discouraging, and something that's a little difficult to reconcile myself to to from my seamstress perspective. Yes, I mess up my sewing, but there's usually a way to, in the immortal words of Tim Gunn, "make it work". It's very rare that I have to just toss the whole thing and start from scratch, you know?

                I'm honestly thinking that it might be easier to just unravel the whole thing and start over, rather than unknit stitch by stitch to whatever row in the chart I started screwing up here. I'm assuming the chart may go faster now that I've knit my way through it once, and unpicking this will take hours. I'm not even sure it's possible to do it and get the right stitch count, with all of those yarnovers and knit 2 togethers and stuff.... I'm too new at this.

                So, while I wait for that, happier sewing thoughts instead. Today's non-work projects (other than my continued hunt for a new part-time job with more hours--thus the reason I'm posting during the day so much lately) include switching out the last of my more summery clothes, because I've been digging something out from under my bed every day lately just to find something long-sleeved to wear. But if I have time, I'm hoping to make some refashion progress. And I'm thinking the next thing on the sewing table is going to be that knit print I pulled out for my FESA. Though I probably won't be able to touch that until Wednesday.

                October 20, 2011

                a bag for a friend

                I finally got a decent amount of sewing time in yesterday. It had been awhile, since the last week has been mostly making preparations/driving around for/recovering from another whirlwind weekend trip. This one was much further away and not the sort that I could bring anything crafty with me, either. Fortunately, since I'd already gotten all of the quilting in last week and found about an hour to assemble the strap on Tuesday night, this bag came together really quickly. (Which is good, because I'm getting really anxious to make some progress on my Fall Essentials list again!)

                So this is the bag I made for Jolene. It's out of the same pattern as my "Autumn in Asia" bag, though a little bigger since I accidentally skipped the part about trimming the overall size down after quilting the fabric...oops. Picking out the fabric was a bit of a fun process--she told me what sort of colors and prints she likes, I took a bunch of pictures on my phone of every print I thought might fit those ideals while I was at Joann's one day, and showed them to her the next time I saw her at church. So the main fabric of this bag is the one she liked best, and then I chose the red and green to match. (She'd specifically mentioned a red interior with this fabric, and I think the overal brownish tone helps to keep it from looking too Christmas-y!)

                Here's the back, with a patch pocket....


                ...and an inside shot.

                So that's that. I'm perfectly happy to go back to selfish sewing for awhile, and have already traced out the Burda pattern for the teal skirt. I also attempted to draft a lining pattern for it, so we'll see how that goes. Pattern drafting is definitely not my strong point!

                I've also been plugging away a bit at the chart section of the Cadence sweater. I think I'm about a third of the way through. So far so good, though I haven't gotten to the decreases yet.

                And I've been thinking that it might be fun to start showing my me-made items in real life more often, since I tend to lose the willpower for daily outfit photos really quick during the Me-Made or Self-Stitched challenge months. But I still love the concept behind them. So since it gives a more accurate sense of the yarn colors anyway, here's a shot of my Counterpoint Hat from the weekend:
                All along, I'd envisioned having this done in time for this particular road trip, since I was planning on taking a more scenic route home via Skyline Drive in Shenandoah National Park. I didn't have time to go through as much of the park since I'd hoped since I got there later than expected and the sun was going down. When I entered the park, I was just wearing it for fun, but by the time I got to here, I was glad that I had a hat. It was getting kind of windy and making it much colder!

                July 6, 2011

                Back to the pants....it's alteration time!

                Warning-- super pic-heavy post coming up!
                It took awhile for me to get going on my next Summer Essential again--got interrupted by the necessity of a laptop bag, work, and travel. But hey, travel gave me something sewing-related to post here! A couple of my good friends and I went to Hogwarts (technically Universal Studios in Florida, though we spent most of our day there at the Wizarding World of Harry Potter section), and I couldn't resist taking pictures of the magical sewing supplies in the window of the wizard tailoring shop! (No, you couldn't go inside, it was just a storefront. But still.)

                I thought the tape measure cat was pretty cute. In the other window, there was a tape measure that unrolled and retracted itself, but that was a little harder to get pictures of.


                Anyway, back to work!

                I started working on altering the actual pants pattern a couple of weeks ago, but didn't quite finish until this weekend. So here's what I've done so far. First thing was to fix the crotch on the regular pattern (that's a pretty big scoop there! But for some reason it worked...)


                And since the welt pockets didn't work out so well on the shorts, I changed the front to be a side slash pocket. Horizontal welts wouldn't work so well with the lacing. So now I have 2 pocket pieces.

                I also discovered that the pants were already pretty flared. So adding another piece for the pleat would basically turn them into a tent for each leg. So since I was retracing the entire pattern for the purpose of adding the waistband anyway, I went ahead and straightened the legs some--took about an inch or so off the bottom of each seam. I figured that should compensate for the extra width I'm adding to the front, so hopefully I'm right!

                As for the pleat itself, I don't have a good picture of it yet, but what I ended up doing was drawing a sort of stretched out trapezoid-shaped piece that runs the entire length of the leg. Since the leg is seamed down the middle anyway, I was thinking that adding a new piece of fabric would be a much easier way to add the pleat and maintain the fit that I already tweaked, rather than just combining the two pieces. Plus then the grainlines would have been all wonky on one side of the leg. Don't want that. It's about 4" wide at the top and 7" wide at the bottom, so once it's sewn in and actually pressed into the pleat, I think it'll end up being fairly close to the original leg circumference. (If I measured it right off of the pattern, the leg hems are originally 28.5"! Love those hippie flares!)

                On Sunday, I cut into my linen. I'm doing the same thing with the facings here that I did on the shorts, and using a cotton print (from the stash, of course.) I'm also planning on Hong Kong seam-finishing as much as I can, since I know the linen is going to have a tendency to fray, so that'll be a good way to use up most, if not all, of the rest of the cotton print. I'm going to do the actual waistband facing a little differently this time, though. I'll go into that later.

                Since I don't have my retail job today and I have a nice chunk of time this afternoon between students, my goal/hope for today is to get as much of the front sewn together as possible. Here goes nothing!

                p.s. I actually may even have a knitting update soon, since I have actual visible progress. But today, sewing comes first.

                May 16, 2011

                And Operation Awesome Pants is underway!

                At least in the testing phase. I figured I'd go ahead and document the process a little more closely--both because my idea to copy the Anthropologie pants seemed to generate some interest, and because this might help me for future pants projects! I'm not quite working on the actual pants yet-- I'm using up some stash to make what I hope will be a wearable muslin, though in a shorts version (since I'm lacking in those anyway.)

                So here's where things stand so far-- all of this was done last Tuesday since I had unexpected time off work, though I haven't touched it since. (I just haven't had time to post, which is probably just as well given all the problems that Blogger had last week. Haven't had time to sew, either.)

                I'm using elements of three different patterns to try and get this to work--the laced-up pants that was a purchased pattern, the waistband and fly front from the shorts, and the welt pockets from the second pair of pants (in the magazine.) All three of these are Burda, so I figured they'd be fairly easy to mix and match. For the sake of clarity, let's say the laced pants pattern is A, the welt pocket pants are B, and the shorts are C.

                I traced out the various pieces I would need (though the legs of the pants are shorter), then got to work on the alterations. The first thing I tackled was the welt pocket from B, which is a vertical welt leading into a full-sized pocket. So I laid that over the side front of A and reshaped the side to match.

                I didn't realize this when I got the pattern, but the front of A is actually split into two pieces! Which I'm hoping will look ok for the shorts. I'm actually quite happy with this discovery for the real version, because that is going to make adding a pleat to the pattern much easier.

                This was me making the actual waistline....

                ....so I could check to see how the waistband of C matched up. The shape was almost identical, actually-- I just needed to fix the length a bit.

                The waist of A had a facing rather than a band. So the next step was to change this to use a waistband instead. I just traced the edge of the C pattern, then added seam allowance (the more solid line that's closer to the top.)

                Then I repeated this for the back, which was slightly complicated by the dart.
                Once all of the pattern pieces were altered and trimmed out, I laid them out on the twill. For the test version, I extended the seam allowances to 1" instead of 5/8", so I'd have a little extra room to play with for fitting purposes. I just drew the seam allowances directly on the fabric with a disappearing marker.

                And here's everything cut out and ready to go! I think I'm going to tackle this in a few stages. The first is going to be just a basic fit test, which will be all basted. Then I'm going to unpick the sides and do the actual welt pockets, because I've never done one of those before and I'd rather have a practice run. I also need to make sure that the fly front is going to work, since I've had trouble with those in the past.

                Like I said, I haven't had time to touch anything sewing-related since Tuesday, though. Things have been super-busy over the last several days, and so the only time I had to actually sit down and sew would have been Saturday night after work. But by the time I got done with that, I was lacking the brainpower to tackle something as complex as merging three patterns. So what I have been doing is a little bit of knitting, and a little bit of sweater unraveling. (I caved and got a small tabletop swift from an Etsy shop, and a ball winder from Amazon--the ball winder isn't in yet, but the swift did arrive, and it's making unraveling those thrift-store sweaters so much easier already!) So there probably will be a knitting update post before too long....but not now, since I have to run off to the next job.


                June 5, 2010

                A 2-for-1 finished project post!

                First up: my finished plaid button-down shirt!

                The plaid shirtings, when I bought them from Fabric.com, were all given boys' names. This one was the "Mason" plaid, but I'm going to call this my "happy camper" shirt-- it just looks like that sort of style. I finished sewing the buttons onto this one on Tuesday. Or was it Wednesday? Oh well, doesn't matter, it's done!

                Just to recap, I made this one based off of New Look 6407--my third shirt from this pattern. Though I made some tweaks to it, mainly in terms of the sleeve. (By the way, the giveaway for this pattern is still open, but only until Monday! I'll pick the winner on Tuesday. So if you're interested, comment away!)

                I am so happy with how the sleeves turned out--exactly how I'd envisioned them! I'm still learning how to manipulate and alter patterns without tweaking-as-I-sew, so the fact that I was able to draw out this sleeve, sew it together, and have it look just like what I wanted is pretty huge for me. I'm also glad that I went with these shell buttons instead of plain shirt buttons like a plaid shirt would usually have-- I think it makes it just a little more interesting. (And a little less lumberjack-ish. I guess I'll be saving that one for the other plaid I bought from the same sale! Though "Ayden" isn't really a lumberjack name...)

                The second project is a bit of a cheat.  I mostly finished it last August--it was intended to be a part of my mini-wardrobe experiment. But since I decided I didn't want to bother with adjustable straps (and honestly, with the hardware for that I was able to find, I really didn't think it would work with the thickness of the sewn straps), I did the construction a bit differently and it resulted in this funky batwing effect. I'd already picked a bit of the binding off with the seam ripper, so all I did last night was gradually take in the top of the side seams about 1/2" each, took 1/2" out of the binding, and sewed it back together. I think it made a pretty significant difference! And now I can finally take this one out of the mending pile and start wearing it. (Actually, for me, 10 months to get to that is pretty good!) I'm hoping that the pleats hang a little better on me than they do on my perpetually-crooked mannequin...poor Donna.

                One final note on the jeans fitting class: my muslin still has a lot of work to go. The teacher, Jennifer Stern, has been very kind and helpful about my plethora of questions! Where it stands right now is that the thighs fit pretty well (yay!), the back crotch is in pretty good shape, but the front still needs a good bit of tweaking--I'm getting these weird wrinkles, and actually have too much room in the front for my stomach! She gave me some suggestions in the chat last night for how to handle it, so I'm hoping to test those out and see if they help. Once I finally get the crotch fixed, the next step is going to be to make it a higher-rise jean...covering my underwear is good. And then I get to work on all of the fun that's going to be actually getting that waist to fit, which was my main incentive for taking this class in the first place--the hope of jeans that fit that I don't have to wear a belt with! Belts certainly have their place, but since my style is generally more longer, tunic-style shirts that stay untucked, I really hate the look of a bulky belt buckle under my shirt!

                So the plan for today is to work on that muslin some more, and then hopefully start sewing my next project, which I cut out on Tuesday. Oh yeah, and do some cleaning, because my best friend is coming over tonight so we can catch up/do some crafty stuff (at this point, I'm thinking I'll be making more bracelets for Wendy while she's here--it's quieter) and watch Doctor Who. I guess I should get on that first!