Showing posts with label sewcialism. Show all posts

August 23, 2015

a study in improvisation

Sometimes, I feel like I'm not a very creative person.

Sure, I look creative. After all, I have a music degree (two, actually), and I mange my own clothes. I also enjoy cooking, most of the time. But here's the thing: I'm a classically trained musician. Which is basically the equivalent of not being the author who creates the story, but the translator who takes a different language and rewrites it into English. The times I've gotten the most nervous performing have been the times I've been told to just make up a part. And I see this in the other things, too. I can follow a recipe well, but I struggle to take a handful of ingredients and turn them into a tasty meal without one. And I choose the fabrics and tweak the fit, sometimes I mash together two patterns if I'm feeling brave, but it's almost always someone else's design that I'm just interpreting.

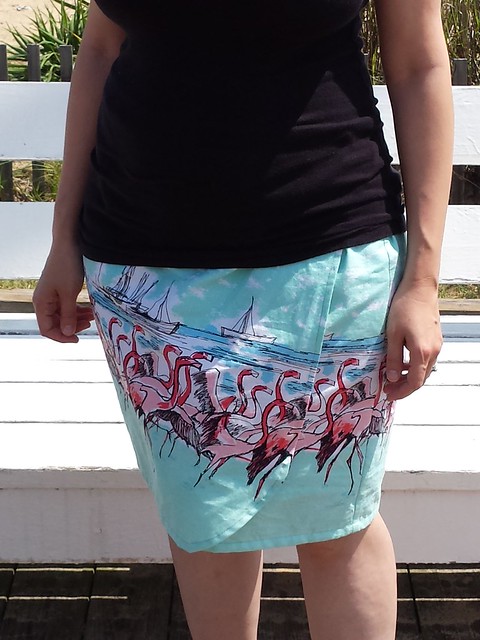
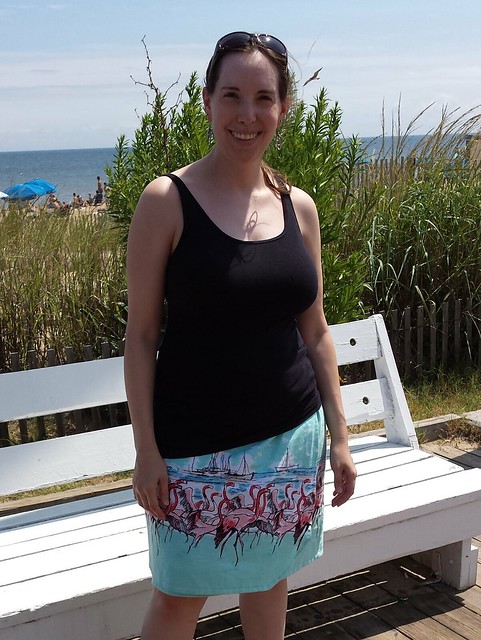
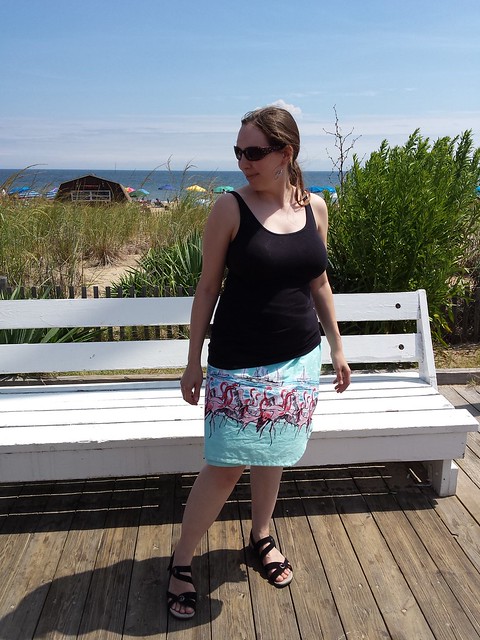
Self-drafted wrap skirtThat being said, this skirt was definitely out of my comfort zone. And it's certainly not perfect. If this was Project Runway and Michael Kors was still a judge, he'd probably pull out that Becky Home-ecky phrase, furthering my dislike of him for making my name synonymous with bad sewing. But I made it, without a pattern, and it did what I wanted it to do. And that's pretty huge for me.

So here's the details: it's two yards of quilt cotton that should be all wrong for me--mint green? Pink? Really? But the flamingos called to me. I cut it to the length I thought would be good, plus seams and hems, then cut that piece into thirds. The back is adjustable, with buttonhole elastic courtesy of Brooke, who kindly sent me some from her own stash when she learned via Instagram that I didn't have any. Aren't sewcialists the best? The front waistband is flat, and secured by two buttons-- one inside, one out. I fully lined it with some white polyester from my stash, which took my totals down another 2 yards. 

Self-drafted wrap skirtI think my favorite detail is the front curve. I had to wing it, because I didn't have anything in the room that was round and large enough, and our plates aren't round either. But I think it turned out really nice!

I was also pleased that I was able to avoid any wardrobe malfunctions, as wrap skirts are prone to. I first wore it for a morning out with Doug and Hobbit, on the boardwalk at one of my state's busiest beaches, as we had a couple of errands to run at specific stores in that area. It was quite breezy, but my legs stayed covered!


Self-drafted wrap skirt


I'm also pleased that I was able to finish it in time for the end of the month, since this fabric just screams summer and probably won't really work once it starts getting colder. I may have a long way to go to truly get the hang of designing my clothes from scratch, but I think this is a step in the right direction.

(Note: the stupid Blogger app on my phone ate about half of the original post when I was trying to get off of the original draft, so I've reconstructed it as best as I could.)

August 10, 2015

this year's sewing, revisited

Now that I've been using some of these baby-related things for several weeks, I figured it would be a good time to look back at the things I've made this year, and see how they're working out in the real world. If you follow me on Instagram, I apologize that you've seen some of these photos before, but it's the only way I can actually show these right now.

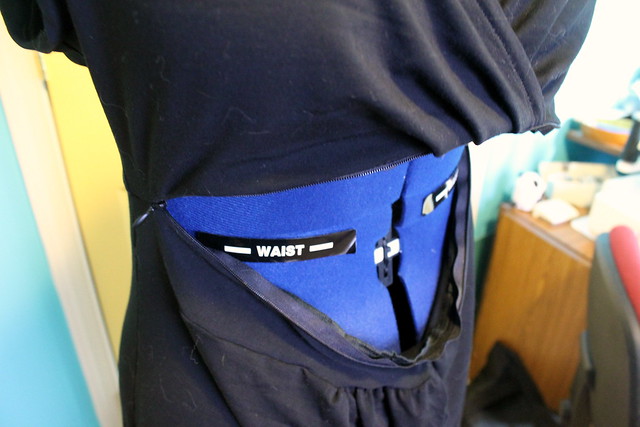
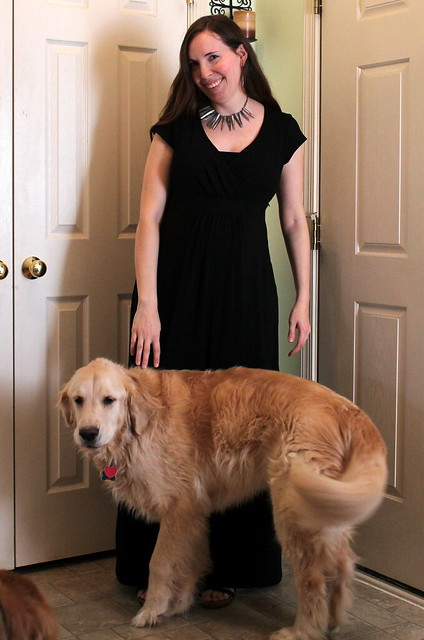
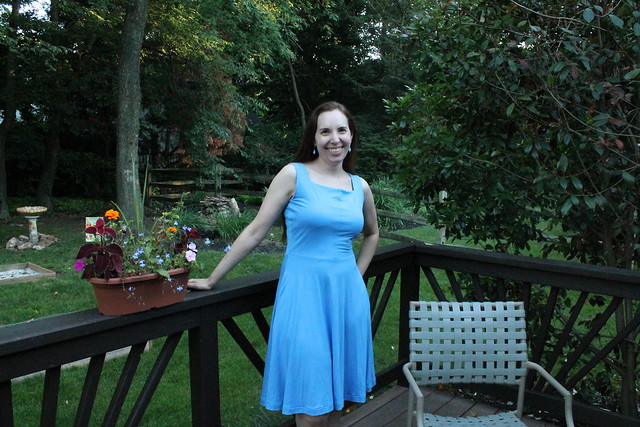
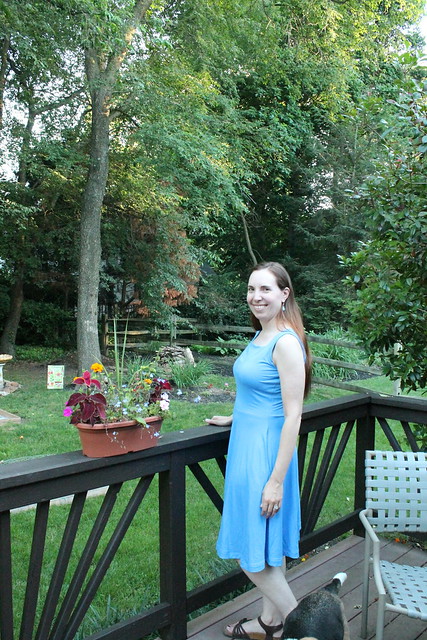
IMG_20150705_082632First off, the maternity clothes that I made hoping they'd also work after. I haven't had a chance to try out the Megan Nielsen top again, because it is way too hot and humid for polyester right now. But the two maxi-dresses (pictured here, and the solid black one), and the tie-dyed maxi skirt are all working out pretty well. There are things I do wish were a little different about each one. The yoga-style waistband on the skirt was a bit too wide even when I was pregnant, and I have to fold it over pretty far now. But it does fit without falling down, which was my main goal. This blue dress still feels a bit wide in the upper back, and I am debating whether to add a faux back seam just to take in some of that extra fullness--I'd hate for a print this lovely to feel frumpy! As for the black dress, the fit is still really good, even minus the bump. But I do need to hem it a little shorter. It was on the verge of too long before, and now I have to be really careful to avoid stepping on it when I walk. I just haven't had the time to do so yet. On the plus side, the zipper nursing access, though not perfect, functions pretty well.

If you have no interest in reading about the more baby-specific makes, here's a good place to stop! Otherwise, moving on to...

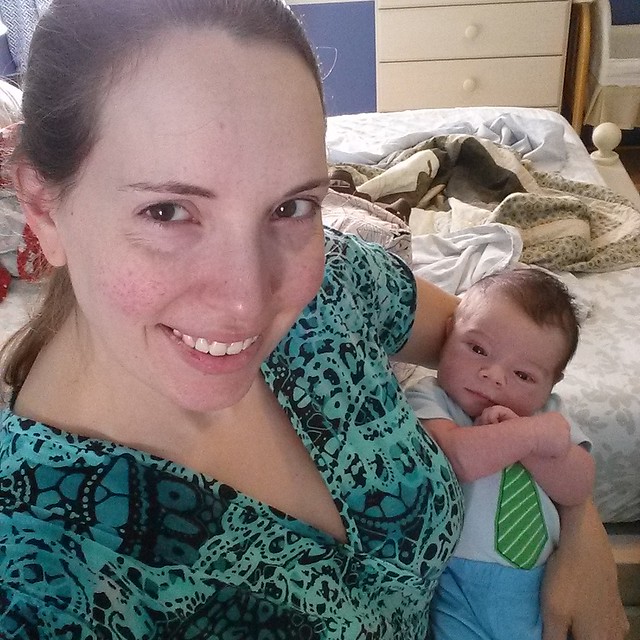
IMG_20150804_081217...the gender-reveal outfit! Along with Hobbit's very skeptical expression. He's not a small baby by any means--he's only 6 1/2 weeks old, and we've already had to take the newborn insert out of his car seat, and several of his 0-3 month sized clothes are beginning to feel a little tight when snapping them closed. I say that to show just how ridiculously oversized this is on him! I think I may have misread the pattern. I thought it was a 0-3 month size, but I'm looking at the sizing chart on the website, and it looks like this may be more of a 6 month size. Which leaves me wondering if I should go back and add some length to the legs, since these are shorts and that would mean he won't fit into these well until it's cold. The thought of him not being able to wear it at all is mildly heartbreaking, and I do still have some of this denim left. But would that look dumb to have that seam there?

Next up: the diapers.
20150729_095433
He's modeling the smallest of the three sizes here. For the most part, they're working out really well so far-- we've been having to do laundry at least every other day because of them, but we haven't had to buy a single diaper yet. (We were given some disposables at the shower, and have been using those occasionally, but for the most part, it's been almost exclusively the sewn ones since I was recovered enough to start taking more stairs around week 3.)

At the risk of being TMI, for the most part, the messes have been contained well. I think we've had maybe 3-4 blowouts the whole time so far--granted, I try to change him pretty quickly as needed, but still. The kid really does eat like a hobbit (i.e. a LOT), so I suspect we'd have had a lot more otherwise. The only issue, other than frequent laundry, has been that the really wet diapers soak through the front where the velcro stitching is. They're not constructed in a way that I can really go back and waterproof those seams, but I think it will probably only be another month or two before he outgrows this size anyway, so it probably isn't worth the effort. It'll be interesting to see what happens when I switch to the next size with the pocket inserts and snaps. The bulk of these has also occasionally made it hard for him to wear certain shorts and pants, but honestly, it's been so hot here that we usually have him in just a onesie or a t-shirt anyway, other than when we're in the icebox that is my church.

I don't have pictures of me using the next three things. I've gotten some good use out of the nursing cover, including one incident where I had to feed him in a restaurant parking lot. Suffice to say, I thought initially that maybe it was too big, but I'm glad it's the size it is. I'm still getting the hang of maneuvering him underneath, but I'll figure it out. The diaper bag is also working out well, though it's usually packed very full due to the bulk of the cloth diapers. The matching changing mat does the job, though the snap stopped working after the first time I washed it. I guess I messed something up when setting it, but I just fold it up and stuff it in the bag. It's easier to maneuver with one hand that way, anyway.

So the last thing I have to review at the moment is the play gym.
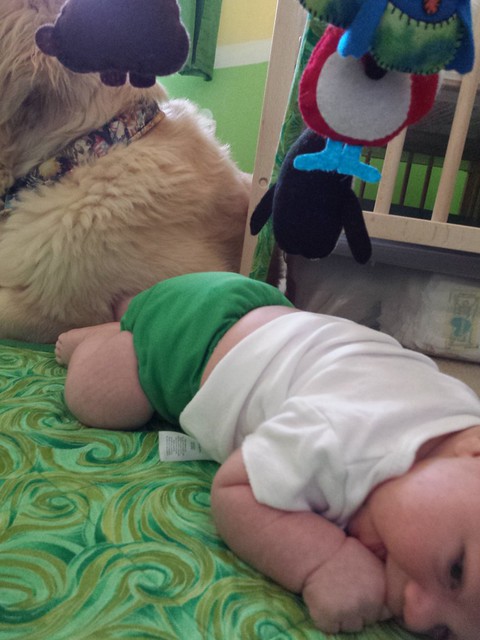
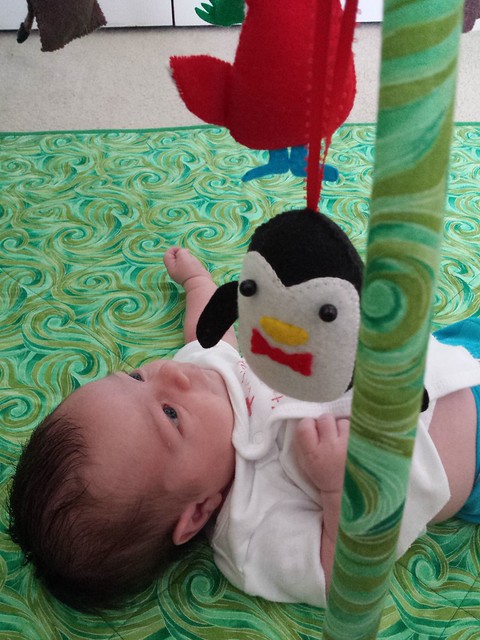
20150718_110525 As far as I can tell what's going on in a baby's head, he really seems to love it! We've been using it almost daily as a mat for his tummy time, and once he starts getting fussy, I'll flip him over and let him bat at the felt animals. He's gotten pretty good at aiming for the lowest-hanging ones, and has also figured out that he can make them all shake if he hits the hula hoop instead. I've tried him with a few other toys here and there, but so far, this one holds his attention the best. So I'd say it was well worth the effort to make it. Yay for Pinterest wins!

Otherwise, I have been sewing a little, though I'm pretty much limited to when I can get him to nap. I've finished a skirt, but haven't had a chance to photograph it yet. I've been going through my wardrobe and weeding out things that won't work anymore, including several me-mades, and am debating whether to do the same with my sewing patterns. I'm helping my best friend with a DragonCon costume, which is taking all of my sewing time at the moment. I've got multiple other quick projects lined up for myself, mostly of the refashion type, and am hoping that I can get to them soon! I'm also taking part in the #sewphotohop meme on Instagram, which has been fun so far. (I have my account there set to private, since I post a lot of baby pictures there these days, but if you want to follow me on there, just send a request. It hasn't been hard to figure out who sews on there, I'm just trying to block random strangers from getting access to the kiddo! At least, as much as is possible when posting occasional pictures on something as public as a blog.)

March 21, 2015

it's the time of the season

Happy spring, right? Here in the good old Mid-Atlantic, ours started with winter trying to get in one last sucker punch! I think it's time for a breakup with cold weather, because I am OVER winter clothes. I know I say that every single year, but with my currently limited wardrobe choices, it's even worse. I've been wearing the same 2 pairs of pants (with the jeans mixed in as I can) and the same 3 cardigans almost every single day. And my one purchased winter maternity top is looking rather dingy and sad. I guess that's what I get for buying a cream sweatery-looking top.

That being said, with the limited window I have remaining in which making clothes for myself to wear throughout the rest of this pregnancy still has a point, I'm trying to focus on things that will carry me through the spring and into the summer. And, hopefully, still be wearable afterwards.

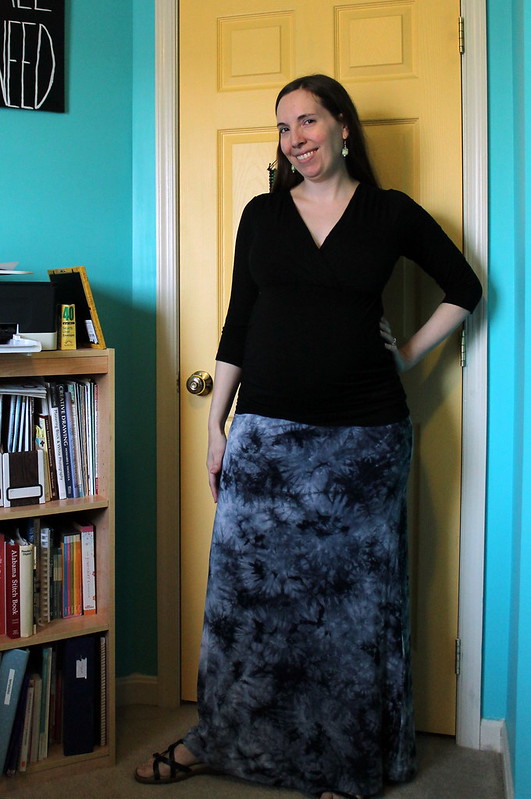
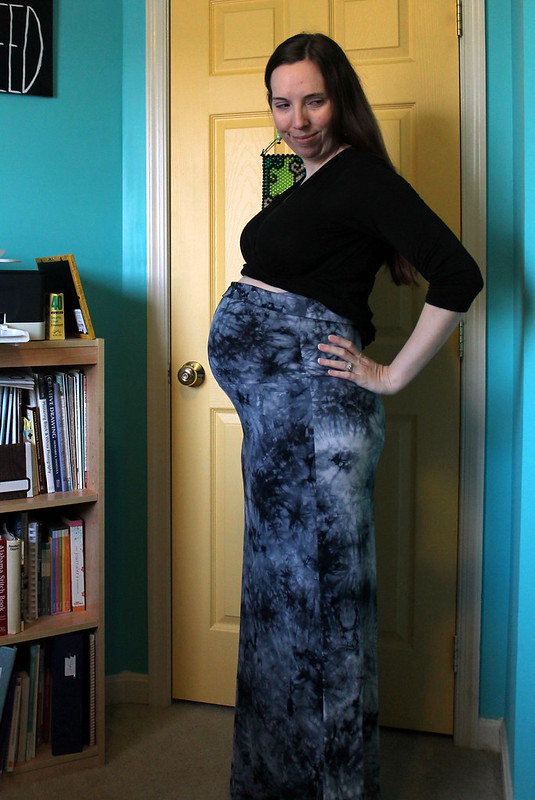
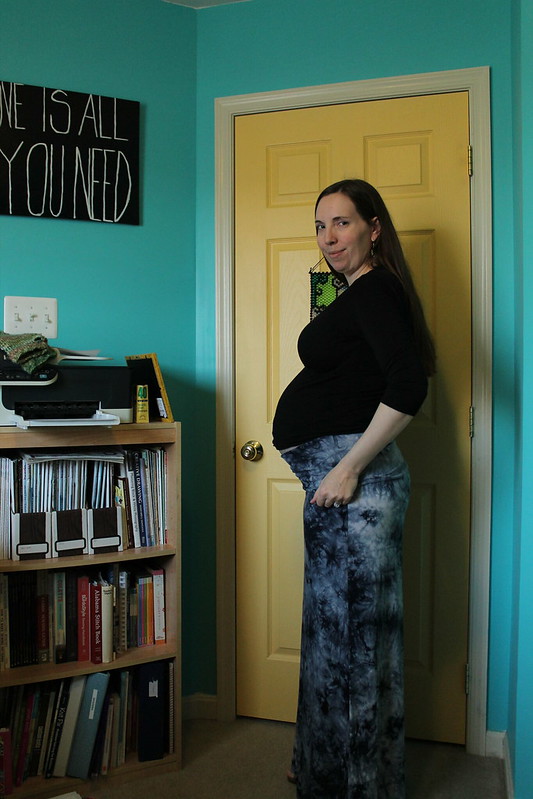
Tie dye maternity skirt frontEnter my new maxi-skirt! The fabric is a luscious-feeling bamboo-rayon jersey blend, part of the mini-stash of knits that my parents gave me for Christmas. It took me a lot of thinking initially about whether this fabric wanted to be a skirt or a top, but once I realized that I only have 2 pairs of non-jeans maternity pants left that still fit (I've outgrown the third, which were a little small on me when I first chopped them into maternity pants), and they're both reconstructed corduroy pants, a warmer-weather friendly piece of bottomwear won out.

This month's Stashbusting Sewalong theme is sewing with patterns that you already have. So I based this skirt rather loosely on Simplicity 7229, which I've used a few times before for skirts and capri pants. (I'm having to link this to my Pinterest since it's out of print, so hopefully it'll work!) The original skirt is pretty basic-- the two pieces for the front and back are the same, and it has a wide yoke with a drawstring top. I'd always made it in wovens before, but here's the changes (aside from knit fabric) that I made to make it more maternity-friendly:
    skirt full panel
  • Added several inches to the length of the front/back pieces. Which I actually did the last time I made this pattern, because the original pattern was this awkward mid-calf length, and I ended up hating that and chopping off the previously made skirts to a shorter length.
  • I did also have to narrow that at the bottom a bit, because my fabric wasn't quite wide enough to accommodate the extra width. But since it's stretchy, that's ok. Especially since I'm starting to get into the waddle phase and my steps aren't quite as big as they used to be.
  • While I used the yoke/drawstring waistband pieces to get a general idea of how wide to cut it, I replaced that with a slightly skinnier but much longer rectangular piece. The idea is that I can use it to cover up the baby bump for now--the over-bump stuff sits on me way better than under-bump stuff, which just feels awkward and like it's constantly on the verge of falling down. It's a little loose at the very top of the band, around the rib area. But I'm not too worried about it.
skirt yoga waistband
    It folds down into a yoga-style waistband, so I'm hoping that it'll be snug enough that I can wear this skirt once I'm a little smaller around the waist again, too! It's obviously hard to tell how that will work right now, but a girl can dream, right? 

    Overall, I'm really pleased with how this adaptation worked out, and how fast it was to sew together! I did all of it, including cutting out, in 2 sewing sessions. Which is pretty speedy for me. Depending on how this works out to wear afterwards, this just may be how this skirt pattern ends up getting used from now on. It's so tempting to find more of this type of knit and whip out a few more! But I have several pieces of knit that I still want to make other clothes out of to wear in the meantime, so I shall try to restrain myself.

    I used up pretty close to a full 2 yards on this. As an added bonus, I had just enough fabric left to make a little something for the Hobbit! We're actually doing pretty well with collecting baby clothes so far, largely thanks to my mother-in-law, who's brought over multiple bags of things that neighbors and acquaintances were getting rid of.  At least, we're doing pretty well with onesies and pajamas. What seems to be largely lacking is pants. Given his nickname, all I can think of is that old Lord of the Rings movie meme where certain words get substituted with "pants". The most famous being...
    Which never fails to crack me up, but Hobbit is going to need some pants eventually. So I made some.

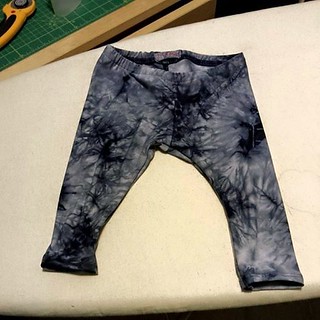
    tie dye leggingsThe pattern was a freebie that I found on Craftsy, the Go To Baby Leggings. I wasn't entirely sure about tie-dyed pants for a boy, but a few kind sewcialists on Instagram talked me into it, and I hope these actually end up fitting him because I think they turned out pretty cute! I made these in the 3-6 month size--partially because lightweight jersey pants going into the fall make sense, and partly because I literally did not have enough fabric left to make them any bigger. Doug was pretty impressed, I think--I cut and sewed these in their entirety on Thursday, along with finishing the skirt, and his instant reaction was that they were adorable and I should post them on Facebook. Always a good sign. I wish I knew how they were actually going to fit him, because I had these cut out and sewn together entirely in basically no time! But at least I have the pattern tested, so if it works out, I can always fall back on this as a quick project while he naps or something.

    February 25, 2015

    black is the new red

    A little bit of selfish sewing in the midst of baby-sewing craziness! As it happens, I finished this dress just in time for my birthday tomorrow. But I won't be wearing it, because there's a chance of snow and it's only supposed to get up to 33 degrees, tops. That's .5 degrees for you Celsius folks, and I don't know how you live with that temperature scale, because that sounds even worse! And this isn't the sort of dress that would work well with close-toed shoes. February birthdays can suck like that.

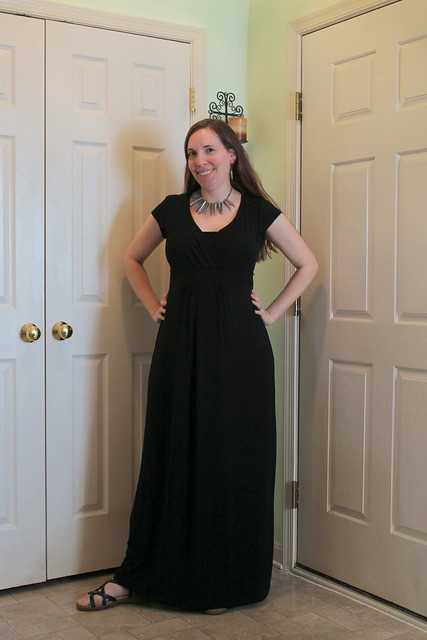
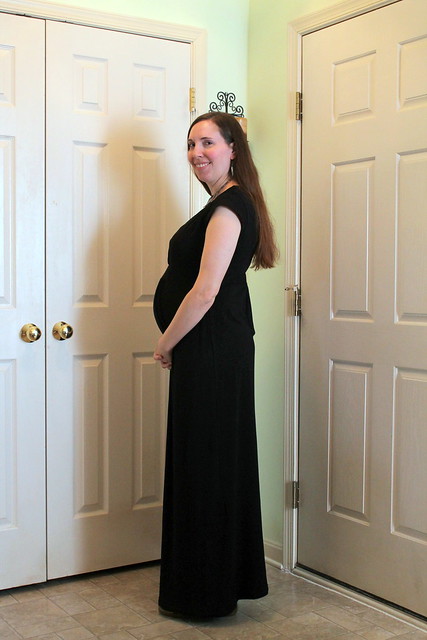
    IMG_2327Anyway. This is Simplicity 3678, now out of print, which I've actually made once before. I'm laughing because in the original post, I did specifically mention possibly revisiting it if I ever needed a maternity dress, because of all of the gathering that I needed to remove to avoid the preggo look! I'd kind of forgotten I'd said that, actually. I guess it's a good thing I never threw the pattern away. The funny thing is, at least in this picture, I seem to look pretty normal from the front, right?


    Maternity maxi-dress
    Nope. Definitely a maternity dress. (I'm at 24 1/2 weeks now.)


    Aside from lengthening and slightly flaring the skirt, since I really wanted a maxi-dress, here's the adjustments I made:


  • In some ways, I followed the instructions more closely than the first time. In the original dress, I stitched the pleats down into more of a pintuck, because it was kind of ballooning out funny. For this version, I figured I'll need the extra room and left those as pleats. I also sewed the facing more as it called for, though with a double row of stitching to try and give it a little more of an RTW look. (I wish I knew why my machine is occasionally skipping stitches for that, since I am doing a slight zigzag on a longer stitch length with a ballpoint jersey needle, just like I'm supposed to be! Any thoughts? My machine doesn't have that lightning bolt stretch stitch.)


  • I added a little more gathering in the front to accommodate the bump. Probably somewhere close to 2"--honestly, all I did was go out from the center front fold to the still uncut edge of the original pattern tissue.


  • I still had to cut the back in two pieces, which I apparently had to do the first time, too. With all of that extra skirt length, I was barely able to get the pieces to fit! I actually also had to cut the midriff pieces perpendicular to what it called for as well--but after the recent leggings disaster, I made sure the stretch would work for that before I cut it this time. 

    1. IMG_2322
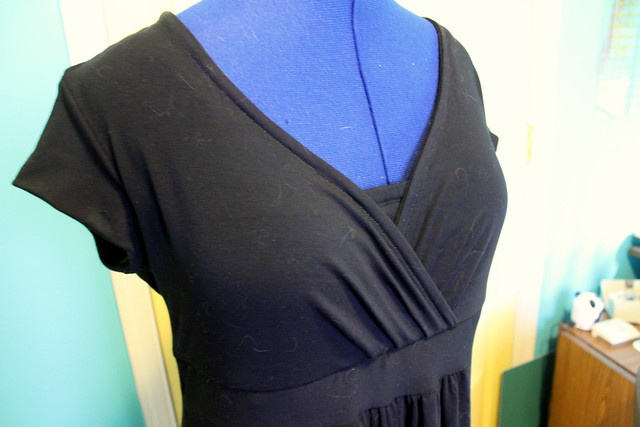
    • Doesn't look so V-neck now, does it? While that also would have been nursing friendly, my size has already changed enough that this would have been very mentally uncomfortable for me to wear in public. (Seriously--while I know there's a good reason for it, I'm actually kind of embarrassed at the size bra I had to buy recently!) So I improvised a bit of a faux camisole front for it, and even inserted some elastic in the casing that the stitching made to help hold things in place. It's not quite as snug as I would have hoped, but it should do the job. 
      • For the bodice/midriff, I did slim down the seam allowances on the side slightly-- 1/2" instead of 5/8"-- just to give me a little extra room, since I'm not sure how things will go in the third trimester or if my ribcage will expand or anything like that.
          Nursing adaptation
        • To make this nursing-friendlier so I can wear this for more than just the spring, I took a suggestion from Joanne and added an invisible zipper in the front of the dress! It's sitting right at the top of the waistband, which I'm hoping will also stabilize the weight of the longer skirt. (I also sewed some clear elastic in the back to help with that as well.) Because of that, I did somewhat have to change the order of the directions, as in sewing the side seams for the bodice/midriff separately instead of all at once. But again, I took a cue from the leggings issues and made sure to baste things first so the seams had a better chance of lining up. Overall, I'm very happy with how this modification worked, and will possibly be doing it again, since I'm hoping to make a second maxi-dress before Hobbit comes. It's just a case of deciding whether to stick with this pattern, since I already did the hacking, or to play around with modifying last summer's Tiramisu hack. If I do the latter, I may not need to add extra access points, since that one works better on me as a V-neck.
          It'll be good to have something new to look forward to, if it ever warms up around here. If I've learned one lesson from the last month or so of trying to cobble together outfits, it's that I'm just not a wardrobe minimalist. I admire those people that can fully commit to the Wardrobe Architect-type thing of paring down her closet to a set of core outfit components that they can mix and match and accessorize to their heart's content. But frankly, I like having more options, and I've definitely been missing having more prints in my life, even if they don't necessarily go with everything! (I say as I show off a solid black dress, right?)

          IMG_2332Oh, and the title? I'm still trying to play around with keeping up with some of the monthly themes/challenges for the Stashbusting Sewalong and The Monthly Stitch as I can. I can use this for the latter, since it's a solid color, but the only color specified in this month's Stashbusting theme was red, which I hardly ever wear or even buy. But Malkin was kind enough to sport a little red on his collar while photobombing me, so that has to count for something. Right?

          November 18, 2014

          Making plans, Disney-style

          If you follow the Sewcialists blog, then you've probably heard that this month's theme is all things Disney. And I'm co-hosting! So I'm really glad to be done with the coat so I can actually, you know, make an outfit for this.

          Since I already channeled my favorite Disney bookworm earlier this year for DragonCon, I decided to look a little further back into my childhood for this one. I grew up watching Disney cartoons--one of the things that I always looked forward to during family gatherings was that my grandmother would try to get the latest Disney movie on VHS, and my cousins and I would all watch it together. And if there wasn't anything new, we'd watch older classics like Cinderella or Peter Pan. I enjoyed those, of course, but the first one I really remember latching onto was this one:

          I have this vague memory of this being the first movie that I actually saw in a movie theater, though I guess that depends on how accurate my memory is--after all, I would have been around 7 at the time. But I loved this one. Especially the music, and all of the underwater prettiness, though I'm also pretty sure this is where I got the idea that my hair should be red and if it doesn't agree, then I should just give it a little help! (Now if I could just get her volume...)

          I don't want to go all-out costume for this one, especially since a shell top and tail just isn't something I want to be seen in out in public! So I'm taking my inspiration more from her going around town/"Kiss The Girl" outfit:


          I actually already have the top done, so I'll give a little sneak preview!

          It sits a little wonky on Donna, but here's what I came up with! I really thought about making the black neckline more of a sweetheart shape, but with some careful basting, managed to get a mostly clean line for the notch.

          It's a Renfrew, of course, with some modifications for the color-blocking and also a raised neckline. Now that I look at the Ariel picture again, I probably could have left it a little more scooped, but I'll be warmer this way. Since I'm all about the stashbusting, and some of the pictures look more off-white and some more light blue, I used an ivory jersey for the top/sleeves and the leftover black interlock from the dress I made over the summer for the "corset".  I just barely had enough to squeeze this out--I couldn't even cut the band for the bottom, so it's just hemmed. I'm hoping this won't look too blatantly costumey if I pair it with cardigans or jackets or whatever, but I do like the look of it, and I'm quite happy that my hack turned out the way I wanted it to! There may have to be more color-blocked Renfrews in my future. Because that's a way more interesting use of plain colored fabrics, IMO.

          More pics to come once I figure out what I'm doing about that skirt--I was originally planning to make a Gabriola, but it isn't going to work at this point. So I'll have to improvise. Looks like it might be my old Burda magazines to the rescue...

          September 29, 2014

          an American fabric-shopping in Paris!

          Yeah, that happened! There's a lot more I could say about my trip, but we all know you're really here for the fabric chatter, right? Of course right.

          Several people were kind enough to give me recommendations for places to check out, via Twitter. Specifically Sonja and Sarah--thanks, ladies! I knew I would have to limit myself on how many places I could visit, since I'd be dragging Doug with me, so I ended up picking one recommendation from each sewcialist.

          Les Coupons de Saint-PierreFirst up was Les Coupons de Saint-Pierre. I'd been forewarned that this place was one you'd have to dig through piles, but I've been a thrift shopper since I was 13, so I have no problem with that.

          To be honest, I could have spent hours in this part of town alone--there were so many tables full of fabric sitting outside multiple shops, just begging to be noticed! For a girl who only has a handful of Joann's in her entire state to pick from, this was a dream! But for the sake of my long-suffering husband, I restrained myself. Yes, there was a lot of digging to do. All of the fabric is piled onto tables by type, in 3-meter cuts--there was a huge pile of cottons, a section for linen, a part with leather hides, a huge section on the one side of the store for "silks", etc. (I put the silk in quotes, because upon closer examination, I deduced that the sign probably meant silky and the biggest pile was actually polyester. All of the labels were in French, of course, but I made sure to look up the words for the different fiber types before I left!) So I bought 3 pieces of fabric here. When we were walking to the metro, I spotted a fourth "coupon" on an outside table that I couldn't pass up, so we quickly bought that as well and kept moving. I forget the name of that shop, but it also had "Coupons" in the name, and looked to be pretty similar.

          French fabric!Here's what I ended up with, from left to right:

          1. A fine-wale corduroy, covered in embroidery and sequins. This was on the 5 Euro table outside the store. My first instinct says jacket, but since I already have a brown corduroy jacket, I'm pondering a fall skirt. A Beignet, maybe? French named-pattern for a French fabric!

          2. The piece on the side of the road I couldn't leave! It's a thin jersey, and I do so love brown and teal together. I think this could be very nice as the lately-released Muse Jenna cardi, though I don't have that pattern yet. 4,75 Euros.

          3. A denim with a slight amount of stretch. I liked the cross-hatching in the weave. These will eventually become jeans, of course. I'll have to decide whether to make them skinny, since that's pretty much the only pants I saw anywhere in Paris, or give myself another pair of bootcuts.

          4. An ITY floral jersey. This color scheme is odd for me, and almost completely outside of my palette, but something about it called to me. I don't know what this one will be yet, but it's not like I have a shortage of jersey patterns. I'm open to suggestions, though!

          All together, the cost of these fabrics was just under 30 Euros. Which made the whole shopping trip cheaper than almost every single meal we ate. Those cafes are expensive when you're buying for 2! Even for just sandwiches!

          la drougerieThe second store I visited later in the week was La Drougerie. I didn't end up buying any fabric here, because there was only a small selection and it looked like mostly quilt-type cottons. It was also sold by the meter instead of the 3-meter cuts, so it looked like that would add up quickly. It looked like the big draw here was the yarn--it's the first thing you see when you walk into the door, and dominates the whole first half of the store. There's also a room to the side where you can browse beads and buttons and trims, and again, I could have spent a lot more time here.


          I decided to limit myself to just a small yarn purchase here, since the yarn is sold by weight. It's a good thing I came armed with fiber translations, because as usual, there's wool in almost everything! But I did find this super-soft linen/bamboo blend. It's called Kaleido, Ravelry has it categorized as fingering weight, and I ended up with about 330 yards. So probably enough for a hat or a lacy scarf or something along that line.
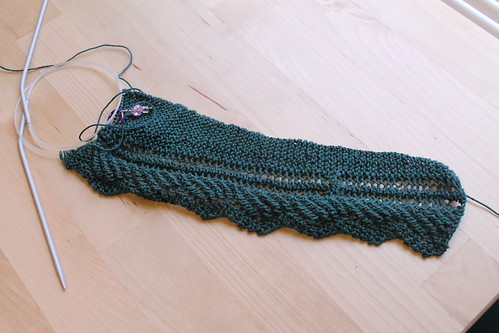
          Unleaving, in progress
          Finally, I did do some crafting while I was gone! This was mostly done during times like airport layovers and sitting in the hotel room at night-- I was originally thinking to knit on the plane some, too, but for both of the long flights, I ended up in the middle seat with not a ton of elbow room. This is the Unleaving Shawl from Knitty, which really looks a lot more like a scarf than a shawl and highly increases the chance of this actually getting worn. And it's a really simple pattern, unless I'm so tired from flying for 8 hours straight that I screw up the pattern and can't figure out how to backtrack and fix it. (Yeah, that happened once. Hopefully it's not too terribly obvious. I really should not knit anything other than straight stockinette when I'm super-tired.)

          One other fun sewing-related story from the trip: Doug and I had just gotten on the metro later in the day after dropping off my fabric at the hotel, to head to Notre Dame. There were two older ladies in the seats near the rail we were holding onto, and one was telling her friend (in English) about something having to do with a silk-cotton blend and the pattern she was working with. So when there was a pause in the conversation, I asked them if they sewed, they answered in the affirmative, and the three of us got to chatting about sewing clothes! I didn't have time before our stop to ask their names or where exactly they were from, though I'm guessing America based on the accents (or lack thereof, to my ears). But they did like my Cooper bag that I was carrying, and had heard of Colette when I replied to their question of what pattern I'd used. It's amazing that I could instantly find someone to talk to in a random subway on the other side of the world because of sewing!

          If you do want to see travel photos, I have a small selection up on my Instagram. I still need to sort through the photos on my SLR, and when I uploaded those and the ones on my phone this morning, I have over 700 photos from the week! But I'm also going to make a Flickr album of my favorites, mostly to make it easier to upload and print. After all, this is exactly the sort of trip that makes me want to dig into my scrapbook paper and play!

          September 15, 2014

          Do the (blog) hop!

          I'm sure many of you have seen the blog hop that's been going around about our writing processes lately, and Alessa nominated me! If you don't know her, she lives in Germany, makes wonderful, colorful dresses, and started a new job as a doctor this year (congrats!) So it's an honor to be nominated by her. And here's my answers.


          Early days blog photography, when Donna 1.0 was my main model.
          Why do I write? I started this blog waaaay back in 2007, mostly just as a way to keep track of my own projects, make notes of changes that I'd make when re-using patterns in a place where I couldn't misplace them, etc. Somewhere on the way, people actually started reading it and (gasp!) commenting. And suddenly, I was actually part of a sewing community. Since I live in what is basically a desert for garment sewing, and the only people I know who sew regularly are my mom and grandmother (who are both more into quilting), this is a pretty big deal! When the "sewintists map" went live, I kept checking and checking, but I've never seen another pin in Delaware. I guess it's a good thing I'm only a day trip away from Philadelphia/Baltimore/DC, right? So my blog is still mostly just for my own personal documentation, but also as one method of keeping conversations going with other sewcialists.
          A recent outtake with both dogs trying to get in the action!

          What am I working on? Blog-wise: you probably wouldn't know it, but I am attempting to work on improving my blog photos. My current challenges here are that I don't have anywhere good to take photos outside on a regular basis, since I live in a middle-unit townhouse that has a lovely view of one of my state's busiest highways from the backyard, and I'm still trying to convince my long-suffering husband to not be scared of my camera. Also, photobombing Golden retrievers. :-)

          I'm also working on writing more concisely, because I have a tendency to ramble!

          Sewing-wise: I've got two projects going on right now! One is my winter coat, which I'll probably write more about soon. This one pretty much demands in-progress posts. The other is a patchwork skirt commissioned by my sister-in-law. It's a good thing she's patient, because I started this one before my wedding dress and it still isn't done! But since this is the perfect project for Scraptember, I'm trying very hard to finish it this month. We'll see if I make it, since I'm leaving for vacation on Friday!

          How does it differ from others of its genre? I don't think my blog is all that unique, tbh. I don't design patterns, I'm not an expert at fitting or pattern hacking, and I'm not trying to come up with anything to sell at this point in my life. Since I've already turned one hobby into a job, via my music teaching and occasional performance, I'd like to keep my crafty life as something that's just for fun! I guess what does make me a little different is that I don't just sew--that's why I named this blog what I did. I've been teaching myself to knit, I make jewelry when the mood strikes, I've been making scrapbooks since I was in high school, and sometimes I do other "crafty" stuff. And I need to remember sometimes that just because something isn't sewing-related, doesn't mean it's not creative or unworthy of a mention.
          me as Amy Pond
          Or not-so-secret costumes, though only the Whovians would get this.

          Also, some people like "secret pajamas" clothes.... I like making secret costumes! (AKA things inspired by geeky things I love, which can still be worn in my everyday life.)

          How does my writing process work? Most often, I start with the words. I've always found it easier to consolidate my thoughts in writing, rather than verbally. Also, sometimes I pre-write my posts at my retail job, when I'm close to finishing a project and don't have anything else to do. (Shh!) After that, I take the photos/pester Doug into taking them for me, edit my text as needed to match them, and post! Lately, that's also been followed by tweeting about the new post, since sewing completely sucked me into the Twittersphere. 

          I'm supposed to tag two other people, so I'm nominating Katie from Kadiddlehopper and Helena at By Eitchy. In case you don't know them, Katie makes fabulous clothes for both her and her highly photogenic daughter, and has the most stylish Barbies around. She's seriously tempting me to get out my old Samantha doll and make some outfits for her with my scraps! Helena lives in Sweden, is working through a really fascinating project she calls "Sew For A Change" where she's also working on greening up her lifestyle, and has also been in pretty much the same boat of re-examining her wardrobe plans and ideals through the Wardrobe Architect project. I also find it interesting when she talks about Swedish culture, since it sounds like it's soooo different in a lot of ways from what I'm used to here in America.

          June 21, 2014

          Mone-misu? Tir-etta?


          Monemisu
          This dress wasn't in my original summer plan, but it was a nice quick make. I cut it out and sewed most of the bodice together on Sunday, sewed the neckline and armholes on Monday, made and attached the skirt on Wednesday, and hemmed it yesterday. It's also nice and comfortable--the fabric is some rayon knit from Mood that I bought specifically for this project. Not so great for the stashbusting, but at least I used it quickly!


          IMG_1411This week's Indie Pattern Month contest on The Monthly Stitch is Franken-patterning, so that was part of my inspiration.  The top is based on the Colette Monetta dress, and the bottom is based on the Cake Tiramisu dress, though I modified both parts. For the Monetta top, I squared off the neckline and added seams down the center of both the front and back of the outside pieces. Since I wasn't doing the collar, but I still wanted to line the top, I also had to tweak the clean finish directions a bit--I did that around the neckline, and the lower half of the armholes, but I had to hand-stitch the top of the armholes closed. For the skirt, I cut both halves on the fold instead of seaming it down the middle like the original pattern. It's a pretty plain and simple dress overall, but I think it'll be a good one to play with accessories. Especially since the color is much brighter and cheerier than the average neutral solid knit dress!

          IMG_1409
          So if you've been reading this blog for awhile, you know I'm a fan of secretly geeky clothes. Now that I've got you thinking this is just a normal knit dress, it's time to ruin the illusion by revealing that this is also going to be a part of one of my DragonCon costumes! I still have a couple components to make for that, but I'll give you a clue: Think Disney bookworm who's fond of teacups.


          I'm having trouble with the picture insert, so you can find the picture here. So did I get the gist of it? The idea is to make as many costume bits that can be worn as everyday clothes as possible, so I'm not spending my entire summer sewing things that I'm only going to wear once. And Belle was my favorite when I was a kid--she loved books, she was a fellow brownI'm having trouble inserting the picture, so click here.-eyed girl, and she wasn't afraid to use her head to help her get out of sticky situations. And whack at the wolves with a big stick, even if she wasn't very good at it. What's not to love?
          I still need to make a top, apron, and hair bow for this, but I think this dress is a pretty good start.

          Speaking of DragonCon, I've recently made the difficult decision to set the Tauriel costume aside. It's been going so slowly, and I've been racking my brains unsuccessfully for 3 months to come up with a good way to sew that armor bodice without making the vinyl tear apart the second I put it on, since I never was able to find a closure for it. Given how much I still need to make for multiple costumes, even though they're more everyday-clothes, and that I'm also going to need to help my best friend with some of hers, it just doesn't make sense to continue when I have a perfectly good Eowyn costume that only needs a blonde wig. Besides, as surprisingly much as I enjoyed Tauriel in the latest Hobbit movie, Eowyn is still cooler. And, you know, actually in the books.

          April 19, 2014

          everyone deserves a tea dress

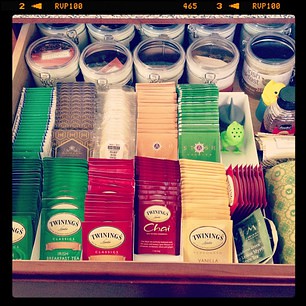
          It's no secret that tea is my favorite beverage in the entire world. I grew up spoiled on home-brewed iced tea made from real tea bags, and branched out into hot tea in my college years when I discovered that no matter how many all-nighters I was pulling, I will never, ever like the taste of coffee. It all started with discovering chai in the coffee shops, and went uphill from there. I started going for nice loose-leaf teas somewhere within the last 6-7 years, and I literally have an entire drawer in my kitchen that is dedicated to tea.
          tea drawer See? (For the record, Doug is the one who organized this for me. He's really good at that sort of thing.)

          I love my tea drawer.


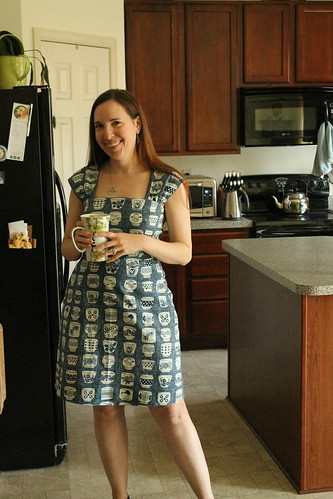
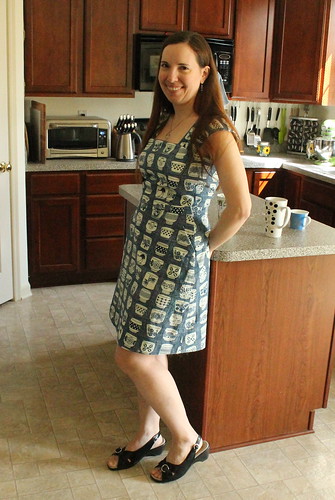
          Tiny teacupI also love this dress! You may recall that this fabric was part of my Christmas haul, and only being in the stash for less than 4 months is pretty amazing for me. I wanted to get to this quickly anyway, and the Sew Dolly Clackett event was pretty much the perfect excuse. So it's the perfect dress to sip a cuppa in.


          Real teacup!Just kidding....THIS is what passes for a cup of tea in my world! The mug even says so.

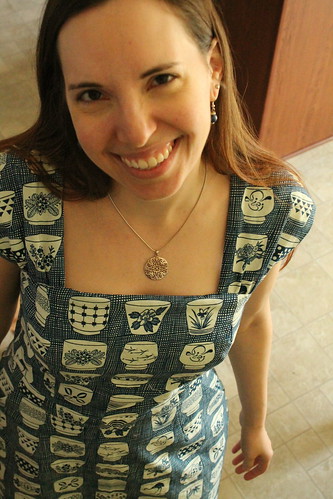
          The dress is the Cambie, of course, to continue my theme of all things Sewaholic that seems to be happening this year. Though this is the first "real" Cambie that I've made, since the wedding dress version was so heavily altered and didn't even use the skirt. This time, I cut a straight size 10, because I was going by the bust size and figured the skirt would be ok. I also decided right off the bat to use Tasia's tutorial for the "slightly less sweet" straight neckline, because it looked like it would fit better with the more-or-less linear pattern. I took in the back darts a little bit after the muslin stage. When I got to the point where I was ready to sew the lining in, I discovered that the neckline was gapping. Odd, since it didn't do that on the muslin! So my quick fix for that was to add some darts at the top, right around where the sleeve/strap things meet the bodice.  Whenever I end up making this again, I'll probably just go back to my wedding dress fix and convert the top to princess seams.

          Tea CambieThe pattern matching could have been better, I guess-- I did try, and did fairly well in several places! But I didn't think to factor in the flare of the skirt, and that skewed things a bit. In my defense, the teacups aren't exactly in a straight line, either. I checked. With a 6" wide ruler. It's not as fitted as I usually make my dresses either, but I think that will actually be a good thing. I recently had to weed several of my handmade dresses that I've had for years out of the closet, because slight post-honeymoon weight gain means they just don't zip up anymore! But those dresses were overall very fitted at the waist, and wovens, and so I think a little extra wiggle room will be a good thing. Especially for things like breathing while playing my flute, and the mid-Atlantic heat/humidity. You know, if it ever actually gets warm and stays there.


          Tea Cambie closeupThe dress is completely lined in the ivory cotton sateen that I've already used to line two other dresses. And I still have about a yard left! I also have about 1/3 yard of the teacup fabric left, which will be perfect for something like jeans pockets. So here's my stashbusting totals:

          Total fabric out: Approximately 5 1/4 yards.
          Total stash left: Approximately 312.19 yards. Though this total will be going up soon, sadly, because I had a box of stuff I accidentally left at my parents' come home with me recently, and there is some actual yardage in with the scraps. So I need to measure and update.

          Oh, and before I forget: I've been going back and forth on this, and I've decided to go ahead and sign up for Me-Made May anyway. So my pledge:

          I, Becky, pledge to wear at least one handmade garment and one handmade accessory every day, for the duration of May. (I think my focus is going to be on testing out what I've been playing with in the Wardrobe Architect series, particularly the palette and silhouette picks. Incidentally, with the navy and ivory, this dress fits right in!)

          April 2, 2014

          Happenings in my corner of the internet

          No pictures this time...just a few things of interest lately.

          First of all, I wanted to thank those who responded to the Spring Cleaning swap! Out of the 16 patterns I offered up, I got requests for 6 of them, which is not bad at all. My work hours for the next 2 days are shorter, as I had some rearranging with my lessons and only have the garden center job tomorrow, so I plan to get those packaged up and out in the mail by the weekend. I think I'm going to put the remaining ones up in the Flickr group, since there's still the ongoing swap for the year there and one of them was actually requested through it anyway.

          I have a little package of my own to look forward to--Gail had this cool piece of bamboo-printed rayon denim that she offered up, and my name got picked! Thanks, Gail! I'm already plotting what I can do with it, though I'll have to check my own pattern stash for yardages and all.

          Now that it's April, I finally have some tangible progress on the March Sewcialist theme. Haha. I haven't sewed a stitch yet, but I did finally finish cutting out the first garment for my costume yesterday. I guess it's something. 

          Saving the best for last, because I got good news today...Pattern Review's independent designer spotlight of the month was for Sewaholic Patterns, and they were running a contest to get some more reviews of her work up there. The prize was that two randomly drawn people would win a voucher for 3 Sewaholic patterns, and I found out today that my Robson coat review was one of the ones picked! Which leaves me with the question: what patterns to choose? Honestly, I might have to wait for her to release some more, because I already have almost all of them...

          March 20, 2014

          shieldmaiden slowness

          So you know my not-so-inner geek was super-excited about the Sewcialist sewalong theme for this month, right?
          Shieldmaiden Hwaet

           But my progress has been a little bit slower than battle-ready this month. Partially due to the Robson, partially due to needing to finish up some sewing for others, partially due to starting back up at work, and partially due to a few other life things that have sucked up the bulk of my weekends. But since it's almost 2/3 of the way through the month, I'd like to show that I am, in fact, working on it.

          My first thought when I hear "shieldmaiden" is inevitably Eowyn. But I've already made costumes inspired by her garb in the movies. Twice. But I still can't resist Middle-earth, so my plan is to make this.


          I mean, kick-butt red-headed Elf? Yes, please! I know she wasn't in the books or anything, but I do like the way she's turning out so far. This is a pretty complicated costume with lots of components, so I was never planning on fully finishing this month. I am hoping that I can get the bulk of one of the main pieces done, though--in this case, the green coat thing that she wears all the time in the movie.


          (My final costume will probably end up being closer to this, though I like that green bodice hoodie thing that she wears, too. I did buy a curtain at the thrift store with a similar color/texture just in case, but I can always use it to make pillows or something if I don't use it.)

          So here's my progress so far:
          Tauriel jacket- fabricI dyed some bedsheets. The left is before, and the right is after. This is not the final color. I'm trying to do this as much on a budget as I can, since I'm stashbusting anyway and probably have a few more costumes to make this year. I didn't count this in my yardage totals, but I already had the bedsheets--my parents were getting rid of them anyway, so my mom gave them to me awhile back for muslins or whatever. Yay, free costume fabric! This was after one round in the washer with a bottle of RIT dye, and it's definitely darker than it started, as you can see. But I'm pretty sure there must be some polyester in the fabric, because it didn't get nearly as dark as I'd hoped.(Incidentally, that more textured green fabric is the curtain I found at the thrift store for the hoodie bodice, if I make it.)

          My new plan is to try the iDye Poly out, mixed with a fairly dark regular iDye. This needs to be done on the stovetop, so since I'm a little limited in my size of pots on hand that I'll never, ever use to cook food in again, I'm going to cut out and sew the bulk of the costume together first in order to cut down on the amount of fabric that I need to stuff in there. (I say the bulk, because that will enable me to match threads better for stitching that will show on the outside, like hemming. Also, since I need to shape that collar, I don't want to melt my interfacing in boiling water, right?)


          I've also traced out my Frankenpattern, using all costume patterns that I already had on hand!
          Tauriel jacket- patterns
          And yes, I'm totally counting both of these as patterns used for Stash Diet purposes. So there.

          I've made the dress on the right before, though I had to modify it by adding a central panel because this was about the time that I realized my chest got bigger since I'd started college and Big 4 size 12 wasn't going to work anymore. (I realized this after I had already cut and sewn the bulk of it together and I couldn't zip it up.) If you want to see the finished product, it's the second dress down in my pre-blog costume roundup post. I've never used the pattern on the left, I just liked the look of the coat in particular, and thought maybe I could adapt it for real life wear. Which I never have. But I'm basically doing that, modified for things like hem shaping, and mashing it up with the collar from the grey dress with the obi belt, because it's the perfect shape.

          I'm hoping the collar works out ok, since the largest size on the collar was a size 12, my coat starts at size 14, and I'm not entirely sure how the shoulder seams will line up with the modifications I made. So my plan is to cut extra-large seam allowances and tweak as needed as I go. I'm not muslining a costume made of bedsheets. No one has time for that!

          I have to kill some time at my parents' after the garden center job tomorrow, since I'm meeting up with a couple of good friends to go to a book signing and driving home is pointless for the amount of time I'd need to stay. My mom said I can use their pool table--or, as she dubs it, the quilt pinning table--to cut the fabric out. Which is great, since bedsheets are a little wide for my little IKEA cutting table. So at least I will make some progress before the end of the month. I hope.


          February 25, 2014

          Sew Grateful Week!


          Day 1- Giveaway!
          Better late than never, right? I didn't find out until right before I needed to leave for teaching and a rehearsal that Sew Grateful week was happening this week. I've been blogging for awhile, but never really got to fully participate in this before. And the sewing community is such a fun place that I'd love to have a chance to give something back! (I was thinking it would be fun to do a little giveaway soon anyway, since my birthday is tomorrow, so the timing couldn't be more perfect!)

          I have two pieces of fabric to offer. Unfortunately, due to the weight/size, I can only ship within the US. (Sorry!) But hopefully they'll find good homes with one of you lovely ladies!

          SWAP- suitingThe first piece is a taupeish suiting. It's 58" wide, and I have 3 yards of it. People sometimes give my quilter mom fabrics, and if they're more suited to clothes, she passes them on to me--this was one of those. I don't know the fiber content, and haven't done a burn test to know for sure, but I strongly suspect that there's wool in it, based on how my hands reacted to folding this up! Which means that I can't use this, but it could be great for someone else.


          IMG_1162
          The second piece is a red organic cotton twill, 58" wide, 2 yards. I bought this one online from Mood a few years ago, thinking that I needed to branch out into some warmer colors and I should make it into a Beignet skirt. I haven't gotten to that pattern yet, and it's just as well, because red isn't really a color that I wear much at all. But I know a lot of you love red, so I'd love to see it get into the hands of someone who will use it! The red is a little less orange than the picture shows-- if I remember correctly, it's listed as "tomato" and they still have it.

          The red has been prewashed--I don't think I washed the suiting. You may want to wash them again, if dog hair is an issue for you. (I've tried to keep them clean, but Golden Retriever hair gets everywhere!) If you're interested in one or both of these fabrics, just leave a comment saying which one(s) and what you might make it into. I'll leave the giveaway open until Sunday night.

          Day 2- Reflections Day 
          I've talked before about why I sew and how I got started and all of that, so I'm going to focus on the online sewing community. Aside from my mom and grandmother, who are both a lot more into quilting than anything else, I don't really have local people in my life who sew. Sewing really isn't a big thing at all where I live, so my local resources are quite limited, and if you check the map, I'm still the only one in my little state!

          I've been blogging longer than many of the people that I've come to think of as sewing friends, and started it more to have an easily accessible record of the things I make and learn about sewing than anything else. It's really been more in the last two or so years that I've really started to feel like I'm part of a sewing community. I love how the internet makes it so easy to find people all over my country and internationally who enjoy the same things I do. I've enjoyed getting to know people from places that I've never visited, like Europe and Australia, in this small way, and seeing what life and culture is like in these other countries.

          Since I grew up sewing the "Big 4" patterns, which was all that was available in the one Joann's store that I have around here, it's been really fun to watch the beginnings and growth of smaller companies like Colette and Sewaholic and Cake Patterns. It's also great to feel like I'm supporting people who really care about sewing and work so hard to put out quality products that are great for all levels of sewists.

          I love that I can use things like Twitter and Instagram to get sewing advice in real time now. I also love how seemingly random comments on there can turn into fun sewalong ideas! (Hellooooo, March of the Shieldmaidens!) I'm enjoying having the group encouragement to use what I have this year through the Stash Diet and the Stashbusting Sewalong. I love seeing all of the creativity that different bloggers have with different patterns, and how generous everyone is in sharing their ideas, encouragement, and general excitement in seeing what gets made.

          Mostly, since sewing has been such a big part of my life and identity for so long, I love "knowing" people that get it.

          February 11, 2014

          Thurlows so nice, I made them twice

          Twice more would probably be more accurate. But I finally got to test out my plan to sew these assembly-line style. I still have one more pair cut out to sew, but the serger thread has to be different for it to look best, so I waited. Navy blue and charcoal, though? Black served absolutely fine for both.

          Navy Denim ThurlowsSince I've already showed two pairs of these, there isn't too terribly much to say. (Other than I need to work on my tripod camera positioning, because this angle makes me look kind of stumpy!) I did make a few minor detail changes to make them more jeans-style, since both of these are made from a lightweight denim. There's topstitching on the waistband, the darts, and around the welt pockets. I added a bar tack on the fly and some topstitching to just after the front pockets after wearing the charcoal pair for a day, because a stress point was already showing! (I also reinforced the stitching in the crotch and thigh areas for the same reason.) I did not, however, make the belt loops for these two pairs-- I didn't even cut them out this time, since by the time I got to that step for the other two pairs, I was pretty much mentally done and just wanted to hem them and be finished.

          I am happy that this navy denim pair can count for the #bluefebruary sewalong!


          Charcoal Denim ThurlowsAnd here's the charcoal pair. Do I look a little smug here? (That wasn't intentional. I also need to work on my posing. Sadly, this was the best of the lot.) Even though you're probably tired of me talking about making pants, I think these will both be great additions to my wardrobe that will go with tons of stuff. I had to give myself a break from pants yesterday and made a quick knit project instead (to be blogged soon), but I think I'm ready to continue with the last pair now. And then take a bit of a break from pants...but it won't be forever, because I need some jeans! (Especially since my one pair of skinny jeans accidentally ended up in the dryer this weekend and now I can't get them on anymore. So sad. On the plus side, now I know what to do with the leftover stretchy denim from the TARDIS skirt...)tablet case- outside


          One bonus project-- I actually finished this in January, but couldn't show it until now, since it was part of Doug's birthday present. He's been talking about wanting a Microsoft Surface tablet for months, so I teamed up with both sets of our parents to get him one. It came with a thin keyboard-style case, but I thought an extra case would also be helpful to keep things from jamming between the keyboard and the screen. So I used a scrap of the charcoal denim to make this envelope-style case, basically just winging it on the measurements by folding the fabric around the actual tablet.

          tablet case- inside
          The inside fabric was a fortuitous find-- I went to Goodwill with my bestie recently to try to find some preliminary costume materials for some stuff we're hoping to do later this year. While poking around the home decor section, I found this bedsheet that's all the various hockey teams in the NHL. Doug is a huge hockey fan, so I snatched that up and smuggled it home! I only needed a small scrap for this bag, but made sure to center one of his two favorite teams so that it was showing--the one that would require me to cut into the least amount of fabric, of course! I still have quite a bit of this left, though I'm not counting it as adding to the stash, but I'm sure I can use it up for some big blocky project like making pillows for the basement, aka his "man cave".

          And now for totals:

          Pattern: Sewaholic Thurlows (plus improvised pattern for tablet pouch)

          Amount of time it took to make: About two weeks, plus some breaks to make the pouch while Doug wasn't home, so that averages to a little less than a week per pair. Not too shabby.

          Fabric used: lightweight denims from Fabric.com

          Amount of fabric used: approx. 3.5 yards (about 1.25 yds of main fabric/.5 yd lining per pair) - there's approximately 1.75 yards of each main fabric remaining, though not the full width of the fabric. (Any ideas?)

          Stashed since: 2012

          Current stash total: Counting the 6 yards I just bought at Mood, about 336 yards. Well, it's still some progress.

          December 30, 2013

          Two last projects for 2013

          Now that Christmas is over, I can show one of my more recent secret projects! And even though most of my "craft" time since then has been "completely reorganize the craft room" time, I did take a break from it on Saturday night to knock out another project. So I thought I'd share.

          Christmas placematsFirst up are these placemats, which I (partially) made for my mother-in-law. I can't take credit for too much on here--making them in the first place was Doug's idea, and I honestly would not have been able to get these done even remotely on time without some greatly appreciated help from my own mom. I did the quilting and cutting, but she cut and sewed on all of the binding strips and also did the majority of the hand-sewing for that. Thanks, Mom!


          Christmas placemats


          A close-up of the fabrics. The penguins are because my mother-in-law is pretty much obsessed with them--seriously, she loves anything with a penguin on it! And Doug thought this would be more practical than another figurine. The flip side with the Christmas puppies are because the lighter one in particular strongly resembles the older of our two dogs, which she also loves a lot. It's really hard to find penguin fabric that isn't blatantly Christmas, but I'm glad I succeeded, because then she can use them more often.

          Another Renfrew topThe other project I finished over the weekend was for the #SewGreenDecember sewalong that the Sewcialists on Twitter have been doing. It's another Renfrew, my third one now, so there's not too terribly much to say, other than this:

          1. This was my first time doing the V-neck. It's not quite as crisp of a V as I would have preferred, due to the fabric, but I'm proud of how it turned out nonetheless.

          2. The fabric itself is a very drape-y, more or less a textured slinky knit. Thus the not-crisp V. The other effect that this had was that this one seems to have ended up a little longer than my other ones. The sleeves in particular do bunch around my wrists a bit, and pull down to handwarmer length. I don't mind this, actually, since my hands do get cold frequently. My only regret is that I didn't think to add thumb holes until after I tried it on! As for the print, all I can think when I look at it is that it's like a closeup of Impressionist shrubbery. Which is probably what this shirt will end up being called on the sidebar, because I'm not-clever like that.

          3. Since it was already cut out, this was super-quick. It's really nice to have a TNT pattern that I can knock out in a few hours while watching tv. It's also nice that I was able to use up a piece of fabric that has been sitting in the stash since before I started this blog!

          So now I've done all 3 neckline options, and two of the three sleeve lengths on this pattern. I'm sure there will be more, though I don't have any more planned for the semi-immediate future.

          I do have one more end-of-year post I'll need to do, since I did get some fun crafty/handmade things for Christmas that I wanted to show off. I'm also in the middle of inventorying my fabric (on a spreadsheet) and my yarn (on Ravelry), to give me something tangible to track in my stashbusting efforts. I do have to say that the numbers on my fabric are embarrassing at the moment--I haven't quite finished due to finding some things in unexpected places (and another fabric purchase that Gillian and Heather completely enabled me on, when I commented on Twitter that I had an Archer pattern and literally nothing to use for it), but at last count, I was over 320 yards! And that's not even counting scraps! Yikes!


          November 28, 2013

          Come along (to the grunge show), Pond

          I had been planning on making a plaid flannel shirt for the Doctor Who Sewalong from the earliest days of my planning. After all, when I think of Amy Pond, her Impossible Astronaut/Day of the Moon outfit is the one that immediately jumps to mind.

          https://blogger.googleusercontent.com/img/b/R29vZ2xl/AVvXsEj-GlROkPRh5NA2lUkWiomVv6ZuizO5-EsHzMnV2f-iAytkDGic0HnNu1ssYbpc6uXwOMx3PlDFC6PWHUMQUG_7DjwPpzzzdsvae_olSt2uIbZmYxwW7xQ4pKsmLS8rPNP1QaX90A/s1600/ImpossibleAstronaut_04.jpg

          (Though, with the right white button down, I could definitely wear River's outfit, too. Minus the gun holster. And let's face it, my hair is definitely more like Amy's!)

          For once in my life, the timing on this project was quite serendipitous, because it enabled me to participate in three sewalongs with one project! It would have been four, but I just couldn't quite get this done in time for the official dates of the Fall Essentials Sewalong. I can, however, claim this shirt for both the Grunge Sewalong and the Flannel Shirt Sewalong that Kelly is hosting!

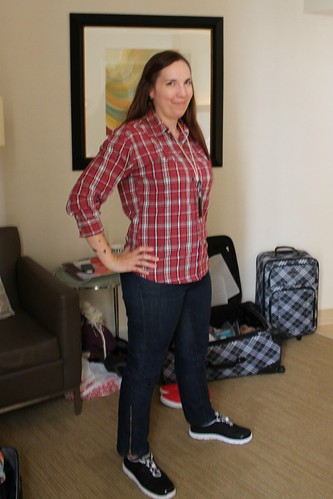
          What's with the silence?My initial thought was to find a plaid as similar to Amy's shirt as possible, but then I remembered that I hardly ever wear red. And I already have this shirt. And I also found that lovely blue plaid that I showed in its half-done state in the last post, and figured that would mix in with my wardrobe much better.

          I'm quite pleased overall with how it turned out. I can wear it with the sleeves rolled up like Amy's, with some skinny jeans and boots...


          Wait, what was I doing again?

          Oh, right, project details. I'll get to those after the fashion show.


          Grunge styleOr I can wear it with the sleeves rolled down for warmth, which is how I'll be rocking it today, since it's still stupid cold out there. Going grunge-style here and wearing it over a t-shirt, which is how I was most likely to wear a flannel in the 90s. I guess my musical experience was more "grunge-lite" than anything else--I was still a pretty young teenager in its heyday, and my fashion choices were largely dictated by my school's dress code. I did listen to bands like Pearl Jam and Soundgarden, but I was also just as (or more) likely to listen to U2 or Counting Crows. Or the Beatles. Yes, I was the weird kid who preferred 60's music to all those boy bands that were so ridiculously popular by the time I graduated. Every time they play the Backstreet Boys on the radio station at work, which they do on a disgustingly regular basis, it still takes me back to walking the halls of my high school and hearing my female classmates singing it while they sat against the wall before class.

          (For the record, yes, there's a Weeping Angel on my shirt. My intention was to do a "Don't Blink" photo, but I was having trouble getting one where it didn't look like it was yawning. On the plus side, you can look away from your screen now.)

          Ok, back to those pattern details. I'll do a proper review, since it's been awhile.

          Finished!Pattern: I used #114 out of the April 2010 issue of BurdaStyle. I was originally going to use my beloved New Look 6407 and mash it up with the BurdaStyle pattern I used for that other plaid shirt I linked to earlier. Then I decided it would be easier to just trace out a new pattern, and I needed a little more length and a little less front darting for a plaid. (And I didn't have enough time to jump on the Archer bandwagon and order that.)

          Description:  The magazine just calls it a "casual shirt-blouse".

          Pattern sizing: Size 38-46. I made the 40.


          Did it look like the photo/drawing on the pattern envelope once you were done sewing with it? Mostly.

          Were the instructions easy to follow? For Burda patterns, they were surprisingly straightforward! The annoying thing was that it referred me to instructions for two other patterns in this particular issue, but all things considered, I can live with that.


          What did you particularly like or dislike about the pattern? Overall, it's a pretty good basic button-down. I also like that the sleeves are actually long enough for my arms with no alterations. That's pretty rare. I do not like this collar, though. It's crazy wide, and just looks kind of weird.

          Fabric used: A cotton plaid flannel that I bought at Joann's. I know there's a lot of Joann's haters out there, but aside from some fraying when I prewashed it, the fabric turned out very soft and cozy. Since they're literally the only apparel fabric store option in my entire state, it's good to know that they still have nice fabric sometimes!

          Plaid matchingPattern alterations or any design changes you made: I left off the pocket, and that little back loop thing. I cut a few pieces on the bias, like the cuffs, collar and yoke, just to avoid more plaid matching. I also used my New Look pattern as a guideline for lowering the bust dart. It would have been super-high on me otherwise. I also didn't bother putting buttons on the collar stand, because I will never button this that high. Good thing, since I would have been one button short otherwise. 

          Quick note on the plaid matching--I honestly forgot to factor in the dart when working on this, so I went for the next best thing and intentionally alternated the lines. Because Amy kept alternating between Rory and the Doctor...yeah, something like that. But hey, look at that matching in the sleeve and under the arms!

          Would you sew it again? Would you recommend it to others?   I might sew it again, with some tweaks.
          I'd probably add a little more front shaping, and a bit more flare at the hem. It's a little tighter around my hips than I'd like. Or maybe I'll just jump on the Sewcialist bandwagon and buy the Archer....hey, look, she's having a sale this weekend!

          But first, time to change out of these skinny jeans. After all, it's Thanksgiving here in the States, and that is not a good fashion choice for stuffing my face with turkey and mashed potatoes.