Showing posts with label coat. Show all posts

November 13, 2014

the coat that stubbornness built

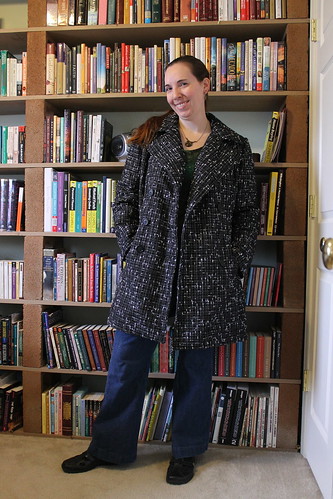
peacoatThe coat is finally done! It took a lot longer than I'd planned, mostly due to my sewing mojo being the lowest it's been since I was in grad school and trying to juggle that, my TA duties, getting a teaching career going outside of the university's music school, and actually seeing my friends on occasion. But I did the last bit of hand-stitching and sewed on the buttons last night, finishing it just in time for the cold to come. Literally. Yesterday it was in the 60s, and today we might scrape the upper end of the 40s if we're lucky. Brr.

Since I've used this pattern before, there isn't really a ton to say about it. I did do several things differently this time, mostly involving hand-stitching all of the internal seams down because they weren't pressing flat enough, and underlining. I used up that silk organza I'd mentioned in a previous post to underline almost everything (I didn't have quite enough for the sleeves, so I left it out of there), and I also underlined (interlined?) the lining with Thinsulate. Which was way less time-consuming in the long run than my last coat, where I quilted two layers of quilt batting into the lining. This coat is still heavy, though! I think it's mostly due to the outer fabric, which is pretty thick and heavy compared to the suedecloth I used for the last coat. Oh, and I had to draft the pattern piece for the collar stand, because apparently I also failed to return that to the envelope the last time, along with the first page of directions. Organization fail. Maybe next time I need a coat, I should just get a new pattern!

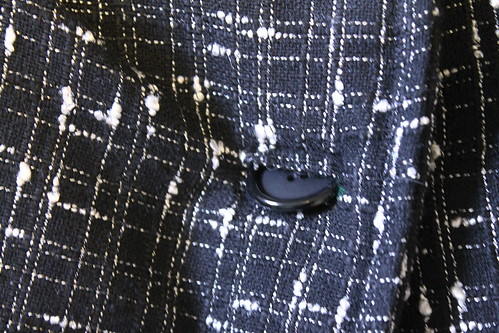
bound buttonholeOh, and I did bound buttonholes! This was my first attempt at doing it, and they are a little wonky in spots (also probably due to the thickness), but they blend in well enough with the fabric that it isn't blatantly obvious unless you're looking up close. I did cheat a little bit--the original coat pattern calls for an additional buttonhole on the part that goes underneath the main buttoned-up part, to attach to a button on the lining. But honestly, I rarely, if ever, buttoned it there when I was wearing the other coat. So I figured I'd save myself some time and skip it! I also stole the buttons from the old coat, since they were still perfectly good.

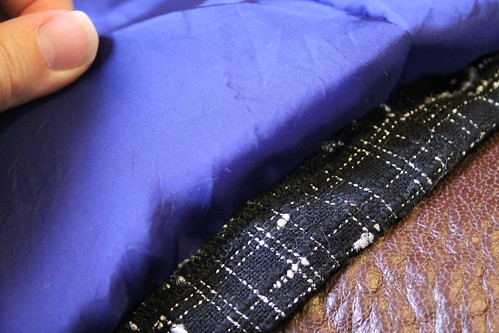
hemI cheated on the lining a bit, and just shoved the raw edge of the lining underneath the serged edge of the coat and hemmed it on machine. At that point, I just wanted it DONE. But honestly, I think it will hold better in the long run than hand-stitching on this particular fabric, and since the lining pleats over top of the hem, you can't even really see that serged edge.

This project may have taken forever, and it was honestly sheer stubbornness combined with my fear of cold that pushed me to finish it. But it was great for stashbusting! All together, I completely used up 3 yards of that tweedy stuff on the outside, 2 yards of Bemberg lining, and about 3 1/3 yards of the organza--it wasn't full width everywhere since it was leftover from a previous project, so I had to do some creative pattern work. I do have a decent-sized piece of leftover Thinsulate, so I'll need to figure out what to do with that at some point.

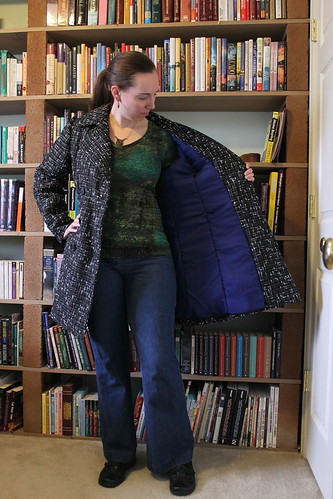
peacoat liningSo, one project of my FESA plan down, finally.  I'm hoping I can still squeeze in my SewDisney project before the end of November, but I'm starting off with a Renfrew hack, so this should theoretically go much faster! And at least I'll manage to stay warm in the meantime. I hope. Since this is me we're talking about, after all.

October 16, 2014

What's it got on its pocketses?

Since finishing up my friend's cape, I've managed to make a little progress on my coat, at least as far as construction of major sections has gone. It's taking a little longer, for a couple of reasons:
a) This tweedy fabric frays if you just look at it--I'm really not exaggerating by much! So I'm having to go back and serge every raw edge once the seams are sewn.
b) The first page of the directions somehow didn't make it back into the envelope after the last time I made this coat! So I'm having to really think through this and make sure I'm doing it right. I even pulled out my old Reader's Digest Guide to Sewing as a reference just to make sure. Yay for sewing books!
c) I'm actually glad I did that, because it inspired me to add a detail to the pocket construction that I think will make this coat better. Also, I had to cut the pocket lining in the first place.
d) I also discovered that I sewed one of the pockets on in the wrong place, and had to rip it off and re-sew it to the right place. Which means I've just now finished the first two front seams, minus topstitching. Yikes.

So that pocket detail... I added a facing to the lining fabric portion. (One side is cut from the actual coat fabric.) I was originally planning on lining the coat in this lime green silk crepe that I bought for the wedding and then couldn't use. But I had this royal TARDIS blue Bemberg lining that I bought to attempt to line the Darling Ranges dress that I was originally thinking of making this fall. (At this point in October, I'm thinking my best bet is to drop that part of my FESA plan and save it for going into next fall. Again.) A little Twitter conversation confirmed my thought that fully lining the dress might be more complicated than helpful, particularly for the bulk of the gathered skirt. So I commandeered that particular piece of fabric for the coat lining instead, because I think it will slide over sweaters and the like so much more nicely. (Now I still have to come up with something to do with 3 yards of lime green silk. Help?)
I was worried about how the lining would hold up against the strain of pulling my gloves in and out of my pockets, especially with the thicker tweedy fabric. So I basted a leftover scrap of my organza, cut on the selvedge, onto the seam line of the two pocket pieces...


...and then stitched on a piece of the coating. The edge facing the inside pocket is serged, of course, because of that fray factor.

A small detail, I know, but even though the front isn't pressed yet, I think this is helping the pocket to lay much better. And it looks a lot more professional to not have that blue peeking out!

I don't think I'm going to go all-out tailored with this coat, because it being halfway through October means I'm feeling pressured to get this done. Especially since it's been oddly warm and the temperatures are set to plummet this weekend, which means I'll be freezing my butt off at work next week for sure. So if I try any more super-tailored details on this one, I think it'll be attempting the bound buttonhole thing. I just can't see a regular stitched-and-cut buttonhole holding up for too long on this fabric. I guess I'll have to figure out when in the process to do that, so wish me luck! I think I'm at least caught up to the point where I have directions again. So that's something.

October 9, 2014

the slowest of sewing

I figure I'll have to do a few more in-progress posts for awhile, since I'm not speedy enough to whip out a winter coat in no time! Also, I've gotten a little sidetracked by a sewing request from a friend that I couldn't pass up. (Because it's costume-related and for a little kid--how could I say no?)


All I've managed to get done on my coat so far is to cut the outside and underline the pieces. My fabric doesn't look like a loose weave on the table, but when you hold it up to the light, it tells a different story!

If that much light gets through, it seems reasonable that winter winds could do the same! I had a large piece of silk organza left over from making this dress, because I seriously overestimated how much I would need to underline it. I also ruined the light color of it back when I made that dress, because I threw all of the fabrics in the wash together and it turned sort of an uneven, hand-dyed-looking grey. So I didn't want to use it as a press cloth, and I couldn't use it for any interfacing-type roles on lighter colored fabrics. However, I did have just enough to squeeze most of the outer pieces of this coat onto it, minus the two front pieces. (They were supposed to be interfaced anyway, and overlap when the coat is buttoned, so I was ok with making an exception there.)

The grain may be wonky on a few pieces here and there, because if you've ever worked with silk organza, you know how it shifts. At first, I tried cutting out the pieces and then basting it onto the main coat pieces, but of course things were shifting like crazy. So since the fabric itself has a bit more grabbing power than the usual things I underline, I tried a different approach: laying the pieces directly on the organza, basting them on, and then cutting them out. The other advantage to this was that I could tweak the layout to fit as many pieces of the coat on as possible, since I was working with leftovers!

The pieces are all cut out and ready to go, including the two interfaced front pieces. I'm hoping to finish my friend's project--an owl cape for her foster son to wear for Halloween/his early November birthday--before the weekend is over, so I can give it to her on Sunday. I do have a little sneak peek of that, aside from what I've been posting on Instagram here and there, because Doug got bored while I was working on this last weekend and started goofing off with my camera. I guess a good side effect of our Paris trip is he's a lot less nervous about using it now!
So many feathers. But the good thing is that I was able to completely bust a few pieces of quilt cotton from my stash!
And a little peek at me in my sewing room. It had been awhile since I had a nice chunk of weekend time to sew, so I was a happy girl!

The feathers didn't go quite as far when I pinned them on for real after edge-finishing, so I cut out what I hope is the last of those last night. The only work I have today is teaching a couple of lessons, so I'm hoping to get those edges done so I can finish up the sewing ASAP!

September 11, 2014

FESA plans!


It's that time of year again! I do love this sewalong, and this is the 3rd year I've participated. You all know how I feel about the cold, and my ironically wool-phobic skin doesn't help matters. (I say ironic, because since I got married, my last name now starts with Wool! Go figure.) So this is a great way to keep me focused and excited about making things to get me through the winter.

So without further ado, here are my plans for the next couple of months. I'm keeping things rather conservative this time, so maybe I can actually finish everything?


Fashionable Foundations for Frosty Weather: I have some stashed knit to try out the Espresso leggings, and I'd like to knock out a pair or two of them. Since woolly tights are a sad no-go for me, I think this could be a great way to keep my legs warmer for wearing skirts. (I wear boots with skirts a lot, so the no-foot-coverage thing won't be an issue.) Not to mention it's a layer I can wear under my jeans while I'm shivering my way through the last bit of October at the outside register at my retail job. (I have some black, too, but it's a much bigger bolt since I'd also bought this fabric with that aborted attempt at a Red Velvet in mind. Oh well. I can always use black knit somewhere, right?)

Chic Chemises for Cool Climates: The definite is that I'd like to finally finish up the Roheline cardigan that I've been knitting since August 2013! (Though I really didn't get it started until last September, since I had to restart no less than 7 times.) I'm so, so close to finishing the sleeves, which means I only have the yoke and buttons to go, so it's not unreasonable. Depending on how the time goes, I also wouldn't mind trying out the Archer blouse, since I didn't get to that in my summer plans.

Fabulous Frocks: I would like to do a Darling Ranges dress if at all possible, since the colors will be great for taking it into the winter. Also, I meant to make it last year, so it's time. I'm hoping to knock this one out next month, since The Monthly Stitch's theme is "Frocktober" anyway. I'll just need to find a layer to go over it--I have yarn to knit a yellow cardigan that will pair nicely with this, but there's no way I'll be able to finish 2 cardigans in this time span.

Baby It's Cold Outside: My old peacoat that I made in 2007 is starting to fall apart. Replacing that will be first priority! (Even so, 7 years, including the polar vortex of wintry doom that we had this past year, is not bad at all for my first me-made winter coat!) I'm hoping to play around with a few more tailoring techniques, but I'm using the exact same pattern as the first one, so at least fitting won't be an issue. I actually have started cutting this one out already, but since there's 4 layers involved, I'm still on the outside. (The black and white tweedy fabric has been cut, but I'm underlining most of the pieces with that greyish silk organza that's right next to it. And that's taking a little longer. Especially given that I haven't been able to touch it since Saturday.)

Other projects: I'm hoping to knock out a skirt before the end of the month, because a long-standing project I've been making for my sister-in-law is perfect for Scraptember! I may knit up a scarf, too, since I'm strongly leaning towards a one-skein project to take on my upcoming trip to France. (Next weekend! Eeeeee!) After all, I have a lot of plane/airport time, and at least 6 hours on a bus to get to Normandy and back, and I'm not sure how well my Kindle battery will hold up for a cross-continental flight. Also, I know from experience that I sadly cannot read on the bus without getting sick.  Maybe I'll have better luck with just keeping my hands busy.

I'm also beginning to plot out what I'm going to make for the Disney sewalong that Katie and I are co-hosting in November, but that project is still a secret!


March 13, 2014

Throwback Thursday

Between the Stash Diet/Stashbusting Sewalong efforts, and the Wardrobe Architect challenges, I've been in the mood lately to take a good, long look at my closet and see what maybe doesn't belong there anymore. A lot of the things I've been pulling out so far are thrifted or RTW items, but I've also found a few things I made that mostly predate my blogging days. So, I figured I'd feature them for a moment here before I repurpose them.

1. The denim jacket, circa 2005 (I think). This is the coat that my Robson is replacing. I made it using a slightly shortened version of a Vogue coat pattern (1266). It hasn't aged well, as far as denim jackets go--instead of looking broken-in and casual like the more traditionally-styled ones do, it just looks faded in all the wrong places. You can probably see those collar wrinkle fade marks all the way from here.


The lining is still in good condition, though. I love all of the fun colors in this fabric!


2. The retro skirt, circa 2006. This one was actually one of the first things I shared on this blog, though not in much detail, since it was only my second post and all I did was mention some things I'd made over the previous summer. (Incidentally, aside from this skirt, the only things in that post that I still have are the bag and the long wrap skirt. I occasionally pull out the bag for days that I don't need to carry much weight, because I can't bring myself to get rid of the hand-painted panel but it won't hold up to more. And I do still wear the wrap skirt fairly regularly during the summers.) My original intention was to wear this skirt for my grad school graduation, but I was too busy with classes and such to finish it in time. So I finished it up the following summer. I still think this fabric is really fun, but the proportions of the skirt were never quite right. (Or the fit, if the way the waistline just hangs off of Donna is any indication.) I tried to draft my own pattern, and it didn't work out well. So then I used McCall's 4783 for the yoke, and I should really just ditch that pattern because the yoke is too wide and it means there's a seam right on the widest part of my hips. Not flattering. And then it ended up too short, which is why there's that white band on the bottom. Which is now somewhat dingy-looking.

I do still think the piped faux pockets are a cute detail, and I may have to revisit that one sometime, but they'd work out a lot better if they were several inches higher. And stopped curling. If I do revisit this, interfacing would probably not be a bad thing.


3. The Japanese maxi-skirt. I think this one was one of the few things I actually managed to crank out in college, which would put it around 2002-2003. I still like the skirt, honestly. It's Simplicity 7097, which I've used for another project or two over the years. Even though it's straight, it has a slit that's a good length for me to still be able to move freely. And I think the fabric is really fun. According to the website where I bought it, the symbols are kanji for "moon". The thing is, I only wear this skirt maybe once a year, tops. It's partly that I don't really have anything to wear with it, other than black tops. Though 3/4 of the colors are definitely in my palette, the red is what stands out to me and gives me mental blocks on wearing it. The other thing is, I love prints that evoke other cultures, but I often feel a little weird wearing them as a white girl of primarily German/UK descent. It's like I have this subconscious fear that, say, I'll offend my students that come from Asian families if I wear a skirt with Japanese writing. It's probably weird, and my thought line is more "I like this thing about your culture well enough to borrow it for my wardrobe", but it's still there.

Rather than just pass these on to the thrift store, I'm going to recycle them here. I'm in the very beginning stages of planning a quilt, and spent a snow day chopping up smaller pieces of cotton prints and old muslins to do so. So since they're all quilting cotton prints (I'm thinking the lining of the coat, not the denim), why not add them? This thing's probably going to take me 5 years to make anyway, so I might as well include little pieces of my fashion history.

Plus, you know, free fabric, and I can hoard the zippers and buttons for future projects. I love free stuff!

And yes, I am sewing. Though I'm at a bit of a standstill for March of the Shieldmaidens while I wait for dye to arrive/frantically try to finish the sewn part of a gift before a baby shower next weekend. With any luck, I should be able to start this costume by April...

March 10, 2014

here there be dragons

I've been putting a LOT of sewing hours in over the last week and a half, including about a 5 hour stretch last Saturday. I knew that my extra free time would be ending soon, and I've officially gotten the call back to my garden center job now. So I really wanted to get this project done before it happened, and I just made it, since I finished this on Thursday night and I have to go back tomorrow.

Oh, sewing time, how I will miss you!

As you know, I've been working on the Robson coat, and I'm rather pleased with how it turned out! I'm going to start with a proper pattern review, since Pattern Review is having a Sewaholic contest-- how convenient!

Robson CoatPattern: The Robson Coat, from Sewaholic Patterns

Description: From the website: "This is a feminine take on the traditional military trench, with rounded edges for a softer look. The Robson Coat features everything you'd hope for on a trench coat, including front and back storm flaps, epaulettes, topstitching, tie belt and sleeve tabs. It's unlined to make it easier to sew, as well as easier to press the finished coat. Front pockets are covered with welts and lie flat against the body. All of the inner seams are bound with bias tape for a clean finish."

Pattern sizing: size 0-16. I made a 10 for the top and graded to an 8 at the bottom, to account for the pear-shaped figure grading.

Did it look like the photo/drawing on the pattern envelope once you were done sewing it? Yes!

Were the instructions easy to follow? I found them easy to follow, but I've been sewing for a long time. The hardest thing for me was the left vs right thing, but that's normal.

Robson CoatWhat did you particularly like or dislike about the pattern? I love the styling, and I think it's very well-drafted. The collar in particular came together beautifully, in my opinion. I do wish that the belt loop placement had been marked differently, like with dots instead of notches--by the time I was ready to sew them on, the notches had long been enclosed with bias tape, and I had to resort to measuring from the bottom to get them evenly. It's also a LOT of layers in certain points, particularly the shoulders with the yoke, the sleeve, and the epaulettes. It would probably be fine in a lightweight raincoat sort of fabric, and I got through it miraculously ok, because my machine is a beast. (Yay, Berninas!) But other machines would have an issue with it, depending on the fabric used.

Speaking of...

Fabric used: The Montauk Twill from Fabric.com, in the "deep sea" color. It's described as a medium-to-heavyweight twill, which is probably why the thickness was an issue from time to time. The right side has a lovely brushed feel to it, and it was wonderful to sew with! (Though it did get some fuzzballs on the wrong side from washing, and it turns out that Golden retriever hair sticks to it pretty easily. But then, I'm pretty sure the one dog's fur is made from Velcro.) I also used a quilter cotton for the bias bindings, and some polyester satin to underline the sleeves.

Robson coat insidePattern alterations or any design changes you made: I ended up adding an extra 1/8" back in per side around the bustline princess seams and the upper center back seam. Along with making the top a larger size, this worked great as a cheater FBA. I also underlined the sleeves with a more slippery fabric. (Look, I'm print-mixing!) Aside from that, it's pretty much as is.

Would you sew it again? Would you recommend it to others? I could see myself sewing it again, but not for a really long time. Unless I cropped it, ditched the flaps, and styled it as a layering jacket. You really only need one spring outerwear coat, you know? I would recommend it to an advanced sewist, or an intermediate one who isn't afraid to try some new things, like bias tape seam finishes.


Dragons!Other notes:
I am absolutely in love with these buttons. They're slightly smaller than what's called for, and I don't care.

Because DRAGONS.

Seriously, aren't these the coolest? I mentioned back during Sew Grateful week that I found these at KnitPicks. I did end up buying one pack too many, because I didn't realize that 3 of the buttons were only to be sewed on the wrong side for buttoning purposes. (I also ended up sewing those 3 inner buttons to the wrong side, but I'm not going to bother fixing it. Honestly, as much as I need to get in and out of jackets fairly quickly when travel-teaching lessons, I'm probably never going to properly button this.) So I have 5 of these lovelies left, and will have to come up with some use for them. These are too fun to hoard, even though hoarding is a dragon's favorite thing to do.

I'm kind of tempted to call this my "Smauglock" jacket. If you're a fan of the BBC Sherlock and/or the recent Hobbit movies, you may have seen things like this, where artsy people have fun with the same two actors playing Holmes/Watson and Smaug/Bilbo:


I mean, come on, that scarf is pretty much the exact color of this coat!

IMG_1178Now, for the stashbusting details, minus the usual categories that got covered in the pattern review (pattern, fabric used):

Amount of time it took to make: About a week and a half, but I put in a lot of hours during that time.


Amount of fabric used: 6 yards (yeah!) I entirely used up 2 pieces, and have about 1/2 yard left of the quilter cotton. But it's just a big triangle, and I do already have several bias-cut strips left over, so I'll probably just go ahead and cut the rest into strips for either more bias tape, or to use for the leftovers scrap quilt I'm plotting.

Stashed since: 2013 for the twill and quilt cotton, since it was bought specifically for this project at the end of last year. 2011 for the poly satin, since it was leftover from lining this jacket.

Current stash total: About 325.5 yards. (Oddly, I took 5 additional yards out for the Sew Grateful giveaway, but I guess it had stopped counting at some point in my spreadsheet, because I ended up with 4 more yards than I'd thought! Arrrgh!)

For Stash Diet purposes, this means I've now gotten rid of 8 pieces of fabric (10 if you count the two for the giveaway, which will be going out soon!), and used 4 different patterns this year. According to my rules, this means I've "earned" both a new piece of fabric, and a new pattern! But I'm going to hold off for now, since I won the Avocado Hoodie pattern during Sew Grateful week, and Doug and I have some financial goals we're trying to meet that would be helped by me not buying fabric just yet. I already have such a long list of projects to get to soon that I think I can wait.

IMG_1215I'm going to leave you with one last shot--I actually managed to get outdoor photos for once! I finished this just in time for a Saturday that was decently warm enough to take this jacket out for a test-drive, so Doug and I took the dogs to a nearby dog park to throw some tennis balls for them. They don't get much space to play in our tiny, unfenced backyard, so this was definitely a treat for them. I was having fun attempting to get some good action shots of them running around, and Doug graciously agreed to take some photos of the coat. So of course, we ended up with a few involving my furry photobombers. But they're pretty cute in this one.

March 1, 2014

February Stash Diet update

Here's my totals for the month!

For sewing, I finished a whopping 6 projects! Three pairs of Thurlows, a Plantain tee, plus an infinity scarf and a tablet case. I love the months off from my retail job. I only used up two pieces of fabric completely, though I made nice dents in the fabrics I used for the pants. I did also buy several pieces of fabric this month--there was my travel exception that I made for Mood, plus I used my regular allowance to buy a piece of faux leather for my March of the Shieldmaidens project. I also bought two half yards of fabric to make a baby gift for a friend, since I needed a little more to get free shipping anyway and I really don't have baby-friendly stuff on hand.

Total fabric out: 7 1/2 yards
Total fabric in: 10 yards
Difference: + 2.5 yards
Total stash left: approximately 327 1/4 yards
Pieces of fabric completely used up: 2 (the cherry print cotton for the charcoal Thurlow pockets, and the paisley knit for the Plantain/scarf)
Patterns used: 2. I believe I have one more to go for my pattern buying allowance.


For knitting, I finally managed to start the sleeves on my cardigan! I also finished up a scarf for the Craftsy class that my mom and I have been working through together, aside from sewing the two halves together and weaving in the ends.. I am so, so close to finishing up that skein of yarn-- if the method for figuring out yardage from weight that I found is correct, I only have about 20 yards of this particular yarn left. Seriously, what do you do with 20 yards of yarn?

I didn't do so well on the yarn in vs out this time. Since I was sharing my beginner knitting Craftsy class with my mom, she decided to buy another one for us to work through together--the "Improve Your Knitting" one, which is probably what I would have gone for in the first case if it had been available at the time. I did check my stash, but unfortunately didn't have anything on hand in the right weights and amounts for the three projects that we'll be making for this class. So I ended up buying another 8 skeins of yarn! Hopefully these will get entirely used up during the course of this class, but I will not be counting these towards my yarn purchase allowance when I do use them up.

On the plus side, aside from my cardigan, I can make my totals a little more accurate now. I was finally able to give one secret project to its recipient--I made these dishcloths for my bestie, who recently bought her first place! So this was part of her housewarming gift, which had a geeky-but-practical theme going. So these have the Earth symbol from Stargate, a TARDIS, the Golden Snitch from Harry Potter, and the Starfleet Academy symbol from Star Trek. (I also bought her this apron--it references both Lord of the Rings and the Big Bang Theory, and is a favorite quote to throw at each other on a regular basis--a cookbook, and a cast-iron skillet--also known as Samwise Gamgee's/Rapunzel's security system!) I basically used up both skeins of yarn on these dishcloths.

I didn't quite finish my Robson coat in time for the end of #bluefebruary, so I'm going to count that yardage total towards March. I also did some dyeing to prepare for my costume yesterday--I'm trying to do my costume on a pretty tight budget, so I dyed some bedsheets that my parents were getting rid of. They did get darker, though not quite dark enough for my intended costume. So I think I might sew the main part of the costume up anyway, and then try the one dye I know works for polyester. (You have to boil it on a stovetop, so I need a smaller quantity than queen-sized bedsheets!)


February 20, 2014

muslin making and palette play

Same pattern company, different type of garment... I'm making a Robson Coat next!

I've learned from experience that Sewaholic Patterns need more tweaking on my top half than my bottom half. (Incidentally, I really hope I still have that wedding dress muslin around somewhere, because I'd like to make a "real" Cambie sometime and don't want to muslin the top 3 times again!) So I figured I'd better actually suck it up and make a muslin on this one. Since it looked like the finished garment measurements for the bust and waist were about the same, and my bust isn't quite that...um...flat, I decided to experiment with cutting a size 10 for the top and sleeves, grading to an 8 at the waist, and leaving it a size 8 for the hips.

Here's my result.
Robson fitting front

The front of the coat. I didn't cut the muslin the full length, because fitting over the hips was not the issue I was worried about. I'm also not entirely sure I pinned the coat closed in the places marked on the pattern, or on the correct side for that matter, but you get the idea. I do think my grading worked pretty well, though there is a bit of a diagonal wrinkle going towards that first pin that makes me wonder if I need to do a slight FBA after all. I also doubt I'm going to be doing airplane impressions much in this, but I wanted to test the range of movement in the arms. They feel pretty comfortable over a long-sleeved shirt, which is probably the most I'd be wearing under this, so even though it pulls when I do that, I think I'll be good.

Robson fitting back

And then here's the back. I know I've got a bit of a swayback going here, though I don't want to overfit this one since it's meant to be worn over other things. I might just leave it. The one tweak I'm thinking I may want to seriously consider is adding just a little more room across the upper back--this was me raising my arms to the level I would need to, say, drive my car. It's not like I'm about to do my impression of the Hulk, but adding just a tiny bit more room, say 1/8" in the center back on each side, might do a lot for avoiding strain on the seam. Any thoughts from you fitting gurus out there?

It looks like the sleeve length is pretty good here, but I think I'll have to check the hem depth and probably add a little to the final pattern--I'm probably not going to want it much shorter than what it's showing up as here.

I think I'm going to like the style of this coat! And though I am going for the full length for the real version, because I like longer coats, this muslin makes me think that it could be a cute shorter coat as well. 


I'm throwing the most recent Wardrobe Architect assignment in this post too, because it's more or less an extension of last week's color assignment. All we were asked to do was organize our palettes into three categories: neutrals, near-neutrals, and statement colors.

So I took last week's palette and did a little rearranging. No surprise, over half of my colors fall into the "statement" category. Unless teal is now a neutral, because I wear it a lot these days. It's the perfect compromise color between blue and green. So teal is totally a neutral, right?

Even though I wasn't sure how to make metallic swatches on Photoshop, I'm adding metallic silver, gold and copper to my near neutrals, because the majority of my jewelry incorporates some kind of metallic. I do mostly lean towards silvers, but have discovered the value of having gold, especially the more antique color, and copper to mix things up over the last few years.

Of course, the problem with statement colors being your main thing is that there's so many different shades of the same thing. Like that purple-- I categorized it as plum, but it could also be eggplant, or maybe a darker radiant orchid, since that's the color of the year. The darker green could be emerald, or kelly, or grass, or whatever. There's probably at least 5 shades that could fall under the umbrella of "teal". So I'm looking at this more as a guideline than a rule.

November 20, 2013

Of winter wardrobe planning and wool allergies (and a giveaway winner!)

Now that it's getting to the end of the year, my mind is already turning towards my goals for next year's sewing. I usually do a post about this closer to the end of December, and I'm sure I still will, but one thing I've already realized/decided is that I really need to focus on beefing up my cold-weather wardrobe. This isn't to say that I won't sew anything for the summer months, particularly since I have quite a bit in my stash that's better for that and I still want to stashbust. But I had the very sobering realization recently that I'm already bored with my clothing options for the colder weather. And it's only November. I may have to do some thrift shopping soon to give myself a few new things to mix in, but of course I want to make some new things too! Though much of this may have to be for next winter. Look at me, planning ahead.
The other complication to my plans, which you know if you've been reading this for awhile, is that I get cold ridiculously easily. And I also can't wear wool. Honestly, I can hardly even touch the stuff, because my fingers start prickling and itching almost instantly when I do. (Ironically, there's now "wool" in my new last name. Go figure.) So my constant challenge is to try to put together outfits that keep me warm, are still at least somewhat stylish, and won't make me break out in hives if I leave it on too long.

My big challenge for next year is that my peacoat that I made back in the early days of this blog is getting rather worn out. I can make it through this winter, but I'll have to make a new one before the next cold season. (Still, 7 years, not bad for my first me-made coat!) To get that coat warm enough, I had to basically make a quilt for the lining with a double layer of batting, under polyester suedecloth. It's warm, but it's also very bulky and started off so stiff that it could literally stand on its own. It's softened since, but I don't really want to do that again. So I need to figure out a good option for the outer layer especially, and then any underlinings that I choose to do. I actually am seriously considering sucking it up and underlining my outer fabric with wool, in hopes that I might not feel it once it's completely enclosed by other fabrics. It would be awful to sew, though. My hands are itching just thinking about it. I suppose fleece could be an underlining option too, but wind just cuts right through fleece for me when I'm wearing that as an outer layer.


I'll probably just go with the same pattern again (view A, in lavender here), since I've already gone through making and fitting it once, and it's a classic style. I'm probably also going to stick with mostly black, since that means I can mix and match colorful knitted scarves on a whim. I think Mood Fabrics is out for me this time, since I haven't found a coating on their website yet that isn't at least blended with wool. I have found a few options elsewhere:

Polyester/Acrylic boucle coating from Fabric.com. I like the texture, though it would be quite prone to raveling and would certainly have to be underlined for warmth.

Black Heavyweight Rainwear from Denver Fabrics. On the plus side, it would keep me dry. Though I already have a cold-weather raincoat.

"Poodle Fur" Knit from Gorgeous Fabrics. Though, honestly, I'm not really seeing this as an option. The thought of a fur-looking winter coat just isn't working for me.

So, yeah, I guess that boucle is the best option so far. Any thoughts about other fabric options/what I should underline and/or line with? I will gladly take any and all help I can get, because my only other somewhat fashionable option is something like this.


http://upload.wikimedia.org/wikipedia/en/d/d8/Stay-puft-marshmallow-man.jpg


And the last thing I want to look like in the winter is this.


On a cheerier note, I did find a solution to another planned wardrobe addition recently. I've been thinking that once I finish the cardigan I'm currently working on, I'd like to make a mustardy yellow one next. It would go with this, the two fabrics I bought for Darling Ranges and Reglisse dresses, and my totally wear-again bridesmaid dress from the most recent wedding. (Mine is a charcoal grey.) I'm pretty proud of myself, because even though it took quite a bit of scouring through a closeout section, I found a fully cotton yarn in just the right color, and for half price! I got the "Impala" color. The plan is to make this cardigan, from my Coastal Knits book. I know I won't have it for this year, but hopefully I can manage to knock this out before next fall, because a cheery yellow cardigan sounds just perfect for combating the winter blahs.

Edit: I ended up having to switch yarns, due to the supplier not having enough. I guess someone else ordered some around the same time I did. So now I'll be using this, in yellow. The person from Webs who helped me out was great, though--she even offered wool-free alternative suggestions to me! Thanks, Jackie!

Speaking of knitting, I do need to draw a name for that KnitScene giveaway!  I'm a couple of days late. My excuse is that my grandfather passed away on Monday, so it's been a bit of a rough week so far. Since I'm home alone right now, and dogs aren't the most helpful name drawers, I'm resorting to the random number generator as usual.

That makes the winner Laura, who said she liked the Rosemary cardigan best. (I don't blame you. That was a very strong contender for that yellow cardigan! I just loved the Rocky Coast one first. It'll get made eventually.) So congratulations, and I'll be in touch with you soon.

February 26, 2012

A very browncoat weekend

I have to admit that I was getting a little frustrated last week over being two months into the year and having virtually no finished projects to show for it. (At least, not finished projects that I actually got to keep, other than that one reconstruction.) But it's ok, because I finished two things over the weekend. And yes, they are both of my brown coats!

First off, the raincoat is now 100% finished. I got my Fashionable Stitch order of replacement eyelets in last week, and hammered them into the belt on Friday, just in time for heading out on the town on a somewhat rainy night. I did my best to get an action shot, since I'd already gotten the main detail pictures, but due to the rather useless clutch purse that I could barely even fit my phone and wallet into, all I had was my flash-less phone. But here's my attempt anyway, and my apologies for the blurriness. And the darkness. And the fact that you can't even really see the belt. But I promise you that I'm wearing it! The verdict: it's not quite as warm as I'd hoped, but it's still most certainly warmer than my store-bought raincoat that I use in the spring and summer months. So I guess mission accomplished?


I also finished my corduroy jacket over the weekend. It took me some time to figure out the vents in the sleeves, but with a great deal of help from Sigrid's tutorial, I finally managed to fudge my way through it. Not the best job ever, but hey, couture hand sewing! (It's there, buried among the interfacing and the frayed edge.)

Today's my birthday, and I really like to have something new and me-made to wear for that whenever possible. So I basically spent all day yesterday frantically sewing to try to get this done-- about 5 hours on the machine to get the lining/facings sewn together and into the jacket, and then another 4 hours hand-sewing the lower hem and the lining and all of the buttons while watching movies with my (very patient) boyfriend. But I finished it! I've already worn this two ways--jeans and my new Princess Bride t-shirt for low-key hanging out with my family this afternoon, and paired with tights, boots and this dress for church this morning. (Because, as I put it on Facebook this morning, it's my party and I'll wear tropical prints in February if I want to!)

I'm really happy with how this jacket turned out. The fit is great, it's super-comfortable, and the style details remind me a lot of this other brown corduroy jacket that I had and loved in high school, which was a vintage lighter brown one from the 70s that my mom had sewn for herself. It was a bit too small across the back for me and too short in the sleeves, so I eventually let it go, but the wide collar and patch pockets on this one bring it to mind. I think that the basted fitting method worked really well for this, since the fabric was tough enough to take it, so I'm not sorry that I didn't make a muslin.

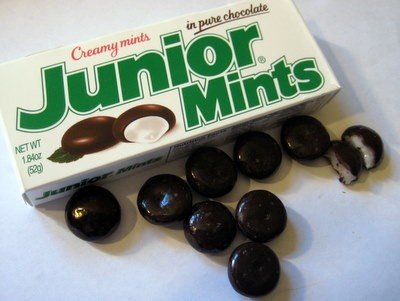
The lining combined with the dark chocolate exterior still reminds me of the packaging for Junior Mints, though!

Don't you think?


One last note, since several of you commented on my last post about how organized I'm being with the bagged-up projects. Thank you, but this is actually rather unusual for me-- I'm generally not a very organized person at all! I'm usually the person who cuts something out and then realizes when I get to that step that I forgot to cut out my interfacing yet again or that I don't have a zipper or that I forgot to make sure I have the right color of thread or whatever. But I'm trying to plan ahead this time, especially knowing that my sewing time is going to be pretty limited over the next couple of months. I doubt I'll get any sewing in tomorrow since I'll have to work and all, but I'm hoping that they won't need me to come in on Tuesday-- all of my students that day have cancelled this week for one reason or another, so that leaves me with basically an entire free day. So I'm hoping to be able to spend it tracing out a couple of things and cutting out several of those projects so they're all ready to go!

February 9, 2012

So, so close....

My goal for yesterday was to finish the raincoat. And I almost made it. But then disaster struck, in the form of eyelets...
All those raggedy sharp edges.... apparently all of that trouble I was having with the belt for the Licorice dress wasn't a fluke. The eyelet setting went even worse this time. I even asked my tool-savvy dad for help, and he couldn't get them to go in right either. So we concluded that the eyelet setting tool is a piece of crap, and that I'll need to get a new one. He thinks he can get the eyelets out without messing up the belt itself, which is hopefully going to be the case. So I'll have to talk to him about that soon... I can salvage the buckle either way, but worst case scenario, I found just enough fabric to make a new belt if needed. I just need to remember to keep an eye on the A Fashionable Stitch shop for when the eyelets come back in stock so I can get those, the hammer-in tool instead of the awful pliers tool, and some new belt backing if necessary. Sunni's customer service is great-- I emailed her last night to ask if she carried those aside from the entire belt kit, and got a response back within half an hour! So I would definitely highly recommend her shop. (As an aside, Sunni, if you manage to find jeans rivets to stock, I will love you forever!)

On a happier note, I think the coat itself turned out pretty good!
Not quite the same look as what was in the magazine-- let's just do this properly and I'll do a pattern review, shall we?


Pattern: Burda Magazine 3/2009, #119


Pattern Description: Double-breasted trenchcoat with gun flaps on both sides, knee length, inverted box pleat in the back.

Pattern Sizing: 34-44. I made the 40.

Did it look like the photo/drawing on the pattern envelope once you were done sewing with it? Close, but not quite...I just realized now, while looking at the line drawing vs. my photo, that I should have pulled it closed more in the front when I was figuring out button placement and that's why the double row of buttons would have just looked silly. Oops. Oh well, it's probably more functional this way, anyway! I also left off a few of the extra details, like the mini-belts around the wrists and the epaulettes. And the belt, obviously, but that will come.


Were the instructions easy to follow? They're Burda magazine instructions. 'Nuff said. Truth be told, I didn't follow them too closely, because I had to rework half of the order to accommodate the waterproofing, and my desire for a full lining. But hey, look how nice it looks! Inverted box pleat and everything! Um, don't look too closely at the internal hem, ok? That was a bit of a wrestling match, but hopefully it won't show too badly.)


What did you particularly like or dislike about the pattern? I liked the styling of it, and would have quite happily incorporated those extra details if they wouldn't have added extra holes in unnecessary places that I would have had to waterproof. There wasn't really anything I seriously disliked about the pattern itself, more my construction process. But that's not the pattern's fault.

Fabric Used: A waterproof taffeta from Gorgeous Fabrics for the outside, and some polyester stuff I was given for free years ago for the lining. The lining is also fully underlined with flannel for warmth. (I also used the flannel for interfacing where needed.)


Pattern alterations or any design changes you made:
As already mentioned, I fully lined the coat, rather than the yoke/sleeve only lining that the pattern called for. And the accidental design change in the front with the buttons. I did a lot more topstitching than it called for, since the taffeta was very prone to fraying and I needed to finish all of those seams accordingly (lots and lots of flat-felled seams. Great practice for those jeans I still plan to make.) I also used a belt-making kit from A Fashionable Stitch, rather than the directions that the pattern called for. I made no sizing alterations, since I wanted to allow extra room for bulky winter clothes, other than maybe making the sleeves a bit longer.

Would you sew it again? Would you recommend it to others? I think it makes for a nice, classic trench-coat look. I might sew it again whenever my lightweight spring jacket wears out--wouldn't this be fun in a bright, cheery twill print or something? 


Conclusion: This has nothing to do with the pattern itself, but I am SO glad to be done with this thing. And I really hope this raincoat holds up for a long, long time, because I don't want to waterproof anything again for a long, long time!

In other sewing news:
1. In one of the recent interims of letting waterproofing stuff dry before I could continue, I made these:

 Yes, I have another bridal shower to go to! This time, for a cousin getting married in March (the wedding I'm knitting that black shrug for.) So I whipped up yet another of my go-to apron pattern, along with the potholders I tried out back in the fall for a last-minute addition to a friend's shower gift. These seem to be along the lines of the colors she wants in her kitchen, so hopefully my cousin will like them! I can probably make the apron in my sleep by this point. The potholders still need a bit of work, as I still haven't quite figured out the best system for getting the bias tape around the top, (Probably because I keep insisting I can do better than the pattern, and making the loop out of the bias tape instead of a ribbon like the pattern calls for.)


Speaking of that black shrug, I'll do a knitting update soon.... in about 3 rows, it will make a better picture than what I can take now. But there has been progress. Honest.

2. My next project is mostly cut out and ready to go. And it's....(drumroll)....another brown coat! More specifically, the brown corduroy one that was #1 on the list. Hey, I've been meaning to make that thing for 2 years now. So I have the outside all cut out and interfaced where needed, with some extra-large seam allowances. My plan is to baste it together, tweak the fit where needed, mark that on the pattern, and then cut out the lining. Corduroy's tough. It can take being a muslin and a finished jacket. Now if only I could find what's left of my old fabric notebook so I can remember how many yards I can take off my stash list...

3. I also need to sit down soon and figure out what I need for the next several projects I'm going to tackle. Especially since the button packs are buy one get one free next weekend! (And maybe check out the Simplicity patterns, since they're 5 for $5...)

4. I got an early birthday present today...I'm signed up for one of the sewing classes at Craftsy. I got an email this morning saying that the pants-fitting one is currently half-price, and since I have both jeans and trousers coming up in the queue, I figured this would help immensely. I do have two pairs of jeans that I love the fit on (one boot-cut and, surprisingly, my one pair of skinny jeans, both purchased from Goodwill), and a pair or two of pants that I also think fits pretty well. Actually, I was thinking just yesterday that I wish I could replicate this one brown pair I have, because the fit at the top is great but I've washed and worn them so often that there's starting to be some obvious wear-and-tear on places like the back welt pockets. Plus they're just too short to look really good with my boots. So since the whole idea is reverse-engineering the fit without destroying the original jeans or pants, this could be just the thing! I've liked the Pattern Review classes I've taken in the past, but I'm excited to try the Craftsy ones since they have video and no set dates, so I can just do it as I can without stressing about falling behind. (Plus they're less expensive. Always a plus.) I'm thinking for the jeans, I can use this to make whatever last tweaks are needed to the muslin I already made for the last jeans class, and use the pattern I already have from there. So then I can finally cross that off the list, since I've been saying for, oh, only the last 3 or 4 years in a row that this is going to be the year I successfully make jeans!

February 2, 2012

Things left unblogged

Warning: This is going to be a rather picture-heavy post.

My raincoat has a sleeve now! Which I forgot to waterproof after I got done teaching last night like I'd meant to. I got sidetracked by finishing up the last two rows on the chart for the back of my shrug that I'm knitting, and swatching for another upcoming project. So I guess I'll have to do that today, and not sew on this. (It doesn't really have a lining in there yet, I just stuck it on the hanger with it so I could get an idea of what it looks like.)

And since there's not much more to say about that, I remembered that there are some things I've done more recently that I haven't written about yet. So I'm just going to put these up now.

#1: Yes, I know it's February, but I'm going to post about a Christmas ornament anyway!
The backstory: For the last few years, an out-of-town married couple that I'm friends with has hosted a game party around New Year's--basically, lots of board or card-type games and usually some kind of movie or tv-show watching that has some kind of geeky twist to it. (This year, it was a bunch of episodes of The Big Bang Theory.) And one of the first years, the guy closed the email invite with comparing Sauron (the big flaming eyeball bad guy from Lord of the Rings) to Santa, because they're both always watching. So that became kind of a running joke. This year, I had the thought one day while I was bored at work that this could become a pretty funny ornament. So I approached my best friend (who is also friends with them) with the proposal, and we agreed that I'd paint the ornaments, and she'd crochet the hats. (I made 3, because of course we each wanted one too.) Since we rode up to their house together, we had some pretty amusing moments of me gluing the hats to the balls in the car and hanging them from the rearview mirror to dry! Our friends thought it was hilarious, and so this is Sauron Claus hanging proudly near the top of their tree at the party.

#2: I'm easing myself back into scrapbooking, after basically not doing it for a couple of years. Admittedly, these aren't my most creative pages ever, and I certainly wouldn't win any prizes for them. But hey, they're done! Most of these fall into the category of "I just want to get something done so I'm just going to write on these pages that I'd already glued pictures to awhile ago and call it finished."
And you can't even see the writing on most of these, but since it's been sitting unfinished in the album for awhile, it's still better than nothing! I did have fun with making the wavy paper shapes on this one to kind of go along with the way the wall was painted in the restaurant, though.


Easiest page ever, and one that was truly made recently. I just slapped the pictures from the manicures we got for a friend's wedding, oh, 4 1/2 years ago onto a piece of patterned paper and just wrote on it. I don't know why I kept putting this off.


This one had been mostly done awhile ago, except for one thing...


See that writing? Yeah, bubble letters that I colored around with a black marker on top of the paper that was already there. I don't know why I didn't finish that one 3 years ago, either.


The actual layout took some effort, due to all of the little photos....the writing falls into the category of "it's getting kind of late and I don't feel like taking the time to type this and choose a font and print it and everything." Honestly, I'm thinking I'll just have to transfer all of my fonts to my laptop, because the printer is in the kitchen, and then I can just sit next to it and feed paper into it to print things. I'd be so much more productive that way.

I'm a little more proud of this one, from a concert I went to back in 2008. Same deal, just writing on the paper myself, but the gold pen makes it more fun.


And I did enjoy doodling on the patterned paper some to go along with that paisley printed scrap of paper that already had the gold on it.


I do have another page about halfway done, but this one actually will need stuff printed on the computer before I can glue it all down. Ok, so I have several pages about halfway done, but at least I'm starting to get some work done on them now!

Aside from the laptop for writing, I'm hoping this will help...one of my major deterrents has been that my scrapbook stuff is mostly put away, so every time I want to work on it, I have to haul a bunch of stuff out and figure out what I want to use and then put everything else away and then put what I actually did use away and it just takes so much time. I like things I can just pick up and work on. But when I was out running errands with my mom recently, we stopped at AC Moore and she found these little totes on clearance. It has all of these pockets and even a pull-out drawer at the bottom, so I can store a good number of the most basic tools I use (other than my computer for typing, obviously.)


See that box? That's about 2 years' worth of photos that I recently got printed. And that's not counting all of the photos from the 2-3 years before that where I either only halfway did a page or just stuck some paper with it to do later or never started at all. Kind of overwhelming, isn't it? But since the stuff is here now, that will make it easier to start chipping away at these and actually get some more albums done. If I can ever sort out once and for all whether it would be better to organize everything after my last fully completed album chronologically or by broader categories. (My last fully completed album stops at the end of spring 2006. And there's so many holes in the chronology from photos I never finished--or started--that I'd thought categories might make it easier. Either way, I have my work cut out for me, now that I've actually been in the mood to work on this again!)